Herunterladen Inhalt Inhalt Diese Seite drucken
Inhaltsverzeichnis

Werbung

Verfügbare Sprachen
  • DE

Verfügbare Sprachen

  • DEUTSCH, seite 13
Polyx Clima
art. L/N/NT4450
Manuale d'uso
Gebrauchsanleitung
Manuel d'utilisation
User manual
Manual de uso
Gebruikershandleiding
Manual de uso

Werbung

Inhaltsverzeichnis
loading

Inhaltszusammenfassung für Bticino Polyx Clima

  • Seite 1 Polyx Clima art. L/N/NT4450 Manuale d’uso Gebrauchsanleitung Manuel d’utilisation User manual Manual de uso Gebruikershandleiding Manual de uso...
  • Seite 2  Italiano  Deutsch  Français  English  Español  Nederlands  Português...
  • Seite 3: Inhaltsverzeichnis

    Indice  Indice 1 Introduzione Comandi e segnalazioni  Comandi  Segnalazioni  2 Funzionamento base Il tuo Cronotermostato: usalo subito!  Impostazione di giorno e ora  Selezione Estate / Inverno  Modi di funzionamento  Modi di funzionamento ...
  • Seite 4: Introduzione

    Introduzione Comandi e segnalazioni Il cronotermostato L/N/NT4450 misura la temperatura ambiente ■ e regola l’impianto di riscaldamento o di condizionamento a cui Comandi  è collegato. Il modo di funzionamento può essere scelto fra uno di quelli predefiniti o personalizzato secondo le proprie esigenze. L’ampio display mostra il profilo di temperatura —...
  • Seite 5: Segnalazioni

    Funzionamento base Il tuo Cronotermostato: usalo subito! Segnalazioni ■  Per mettere in funzione il cronotermostato dopo la sua installazione eseguire nell’ordine le seguenti operazioni: 1 - Impostazione di giorno e ora. 2 - Selezione funzionamento Estate / Inverno. 3 - Scelta del modo di funzionamento. Impostazione di giorno e ora ...
  • Seite 6: Selezione Estate / Inverno

    Funzionamento base Selezione Estate / Inverno 3 - Modificare i minuti con i tasti p e q e passare al giorno col tasto  Per passare dal funzionamento invernale (impianto di riscalda- mento) al funzionamento estivo (impianto di raffrescamento), e viceversa, tenere premuto per almeno 4 secondi il tasto Estate / Inverno.
  • Seite 7: Modi Di Funzionamento

    Funzionamento base Modi di funzionamento Nel funzionamento estivo la temperatura T3 ha un limite su- ■ periore pari a 30°C. Superando questo valore T3 assume il valore Il cronotermostato ha 4 diversi modi di funzionamento — Manuale, OFF che significa spegnimento dell’impianto. Automatico, Holiday e Jolly —...
  • Seite 8: Modo Di Funzionamento Jolly

    Funzionamento base Modo di funzionamento Jolly Si può interrompere in qualsiasi momento il Jolly selezionando  un qualsiasi altro modo di funzionamento. Con il modo di funzionamento Jolly il cronotermostato interrom- Il modo di funzionamento Jolly può essere usato, ad esempio, per: pe il modo di funzionamento in corso e regola il funzionamento •...
  • Seite 9: Funzionamento Avanzato

    Funzionamento avanzato Programmi Predefiniti 2 -Appare il profilo di lunedì (DAY 1) per il funzionamento Inver-  nale (icona ). Usare i tasti per spostare il segmento Il cronotermostato è dotato di due programmi predefiniti, uno in- lampeggiante del grafico a barre sull’ora in cui si vuole mo- Inverno Estate vernale e uno estivo, per una sua più...
  • Seite 10: Visualizzazione Temperatura Rilevata Dalla Sonda Separata

    Funzionamento avanzato Ripristino dei parametri predefiniti Statistiche  Per ripristinare i profili di temperatura e i valori delle temperature Il cronotermostato fornisce un insieme di dati statistici sul fun- predefiniti (T1-T2-T3-Temperatura usata in manuale, Temperatura zionamento dell’impianto. usata in Jolly, Temperatura antigelo funzione Off) premere e tenere Per accedere ai dati fate quanto segue: premuti contemporaneamente i tasti quando si è...
  • Seite 11: Manutenzione

    Manutenzione Pulizia  Per la pulizia del cronotermostato si consiglia di utilizzare un panno morbido di cotone senza alcun detergente. Sostituzione delle pile  Quando la carica delle pile incomincia ad essere insufficiente inizia a lampeggiare sul display il simbolo Se non si sostituiscono entro 15 giorni le pile, il cronotermostato si spegne automaticamente e sul display compare la scritta OFF al posto della temperatura.
  • Seite 13 Inhaltsverzeichnis  Inhaltsverzeichnis 1 Einleitung Steuerungen und Meldungen  Steuerungen  Meldungen  2 Grundlegende Funktion Ihr Zeitthermostat:  verwenden Sie ihn gleich! Tag und Stunde einstellen  Sommer / Winter wählen  Betriebsmodi  Betriebsmodi  Manueller Betriebsmodus  Automatischer Betriebsmodus ...
  • Seite 14: Einleitung

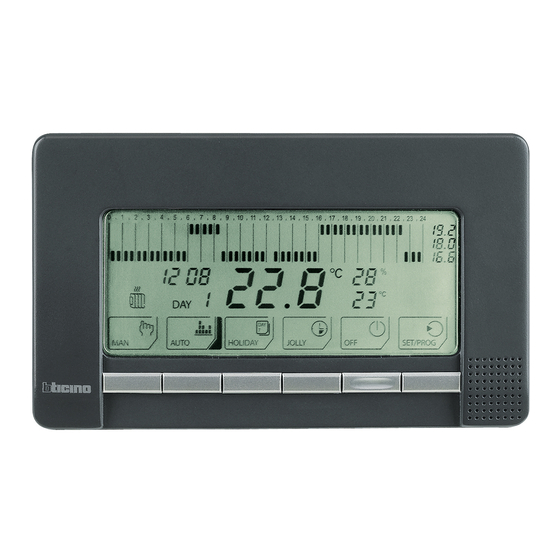
    Einleitung Steuerungen und Meldungen Der Zeitthermostat L/N/NT4450 misst die Raumtemperatur und ■ regelt die Heiz- und Klimaanlage mit der er verbunden ist. Der Be- Steuerungen  triebsmodus kann unter den voreingestellten gewählt oder nach Wunsch je nach den eigenen Bedürfnissen gewählt werden. Das große Display zeigt das Temperaturprofil an, d.h.
  • Seite 15: Meldungen

    Grundlegende Funktion Ihr Zeitthermostat: verwenden Sie ihn gleich! Meldungen ■  Um den Zeitthermostat nach der Installation in Betrieb zu setzen, folgendermaßen vorgehen: 1 - Tag und Stunde einstellen 2 - Sommer-/ Winterbetrieb wählen 3 - Betriebsmodus wählen Tag und Stunde einstellen ...
  • Seite 16: Sommer / Winter Wählen

    Grundlegende Funktion Sommer / Winter wählen 3 - Die Minuten über die Tasten p und q einstellen und dann auf  die Minuten mit der Taste übergehen. Um von dem Winterbetrieb (Heizanlage) auf den Sommerbetrieb (Kühlungsanlage) und umgekehrt umzuschalten, die Taste Som- mer / Winter mindestens 4 Sekunden lang gedrückt halten.
  • Seite 17: Betriebsmodi

    Grundlegende Funktion Betriebsmodi Wird dieser Wert überschritten, so übernimmt T3 den Wert OFF ■ was das Ausschalten der Anlage zur Folge hat. Der Zeitthermostat verfügt über 4 Betriebsmodi – manuell, auto- Die Temperatur T2 darf nicht höher als die Temperatur T3 und matisch, Holiday und Jolly –...
  • Seite 18: Jolly Betriebsmodus

    Grundlegende Funktion Jolly Betriebsmodus indem irgend eine andere Betriebsweise gewählt wird.  Der Betriebsmodus Jolly kann beispielsweise verwendet werden: Im Betriebsmodus Jolly unterbricht der Zeitthermostat den • um Energie zu sparen, d.h. die Temperatur niedriger zu schal- laufenden Betriebsmodus und regelt den Betrieb der Heiz- oder ten wenn das Haus über das Wochenende oder während des Kühlungsanlage, um die Jolly Temperatur während der gesamten Winterurlaubs nicht bewohnt ist und man bei seiner Rückkehr...
  • Seite 19: Fortgeschrittener Betrieb

    Fortgeschrittener Betrieb Voreingestellte Programme 2 -Es wird das Profil für den Montag (DAY 1) und den Winterbetrieb  (Symbol ) angezeigt. Die Tasten verwenden um Der Zeitthermostat ist mit zwei voreingestellten Programmen für den blinkenden Strich der graphischen Kästchendarstellung Inverno Estate den Winter und für den Sommer ausgestartet, um ihn schneller auf die Stunde zu verschieden für die die Temperatur geändert...
  • Seite 20: Anzeige Der Von Der Separaten Sonde Erfassten Temperatur

    Fortgeschrittener Betrieb Voreingestellte Parameter wieder herstellen Statistiken  Um die voreingestellten Temperaturprofile und Temperaturwerte Der Zeitthermostat stellt eine Reihen von statistischen Daten über (T1-T2-T3- manuell einzustellende Temperatur, Jolly Temperatur, den Anlagenbetrieb zur Verfügung. Frostschutztemperatur, OFF Funktion) wieder herzustellen, im Um diese Daten abzurufen, folgendermaßen vorgehen: Modus ‚Programmierung der Temperaturprofile’...
  • Seite 21: Wartung

    Wartung Reinigung  Um den Zeitthermostat zu reinigen empfehlen wir ein weiches Baumwolltuch ohne Reinigungsmittel zu verwenden. Batterien auswechseln  Bevor die Batterien vollkommen erschöpft sind, beginnt das Symbol am Display zu blinken. Werden die Batterien nicht innerhalb von 15 Tagen ausgewechselt, schaltet der Zeitthermo- stat automatisch aus und am Display wird die Schrift OFF statt die Temperatur angezeigt.
  • Seite 23 Table des matières  Table des matières 1 Introduction Commandes et signaux  Commandes  Signaux  2 Fonctionnement base Votre chronothermostat:  utilisez-le dès maintenant! Réglage du jour et de l’heure  Sélection Été / Hiver  Modes de fonctionnement ...
  • Seite 24: Introduction

    Introduction Commandes et signaux Le chronothermostat L/N/NT4450 mesure la température am- ■ biante et règle le système de chauffage ou de climatisation Commandes  auquel il est relié. Le mode de fonctionnement peut être choisi parmi l’un de ceux prédéfinis ou bien peut être personnalisé sur la base de ses propres besoins.
  • Seite 25: Signaux

    Fonctionnement base Votre chronothermostat: Signaux ■  utilisez-le dès maintenant! Pour mettre en marche le chronothermostat après son installation, procéder dans l’ordre indiqué aux opérations suivantes: 1 - Réglage du jour et de l’heure. 2 - Sélection fonctionnement Été / Hiver. 3 - Sélection du mode de fonctionnement.
  • Seite 26: Sélection Été / Hiver

    Fonctionnement base Sélection Été / Hiver 3 - Régler les minutes à l’aide les touches p et q et passer au jour à  l’aide de la touche Pour passer du fonctionnement hiver (système de chauffage) au fonctionnement été (système de rafraîchissement) et vice-versa, maintenir enfoncée pendant au moins 4 secondes la touche Été...
  • Seite 27: Modes De Fonctionnement

    Fonctionnement base Modes de fonctionnement En fonctionnement Été la température T3 a une limite maxi- ■ mum de 30°C. En cas de dépassement de cette valeur, T3 prend Le chronothermostat prévoit 4 modes de fonctionnement — Ma- la valeur OFF qui signifie l’arrêt du système. nuel, Automatique, Holiday et Jolly —...
  • Seite 28: Mode De Fonctionnement Jolly

    Fonctionnement base Mode de fonctionnement Jolly Il est possible d’interrompre à tout moment le mode Jolly en  sélectionnant un autre mode de fonctionnement. En mode de fonctionnement Jolly, le chronothermostat interrompt Le mode de fonctionnement Jolly peut être utilisé par exemple pour: le mode de fonctionnement en cours et régule le fonctionnement •...
  • Seite 29: Fonctionnement Avancé

    Fonctionnement avancé Programmes Prédéfinis 2 -Ouvrir le profil du lundi (DAY 1) pour le fonctionnement Hiver  (icône ). Utiliser les touches pour déplacer le seg- Le chronothermostat dispose de deux programmes prédéfinis, un pour ment clignotant du graphique à barres sur l’heure dont on Inverno Estate l’hiver et un pour l’été, pour garantir une mise en marche rapide.
  • Seite 30: Visualisation De La Température Mesurée Par La Sonde Séparée

    Fonctionnement avancé Rétablissement des paramètres prédéfinis Statistiques  Pour rétablir les profils de température et les valeurs des tem- Le chronothermostat fournit un ensemble de données statistiques pératures prédéfinies (T1-T2- T3- Température en mode manuel, sur le fonctionnement du système. Température en mode Jolly, Température antigel fonction Off) Pour accéder aux données procéder comme suit: maintenir enfoncées simultanément les touches...
  • Seite 31: Entretien

    Entretien Nettoyage  Pour le nettoyage du chronothermostat, il est recommandé de faire usage d’un chiffon doux en coton sans aucun détergent. Changement des piles  Quand la charge des piles commence à être insuffisante, le sym- bole commence à clignoter sur le moniteur. Ensuite, si les piles ne sont pas changées dans les 15 jours, le chronothermostat s’éteint automatiquement et sur le moniteur s’affiche l’indication OFF au lieu de la température.
  • Seite 33 Contents  Contents 1 Foreword Controls and Signaling  Controls  Signalling  2 Basic operation Your timer thermostat: use it immediately!  Setting the day and time  Summer / Winter selection  Modes of operation  Modes of operation ...
  • Seite 34: Foreword

    Foreword Controls and signaling The L/N/NT4450 chronothermostat measures the room tem- ■ perature and adjusts the heating or air-conditioning system it Controls  is connected to. The operation mode can be chosen between one of the preset modes or customized modes, depending on your needs.
  • Seite 35: Signalling

    Basic operation Your timer thermostat: use it immediately! Signaling  ■ To operate the chronothermostat after its installation, carry out the following operations in the order given: 1 - Set the day and time. 2 - Select the Summer / Winter operation mode. 3 - Choose the operation mode.
  • Seite 36: Summer / Winter Selection

    Basic operation Summer / Winter selection 3 - Change the minutes using keys p and q and then the day using the  key. To switch from winter mode (heating system) to summer mode (cooling system) and vice-versa, hold down the Summer / Winter key for at least 4 seconds.
  • Seite 37: Modes Of Operation

    Basic operation Modes of operation In summer mode, temperature T3 has a top limit equal to 30°C. ■ When this value is exceeded, T3 is set to OFF which means that The chronothermostat has 4 different modes of operation — Ma- the system will be switched off.
  • Seite 38: Jolly Operation Mode

    Basic operation Jolly operation mode The Jolly mode can be stopped at any time by selecting any  operation mode. When using the Jolly operation mode, the chronothermostat stops The Jolly operation mode can be used, for instance, to: the current operation mode and adjusts the heating or cooling •...
  • Seite 39: Advanced Operation

    Advanced operation Preset Programmes 2 -The Monday profile will appear (DAY 1) for the Winter opera-  tion mode ( icon). Use the keys and move the flashing The chronothermostat is provided with two preset programmes – a win- segment of the bar chart to the time you need to change the Inverno Estate ter and a summer programme –...
  • Seite 40: Temperature Display Detected By The Separate Probe

    Advanced operation Resetting the preset parameters Statistics  To reset the temperature profiles as well as the preset temperature The chronothermostat provides statistical data on how the system values (T1-T2-T3 - Temperature used in manual mode, Tempe- functions. rature used in Jolly mode, antifreeze Temperature - Off function) To access the data, do the following: press and hold down the keys simultaneously when you are...
  • Seite 41: Maintenance

    Maintenance Cleaning  When cleaning the chronothermostat, it is recommended to use a soft cotton cloth with no detergent. Replacing the batteries  When batteries start getting low, the symbol will start flashing on the display. If the batteries are not replaced with 15 days, the chronothermostat will automatically switch off;...
  • Seite 43 Índice  Índice 1 Introducción Mandos y señales  Mandos  Señales  2 Funcionamiento básico Tu cronotermostato: ¡úsalo ya!  Establecimiento del día y de la hora  Selección Verano / Invierno  Modos de funcionamiento  Modos de funcionamiento ...
  • Seite 44: Introducción

    Introducción Mandos y señales Mandos El cronotermostato L/N/NT4450 mide la temperatura ambiente y ■ regula el sistema de calefacción o de acondicionamiento al cual Mandos  está conectado. El modo de funcionamiento se puede escoger entre uno de los predefinidos o personalizar en base a las propias exigencias.
  • Seite 45: Señales

    Funcionamiento básico Tu cronotermostato: ¡úsalo ya! Señales ■  Para poner en función el cronotermostato después de su instala- ción, efectúe en este orden las siguientes operaciones: 1 - Establecimiento del día y de la hora. 2 - Selección funcionamiento Verano / Invierno. 3 - Elección del modo de funcionamiento.
  • Seite 46: Selección Verano / Invierno

    Funcionamiento básico Selección Verano / Invierno 3 - Modifique los minutos con las teclas p y q y pase al día con la tecla  Para pasar del funcionamiento invierno (sistema de calefacción) al funcionamiento verano (sistema de refrigeración) y viceversa, mantenga presionada por almenos 4 segundos la tecla Verano / Invierno.
  • Seite 47: Modos De Funcionamiento

    Funcionamiento básico Modos de funcionamiento En el funcionamiento verano la temperatura T3 tiene un límite ■ superior de 30°C. Al superar este valor, T3 asume el valor OFF El cronotermostato está dotado de 4 modos de funcionamiento que determina el apagado de la instalación. diferentes - Manual, Automático, Holiday y Jolly - y la función La temperatura T2 no puede ser superior a la temperatura T3 o Apagado (OFF).
  • Seite 48: Modo De Funcionamiento Jolly

    Funcionamiento básico Modo de funcionamiento Jolly Se puede interrumpir en todo momento el modo Jolly seleccio-  nando cualquier otro modo de funcionamiento En el modo de funcionamiento Jolly, el cronotermostato interrum- El modo de funcionamiento Jolly se puede utilizar, por ejemplo, para: pe el modo de funcionamiento en marcha y regula el funciona- •...
  • Seite 49: Funcionamiento Avanzado

    Funcionamiento avanzado Programas Predefinidos 2 -Aparece el perfil del día lunes (DAY 1) para el funcionamiento  invierno (icono ). Utilice las teclas para desplazar el El cronotermostato está dotado de dos programas predefinidos, uno segmento parpadeante del gráfico de barras a la hora en que Inverno Estate de invierno y otro de verano, para una rápida puesta en función.
  • Seite 50: Estadísticas

    Funcionamiento avanzado Restablecimiento de los parámetros predefinidos Estadísticas  Para restablecer los perfiles de temperatura y los valores de las El cronotermostato suministra un conjunto de datos estadísticos temperaturas predefinidas, (T1-T2-T3-Temperatura utilizada en sobre el funcionamiento del sistema. modo manual, Temperatura utilizada en modo Jolly, Temperatura Para acceder a los datos, siga estas instrucciones: antihielo en función Off), pulse y mantenga presionada al mismo 1 - Ingrese a la página principal del menú...
  • Seite 51: Mantenimiento

    Mantenimiento Limpieza  Para la limpieza del cronotermostato, se aconseja utilizar un paño suave de algodón, sin ningún tipo de detergente. Cambio de las pilas  Cuando la carga de las pilas comienza a agotarse, se pone a par- padear en el display el símbolo .
  • Seite 53 Inhoud  Inhoud 1 Inleiding Bedieningen en signaleringen  Bedieningen  Signaleringen  2 Basiswerkinge Je chronothermostaat:  gebruik hem onmiddellijk! Instelling van dag en uur  Selectie Zomer/ Winter  Werkwijzen  Werkwijzen  Manuele werkwijze  Automatische werkwijze ...
  • Seite 54: Inleiding

    Inleiding Bedieningen en signaleringen De chronothermostaat L/N/NT4450 meet de kamertempera- ■ tuur en regelt de installatie van verwarming of airconditioning Bedieningen  waarop hij is aangesloten. De werkwijze kan gekozen worden tussen een van de vooraf bepaalde werkwijzen of verpersoonlijkt worden volgens de eigen vereisten.
  • Seite 55: Signaleringen

    Basiswerking Je chronothermostaat: gebruik Signaleringen ■  hem onmiddellijk! Om de chronothermostaat in werking te zetten na de installatie, in volgorde de volgende operaties uitvoeren: 1 - Instelling van dag en uur 2 - Selectie werking Zomer / Winter. 3 - Keuze van de werkwijze Instelling van dag en uur ...
  • Seite 56: Selectie Zomer/ Winter

    Basiswerking Selectie Zomer / Wintero 3 - De minuten wijzigen met de toetsen p en q en overgaan naar de dag  met de toets Om over te gaan van de functie winter (installatie van verwarming) naar de functie zomer (koelinstallatie), en omgekeerd, minstens 4 seconden de toets Zomer / Winter ingedrukt houden.
  • Seite 57: Werkwijzen

    Basiswerking Werkwijzen In de werking zomer heeft de temperatuur T3 een bovenste ■ limiet gelijk aan 30°C. Wanneer deze waarde overschreden wor- De chronothermostaat heeft 4 verschillende werkwijzen- Manueel, dt, neemt T3 de waarde OFF, hetgeen de uitschakeling van de Automatisch, Holiday en Jolly- en de functie Uit (OFF).
  • Seite 58: Werkwijze Jolly

    Basiswerking Werkwijze Jolly De Jolly kan op gelijk welk ogenblik onderbroken worden door  een willekeurige andere werkwijze te selecteren. Met de werkwijze Jolly onderbreekt de chronothermostaat de De werkwijze Jolly kan gebruikt worden, bijvoorbeeld, voor: lopende werkwijze en regelt de werking van de installatie van •...
  • Seite 59: Gevorderde Werking

    Gevorderde werking Vooraf bepaalde programma’s 2 -Het profiel van maandag (DAY 1) verschijnt voor de werking  winter (icoon ). De toetsen gebruiken om het knippe- De chronothermostaat is uitgerust met twee vooraf bepaalde rend segment van de streepjesgrafiek te verplaatsen op het uur Inverno Estate programma’s, een voor de winter en een voor de zomer, voor een...
  • Seite 60: Visualisering Temperatuur Opgenomen Door De Afzonderlijke Sonde

    Gevorderde werking Herstel van de vooraf bepaalde parameters Statistieken  Om de temperatuurprofielen en de vooraf bepaalde waarden van De chronothermostaat geeft een geheel van statistische gegevens de temperaturen (T1- T2- T3- Temperatuur gebruikt in manueel, over de werking van de installatie. Temperatuur gebruikt in Jolly, Temperatuur Antivries functie Off) te Om naar de gegevens te gaan, als volgt tewerk gaan: herstellen, tegelijkertijd de toetsen...
  • Seite 61: Onderhoud

    Onderhoud Schoonmaak  Voor de schoonmaak van de chronothermostaat raadt men aan een zachte katoenen doek zonder wasproducten te gebruiken. Vervanging van de batterijen  Wanneer de lading van de batterijen onvoldoende begint te zijn, begint op het display het symbool te knipperen.
  • Seite 63 Índice  Índice 1 Introdução Comando e sinalizações  Comandos  Sinalizações  2 Funcionamento base O seu cronotermostato:  use-o imediatamente Programação do dia e da hora  Selecção Verão / Inverno  Modo de funcionamento  Modo de funcionamento ...
  • Seite 64: Introdução

    Introdução Comando e sinalizações O cronotermostato L/N/NT4450 mede a temperatura do ambien- ■ te e regula a instalação de aquecimento ou de arrefecimento a Comandos  qual está conectada. O modo para fazê-lo funcionar pode ser escolhido entre um dos que foram predefinidos ou personalizado de acordo com as exigências de cada um.
  • Seite 65: Sinalizações

    Funcionamento base O seu cronotermostato: use-o Sinalizações ■  imediatamente! Para fazer o cronotermostato funcionar executar na ordem as seguintes operações depois de tê-lo instalado: 1 - Programação do dia e da hora. 2 - Selecção do funcionamento Verão / Inverno. 3 - Escolha do modo de funcionamento.
  • Seite 66: Selecção Verão / Inverno

    Funcionamento base Selecção Verão / Inverno 3 - Modificar os minutos com as teclas p e q e passar ao dia com a  tecla Para passar do funcionamento invernal (sistema de aquecimento) ao funcionamento estival (sistema de arrefecimento) e vice-versa, manter carregada por pelo menos 4 segundos a tecla Verão / Inverno.
  • Seite 67: Modo De Funcionamento

    Funcionamento base Modo de funcionamento Ao funcionar no período de verão a temperatura T3 tem um ■ limite superior que é igual a 30°C. Se este valor for ultrapassa- O cronotermostato tem 4 modos diferentes de funcionamento – Ma- do T3 assume o valor OFF que significa que a instalação está nual, Automático, Holiday e Jolly –...
  • Seite 68: Modo De Funcionamento Jolly

    Funcionamento base Modo de funcionamento Jolly Pode-se interromper a qualquer momento o Jolly seleccionando  qualquer outro modo de funcionamento. Com o modo de funcionamento Jolly o cronotermostato inter- O modo de funcionamento Jolly pode ser usado, como por exemplo, para: rompe o modo de funcionamento que está...
  • Seite 69: Funcionamento Avançado

    Funcionamento avançado Programas Predefinidos 2 -Aparece o perfil da segunda-feira (DAY 1) para o funcionamen-  to invernal (ícone ). Usar as teclas para deslocar o O cronotermostato possui dois programas predefinidos, um segmento lampejante do gráfico em barras na hora em que Inverno Estate para o Inverno e outro para o Verão, para um funcionamento...
  • Seite 70: Visualização Da Temperatura Detectada Pela Sonda Separada

    Funcionamento avançado Restabelecimento dos parâmetros predefinidos Estatísticas  Para restabelecer os perfis de temperatura e os valores das O cronotermostato fornece um conjunto de dados estatísticos temperaturas predefinidas (T1 – T2 – T3 – Temperatura usada sobre o funcionamento da instalação. no manual, Temperatura usada no Jolly, Temperatura antigelo Para aceder aos dados fazer o seguinte: função Off) pressionar e manter carregadas contemporaneamente...
  • Seite 71: Manutenção

    Manutenção Limpeza  Recomenda-se que se utilize um pano macio de algodão sem detergente para limpar o cronotermostato. Substituição das pilhas  Quando as pilhas começarem a ficar descarregadas o símbolo começa a piscar no mostrador. Se as pilhas não forem substituídas em até...
  • Seite 72 Bticino SpA Via Messina, 38 20154 Milano - Italia www.bticino.it...

Inhaltsverzeichnis