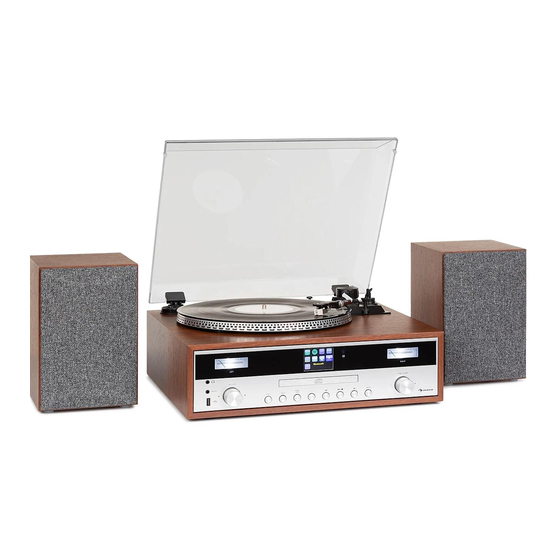
Herunterladen Inhalt Inhalt Diese Seite drucken
Inhaltsverzeichnis

Werbung

Verfügbare Sprachen
  • DE

Verfügbare Sprachen

  • DEUTSCH, seite 1

Werbung

Inhaltsverzeichnis
loading

Inhaltszusammenfassung für auna Birmingham

  • Seite 3: Inhaltsverzeichnis

    Sehr geehrter Kunde, wir gratulieren Ihnen zum Erwerb Ihres Gerätes. Lesen Sie die folgenden Hinweise sorgfältig durch und befolgen Sie diese, um möglichen Schäden vorzubeugen. Für Schäden, die durch Missachtung der Hinweise und unsachgemäßen Gebrauch entstehen, übernehmen wir keine Haftung. Scannen Sie den folgenden QR-Code, um Zugriff auf die aktuellste Bedienungsanleitung und weitere Informationen rund um das Produkt zu erhalten:...
  • Seite 4: Sicherheitshinweise

    SICHERHEITSHINWEISE Hinweis: Da es durch die CD-Bewegung und den sensiblen Schaltkreis zu Interferenzen mit in der Nähe befindlichen Geräten kommen kann, schalten Sie das Gerät aus, wenn Sie andere elektrische Geräte in der Nähe verwenden möchten. • Alle Sicherheits- und Bedienungshinweise müssen eingehalten werden. •...
  • Seite 5: Geräteübersicht

    VORSICHT Durch Nichtbeachten der in der Bedienungsanleitung beschriebenen Bedienungshinweise kann es zur Freisetzung von gefährlicher Strahlung kommen. Dieses Gerät sollte ausschließlich von hierfür qualifi ziertem Personal angepasst und repariert werden. GERÄTEÜBERSICHT Gerät (Vorderansicht) Staubabdeckung P-Taste Bildschirm Titel nach vorne überspringen Aussteuerungsmesser Wiedergabe/Pause/Stopp Kopfhöreranschluss...
  • Seite 6: Rückansicht

    Plattenspieler 45 RPM Adapter Lifthebel Drehteller Geschwindigkeit (33 & 45 RPM) Transportsicherung Tonarmsicherung Gegengewicht Tonarm mit Nadel Höhenregler Rückansicht Lautsprecheranschluss Antennenanschluss Rechter Line-Out Anschluss Netzkabel Linker Line-Out Anschluss...
  • Seite 7: Fernbedienung

    Fernbedienung (CD-Fach öffnen/schließen) On/Standby (Einschalten/Standbymodus) MODE (Modusauswahl) (vorheriger/ nächster Titel) (Wiedergabe/ Pause) (Stopp) Folder/Pre (vorheriger/hoch/runter Ordner) Volume -/+ (Lautstärke anpassen) MENU/INFO (Internetradio: Informationsauswahl; CD-/ USB-Modus: Aktivierung ID3-Funktion; Alle anderen Modi: Menü) Mute (Ton zeitweise stummschalten) Preset EQ (Auswahl verschiedener EQ-Modi) BACK (zurück zur vorherigen Ansicht) SHUFFLE/REP (CD-Modus: Wiederholungsfunktion aktivieren;...
  • Seite 8: Installation

    INSTALLATION Einlegen der Batterien Das Batteriefach befindet sich auf der Rückseite der Fernbedienung. • Entfernen Sie die Abdeckung des Batteriefachs, indem Sie dieses an der Markierung eindrücken und anschließend abnehmen. • Legen Sie zwei Batterien des Typs AAA (nicht im Lieferumfang enthalten) in das Batteriefach ein und achten Sie auf die richtige Polarität.
  • Seite 9 Stecken Sie den Netzstecker (32) in die Steckdose. • Wenn Sie das Gerät zum ersten Mal einstecken, wird auf dem Bildschirm „auna“ angezeigt. • Ungefähr 30 Sekunden später startet das Gerät, wenn es zum ersten Mal verwendet wird, automatisch den Einrichtungsassistenten und der Bildschirm zeigt „Start now“...
  • Seite 10: Inbetriebnahme Und Bedienung

    INBETRIEBNAHME UND BEDIENUNG Das Gerät wechselt, nachdem Sie die oben aufgezeigten Einstellungen vorgenommen haben, in den Internetradiomodus. Drücken Sie die Tasten und wählen Sie „Station list“ (Senderliste) aus. Bestätigen Sie Ihre Auswahl durch Drücken der Taste OK. 2. Drücken Sie die Tasten , um „Stations“...
  • Seite 11 Automatische Sendersuche Drücken Sie zur Auswahl des FM-Modus die Taste MODE (15). 2. Drücken Sie zur Auswahl der Suchrichtung die Tasten und drücken Sie zum Bestätigen die Taste OK. Die automatische Sendersuche wird dann gestartet. 3. Wiederholen Sie Schritt 2 so lange, bis der gewünschte Sender erreicht wurde.
  • Seite 12: Cd-Modus

    Senderspeicherung (DAB-Modus) Hinweis: Es können bis zu 20 DAB-Sender gespeichert werden. Stellen Sie den DAB-Modus ein. 2. Stellen Sie den gewünschten Radiosender entweder automatisch oder manuell ein. 3. Halten Sie die Taste P (11) gedrückt. Wählen Sie den gewünschten Speicherplatz durch drücken der Tasten aus.
  • Seite 13: Id3-Funktion

    Wiedergabe/Pause Drücken Sie einmal auf die Taste (13), um die Wiedergabe zu pausieren. Wenn Sie die Taste erneut drücken, wird die Wiedergabe fortgesetzt. Wiedergabe stoppen Wenn die Taste während der Wiedergabe oder Pause gedrückt wird, stoppt das Gerät die gesamte Wiedergabe. Titel überspringen Wenn während der Wiedergabe oder Pause die Taste (14) gedrückt...
  • Seite 14 Titel wiederholen (für CDs) Sie können den gewünschten Titel, Ordner (nur MP3) oder die gesamte CD mit dieser Funktion wiederholen: (1) Wiederholen 1 > (2) Alle Titel wiederholen > (3) wiederholen deaktiviert. Wiedergabemodus Anzeige Einen Titel wiederholen Ordner wiederholen Alle Titel wiederholen Wiederholen deaktiviert ----- Zufallswiedergabe...
  • Seite 15: Wiedergabe Von Mp3-Dateien Von Usb-Geräten

    WIEDERGABE VON MP3-DATEIEN VON USB- GERÄTEN Das Gerät kann auf USB-Geräten gespeicherte MP3-Dateien dekodieren. Versetzen Sie das Gerät zunächst in den Standby-Modus oder einen beliebigen Modus (außer dem USB-Modus). 2. Stecken Sie den USB-Stick richtig herum in den USB-Anschluss und stellen Sie sicher, dass dieser richtig darin steckt.
  • Seite 16 ID3-Funktion Wenn Sie mehrfach die Taste MENU/INFO drücken, zeigt der LC-Bildschirm die MP3-Informationen wie Album/ Künstler/Titel etc. an. • Sollte kein Name vorhanden sein, oder der Name in einer nicht unterstützen Sprache sein, bleibt der LC-Bildschirm beim Drücken der Taste MENU/INFO leer. •...
  • Seite 17: Zusatzfunktionen

    ZUSATZFUNKTIONEN Automatisches Ausschalten Drücken und halten Sie die Taste MENU gedrückt und wählen Sie mit den Tasten das Hauptmenü aus. Bestätigen Sie Ihre Auswahl durch Drücken der Taste OK. 2. Wählen Sie mit den Tasten „Sleep mode“ aus und drücken Sie zum Bestätigen die Taste OK.
  • Seite 18: Plattenspieler

    PLATTENSPIELER Entfernen Sie den Nadelschutz. Stellen Sie sicher, dass der Tonarm vor der Verwendung des Plattenspielers von der Halterung genommen und anschließend wieder gesichert wird. Kartusche Schutz Drücken Sie zur Auswahl des Plattenspieler-Modus (Phono) mehrfach die Taste MODE. 2. Drücken Sie zum Bestätigen die Taste OK. 3.
  • Seite 19: Bt Verbindungsherstellung Und Wiedergabe

    3. Auf dem LC-Bildschirm blinkt das BT-Symbol auf, was bedeutet, dass die BT-Verbindung noch nicht hergestellt wurde. 4. Aktivieren Sie auf Ihrem mobilen Endgerät BT und wählen Sie in der Geräteliste „Birmingham“ aus. 5. Sobald die Verbindung erfolgreich hergestellt wurde, leuchtet das BT- Symbol permanent auf dem LC-Bildschirm auf.
  • Seite 20: Spotify Connect

    SPOTIFY CONNECT Dein neues Gerät hat Spotify Connect Verwende dein Smartphone, Tablet oder deinen Computer als Fernbedienung für Spotify. Auf spotify.com/connect erfährst du mehr. Lizenzen Die Spotify Software unterliegt den Nutzungsrechten von Drittanbietern, die auf folgender Seite eingesehen werden können: https://www.spotify.com/connect/third-party-licenses Alle aufgeführten Marken sind Warenzeichen der jeweiligen Unternehmen.
  • Seite 21: Hinweise Zur Entsorgung

    HINWEISE ZUR ENTSORGUNG Befindet sich die linke Abbildung (durchgestrichene Mülltonne auf Rädern) auf dem Produkt, gilt die Europäische Richtlinie 2012/19/EU. Diese Produkte dürfen nicht mit dem normalen Hausmüll entsorgt werden. Informieren Sie sich über die örtlichen Regelungen zur getrennten Sammlung elektrischer und elektronischer Gerätschaften.
  • Seite 23 Dear Customer, Congratulations on purchasing this device. Please read the following instructions carefully and follow them to prevent possible damages. We assume no liability for damage caused by disregard of the instructions and improper use. Scan the QR code to get access to the latest user manual and more product information.
  • Seite 24: Safety Instructions

    SAFETY INSTRUCTIONS Note: Because CD movement and sensitive circuitry can cause interference with nearby equipment, turn off the equipment if you intend to use other electrical equipment in the vicinity. • All safety and operating instructions must be followed. • Do not use the unit near water or moisture.
  • Seite 25: Product Overview

    CAUTION Non-compliance with the operating instructions described in this manual may result in the release of hazardous radiation. This device should only be adjusted and repaired by qualifi ed personnel. PRODUCT OVERVIEW Device (front view) Dustcover P button LCD display Skip down button VU meter Play/Pause / STOP button...
  • Seite 26: Back View

    Turntable Single 45 RPM Adaptor Cue Lever Turntable Platter Speed Selector (33&45 rpm) Transit Screw Tone Arm Lock Counter Weight Tone Arm with Stylus Pitch Control Back view Speaker Terminal Antenna Socket Right Line Out Socket AC Power Cord Left Line Out Socket...
  • Seite 27 Fernbedienung (Open/Close CD tray) On/Standby MODE (previous/next title) (Play/Pause) (Stop) Folder/Pre (Previous/up/down Folder) Volume -/+ (adjust volume) MENU/INFO (Internet radio: information selection; CD/ USB mode: ID3 function activation; All other modes: menu) Mute (mute sound temporarily) Preset EQ (selection of different EQ modes) BACK (back to previous view) SHUFFLE/REP (CD mode: activate repeat function;...
  • Seite 28: Installation

    INSTALLATION Inserting the batteries The battery compartment is located on the back of the remote control. • Remove the cover of the battery compartment by pressing it in at the mark and then removing it. • Insert two AAA batteries (not supplied) into the battery compartment and make sure the polarity is correct.
  • Seite 29 • Plug the power plug (32) into the wall outlet. • When you plug in the unit for the first time, „auna“ will be displayed on the screen. • Approximately 30 seconds later, when the device is used for the first time, it automatically starts the Setup Wizard and the screen displays „Start now“...
  • Seite 30: Commissioning And Operation

    COMMISSIONING AND OPERATION After you have made the settings shown above, the unit switches to Internet radio mode. Press the buttons and select „Station list“. Confirm your selection by pressing the OK button. 2. Press the buttons to select „Stations“ and confirm your selection by pressing the OK button.
  • Seite 31 Automatic station search Press the MODE button (15) to select the FM mode. 2. Press the buttons to select the search direction and press the OK button to confirm. The automatic station search will start. 3. Repeat step 2 until the desired station is reached. 4.
  • Seite 32: Cd Mode

    Preset station (DAB mode) Note: Up to 20 DAB stations can be stored. Set the DAB mode. 1. 2. Set the desired radio station either automatically or manually. 3. Press and hold the P button (11). Select the desired memory location by pressing the buttons.
  • Seite 33 Play/Pause Press the button (13) once to pause playback. Press the button again to resume playback. To stop playback If the button is pressed during playback or pause, the unit stops all playback. Skip track If the button (14) is pressed during playback or pause, the current title will be skipped.
  • Seite 34 Repeat track (for CDs) You can repeat the desired track, folder (MP3 only) or the entire CD with this function: (1) Repeat 1 > (2) Repeat all tracks > (3) Repeat disabled. Playback mode Display Repeat a title Repeat folder Repeat all tracks Repeat disabled -----...
  • Seite 35: Play Mp3 Files From Usb Devices

    PLAY MP3 FILES FROM USB DEVICES The unit can decode MP3 files stored on USB devices. First, set the unit to standby mode or any mode (except USB mode). 2. Insert the USB stick correctly into the USB port and make sure that it is inserted correctly.
  • Seite 36 ID3 function If you press the MENU/INFO button repeatedly, the LCD screen will display MP3 information such as album/artist/title, etc. The LCD screen will also display MP3 information. • If there is no name or the name is in a language that is not supported, pressing the MENU/INFO button will leave the LCD blank.
  • Seite 37: Additional Functions

    ADDITIONAL FUNCTIONS Automatic switch-off Press and hold the MENU button and select the main menu with the buttons. Confirm your selection by pressing the OK button. 2. Select „Sleep mode“ with the buttons and press the OK button to confirm. 3.
  • Seite 38: Phono Mode (Turntable)

    PHONO MODE (TURNTABLE) Remove the needle guard. Make sure that the tonearm is removed from the holder before using the turntable and then secured again. Cartridge Guard Press the MODE button repeatedly to select the phono mode. 2. Press the OK button to confirm. 3.
  • Seite 39: Bt Connection And Playback

    3. The BT icon will blink on the LCD screen, indicating that the BT connection has not yet been established. 4. Activate BT on your mobile device and select „Birmingham“ in the device list. 5. Once the connection has been successfully established, the BT icon will light up permanently on the LC screen.
  • Seite 40: Spotify Connect

    SPOTIFY CONNECT Your new device has Spotify Connect built in Use your phone, tablet or computer as a remote control for Spotify. Go to spotify.com/connect to learn how. Licenses The Spotify Software is subject to third party licenses found here: https://www.spotify.com/connect/third-party-licenses All listed brands are trademarks of their companies.
  • Seite 41: Hints On Disposal

    HINTS ON DISPOSAL According to the European waste regulation 2012/19/ EU this symbol on the product or on its packaging indicates that this product may not be treated as household waste. Instead it should be taken to the appropriate collection point for the recycling of electrical and electronic equipment.
  • Seite 43 Chère cliente, cher client, Toutes nos félicitations pour l’acquisition de ce nouvel appareil. Veuillez lire attentivement et respecter les instructions de ce mode d’emploi afin d’éviter d’éventuels dommages. Nous ne saurions être tenus pour responsables des dommages dus au non-respect des consignes et à...
  • Seite 44: Consignes De Sécurité

    CONSIGNES DE SÉCURITÉ Remarque : Etant donné que le mouvement du CD et les circuits sensibles peuvent interférer avec les appareils se trouvant à proximité, éteignez l‘appareil si vous envisagez d‘utiliser d‘autres appareils électriques à proximité. • Toutes les instructions de sécurité et d‘utilisation doivent être respectées.
  • Seite 45: Aperçu De L'appareil

    ATTENTION Le non-respect du mode d’emploi décrit dans ce manuel peut entraîner des rayonnements dangereux. Cet appareil ne doit être réglé et réparé que par du personnel qualifi é. APERÇU DE L‘APPAREIL Appareil (vue de face) Couvercle de protection contre la Touche P poussière Ecran...
  • Seite 46 Platine vinyle Levier de commande du bras de Adaptateur 45 T lecture Platine Vitesse (33 & 45 T) Sécurité pour le transport Verrouillage du bras de lecture Contrepoids Bras de lecture avec aiguille Réglage en hauteur Vue de dos Prise d'enceinte Prise d'antenne Prise Line-Out droite Câble secteur...
  • Seite 47 Télécommande (ouvrir/fermer le compartiment CD) On/Standby (marche/veille) MODE (sélection du mode) (titre précédent/ suivant) (Lecture/ Pause) (Stop) Dossier/Pre (dossier précédent/haut/bas) Volume -/+ (réglage du volume) MENU/INFO (radio Internet : sélection d'une information ; Mode CD/ USB : activation de la fonction ID3 ; dans tous les autres modes : Menu) Mute (pour couper le son temporairement) Preset EQ (choix de différents modes d'égaliseur)
  • Seite 48: Installation

    INSTALLATION Installation des piles Le compartiment à piles se trouve au dos de la télécommande. • Retirez le couvercle du compartiment à piles en appuyant sur le repère, puis retirez-le. • Insérez deux piles AAA (non fournies) dans le compartiment à...
  • Seite 49 • Branchez la fiche d‘alimentation (32) dans la prise. • Lorsque vous branchez l‘appareil pour la première fois, „auna“ s‘affiche à ‚écran“. • Environ 30 secondes plus tard, lors de la première utilisation, l‘appareil lance automatiquement l’assistant d’installation, l’écran affiche „Start now“...
  • Seite 50: Mise En Marche Et Utilisation

    MISE EN MARCHE ET UTILISATION L‘appareil passe en mode radio Internet après avoir effectué les réglages ci-dessus. Appuyez sur les touches et sélectionnez „Liste des stations“. Confirmez votre choix en appuyant sur la touche OK. 2. Appuyez sur les touches , pour sélectionner „Stations“...
  • Seite 51 Recherche automatique de stations Appuyez sur la touche MODE (15) pour sélectionner le mode FM. 2. Appuyez sur les touches pour sélectionner le sens de la recherche et appuyez sur OK pour confirmer. La recherche automatique de stations est alors lancée. 3.
  • Seite 52: Mode Cd

    Mémorisation de stations (en mode DAB) Remarque : vous pouvez mémoriser jusqu‘à 20 stations DAB. Passez en mode DAB. 2. Réglez la station souhaitée automatiquement ou manuellement. 3. Maintenez la touche P (11). Choisissez l‘emplacement mémoire en appuyant sur les touches 4.
  • Seite 53 Lecture / Pause Appuyez une fois sur la touche (13), pour mettre la lecture en pause. En appuyant à nouveau sur la touche, la lecture reprend. Pour arrêter la lecture Lorsque vous appuyez sur la touche pendant la lecture ou en pause, l‘appareil arrête complètement la lecture.
  • Seite 54 Répétition d‘un titre (pour les CD) Vous pouvez répéter une piste, un dossier (MP3 uniquement) ou un CD entier en utilisant cette fonction : (1) Répéter 1> (2) Répéter toutes les pistes> (3) Répétition désactivée. Mode de lecture Affichage Répéter un titre Répéter un dossier Répéter tous les titres Répétition désactivée...
  • Seite 55: Lecture De Fichiers Mp3 Sur Un Appareil Usb

    LECTURE DE FICHIERS MP3 SUR UN APPAREIL L‘appareil peut décoder les fichiers MP3 stockés sur des périphériques USB. Mettez d‘abord l‘appareil en mode veille ou dans n‘importe quel mode (sauf le mode USB). 2. Insérez la clé USB dans le port USB dans le bon sens et assurez-vous qu’elle est insérée correctement.
  • Seite 56 Fonction ID3 Si vous appuyez plusieurs fois sur la touche MENU/INFO, l‘écran LCD affiche les informations MP3 telles que le nom de l‘album/ de l‘artiste /le titre du morceau etc. • Si aucun nom n‘est disponible ou si le nom est dans une langue non prise en charge, l‘écran LCD reste vide lorsque vous appuyez sur la touche MENU / INFO.
  • Seite 57: Autres Fonctions

    AUTRES FONCTIONS Arrêt automatique Maintenez la touche MENU puis utilisez les touches pour sélectionner le menu principal. Confirmez votre choix en appuyant sur 2. Utilisez les touches pour sélectionner „Mode veille“ et appuyez sur OK pour confirmer. 3. Sélectionnez la durée souhaitée avant d‘éteindre automatiquement en choisissant 15-30-45-60 avec les touches et confirmez votre choix en appuyant sur OK.
  • Seite 58: Platine Vinyle

    PLATINE VINYLE Retirez la protection de l‘aiguille. Vérifiez que le bras de lecture est retiré de son support, puis bloquez-le à nouveau avant d’utiliser la platine. Cartouche Protection Appuyez plusieurs fois sur la touche MODE pour sélectionner le mode platine vinyle. 2.
  • Seite 59: Établissement D'une Connexion Bt Et Lecture

    3. L‘icône BT clignote sur l‘écran LCD, indiquant que la connexion BT n‘a pas encore été établie. 4. Activez BT sur votre appareil mobile et sélectionnez „Birmingham“ dans la liste des appareils. 5. Dès que la connexion est établie avec succès, le symbole BT s’allume en permanence sur l’écran LCD.
  • Seite 60: Spotify Connect

    SPOTIFY CONNECT Votre nouvel appareil a Spotify Connect Utilisez votre smartphone, tablette ou ordinateur comme télécommande pour Spotify. Pour en savoir plus, allez sur spotify.com/connect. Licences Le logiciel Spotify est soumis aux droits d’utilisation de tiers, consultables à la page suivante : https://www.spotify.com/connect/third-party-licenses Toutes les marques citées sont des marques de leurs sociétés respectives.
  • Seite 61: Informations Sur Le Recyclage

    INFORMATIONS SUR LE RECYCLAGE Vous trouverez sur le produit l’image ci-contre (une poubelle sur roues, barrée d‘une croix), ce qui indique que le produit se trouve soumis à la directive européenne 2012/19/UE. Renseignez-vous sur les dispositions en vigueur dans votre région concernant la collecte séparée des appareils électriques et électroniques.
  • Seite 63 Estimado cliente: Le felicitamos por la adquisición de este producto. atentamente siguiente manual siga cuidadosamente las instrucciones de uso con el fin de evitar posibles daños. La empresa no se responsabiliza de los daños ocasionados por un uso indebido del producto o por haber desatendido las indicaciones de seguridad.
  • Seite 64: Indicaciones De Seguridad

    INDICACIONES DE SEGURIDAD Nota: Debido a que el movimiento del CD y los circuitos sensibles pueden causar interferencia con el equipo cercano, apague el equipo si tiene la intención de utilizar otro equipo eléctrico en las proximidades. • Deben observarse todas las instrucciones de seguridad y funcionamiento.
  • Seite 65: Descripción Del Producto

    ATENCIÓN El incumplimiento de las instrucciones de funcionamiento descritas en este manual puede provocar la emisión de radiaciones peligrosas. Este dispositivo sólo debe ser ajustado y reparado por personal cualifi cado. DESCRIPCIÓN DEL PRODUCTO Aparato (Vista frontal) Tapa Botón P Pantalla LCD Botón skip down Indicador de volumen...
  • Seite 66: Vista Posterior

    Tocadiscos Adaptador de Single 45 RPM Palanca ajuste altura Selector de velocidad (33&45 Plato giradiscos rpm) Perno de tránsito Seguro del brazo Contrapeso Brazo con aguja Control de pitch Vista posterior Terminal de altavoces Salida antena Salida linea derecha Cable de corriente Salida linea izquierda...
  • Seite 67 Mando a distancia (Abrir/cerrar bandeja del CD) On/Standby (encendido/en espera) MODE (selección de modo) (Título anterior/posterior) (Lecture/ Pause) (Stop) Carpeta (carpeta anterior/abajo/arriba) Volumen -/+ (ajuste de volume) MENU/INFO (Radio en internet: selección de información; modo CD/ USB: activación de la función ID3;...
  • Seite 68: Instalación

    INSTALACIÓN Introducir las pilas El compartimento de las pilas está en la parte de atrás del mando a distancia. • Retire la tapa del compartimento de las pilas presionando en la marca y retirándolo. • Inserte dos pilas AAA (no incluidas) en el compartimento y asegúrese de que las polos están bine colocados.
  • Seite 69 • Enchufe el enchufe de alimentación (32) en la toma de corriente. • Al conectar el aparato por primera vez, en el display aparece „auna“. • Unos 30 segundos después, durante el primer uso, el dispositivo inicia automáticamente el asistente de instalación, la pantalla muestra „Start now“...
  • Seite 70: Puesta En Marcha Y Funcionamiento

    PUESTA EN MARCHA Y FUNCIONAMIENTO • Después de haber realizado los ajustes indicados anteriormente, el aparato cambia al modo de radio por Internet. Pulse los botones seleccione „Lista de emisoras“. Confirme su selección pulsando el botón • Pulse los botones para seleccionar „Estaciones“...
  • Seite 71 Búsqueda automática de emisoras Pulse la tecla MODE (15) para seleccionar el modo FM. 2. Pulse las teclas para seleccionar la dirección de búsqueda y confirme la selección con la tecla OK. Comenzará la búsqueda automática. 3. Repita el paso número 2 hasta encontrar la emisora deseada. 4.
  • Seite 72: Modo Cd

    Ajuste de emisora (Modo DAB) Nota: Se pueden guardar hasta 20 emisoras DAB. Seleccione modo DAB. 1. 2. Seleccione la emisora deseada de manera automática o manual. 3. Presione y mantenga el botón P (11). Seleccione de la memoria con las teclas 4.
  • Seite 73 Reproducción/Pausa Pulse una vez la tecla (13), para pausar la reproducción. Si pulsa de nuevo la tecla, la reproducción comieneza de nuevo. Detener la reproducción Al pulsar la tecla durante la reproducción, o cuando esta está pausada, se detiene la reproducción. Saltar una pista Al pulsar la tecla (14) durante la reproducción, o cuando esta está...
  • Seite 74 Repetir pista (para CDs) Con esta función puede repetir la pista, la carpeta (sólo MP3) o el CD completo que desee: (1) Repetir 1 > (2) Repetir todas las pistas > (3) Repetir desactivado. Modo de reproducción Pantalla Repetir un título Repetir carpeta Repite todas las pistas Repetición desactivada...
  • Seite 75: Reproduce Archivos Mp3 Desde Dispositivos Usb

    REPRODUCE ARCHIVOS MP3 DESDE DISPOSITIVOS USB La unidad puede decodificar archivos MP3 almacenados en dispositivos USB. Primero, fije la unidad en el modo de espera o en cualquier otro modo (excepto el modo USB). 2. Inserte la memoria USB correctamente en el puerto USB y asegúrese de que está...
  • Seite 76 Función ID3 Si pulsa el botón MENU/INFO repetidamente, la pantalla LCD mostrará información de MP3 como álbum/artista/título, etc. La pantalla LCD también mostrará información de MP3. • Si no hay ningún nombre, o el nombre está en un idioma que no es compatible, la pantalla LCD permanece en blanco cuando se pulsa el botón MENÚ/INFO.
  • Seite 77: Otras Funciones

    OTRAS FUNCIONES Apagado automático Pulse y mantenga presionado el botón MENU, seleccione con las teclas . Confirme su selección con la tecla OK. 2. Seleccione “Sleep mode” (modo dormir) con las teclas Confirme su selección con la tecla OK. 3. Seleccione el tiempo deseado hasta el apagado automático en rangos de 15-30-45-60 con las teclas y confirme su selección con la tecla OK.
  • Seite 78: Tocadiscos

    TOCADISCOS Retire el protector de la aguja. Asegúrese de que el brazo se ha soltado del seguro y vuelva a colocar en su lugar antes de usar el plato. Cartucho Protección Pulse la tecla MODE varias veces para seleccionar el modo Phono (tocadiscos) 2.
  • Seite 79: Conexión Y Reproducción Via Bluetooth

    4. Active en su móvil el Bluetooth y seleccione de la lista del BlueTooth el “Birmingham”. 5. En el momento en el que se establezca la conexión el símbolo de BlueTooth deja de parpadear, se muestra en la pantalla.
  • Seite 80: Conexión A Spotify

    CONEXIÓN A SPOTIFY Este reproductor tiene una conexión a Spotif Use su teléfono móvil, tableta u ordenador como un mando a distancia para Spotify. Consulte en spotify.com/connect Licencias El software Spotify está sujeto a los derechos de uso de terceros, que se encuentran en la siguiente página: https://www.spotify.com/connect/third- party-licenses Todas las marcas comerciales mencionadas son marcas comerciales...
  • Seite 81: Instrucciones Para La Eliminación

    INSTRUCCIONES PARA LA ELIMINACIÓN De acuerdo a la ley europea de eliminación de residuos 2012/19/EU este símbolo en la caja del producto indica que este dispositivo no puede ser gestionado como basura doméstica. Debe llevarlo a un punto de recogida de residuos eléctricos y electrónicos.
  • Seite 83 Gentile Cliente, La ringraziamo per aver acquistato il dispositivo. La preghiamo di leggere attentamente le seguenti istruzioni per l’uso e di seguirle per evitare possibili danni tecnici. Non ci assumiamo alcuna responsabilità per danni scaturiti da una mancata osservazione delle avvertenze di sicurezza e da un uso improprio del dispositivo.
  • Seite 84: Avvertenze Di Sicurezza

    AVVERTENZE DI SICUREZZA Nota: dato che il movimento del CD e il circuito integrato sensibile possono causare interferenze con altri dispositivi elettrici nelle vicinanze, spegnere il dispositivo volete utilizzare altri dispositivi elettrici nelle vicinanze. • Tutte le avvertenze di sicurezza e utilizzo devono essere rispettate. •...
  • Seite 85: Descrizione Del Dispositivo

    ATTENZIONE Il mancato rispetto delle avvertenze di utilizzo contenute nel manuale può causare lo sprigionamento di radiazioni pericolose. Il dispositivo deve essere regolato e riparato solo da personale qualifi cato. DESCRIZIONE DEL DISPOSITIVO Dispositivo (vista frontale) Copertura antipolvere Tasto P Schermo Passare al titolo successivo VU meter...
  • Seite 86: Vista Posteriore

    Giradischi Adattatore 45 giri Leva di sollevamento Piatto rotante Velocità (33 e 45 giri) Sicura per il trasporto Sicura braccio del pick-up Contrappeso Braccio del pick-up con puntina Regolazione alti Vista posteriore Connessione altoparlanti Connessione antenna Connessione Line-Out destra Cavo di alimentazione Connessione Line-Out destra...
  • Seite 87 Telecomando (aprire/chiudere il vano CD) On/Standby (accendere/modalità standby) MODE (selezione modalità) (titolo precedente/successivo) (Play/Pausa) (Stop) Folder/Pre (cartella precedente/in alto/in basso) Volume +/- (regolazione volume) MENU/INFO (selezione informazioni web radio: modalità CD/USB: attivazione funzione ID3; tutte le altre modalità: menu) Mute (disattivare l’audio temporaneamente) Preset EQ (selezione di diverse modalità...
  • Seite 88: Installazione

    INSTALLAZIONE Inserire le batterie Il vano delle batterie si trova sul retro del telecomando. • Togliere la copertura del vano delle batterie, premendo sul segno e staccandola. • Inserire due batterie tipo AAA (non incluse in consegna) nel vano e fare attenzione alla corretta polarità.
  • Seite 89 Inserire la spina (32) nella presa elettrica. • Quando si accende il dispositivo per la prima volta, sullo schermo compare “auna”. • Dopo circa 30 secondi si attiva il dispositivo. Se è il primo utilizzo, passa automaticamente all’assistente di configurazione, lo schermo mostra “Start now”...
  • Seite 90: Messa In Funzione E Utilizzo

    MESSA IN FUNZIONE E UTILIZZO Una volta eseguite le impostazioni indicate, il dispositivo passa in modalità web radio. Premere e selezionare “Station list” (elenco emittenti). Confermare con OK. 2. Premere per selezionare “Stations” (emittenti) e confermare con 3. Premere per selezionare la modalità di ricerca desiderata, come ad es.
  • Seite 91 Ricerca emittenti automatica Premere MODE (15) per selezionare la modalità FM. 2. Premere per selezionare la direzione di ricerca e confermare con OK. Inizia la ricerca automatica. 3. Ripetere il passaggio 2 fino a raggiungere l’emittente desiderata. 4. Impostare il volume con gli appositi tasti (16). Sistema di dati della radio (RDS) Questa impostazione viene messa a disposizione dalle rispettive emittenti.
  • Seite 92: Modalità Cd

    Salvataggio di emittenti (modalità DAB) Nota: possono essere salvate fino a 20 emittenti DAB. Impostare la modalità DAB. 2. Impostare l’emittente desiderata in modo automatico o manuale. 3. Tenere premuto il tasto P (11). Selezionare la posizione di salvataggio 4. Confermare con OK (7). 5.
  • Seite 93 Play/Pausa Pulse una vez la tecla (13), per mettere in pausa la riproduzione. Premerlo di nuovo per riprendere la riproduzione. Arrestare la riproduzione Premere durante la riproduzione o in modalità Pausa per arrestare completamente la riproduzione. Saltare un titolo Se si preme (14) durante la riproduzione o in modalità...
  • Seite 94 Ripetizione di titoli (per CD) Con questa funzione, è possibile ripetere il titolo, la cartella (solo MP3) o il CD che si desidera: (1) Ripetere 1>(2) Ripetere tutti i titoli>(3) Ripetizione disattivata. Modalità di riproduzione Spia Ripetere un titolo Ripetere una cartella Ripetere tutti i titoli Ripetizione disattivata -----...
  • Seite 95: Riproduzione Di File Mp3 Da Dispositivi Usb

    RIPRODUZIONE DI FILE MP3 DA DISPOSITIVI Il dispositivo è in grado di decodificare file MP3 salvati su dispositivi USB. Mettere il dispositivo in standby o in una modalità a piacere (esclusa la modalità USB). 2. Inserire la chiavetta USB nell’apposito ingresso e assicurarsi che sia collegata correttamente.
  • Seite 96 Funzione ID3 Premendo più volte MENU/INFO, lo schermo LC mostra informazioni MP3 come album/artista/titolo, ecc. • Se non è disponibile alcun nome o se il nome è in una lingua non supportata, lo schermo LC resta vuoto quando si preme MENU/INFO. •...
  • Seite 97: Funzioni Aggiuntive

    FUNZIONI AGGIUNTIVE Spegnimento automatico Tenere premuto MENU e selezionare il menu principale con Confermare con OK. 2. Selezionare “Sleep Mode” con e confermare con OK. 3. Selezionare il tempo desiderato fino allo spegnimento automatico tra 15-30-45-60 minuti con e confermare con OK. Lo schermo LC mostra il tempo impostato fino allo spegnimento automatico.
  • Seite 98: Giradischi

    GIRADISCHI Rimuovere la protezione della puntina. Assicurarsi di togliere il braccio del pick-up prima di utilizzare il giradischi e di fissarlo nuovamente dopo l’ascolto. Cartuccia Protezione Premere più volte MODE per selezionare la modalità giradischi (Phono). 2. Confermare con OK. 3.
  • Seite 99: Stabilire La Riproduzione Bt Eriproduzione

    3. Sullo schermo LC lampeggia il simbolo BT, a indicare che non è stata stabilita una connessione BT. 4. Attivare il BT sul dispositivo mobile e selezionare “Birmingham” dall’elenco dei dispositivi. 5. Una volta stabilita la connessione, il simbolo BT rimane illuminato sullo schermo LC.
  • Seite 100: Spotify Connect

    SPOTIFY CONNECT Il vostro nuovo dispositivo è dotato di Spotify Connect Utilizzate il vostro smartphone, tablet o PC come telecomando per Spotify. Scoprite di più alla pagina spotify.com/connect. Licenze Il software Spotify è sottoposto a diritti utente di parti terze, consultabili alla pagina web seguente: https://www.spotiy.com/connect/third-party-licenses Tutti i marchi indicati sono marchi registrati delle relative aziende.
  • Seite 101: Smaltimento

    SMALTIMENTO Se sul prodotto è presente la figura a sinistra (il bidone dei rifiuti con le ruote), si applica la direttiva europea 2012/19/UE. Questi prodotti non possono essere smaltiti con i rifiuti normali. Informarsi sulle disposizioni vigenti per la raccolta di dispositivi elettrici ed elettronici.

Inhaltsverzeichnis