Werbung
Verfügbare Sprachen
Verfügbare Sprachen
Werbung
Inhaltsverzeichnis

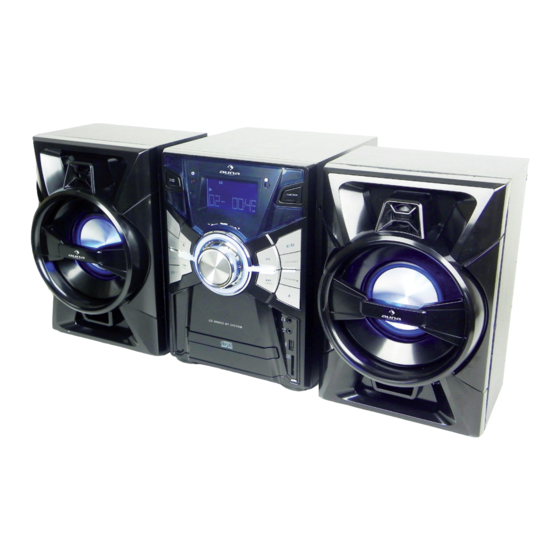
Inhaltszusammenfassung für auna MCD-107C
- Seite 1 MCD-107C Kompakt-Anlage 10028090 www.auna-multimedia.com...
-
Seite 2: Sicherheitshinweise Und Gewährleistung
Sehr geehrter Kunde, zunächst möchten wir Ihnen zum Erwerb Ihres Gerätes gratulieren. Bitte lesen Sie die folgenden Anschluss- und Anwendungshinweise sorgfältig durch und befolgen Sie diese um möglichen technischen Schäden vorzubeugen. Sicherheitshinweise und Gewährleistung • Diese Bedienungsanleitung dient dazu, Sie mit der Funktionsweise dieses Produktes vertraut zu ma- chen. -
Seite 3: Technische Daten
Technische Daten Artikelnummer 10028090 Gerätetyp Kompaktanlage 2 x Stereo-Lautsprecherklemme; 2x LED-Anschluss; Anschlüsse Netzanschluss Stromversorgung Netzkabel, ~230V Lieferumfang Bedienelemente Front:... - Seite 4 Standby-LED Infrarot-Sensor (Fernbedienung) FUNC (Einschalten / Standby) Display VOL + / - DISPLAY / ID3 / ST/MONO MEM / CLK (Uhrzeit einstellen) CD OPEN/CLOSE PLAY MODE Kopfhörer-Anschluss AUX-Anschluss FOLDER / PRE LIGHT / TIMER USB-Anschluss SD-Kartenslot CD-Lade Rückseite:...
- Seite 5 Antenne Anschlussbuchse für LED-Beleuchtung Lautsprecher-Anschlussklemmen Netzanschluss Fernbedienung: Ein-/ausschalten Standby: Gedrückt halten zum Einstellen MEM / CLK ADJ d. Uhrzeit; CD/Radio: Preset-Funktion Funktionsauswahl (CD/USB/SD/BT/Radio/ FUNCTION AUX) Zurück/Weiter (Titel/Sender) Play/Pause CD/USB/SD: Stop / ST/MONO Radio: Stere/Mono umschalten Radio: Nächster/Voriger Senderspeicher FOLDER / PRE MP3: Nächster/Voriger Ordner +10 / -10 10 Titel vor/zurück...
- Seite 6 Inbetriebnahme • Setzen Sie zwei Batterien vom Typ „AAA“ (nicht im Lieferumfang enthalten) in die Fernbedienung ein. Achten Sie auf die korrekte Polarität: • Schließen Sie die Lautsprecherkabel sowie die Anschlussdrähte (mit 3,5mm-Klinke-Steckern) für die Lichteffekte nach folgendem Schema an: Lautsprecher:...
- Seite 7 • Beleuchtung: • Verbinden Sie dann das mitgelieferte Netzteil mit dem Gerät und einer Haushaltssteckdose. Schalten Sie das Gerät mit ein.
- Seite 8 Funktionen Einstellen der Uhrzeit • Schalten Sie das Gerät in den Standby-Modus ( • Drücken Sie MEM/CLK ADJ. „SET CLOCK“ und „24hr“ werden auf dem Display angezeigt. Wählen Sie das Uhrzeitformat (12h/24h). • Drücken Sie MEM/CLK ADJ, um die Uhrzeit zu ändern. Zunächst stellen Sie mit die Stunden ein.
- Seite 9 CDs / MP3s (USB/SD) • Wählen Sie den CD-/USB-/SD-Modus mit der FUNCTION Taste aus. • Öffnen Sie das CD-Fach mit OPEN und legen Sie eine CD (mit der bedruckten Seite nach oben) ein. • Stecken Sie eine Musik enthaltende SD-Karte oder einen USB-Stick (bzw. MP3-Player o.ä.) ein. •...
- Seite 10 • Wählen Sie den BT-Modus mit FUNCTION aus. • Aktivieren Sie die BT-Funktion Ihres Tablets/Mobiltelefon/Laptop und verbinden Sie mit MCD-107C. Bei erfolgreichem Verbindungsaufbau zeigt das Display „BT“ an. • Sie können . nutzen, um durch Ihre mobile Musikbibliothek zu navigieren, oder das externe Gerät dafür verwenden.
-
Seite 11: Hinweise Zur Entsorgung
Display: Drücken Sie in jedem Modus DISPLAY, um die Uhrzeit auf dem Display anzuzeigen Mute: Drücken Sie MUTE, um die Musikausgabe stumm zu schalten / die Stummschaltung zu beenden. AUX-IN: Schließen Sie externe Abspielgeräte (MP3-Player, Laptops, Smartphones etc.) mit einem Audio- Kabel hier an. -
Seite 12: Important Safety Advice
Dear Customer, Congratulations on purchasing this product. Please read and follow these instructions, in order to avoid damaging the item. We do not cover any damages that may arise from improper use of the item or the disregard of the safety instructions. Important Safety Advice •... -
Seite 13: Technical Data
Technical Data Article # 10028090 2 x Stereo speaker terminal Connections 2x LED power jacks (3.5mm jacks); 1x Mains in Power supply Mains cable - AC ~230V Scope of delivery Controls Front:... - Seite 14 Standby LED IR Sensor FUNCTION (On / Standby) Display VOL + / - DISPLAY / ID3 / ST/MONO MEM / CLK CD OPEN/CLOSE PLAY MODE Headphone jack AUX in jack FOLDER / PRE LIGHT / TIMER USB port SD card slot CD Tray Rear:...
- Seite 15 Antenna 3.5mm-jacks for LED light effects pwr supply Speaker terminals Mains in Remote Control: On/Standby Standby: Press and hold for setting the MEM / CLK ADJ clock; CD/Radio: Preset function Choose function (CD/USB/SD/BT/Radio/ FUNCTION AUX) Back/Next (title/station) Play/Pause CD/USB/SD: Stop / ST/MONO Radio: Stereo/mono Radio: Next/previous station preset...
- Seite 16 Setup / Initial Use • Insert two AAA size batteries (not included) into the remote control battery compartment following the polarity markings inside the battery compartment. • Connect the AC cord to the wall outlet. • When you first plug the unit into the mains, the unit will go into standby mode and the standby LED indicator (1) will light up.
- Seite 18 Funktionen Einstellen der Uhrzeit • Set the unit into standby mode ( • Press MEM/CLK ADJ. „SET CLOCK“ and „24hr“ will be displayed. Use to change the time format (12h/24h). • Press MEM/CLK ADJ, To set the time. First, set the hour using .
- Seite 19 CDs / MP3s (USB/SD) • Choose the CD/USB/SD mode pressing FUNCTION repeatedly. • Press OPEN to open the CD tray and put in a CD (with the printed side facing up) or • Insert an SD card or a USB drive containing MP3 or WAV files. •...
- Seite 20 • Press FUNCTION repeatedly to choose BT mode. • Activate BT on your mobile device and connect with MCD-107C. The display shows „BT“ on successfull connection attempt. • . to navigate through your mobile music library, or use the external device, alternatively.
-
Seite 21: Environment Concerns
Display: Press DISPLAY to show the current time on the display. Mute: Press to mute / unmute sound output. AUX-IN: Connect another audio device, e.g. (portable) CD player, MP3 player, (portable) cassette player, etc. to this system via a cord with 3.5mm dia jack plugs (not supplied). Connect one end of this cord to the 3.5mm dia.


