Herunterladen Inhalt Inhalt Diese Seite drucken
Vorschau ausblenden Andere Handbücher für VacTec 30 M:
Inhaltsverzeichnis

Werbung

Verfügbare Sprachen
  • DE

Verfügbare Sprachen

  • DEUTSCH, seite 1
VacTec 30 M
DE
NL
FR
IT
GB
CZ

Werbung

Inhaltsverzeichnis
loading

Inhaltszusammenfassung für Storch VacTec 30 M

  • Seite 1 VacTec 30 M...
  • Seite 2: Inhaltsverzeichnis

    Vielen Dank für Ihr Vertrauen zu STORCH. Mit dem Kauf haben Sie sich für ein Quali- täts-Produkt entschieden. Haben Sie trotzdem Anregungen zur Verbesserung oder aber vielleicht einmal ein Problem, so freuen wir uns sehr, von Ihnen zu hören. Bitte sprechen Sie mit Ihrem Außendienst-Mitarbeiter oder in dringenden Fäl- len auch mit uns direkt.
  • Seite 3: Technische Daten

    Technische Daten Netzspannung 220 - 240 Frequenz 1 ~ 50 - 60 Max. Leistung 1.380 Nennleistung 1.200 Behälterinhalt Füllmenge Flüssigkeit Luftmenge (max.) Unterdruck (max.) kPa (mbar) 23,7 (237) Leistungsanschlusswert der EU: 100 - 2.200 Elektrowerkzeuge Fläche des Flachfaltenfilters Schutzart IPX4 Schutzklasse Durchmesser des Saugschlauchs Länge des Saugschlauchs...
  • Seite 4: Lieferumfang

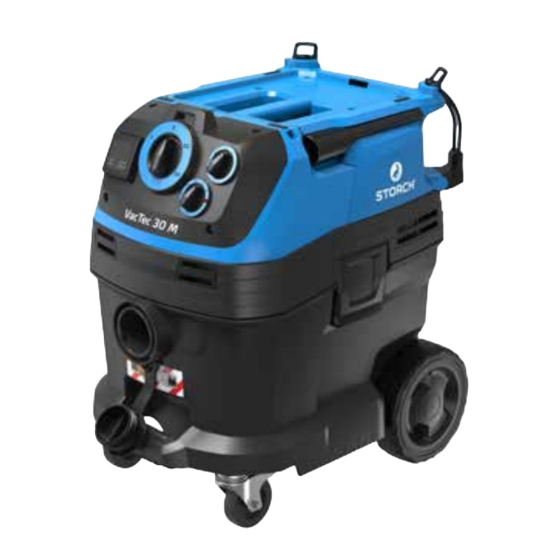
    Lieferumfang VacTec 30 M Sauger, 4 m Saugschlauch elektrisch leitend, 2 x Saugrohr, Krümmer elek- trisch leitend, Bodendüse, Gummilippen für Bodendüse, Fugendüse, Werk- zeugmuffe, Vlies-Filterbeutel, PE-Beutel. Geräteelemente 16 Saugrohr 1 Elektroden 17 Gummimuffe, schraubbar 2 Saugschlauch 18 Filterabdeckung 3 Schlauchhaken 19 Tragegriff 4 Fugendüse...
  • Seite 5 Originalanleitung...
  • Seite 6: Sicherheitshinweise

    Sicherheitshinweise Gefahren für den Bediener und ande- Lesen Sie vor der ersten Benutzung re Personen entstehen. Ihres Gerätes diese Originalbetriebs- anleitung, handeln Sie danach und Bei Transportschaden sofort Händler bewahren Sie diese für späteren Ge- brauch oder für Nachbesitzer auf. informieren.
  • Seite 7: Symbole Auf Dem Gerät

    Symbole auf dem Gerät WARNUNG sönliche Schutzausrüstung tragen. Dieses Gerät enthält gesundheits- Nicht einschalten, bevor das kom- gefährliche Stäube. Entleerung und plette Filtersystem installiert ist und Wartung, einschließlich der Entfer- die Funktion der Volumenstromkont- nung des Staubbeutels, dürfen nur rolle überprüft wurde. von sachkundigen Personen vorge- nommen werden, die geeignete per- Sicherheitshinweise...
  • Seite 8: Sicherheitseinrichtungen

    Sicherheitseinrichtungen Überwachung des Flachfaltenfilters HINWEIS Bei Betrieb des Gerätes ohne Flach- faltenfilter, schaltet dieses automa- Die Hupe reagiert auf Unterdruck. tisch ab. Drehschalter richtigen Saug- Inbetriebnahme schlauchquerschnitt stellen. Das Gerät erlaubt 2 Betriebsarten: Dauerton 1 Industriestaubsaugerbetrieb (Steckdose nicht belegt) Die Hupe ertönt (Dauerton), wenn der 2 Entstauberbetrieb Kühlluftfilter verstopft ist.
  • Seite 9 gen und als Entstauber für ortsverän- derlichen Betrieb zum Absaugen von trockenen, nicht brennbaren Stäuben HINWEIS mit AGW-Werten größer gleich 0,1 mg/m geeignet. Die Öffnung des Entsorgungsbeutels muss vollständig über den Absatz des Beim Aufsaugen von Feinstaub muss Saugstutzens gezogen werden. zusätzlich eine Vliesfiltertüte oder ein Entsorgungsbeutel verwendet wer- Saugkopf entriegeln und abnehmen.
  • Seite 10 Saugkopf aufsetzen und verriegeln. Sauganschluss verschließen Beim Aufsaugen von Nassschmutz muss immer die Vliesfiltertüte ent- fernt werden. Entsorgungsbeutel entfernen Verschlussstopfen passgenau in Sau- ganschluss einsetzen. Verschlussstopfen bis zum Anschlag einschieben. Saugkopf entriegeln und abnehmen. Vliesfiltertüte entfernen Entsorgungsbeutel hochstülpen. Öffnung des Entsorgungsbeutels über den Saugstutzen nach hinten heraus- ziehen.
  • Seite 11: Bedienung

    Allgemein Beim Aufsaugen von Nassschmutz Bürste reinigen. Behälter mit einem mit der Polster- oder Fugendüse, feuchten Tuch reinigen und trocknen. beziehungsweise wenn überwiegend Wasser aus einem Behälter aufge- Clipverbindung saugt wird, empfiehlt es sich, die Funktion „Automatische Filterabreini- gung“ abzuschalten. Bei Erreichen des maximalen Flüssig- keitsstands schaltet das Gerät auto- matisch ab.
  • Seite 12 Arbeiten mit Elektrowerkzeugen GEFAHR Verletzungs- Beschädigungs- gefahr! Die Steckdose ist nur zum direkten Anschluss von Elektrowerk- zeugen an den Sauger bestimmt. Jeder andere Gebrauch der Steckdose ist nicht zulässig. Krümmer am Saugschlauch entfer- nen. Netzstecker des Elektrowerkzeugs am Sauger einstecken. Sauger befindet Werkzeugadapter an Saugschlauch sich im Standby-Modus.
  • Seite 13 stimmt werden. Das heißt, dass bei Gerät ausschalten einer Unterschreitung des zur Ab- Gerät am Drehschalter ausschalten. saugung notwendigen Mindestvolu- menstroms von 20 m/s der Benutzer Netzstecker ziehen. gewarnt werden muss. Nach jedem Betrieb Automatische Filterabreinigung Behälter entleeren. Das Gerät verfügt über eine spezielle Filterabreinigung, besonders wirk-...
  • Seite 14: Transport / Lagerung

    Transport Staubbeseitigende Maschinen sind Sicher- heitseinrichtungen zur Verhü- tung oder Beseitigung von Gefahren im Sinne von BGV A1. VORSICHT Zur Wartung durch den Benutzer Verletzungs- Beschädigungs- muss das Gerät auseinandergenom- gefahr! Gewicht des Gerätes beim men, ge- reinigt und gewartet wer- Transport beachten.
  • Seite 15: Tel.: 02 - 66 22

    Bei Transport und Wartung des Gerä- Flachfaltenfilter wechseln tes ist die Ansaugöffnung mit dem Verschlussstopfen zu verschließen. WARNUNG Sicherheitseinrichtungen zur Verhü- tung von Gefahren müssen regel- mäßig gewartet werden. Das heißt, mindestens einmal jährlich vom Her- steller oder einer unterwiesenen Per- son auf ihre sicherheitstechnisch ein- Filterabdeckung öffnen.
  • Seite 16 Vliesfiltertüte / Entsorgungsbeutel Neue Vliesfiltertüte aufstecken. wechseln Sauganschluss verschließen Saugkopf aufsetzen und verriegeln. Entsorgungsbeutel wechseln Sauganschluss verschließen, siehe Nasssaugen. Saugkopf entriegeln und abnehmen. Vliesfiltertüte wechseln Entsorgungsbeutel hochstülpen. Öffnung des Entsorgungsbeutels über den Saugstutzen nach hinten heraus- ziehen. Entsorgungsbeutel mit Kabelbinder unterhalb der Öffnung dicht verschlie- ßen.
  • Seite 17: Hilfe Bei Störungen

    Saugkopf aufsetzen und verriegeln. Kühlluftklappen mit Schraubendreher entriegeln und herausschwenken. Kühlluftfilter reinigen / wechseln Kühlluftfilter reinigen (absaugen, aus- waschen) oder wechseln. Kühlluftklappen einklappen und einra- sten. Elektroden reinigen Saugkopf entriegeln und abnehmen. Elektroden mit einer Bürste reinigen. Saugkopf aufsetzen und verriegeln. Gerät abkühlen lassen.
  • Seite 18: Kundendienst

    Saugkraft lässt nach - Verstopfungen aus Saugdüse, Saugrohr, Saug- schlauch oder Flachfaltenfilter entfernen. - Gefüllte Vliesfiltertüte wechseln. - Gefüllten Entsorgungsbeutel wechseln. - Filterabdeckung richtig einrasten. - Flachfaltenfilter wechseln Staubaustritt beim Sau- û ü - Korrekte Einbaulage des Flachfaltenfilters prüfen / korrigieren. - Flachfaltenfilter wechseln.
  • Seite 19: Detailzeichnungen / Ersatzteillisten

    Detailzeichnungen / Ersatzteillisten Pos. Art.-Nr. Bezeichnung Anz. Achse sh. Pos. 134 130 * Behaelter Set 132 * Halter Achse 133 * Halter Bodenduese 138 65 25 19 Set Lenkrollen (enthält Pos. 137 + 138) 134 65 25 14 Set Räder inkl. Achse (enthält 2 x Pos.134, 2 x Pos.
  • Seite 20: Fax: +49 (0)2 02

    Originalanleitung...
  • Seite 22 Pos. Art.-Nr. Bezeichnung Anz. 35 65 25 31 Steuerung VacTec 30 M 23 65 25 32 Hauptsteuerung VacTec 30 M 68 * Ventilteller 108 * Zugentlastung Tact 55 * Antirutschgummi Set 61 * Bolzen Haken 96 * Deckel Gehaeuse Luftfuehrung...
  • Seite 23 Pos. Art.-Nr. Bezeichnung Anz. Dichtschnur Gehaeuse Grundplatte Feder elektrisch leitend Kabel Sonde hellblau 0,5 mm² x 490 mm Schnellbefestiger Schraube 4x16 -10.9-R2R (K-In6Rd) Sicherungsscheibe Sonde 2 65 25 22 Set Verschlusslaschen (enthält 2 x Pos. 2) 21 * Gehaeuse Luftfuehrung oben M 9590 * Gehaeuse Luftfuehrung Set M Sicherungsscheibe 5...
  • Seite 24 Pos. Art.-Nr. Bezeichnung Anz. 116 65 25 27 Klappe Kuehlluftfuehrung links 115 65 25 28 Klappe Kuehlluftfuehrung rechts 266 * Linsenschraube mit Innensechsrund 4 x 16 104 * Luftfuehrung M 59 * Magnet Abdeckung 66 * Magnet klein komplett 42 * Magnet Sensor kurz 92 * Netzanschlusskabel 7,5 m Gummi...
  • Seite 25: Zubehör

    Zubehör (ohne Abbildung) 65 13 25 Saugschlauch verpackt NW 35 65 13 35 Muffe verpackt 65 25 34 Saugschlauchanschluss Bajonett für VacTec 30 l 65 25 60 Saugrohr verpackt verchromt NW 35, 550 mm 65 25 70 Bodendüse verpackt NW 35 65 25 80 Filtertüte Vlies 5 Stück verpackt 65 25 81 Beutel PE 5 Stück 65 25 85 Saugschlauch verpackt NW 35, elektrisch leitend...
  • Seite 26: Garantie

    Gerät zusammen mit der Rechnung frei an unser Logistik Center in Berka oder an eine von uns autorisierte Service-Station eingeschickt wird. Zuvor bitten wir Sie, uns unter unserer kostenlosen STORCH Service-Hotline 08 00. 7 86 72 47 zu kontaktieren.
  • Seite 27: Eg-Konformitätserklärung

    EG-Konformitätserklärung Name / Anschrift des Ausstellers: STORCH Malerwerkzeuge & Profigeräte GmbH Platz der Republik 6 . D - 42107 Wuppertal Hiermit erklären wir, dass das nachstehend genannte Gerät aufgrund dessen Konzipierung und Bau- art sowie in der von uns in Verkehr gebrachten Ausführung den einschlägigen, grundlegenden Sicherheits- und Gesundheitsanforderungen der EG-Richtlinien entspricht.
  • Seite 28 Hartelijk dank voor uw vertrouwen in STORCH. Met deze aankoop hebt u voor een kwali- teitsproduct gekozen. Als u desondanks een tip voor verbeteringen hebt of wellicht ooit een probleem ondervindt, dan horen wij graag van u. Neem con- tact op met de medewerker buitendienst of in dringende gevallen rechtstreeks met ons.
  • Seite 29 Technische gegevens Netspanning 220 - 240 Frequentie 1 ~ 50 - 60 Max. vermogen 1.380 Nominaal vermogen 1.200 Inhoud reservoir Vulhoeveelheid vloeistof Luchthoeveelheid (max.) Onderdruk (max.) kPa (mbar) 23,7 (237) Vermogensaansluitwaarde van EU: 100 - 2.200 het elektrische gereedschap Vlak van vlakvouwfilter Beveiligingsklasse IPX4 Beschermingsklasse...
  • Seite 30: Levering

    Leveringsinhoud VacTec 30 M Zuiger, 4 m zuigslang elektrisch geleidend, 2 x zuigbuis, elleboog elektrisch geleidend, vloermondstuk, rubberen lippen voor vloermondstuk, kiermondstuk, gereedschapshuls, vlies-filterzak, PE-zak. Apparaat-elementen 1 Elektroden 16 Zuigbuis 2 Zuigslang 17 Rubberen hoes, schroefbaar 3 Slanghaak 18 Filterafdekking...
  • Seite 31 Vertaling van de originele handleiding...
  • Seite 32: Reglementair Gebruik

    Veiligheidsrichtlijnen aan de apparatuur en gevaren voor de Lees voordat u dit apparaat voor bediener en anderen. de eerste keer gebruikt deze origi- nele gebruiksaanwijzing door, han- In geval van transportschade onmid- del ernaar en bewaar hem voor later gebruik of voor volgende eigenaars. dellijk de dealer informeren.
  • Seite 33: Symbolen Op Het Toestel

    Symbolen op het toestel WAARSCHUWING inbegrepen het verwijderen van de apparaat bevat stoffen stofzak. Schakel het apparaat niet in gevaarlijk zijn voor de gezondheid. voordat het volledige filtersysteem Alleen deskundige personen die een geinstalleerd en de werking van de geschikte persoonlijke veiligheidsui- volumestroomcontrole getest is.
  • Seite 34: Inbedrijfstelling

    Veiligheidsinrichtingen neer de luchtsnelheid lager is dan 20 m/s. Bewaking van het vlakke harmonicafilter Bij gebruik van het apparaat zonder AANWIJZING vlak harmonicafilter, wordt het auto- matisch uitgeschakeld. De claxon reageert op onderdruk. Inbedrijfstelling Draaischakelaar op de juiste zuigs- langdiameter stellen. Het apparaat kan op 2 manieren gebruikt worden: Continue toon...
  • Seite 35 groter dan / gelijk aan 0,1 mg/m volledig over de hiel van de zuigsteun geschikt. worden getrokken. – Bij het opzuigen van fijn stof moet Zuigkop ontgrendelen en wegnemen. ook een vliesfilterzak of een stofverz- amelzak worden gebruikt. Afvalzak aanbrengen. Stofzak over reservoir stulpen.
  • Seite 36 Bij het opzuigen van nat vuil moet Zuigaansluiting sluiten altijd de filterzak verwijderd worden Afvalzak verwijderen Plaats de sluitstop nauwkeurig in de zuigaansluiting. Schuif de sluitstop tot de aanslag Zuigkop ontgrendelen en wegnemen. erin. Stofverzamelzak naar boven stulpen. Filterzak verwijderen Stofverzamelzak kabelbinder onder de opening afsluiten.
  • Seite 37: Bediening

    Bij niet geleidende vloeistoffen (b.v. Clipverbinding booremulsie, oliën en vetten) wordt het toestel bij een volle container niet uitschakeld. De vulstand moet voort- durend gecontroleerd worden en de container moet tijdig geleegd worden. Na het stoppen met natzuigen: Vlak- vouwfilter samen met de filterreini- “Click”...
  • Seite 38 Werken met elektrische werktuigen GEVAAR Gevaar voor letsels en beschadigin- gen! Het stopcontact ist alleen voor rechtstreekse aansluiting elektrisch gereedschap aan de zuiger bestemd. Ieder ander gebruik van het stopcontact ist niet togetsaan. Elleboog aan de zuigslang verwijde- ren. Stroomstekker van het elektrische werktuig aan de zuiger insteken.
  • Seite 39 bewaking op het aangesloten bewer- Na elk bedrijf kingsapparaat (stofopwekker wor- Reservoir leegmaken. den afgestemd. Dat wil zeggen dat de gebruiker moet worden gewaar- Apparaat aan de binnen- en bui- schuwd wanneer de voor het afzu- tenkant reinigen door afzuigen en igen noodzakelijke minimale volume- afvegen met een vochtige doek.
  • Seite 40: Zorg En Onderhoud

    Vervoer Stofverwijderende machines zijn vei- ligheidsinrichtingen voor het voorko- men of elimineren van gevaren in de zin van BGV A1. VOORZICHTIG Voor het onderhoud door de gebruiker Gevaar voor letsels en beschadigin- moet apparaat elkaar gen! Houd bij het transport rekening genomen, gereinigd en onderhouden met het gewicht van het apparaat.
  • Seite 41 worden. werkzaamheden (bv. filtervervanging) ademmasker P2 of meer en wegwer- Bij transport en onderhoud van het pkledij dragen. apparaat moet de aanzuigopening met de sluitstop afgesloten worden. Vlakvouwfilter vervangen WAARSCHUWING Veiligheidsinrichtingen voorko- ming van gevaren moeten regelmatig onderhouden worden. Dat betekent tenminste één keer per jaar door de fabrikant of een opgeleide persoon gecontroleerd worden op een veilig-...
  • Seite 42 Vliesfilterzak / stofverzamelzak Zuigkop eropzetten en vergrendelen. vervangen Afvalzak vervangen Zuigaansluiting sluiten Zuigkop ontgrendelen en wegnemen. Zuigaansluiting sluiten, zie natzuigen. Stofverzamelzak naar boven stulpen. Filterzak vervangen Stofverzamelzak kabelbinder onder de opening afsluiten. Afval eruit nemen. Stofverzamelzak verwijderen conform de wettelijke bepalingen. Nieuwe afvalzak aanbrengen.
  • Seite 43: Kostenloses Bestell-Fax: 08 00. 7 86

    Koelluchtfilter reinigen / vervangen draaier ontgrendelen en eruitdraaien. Koelluchtfilter reinigen (afzuigen, uitspoelen) of vervangen. Koelluchtkleppen inklappen en vast- klikken. Elektrodes reinigen Zuigkop ontgrendelen en wegnemen. Elektrodes borstel schoonmaken. Apparaat laten afkoelen. Zuigkop eropzetten en vergrendelen. Koelluchtkleppen schroeven- Hulp bij storingen AANWIJZING GEVAAR Wanneer er een storing (bijv.
  • Seite 44: Kostenlose Bestell-Hotline: 08 00. 7 86

    Zuigkracht wordt minder - Verstoppingen uit zuigmondstuk, zuigbuis, zuigslang of vlakvouwfilter weghalen. - Volle filterzak vervangen. - Volle afvalzak vervangen. - Filterafdekking goed vastklikken. - Vlakvouwfilter vervangen. Er ontsnapt stof bij het zuigen û ü - Correcte montagepositie van de vlakvouwfilter controleren / corrigeren.
  • Seite 45: Detailtekening / Lijst Met Vervangende Onderdelen

    Detailtekening / Lijst met vervangende onderdelen Pos. Art. nr. Benaming Aantal zie pos. 134 130 * Bak-set 132 * Houder as 133 * Houder vloermondstuk 138 65 25 19 Set zwenkwielen (bevat pos. 137 + 138) 134 65 25 14 Set wielen incl. as (bevat 2 x pos.134, 2 x pos.
  • Seite 46 Vertaling van de originele handleiding...
  • Seite 47: Kostenlose Service-Hotline: 08 00. 7 86

    Vertaling van de originele handleiding...
  • Seite 48 Pos. Art. nr. Benaming Aantal 35 65 25 31 Besturing VacTec 30 M 23 65 25 32 Hoofdbesturing VacTec 30 M 68 * Klepschotel 108 * Trekontlasting Tact 55 * Antislip-rubber set 61 * Bout haak 96 * Deksel behuizing luchtgeleiding...
  • Seite 49 Pos. Art. nr. Benaming Aantal Afdichtkabel behuizing basisplaat Veer elektrisch geleidend Kabel sonde lichtblauw 0,5mm x 490 mm Snelbevestiging Schroef 4x16 -10.9-R2R (K-In6Rd) Zekeringsschijf Sonde 2 65 25 22 Set sluitlussen (bevat 2 x pos. 2) 21 * Behuizing luchtgeleiding boven M 9590 * Behuizing luchtgeleiding set M Zekeringsschijf 5...
  • Seite 50 Pos. Art. nr. Benaming Aantal 116 65 25 27 Klep koudelucht-geleiding links 115 65 25 28 Klep koudelucht-geleiding rechts 266 * Lenskopschroef met binnenzeskant rond 4 x 16 104 * Luchtgeleiding M 59 * Magneet afdekking 66 * Magneet klein compleet 42 * Magneet sensor kort 92 *...
  • Seite 51: Toebehoren

    Toebehoren (zonder afbeelding) 65 13 25 Zuigslang verpakt NW 35 65 13 35 Mof verpakt 65 25 34 Zuigslangaansluitingbajonet voor VacTec 30 l 65 25 60 Verchroomde aanzuigbuis NW 35, 550 mm 65 25 70 Vloermondstuk verpakt NW 35 65 25 80 Filterzak fleece 5 stuks verpakt 65 25 81 PE zak 5 stuks 65 25 85 Zuigslang verpakt NW 35, elektrisch geleidend 65 25 90 Platte vouwfilter...
  • Seite 52: Garantie

    Bij een garantieclaim vragen wij u het gehele apparaat samen met de rekening franco aan ons logistiekcentrum in Berka of naar een door ons geau- toriseerd servicestation te verzenden. Neem eerst contact op met de STORCH Service-Hotline (hiervoor worden kosten in rekening gebracht): +49 (0)202 . 49 20 – 110. Garantieclaims Claims uitsluitend met betrekking tot materiaal- of productiefouten en uits- luitend bij gebruik van het apparaat conform de voorschriften.
  • Seite 53: Eg-Conformiteitverklaring

    EG-conformiteitsverklaring Naam/adres van de opsteller: STORCH Malerwerkzeuge & Profigeräte GmbH Platz der Republik 6 . D - 42107 Wuppertal Bij deze verklaren wij Dat het hieronder vermelde apparaat op basis van zijn ontwerp en type en in de door ons in omloop gebrachte uitvoering aan de toepasselijke elementaire veiligheids- en gezondheidseisen van de EU-richtlijnen voldoet.
  • Seite 54 à votre disposition. Dans ce cas, contactez votre représentant, ou directement notre service clients, s‘il s‘agit d‘un problème urgent. Salutations dévouées SAV STORCH Tél.: +49 (0) 2 02 . 49 20 - 112 Fax: +49 (0)2 02 .
  • Seite 55: Caractéristiques Techniques

    Caractéristiques techniques Tension du secteur 220 - 240 Fréquence 1 ~ 50 - 60 Puissance maximale 1.380 Puissance nominale 1.200 Capacité de la cuve Capacité de liquide Débit d‘air (max.) Dépression (max.) kPa (mbar) 23,7 (237) Branchement des outils électriques EU: 100 - 2.200 Surface du filtre plat à...
  • Seite 56: Etendue Des Fournitures

    Fourniture VacTex 30 M Aspirateur, flexible d‘aspiration de 4 m conducteur électriquement, 2 x tube d‘aspiration, coude conducteur électriquement, buse de sol, lèvres en caout- chouc pour la buse de sol, suceur à joints, manchon à outils, sac filtrant en non tissé, sac PE.
  • Seite 57 Traduction des instructions d‘origine...
  • Seite 58: Consignes De Sécurité

    Consignes de sécurité gers pour l‘opérateur et d‘autres per- Avant la première utilisation de votre sonnes. appareil, lisez les présentes instruc- tions de service, appliquez-les et con- Informer immédaitement le revendeur servez-là pour une utilisation ultéri- eure ou pour un prochain propriétaire. en cas de dommages de transport.
  • Seite 59: Symboles Sur L'appareil

    Symboles sur l‘appareil AVERTISSEMENT Cet appareil contient des poussières porteurs d’un équipement de protec- dangereuses pour la santé. La vidan- tion personnel. N’enclenchez pas l’ap- ge et l’entretien de l’appareil, y com- pareil tant que le système de filtrati- pris l’enlèvement du sachet de pous- on n’a pas été...
  • Seite 60: Dispositifs De Sécurité

    Dispositifs de sécurité Surveillance du filtre plat plissé REMARQUE Lorsque l’appareil fonctionne sans L‘avertisseur sonore réagit à filtre plat plissé, il s’arrête automa- dépression. tiquement. Régler le bouton rotatif sur la bonne Mise en service section de tuyau d‘aspiration. 2 modes de service sont possibles avec l‘appareil : Son permanent 1.
  • Seite 61 REMARQUE REMARQUE L‘appareil convient à une utilisati- L‘ouverture du sac d‘élimination doit on en tant qu‘aspirateur industriel être tirée en totalité sur le décroche- pour l‘aspiration et le dépoussiérage ment de la buse d‘aspiration. à différents endroits, de poussières Déverrouiller et retirer la tête d‘aspi- sèches, non inflammables avec des ration.
  • Seite 62 Positionner la tête d‘aspiration et la Fermer le raccord d‘aspiration verrouiller. Lors l‘aspiration saletés humides, il faut toujours retirer le sac filtrant en toile. Retirer le sac d‘élimination Placer l‘obturateur exactement dans le connecteur pour flexible d‘aspirati- Enfoncer le manchon de jonction jus- qu‘à...
  • Seite 63: Utilisation

    recommandé de désactiver la fonction Clip de fixation „Nettoyage automatique du filtre“. L‘appareil se met automatiquement hors marche lorsque le niveau de liquide maxi est atteint. En cas de liquides non conducteurs (par exemple émulsion de perçage, huiles et graisses), l‘appareil n‘est pas “Click”...
  • Seite 64 Travailler avec des outils électriques DANGER Risque de blessure et d‘endommage- ment ! La prise n‘est destinée qu‘au raccord direct d‘outils électriques sur l‘aspirateur. Toute autre utilisation de la prise est interdite. Retirer le coude figurant sur le tuyau Brancher la fiche de secteur de l‘outil d‘aspiration.
  • Seite 65 pareil de traitement raccordé (généra- Mise hors service de l‘appareil teur de poussières). Ceci signifie que Couper l‘appareil à l‘aide de l‘inte- l‘utilisateur doit être averti si le débit rupteur rotatif. volumétrique minimal de 20 m/s nécessaire pour l‘aspiration n‘est pas Retirer la fiche secteur.
  • Seite 66: Transport / Entreposage

    Transport sur l‘appareil, le mettre hors service et débrancher la fiche électrique. Des machines destinées à éliminer les poussières sont des dispositifs de PRÉCAUTION sécurité permettant d‘éviter ou d‘éli- Risque de blessure et d‘endommage- miner d‘éventuels risques au sens de ment ! Respecter le poids de l‘appa- BGV A1.
  • Seite 67 méables, en conformité avec les pre- scriptions en vigueur pour l‘éliminati- on de tels déchets. DANGER Pour le transport et la maintenance Danger du fait de poussière nocive. de l‘appareil, l‘orifice d‘aspiration doit Pour les travaux d‘entretien (par ex. être raccordé à l‘obturateur. remplacement du filtre), porter un masque respiratoire P2 ou supérieur et une tenue à...
  • Seite 68 Remplacer le sac filtrant en feutre/ Enfiler le nouveau sac filtrant en toi- sachet pour le recyclage Fermer le raccord d‘aspiration Positionner la tête d‘aspiration et la verrouiller. Remplacement du sac d‘élimination Fermer le raccord d‘aspiration, voir aspiration humide. Remplacement du sac filtrant en toile Déverrouiller et retirer la tête d‘aspi- ration.
  • Seite 69: Assistance En Cas De Panne

    Nettoyer le filtre de l’air de refroidis- sement (aspiration, lavage) ou le rem- placer. Rentrer les volets d’air de refroidisse- ment et les enclencher. Nettoyage des électrodes Déverrouiller et retirer la tête d‘aspi- ration. Nettoyer les électrodes avec une Laisser refroidir l‘appareil. brosse.
  • Seite 70: Service Après-Vente

    La force d‘aspiration - Déboucher la buse d‘aspiration, le tuyau d‘aspiration, le flexible d‘aspiration ou le filtre diminue plat à plis. - Remplacement du sac filtrant en toile plein. - Remplacer le sac d‘élimination plein. - Enclencher correctement le recouvrement de filtre.
  • Seite 71: Dessin Détaillé / Nomenclature

    Dessin détaillé / Nomenclature Pos. Réf. art. Désignation Quantité cf. Pos. 134 Lot de récipients 130 * Support axe 132 * Support suceur de sol 133 * Lot de roulettes directrices (inclut les pos. 137 + 138) 138 65 25 19 Lot de roues avec essieu (contient 2 x pos.134, 134 65 25 14 2 x pos.
  • Seite 72 Traduction des instructions d‘origine...
  • Seite 73 Traduction des instructions d‘origine...
  • Seite 74 Pos. Réf. art. Désignation Quantité 35 65 25 31 Commande VacTec 30 M 23 65 25 32 Commande principale VacTec 30 M Tête de soupape 68 * 108 * Soulagement de traction cycle Lots de caoutchoucs antidérapants 55 * Goujon crochet...
  • Seite 75 Pos. Réf. art. Désignation Quantité Cordon d'étanchéité boîtier plaque de montage Ressort conducteur électriquement Câble sonde bleu clair 0,5 mm² x 490 mm Fixation rapide Vis 4x16 -10.9-R2R (K-In6Rd) Rondelle d'arrêt Sonde Lot languettes de fermeture (contient 2 x pos. 2) 2 65 25 22 Boîtier guidage d'air en haut M 21 *...
  • Seite 76 Pos. Réf. art. Désignation Quantité 116 65 25 27 Clapet guidage d'air de refroidissement gauche 115 65 25 28 Clapet guidage d'air de refroidissement droit Vis à tête bombée à six pans creux 4 x 16 266 * Guidage d'air M 104 * Aimant plaque de protection 59 *...
  • Seite 77: Accessoires

    Accessoires (sans illustration) 65 13 25 Flexible d'aspiration emballé NW 35 65 13 35 Manchon emballé 65 25 34 Raccord de tuyau d'aspiration baïonnette pour VacTec 30 l 65 25 60 Tuyau d'aspiration emballé chromé NW 35, 550 mm 65 25 70 Suceur sol emballé NW 35 65 25 80 Sac filtrant non-tissé...
  • Seite 78: Garantie

    à notre centre logistique à Berka accompagné de la facture ou de l'expédier à une station SAV agréée par nous. Veuillez contacter préalablement l‘assistance téléphonique payante de la société STORCH: +49 (0)202 . 49 20 – 110.
  • Seite 79: Déclaration De Conformité Ce

    Déclaration de conformité CE Nom / adresse de l'exposant : STORCH Malerwerkzeuge & Profigeräte GmbH Platz der Republik 6 . D - 42107 Wuppertal Nous déclarons, par le présent acte, que le produit cité ci-après respecte les exigences fondamentales et en vigueur en matière de sécurité...
  • Seite 80 Grazie per la fiducia accordata a STORCH. Con l‘acquisto avete scelto un prodotto di qualità. Se comunque avete dei suggerimenti volti a migliorare la nostra offer- ta o se doveste incontrare qualche difficoltà, non esitate a rivolgerVi a noi. Contattate il Vostro rappresentante oppure rivolgeteVi direttamente a noi in casi urgenti.
  • Seite 81: Dati Tecnici

    Dati tecnici Tensione di rete 220 - 240 Frequenza 1 ~ 50 - 60 Potenza max. 1.380 Potenza nominale 1.200 Capacità serbatoio Quantità di riempimento di liquido Quantità d‘aria (max.) Sotto pressione (max.) kPa (mbar) 23,7 (237) Valore di alimentazione degli utensili EU: 100 - 2.200 elettrici Superficie del filtro plissettato piatto...
  • Seite 82: Elementi Dell'apparecchio

    Materiale compreso nella fornitura VacTec 30 M Aspiratore, tubo flessibile di aspirazione conduttivo da 4 m, 2 x tubi di aspira- zione, gomito conduttivo, bocchetta per pavimenti, labbra in gomma per boc- chetta per pavimenti, bocchetta per giunti, attacco per attrezzi, sacchetto da filtro, sacchetto in PE.
  • Seite 83 Traduzione delle istruzioni originali...
  • Seite 84: Avvertenze Di Sicurezza

    Avvertenze di sicurezza recchio e pericoli per l‘utente ed altre Prima di utilizzare il vostro apparec- persone. chio per la prima volta, leggere le presenti istruzioni per l‘uso originali In caso di danni di trasporto immedia- attenendovi alle indicazioni contenu- te e conservarle per un futuro utilizzo tamente informare il venditore.
  • Seite 85: Norme Di Sicurezza

    Simboli riportati sull’apparecchiot ATTENZIONE idoneo equipaggiamento di sicurez- Questo apparecchio contiene polveri za personale. Non mettere in funzi- nocive alla salute. Lo svuotamento ed one I’apparecchio prima che sia stato la manutenzione, compresa la rimo- installato il sistema di filtri completo zione del sacchetto raccoglipolvere, e che sia stato verificato il funziona- devono essere eseguiti solo da per-...
  • Seite 86: Messa In Funzione

    Dispositivi di sicurezza Controllo del filtro plissettato piatto In caso di funzionamento senza fil- AVVISO tro plissettato piatto, l’apparecchio si Il segnalatore acustico è sensibile alla spegne automaticamente. depressione. Messa in funzione Regolare l‘interruttore in base alla L‘apparecchio consente di ricorrere a corretta sezione del tubo flessibile di due modi operativi: aspirazione.
  • Seite 87 INDICAZIONE AVVERTIMENTO L‘apparecchio impegato come aspira- L‘apertura del sacchetto di smalti- tore industriale è indicato per aspirare mento deve essere tirato completa- ed utilizzato come depolverizzatore mente oltre la bocchetta del manicot- ad uso mobile è adatto ad aspirare to di aspirazione. polveri asciutte, non infiammabili con Sbloccare e staccare la testa aspi- valori CMA superiori oppure uguali a...
  • Seite 88 Chiudere il raccordo di aspirazione occorre rimuovere sempre il sacchetto filtro plissettato. Rimuovere il sacchetto di smalti- mento Inserire esattamente il tappo di chiu- sura nell‘attacco di aspirazione. Spingere il tappo di chiusura fino a battuta. Sbloccare e staccare la testa aspi- Rimuovere il sacchetto filtro plissettato rante.
  • Seite 89: Uso

    Appena raggiunto il livello massimo Collegamento a clip di liquido, l‘apparecchio si disinserisce automaticamente. In caso di liquidi non conduttori (per esempio emulsioni per lavori con tra- pano, oli e grassi) l‘apparecchio non viene spento a serbatoio pieno. Con- trollare costantemente il livello del “Click”...
  • Seite 90 Lavori con utensili elettrici GEFAHR Pericolo di lesioni e di danneggia- mento! La presa è indicata per il col- legamento diretto di utensili elettrici all‘aspiratore. Qualsiasi altro utilizzo non è consentito. Rimuovere il gomito dal tubo flessi- Inserire la spina dell‘utensile elettrico bile di aspirazione.
  • Seite 91 recchio di lavorazione (generatore di Spegnere l’apparecchio polvere). Ciò significa che se il flus- Disattivare l‘apparecchio dall‘interrut- so volumetrico scende al di sotto del tore girevole. valore necessario per l‘aspirazione, ovvero 20 m/s, l‘utilizzatore deve Staccare la spina. venir avvertito. A lavoro ultimato Svuotare il serbatoio.
  • Seite 92: Trasporto / Supporto

    Trasporto Macchine per la rimozione delle pol- veri fanno parte dell’equipaggiamen- to di sicurezza atto all’eliminazione o alla prevenzione di pericoli ai sensi del § 3 del BGV A1. PRUDENZA Ai fini della manutenzione l’apparec- Pericolo di lesioni e di danneggiamen- chio deve essere smontato, pulito e to! Rispettare il peso dell‘apparecchio controllato per quanto è...
  • Seite 93 gli interventi di manutenzione all’ap- manutenzione (ad es. sostituzione parecchio, chiudere l’apertura di aspi- dei filtri) è necessario indossare una razione con il tappo di chiusura. maschera protettiva per le vie respi- ratorie P2 o superiore ed una tuta monouso. Sostituzione del filtro plissettato piatto AVVERTIMENTO...
  • Seite 94 Cambio del sacchetto filtro a vello/ Introdurre il nuovo sacchetto filtro sacchetto di smaltimento plissettato Chiudere il raccordo di aspirazione Rimettere la testa aspirante e bloc- carla. Sostituzione del sacchetto di smaltimento Chiudere il raccordo di aspirazione, vedi aspirazione di liquidi. Sostituzione del sacchetto filtro plissettato Sbloccare e staccare la testa aspi-...
  • Seite 95: Guida Alla Risoluzione Dei Guasti

    nella parete posteriore del serbatoio. - Lasciare raffreddare l‘apparecchio. - Sbloccare gli sportelli dell’aria di Rimettere la testa aspirante e bloc- raffreddamento con un cacciavite e carla. - Pulire (aspirare, lavare) il filtro dell’aria di raffreddamento o sostitu- Pulizia/sostituzione del filtro irlo.
  • Seite 96: Servizio Assistenza

    La forza aspirante dimi- - Rimuovere eventuali otturazioni dalla nuisce bocchetta di aspirazione, dal tubo rigido di aspirazione o dal filtro plissettato piatto. - Sostituire il sacchetto filtro plissettato pieno. - Sostituire il sacchetto di smaltimento pieno. - Far innestare correttamente il coperchio del filtro.
  • Seite 97: Disegno Dettagli / Elenco Dei Pezzi Di Ricambio

    Disegno dettagli / Elenco dei pezzi di ricambio Pos. N. art. Descrizione Quantità Asse vd. pos. 134 Set con contenitore 130 * Supporto asse 132 * Supporto bocchetta per pavimenti 133 * Set di rotelle (contiene pos. 137 + 138) 138 65 25 19 Set con ruote compr.
  • Seite 98 Traduzione delle istruzioni originali...
  • Seite 99 Traduzione delle istruzioni originali...
  • Seite 100 Pos. N. art. Descrizione Quantità 35 65 25 31 Comando VacTec 30 M 23 65 25 32 Comando principale VacTec 30 M Disco valvola 68 * 108 * Scarico di trazione Tact Set con gomma antiscivolo 55 * Perno per gancio...
  • Seite 101 Pos. N. art. Descrizione Quantità Corda di guarnizione corpo piastra di base Molla a conduttività elettrica Cavo sonda blu chiaro 0,5mm² x 490 mm Fissaggio rapido Vite 4x16 -10.9-R2R (K-In6Rd) Rondella di sicurezza Sonda Set con linguette di chiusura (contiene 2 x pos. 2) 2 65 25 22 Corpo condotto dell'aria in alto M 21 *...
  • Seite 102 Pos. N. art. Descrizione Quantità 116 65 25 27 Sportello condotto aria di raffreddamento a sinistra 115 65 25 28 Sportello condotto aria di raffreddamento a destra Vite a testa bombata con esagono incassato 4 x 16 266 * Condotto dell'aria M 104 * Copertura magnete 59 *...
  • Seite 103: Accessori

    Accessori (senza immagine) 65 13 25 Tubo di aspirazione confezionato DN 35 65 13 35 Manicotto confezionato 65 25 34 Raccordo del tubo flessibile di aspirazione, a baionetta, per VacTec 30 l 65 25 60 Tubo di aspirazione confezionato, cromato, DN 35, 550 mm 65 25 70 Bocchetta per pavimenti confezionata DN 35 65 25 80 Sacchetto filtrante, in tessuto, 5 pezzi, confezionati 65 25 81 Sacchetto PE 5 pezzi...
  • Seite 104: Protezione Dell'ambiente

    Berka oppure ad una service-station da noi autorizzata. Si prega di consultare prima la Hotline di servizio STORCH a pagamento: 02 - 66 22 77 15 Diritto alla garanzia Il diritti si possono far valere solo per errori di materiale o di produzione nonché...
  • Seite 105: Dichiarazione Di Conformità Ce

    Dichiarazione di conformità CE Nome / indirizzo dell'emittente: STORCH Malerwerkzeuge & Profigeräte GmbH Platz der Republik 6 . D - 42107 Wuppertal Con la presente la società che l'apparecchio in seguito specificato, a causa della sua concezione e il suo...
  • Seite 106 Thank you for purchasing a STORCH product. You have purchased a quality product. If you would like to suggest an improvement, or experience a problem with your product, please do not hesitate to contact us. Please contact your field sales representative or, in urgent cases, contact us directly.
  • Seite 107: Technical Data

    Technical data Mains voltage 220 - 240 Frequency 1 ~ 50 - 60 Max. performance 1.380 Rated power 1.200 Container capacity Filling quantity (liquid) Air volume (max.)) Negative pressure (max.) kPa (mbar) 23,7 (237) Power connection data of the power EU: 100 - 2.200 tools Surface of the flat fold filter...
  • Seite 108: Scope Of Delivery

    Scope of delivery VacTec 30 M Vacuum, 4 m electrically conductive suction hose, 2 x suction tube, electrically conductive manifold, floor attachment, rubber lips for floor attachment, gap attachment, tool sleeve, non-woven filter bag, PE filter bag. Components of the appliance...
  • Seite 109 Translation of the original instruction...
  • Seite 110: Safety Instructions

    Safety instructions tions may result in damage to the Read these original operating instruc- appliance and danger to the operator tions before using your appliance for and other persons. the first time. Follow the instructions, and keep the instructions booklet for Immediately notify your retailer in future reference or for subsequent case of transport damage.
  • Seite 111: Symbols On The Machine

    Symbols on the machine WARNING suitable protective gear. Do not This unit contains hazardous dust. switch on the unit until the complete Emptying and maintenance, including filter system has been installed and the removal of the dust bag, may only the function of the volume-flow con- be carried out by someone who is trol has been tested.
  • Seite 112: Safety Devices

    Safety Devices Monitoring of the flat fold filter NOTE If the device is operated without a The horn reacts to negative pressure. flat fold filter, it automatically swit- ches off. Set the rotary switch to the correct suction hose cross-section. Start up Permanent tone The appliance allows 2 operating...
  • Seite 113 device for the mobile operation to take up dry, noncombustible dusts with AGW values greater than or NOTE equal to 0.1 mg/m The opening of the disposal bag must When vacuuming up fine dust, an be pulled completely over the collar additional fleece filter bag or a dust of the suction nozzle.
  • Seite 114 To suck wet dirt, first remove the Close the suction connection fleece filter bag. Removing the dust disposal bag Precisely fit the plug into the suction connection. Insert the plug up to the stop.. Release and remove the suction head. Put the disposal bag over.
  • Seite 115: Operation

    In case of non-conductive liquids Clip connection (such as emulsion drilling fluids, oils, and greases) the appliance is not tur- ned off when the container is full. The filling level must be continuously monitored and the container must be emptied in time. After the wet vacuuming: Clean the “Click”...
  • Seite 116 Working with electrical power tools DANGER Risk of injury and damage! The socket outlet is only for the connection of power tools to the vacuum cleaner. Any other use of the socket outlet is not permitted. Remove the elbow from the suction Connect the mains plug of the electric hose.
  • Seite 117 sing tool (dust-generating device). After each operation This means that the user must be Empty the container. warned if the minimum volume flow of 20 m/s that is required for the suc- Vacuum and wipe the appliance insi- tion is fallen short of. de and outside with a damp cloth.
  • Seite 118: Transport / Storage

    Transport before carrying out any tasks on the machine. Dust extracting machines are safeguards for the prevention or elimination of hazards defined in the regulations of BGV A1. CAUTION Risk of injury and damage! Observe In order to carry out maintenance the weight of the appliance when you work, the user must disassemble, transport it.
  • Seite 119 Exchanging the flat pleated filter WARNING Safety equipment preventing hazards must be serviced and main- tained regularly. This means that the manufacturer‘s staff or persons trained by the manufacturer must check the equipment for proper func- tioning at least once a year, i.e. check for leaks, filter damage, functioning of the controlling elements, etc.
  • Seite 120 Replacing the fleece filter bag / dust Insert and lock the suction head. Close the suction connection Replace the disposal bag Close the suction connection, see wet Release and remove the suction head. vacuuming. Put the disposal bag over. Exchange the fleece filter bag Tightly close the disposal bag with cable tie underneath the opening.
  • Seite 121: Troubleshooting

    Clean / replace the cooling air filter Release the cooling air flaps with screwdriver and swivel them out. Clean (vacuum, wash) or replace the cooling air filter. Fold in the cooling air flaps and snap them in place. Cleaning the electrodes Release and remove the suction head.
  • Seite 122: Customer Service

    Suction capacity - Remove blockages in the suction nozzle, sucti decreases on tube, suction hose, or flat pleated filter. - Replacing the full fleece filter bag. - Replace the filled disposal bag - Ensure the filter cover properly locks into place. - Replace the flat pleated filter.
  • Seite 123: Detailed Drawing / Spare Parts List

    Detailed drawing / Spare parts list Pos. Art.-no. Description Quantity Axle see item 134 130 * Tank set 132 * Axle holder 133 * Floor attachment holder 138 65 25 19 Set of swivel castors (contains items 137 + 138) 134 65 25 14 Set of wheels incl.
  • Seite 124 Translation of the original instruction...
  • Seite 125 Translation of the original instruction...
  • Seite 126 Pos. Art.-no. Description Quantity 35 65 25 31 Control VacTec 30 M 23 65 25 32 Main control VacTec 30 M 68 * Valve plate 108 * Strain relief Tact 55 * Non-slip rubber set 61 * Bolt hook 96 *...
  • Seite 127 Pos. Art.-no. Description Quantity Sealing cord, housing, base plate Spring electrically conductive Cable, sensor, light blue 0.5 mm x 490 mm Quick fastener Screw 4 x 16 -10.9 - R2R (plast. int. hex. rd.) Lock washer Sensor 2 65 25 22 Set of locking lugs (contains 2 x item 2) 21 * Housing air guide, top M...
  • Seite 128 Pos. Art.-no. Description Quantity 116 65 25 27 Flap cooling air guide, left 115 65 25 28 Flap cooling air guide, right 266 * Oval head screw, inside hex round 4 x 16 104 * Air guide, M 59 * Magnet cover 66 * Magnet small complete...
  • Seite 129: Accessories

    Accessories (not illustrated) 65 13 25 Suction hose, packaged, NW 35 65 13 35 Sleeve, packaged 65 25 34 Suction hose connection, bayonet for VacTec 30 l 65 25 60 Suction pipe, packaged, chrome-plated, NW 35, 550 mm 65 25 70 Floor attachment, packaged, NW 35 65 25 80 Filter bag, fleece, 5 pieces, packaged 65 25 81 Bag PE 5 pieces 65 25 85 Suction hose, packaged, NW 35, electrically conductive...
  • Seite 130: Warranty

    All claims shall become void in the event of installation of third party components, improper handling and storage, as well as in the event of obvious disregard of the operating instructions. Repairs: All repairs have to be conducted on our premises or by an authorised STORCH service centre. appliances contain valuable materials that can be recycled;...
  • Seite 131: Ec Declaration Of Conformity

    EC Declaration of Conformity Name / Address of issuer: STORCH Malerwerkzeuge & Profigeräte GmbH Platz der Republik 6 . D-42107 Wuppertal We herewith declare: that the following machine complies with the fundamental health and safety requirements of the EC Directives in terms of its design, construction and ver- sion we have brought into circulation.
  • Seite 132 Děkujeme Vám za důvěru ve firmu STORCH. S nákupem výrobku jste se rozhodli pro kvalitní produkt. Pokud přesto máte podněty na zlepšení nebo možná nějaký problém, tak bychom byli velmi rádi, kdybyste se nám ozvali. Promluvte si s příslušným externím spolupracovníkem naší firmy nebo se v naléhavých případech obra- cejte přímo na nás.
  • Seite 133: Technické Údaje

    Technické údaje Napětí sítě 220 - 240 Frekvence 1 ~ 50 - 60 Max. výkon 1.380 Jmenovitý výkon 1.200 Obsah nádoby Objem nádoby na kapalinu Množství vzduchu (max.) m3/h Podtlak (max.) (max.) kPa (mbar) 23,7 (237) Příkon elektrického nářadí EU: 100 - 2.200 Plocha plochého skládaného filtru Ochrana IPX4...
  • Seite 134: Rozsah Dodávky

    Rozsah dodávky VacTec 30 M Vysavač, 4 m sací hadice elektricky vodivá, 2 x sací trubka, koleno elektricky vodivé, podlahová hubice, pryžové chlopně pro podlahovou hubici, spárová hubice, nástrojové hrdlo, filtrační sáčky z textilie, PE sáček. Prvky přístroje 1 Elektrody 16 Sací...
  • Seite 135 Překlad originálu návodu...
  • Seite 136: Bezpečnostní Pokyny

    Bezpečnostní pokyny Před prvním použitím přístroje si pečí pro obsluhu a jiné osoby. přečtěte návod k použití, řiďte se jím a uschovejte jej pro pozdější použití Při škodách vzniklých při přepravě okamžitě informujte prodejce. nebo pro další majitele. Při nedodržování návodu k použití a Při vybalování...
  • Seite 137 Symboly na zařízení UPOZORNĚNÍ osobní ochranné vybavení. Vysavač Tento vysavač obsahuje prach nezapínejte pokud není nainstalován ohrožující zdraví. Vyprázdnění a údrž- kompletní filtrační systém a přez- bu, včetně odstranění pytlíkového koušena funkce kontroly objemového Iapače prachu smí provádět pouze proudu vzduchu. odborný...
  • Seite 138: Uvedení Do Provozu

    Bezpečnostní zařízení Monitorování plochého skládaného Upozornění filtru Signál reaguje na podtlak. Při provozu bez plochého skládaného filtru se přístroj automaticky vypne. Nastavte otočný spínač na správný průřez sací hadice. Uvedení do provozu Nepřerušovaný tón Zařízení umožňuje 2 druhy provozu: 1. provoz průmyslového vysavače Klakson zazní...
  • Seite 139 UPOZORNĚNÍ HINWEIS Toto zařízení se hodí k vysávání jako Otvor sáčku k likvidaci odpadu musí průmyslový vysavač a jako odlučo- být zcela natažen přes nástavec sacího vač prachu pro přenosný provoz za hrdla. účelem vysávání suchého nehořla- Odjistěte vysávací hlavici a sejměte ji. vého prachu s hodnotou AGW vyšší...
  • Seite 140 Při vysávání mokrých nečistot je tře- Uzavřete přípojku sání ba vždy rounový filtrační sáček vyj- mout. Vyjmutí sáčku na likvidaci odpadu Uzavírací zátku nasaďte přesně slíco- vaně do sací přípojky. Uzavírací zátku zasuňte na doraz. Odjistěte vysávací hlavici a sejměte ji. Odstraňte rounový...
  • Seite 141: Obsluha

    Dosáhne-li tekutina maximálního sta- Klipové spojení vu, přístroj se automaticky vypne. V případě nevodivých tekutin (vrtací emulze, oleje, maziva) se přístroj při plné nádrži nevypne. Množství tekti- ny je třeba průběžně kontrolovat a nádrž včas vyprázdnit. “Click” Po ukončení mokrého sání: Očistěte plochý...
  • Seite 142 Práce s elektrickým nářadím Připojte adaptér pro přístroje k eletri- ckému nástroji. NEBEZPEČÍ UPOZORNĚNÍ Nebezpečí úrazu a nebezpečí poško- Rozdílné průřezy sací hadice jsou zení! Zásuvka je určena pouze pro při- nutné k tomu, aby bylo možné přiz- pojení elektrického nářadí k vysavači. působení...
  • Seite 143 Uložení přístroje Silové čištění (při zvláště silném Sací hadici a síťový kabel ukládejte znečištění plochého skládaného fil- tak, jak ukazuje obrázek. tru): Otočný spínač nastavte na  program 2, sací hubici příp.koleno Přístroj uložte v suché místnosti a uzavřete rukou a vyčkejte na auto- zabezpečte jej proti používání...
  • Seite 144: Přeprava / Ukládání

    Přeprava jsou bezpečnostní zařízení k zame- zení nebo odstranění nebezbečí ve smyslu BGV (Spolkové bezpečnostní nařízení) A1. UPOZORNĚNÍ Za účelem údržby musí uživatel Nebezpečí úrazu a nebezpečí poško- přístroj rozebrat, vyčistit a zaopatřit zení! Dbejte na hmotnost přístroje při jej tak, jak je podle návodu prove- přepravě.
  • Seite 145 Výměna filtračního skládaného sáčku VAROVÁNÍ bezpečnostních zařízeních určených k předcházení nebezpečí je třeba pravidelně provádět údržbu. To znamená, že výrobce nebo jiná vyš- kolená osoba přezkouší bezvadnou funkčnost zařízení z pohledu tech- nické bezpečnosti, zkontroluje tedy např. těsnost zařízení, poškození fil- tru, funkci kontrolních mechanismů.
  • Seite 146 Vyměňte rounový filtrační sáček Vyměňte sáček na likvidaci odpadu Uzavřete přípojku sání Odjistěte vysávací hlavici a sejměte Výměňte rounový filtrační sáček  Navlečte sáček na likvidaci odpadu.  Sáček na likvidaci odpadu těsně uza- vřete kabelovým páskem pod otvor-  Vyjměte sáček na likvidaci odpadu.
  • Seite 147: Pomoc Při Poruchách

    Čištění / výměna filtru chladicího vzduchu dicího vzduchu a vyklopte je.  Vyčistěte (vysajte, vymyjte) filtr chla- dicího vzduchu nebo jej vyměňte.  Zavřete a zaaretujte klapky chladicího vzduchu. Čištění elektrod Odjistěte vysávací hlavici a sejměte ji.  Nechte přístroj vychladnout. Vyčistěte elektrody kartáčkem.
  • Seite 148: Oddělení Služeb Zákazníkům

    Sací síla slábne - Odstraňte případná ucpání ze sací hubice, sací trubky, sací hadice nebo filtračního skládaného sáčku. - Plný rounový filtrační sáček vyměňte. - Vyměňte plný sáček na likvidaci odpadu. - Kryt filtru uzavřete až do zaskočení západky. - Vyměňte filtrační skládaný sáček. Při vysávání...
  • Seite 149: Podrobný Výkres / Seznam Náhradních Dílů

    Podrobný výkres / Seznam náhradních dílů Pol. Obj.č. Označení viz pol. 134 130 * Sada nádržek 132 * Držák osy 133 * Držák podlahové hubice 138 65 25 19 Sada řídicích koleček (obsahuje pol. 137 + 138) 134 65 25 14 Sada koleček vč.
  • Seite 150 Překlad originálu návodu...
  • Seite 151 Překlad originálu návodu...
  • Seite 152 Pol. Obj.č. Označení 35 65 25 31 Řízení VacTec 30 M 23 65 25 32 Hlavní řízení VacTec 30 M 68 * Ventilový talíř 108 * Odlehčovač od tahu Tact 55 * Sada protiskluzových gumiček 61 * Hák čepu 96 * Víko krytu vedení...
  • Seite 153 Pol. Obj.č. Označení Těsnicí šňůra kryt základní desky Pružina elektricky vodivá Sonda kabelu světle modrá 0,5 mm² x 490 mm Rychlopřipevňovač Šroub 4x16 -10.9-R2R (K-In6Rd) Pojistná podložka Sonda 2 65 25 22 Sada uzavíracích spon (obsahuje 2 x pol. 2) 21 * Kryt vedení...
  • Seite 154 Pol. Obj.č. Označení 116 65 25 27 Klapka vedení chladicího vzduchu vlevo 115 65 25 28 Klapka vedení chladicího vzduchu vpravo 266 * Šroub s čočkovitou kulatou hlavou s vnitř. šestihr. 4 x 16 104 * Vedení vzduchu M 59 * Magnet kryt 66 * Magnet malý...
  • Seite 155: Příslušenství

    Příslušenství (bez obrázku) 65 13 25 Sací hadice balená NW 35 65 13 35 Hrdlo balené 65 25 34 Připojení sací hadice bajonet pro VacTec 30 l 65 25 60 Sací trubka balená chromovaná NW 35, 550 mm 65 25 70 Podlahová hubice balená NW 35 65 25 80 Filtrační...
  • Seite 156: Záruka

    Logisitk Cen- ter v Berka nebo do námi autorizované servisní stanice. Kontaktujte prosím nejdříve placený hotline servis firmy STORCH: +49 (0)202 . 49 20 – 110. Nárok na záruku příp. garanci Nároky na záruku existují výhradně u materiálu nebo výrobní vady a také...
  • Seite 157: Prohlášení O Shodě Es

    Prohlášení o shodě ES Název / adresa výstavce: STORCH Malerwerkzeuge & Profigeräte GmbH Platz der Republik 6 . D - 42107 Wuppertal Tímto prohlašujeme, že následně uvedené zařízení na základě své koncipace a druhu konstrukce a také v provedení námi uvedeném do provozu odpovídá příslušným základním bezpečnostním požadavkům a požadavkům k ochraně...
  • Seite 160 Art.-Nr. Bezeichnung N. art. Denominazione 65 25 50 VacTec 30 M 65 25 50 VacTec 30 M Art. nr. Beschrijving Art. no. Description 65 25 50 VacTec 30 M 65 25 50 VacTec 30 M Výr. č. Označení Référence Désignation...

Diese Anleitung auch für:

Vactec 30 l

Inhaltsverzeichnis