CAME FERNI series Handbuch
Äussere automatismus mit gelenkigen armen für flügeltoren
Inhaltsverzeichnis
SERIE FERNI
CANCELLI AUTOMATICI
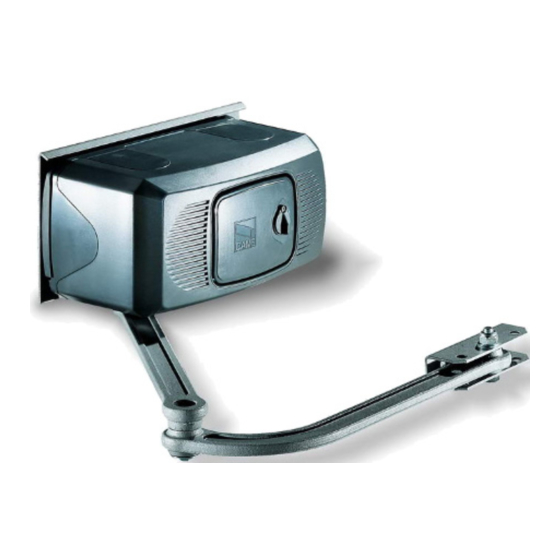
AUTOMAZIONE ESTERNA A BRACCI SNODATI PER CANCELLI A BATTENTE
EXTERNAL AUTOMATION SYSTEM WITH ARTICULATED ARMS FOR HINGED GATES
AUTOMATISME EXTERIEUR A BRAS ARTICULES POUR PORTAILS A BATTANT
ÄUSSERE AUTOMATISMUS MIT GELENKIGEN ARMEN FÜR FLÜGELTOREN
AUTOMATIZACIÓN EXTERNA CON BRAZOS ARTICULADOS PARA PUERTAS CON BISAGRAS
C A
M E
4x1
DIR
Impianto tipo
Standard installation
Installation type
Standard Montage
Instalación tipo
Cavi di alimentazione motori:
6 x 1.5 mm
2
fino a 20 m
6 x 2.5 mm
2
fino a 30 m
Impianto tipo
1 - Motoriduttore
Accessori:
2 - Quadro comando
3 - Ricevitore radio
4 - Antenna
5 - Lampeggiatore di
movimento
6 - Selettore a chiave
7 - Fotocellule di
sicurezza
8 - Elettroserratura
|
|
FERNI SERIES
SÉRIE FERNI
F1000 - F1100 - F1024
DIR
4x1,5
Power wires to motor:
6 x 1.5 mm
2
up to 20 m
6 x 2.5 mm
2
up to 30 m
Installation type
1 - Gear motor
1 - Motorédecteur
Accessories:
2 - Control panel
2 - Armoire de
3 - Radio receiver
4 - Antenna
3 - Récepteur radio
5 - Flashing light
4 - Antenne
indicating door
5 - Clignotant de
movement
6 - Key-operated
6 - Selectueur à clé
selector switch
7 - Photocellules de
7 - Safety photocells
8 - Electric lock
8 - Serrure électrique
|
|
BAUREIHE FERNI
F 1024
Câbles d'alimentation moteur:
Antriebsmotor-Verbindungskabel:
6 x 1.5 mm
2
jusqu'à 20 m
6 x 2.5 mm
2
jusqu'à 30 m
Composition set:
1 - Getriebemotor
Accessoires:
2 - Schalttafel
commande
3 - Funkempfänger
4 - Antenne
5 - Blinkleuchte "Tor in
mouvement
6 - Schlüsselschalter
7 - Lichtschranken
8 - Elektroschloß
sécurité
SERIE FERNI
DIR
4x1,5
2x1
DIR
Cables de alimentación
6 x 1.5 mm
2
bis 20 m
6 x 2.5 mm
2
bis 30 m
Standardanlage
Instalación estándar
1 - Motorreductor
Zubehör:
Accesorios
2 - Cuadro de mando
3 - Radiorreceptor
4 - Antena
5 - Lámpara
Bewegung"
intermitente de
movimiento
6 - Selector con llave
7 - Fotocélulas de
seguridad
8 - Electrocerradura
Documentazione
Tecnica
69
2.5
rev.
05/2002
©
CAME
CANCELLI
AUTOMATICI
119D69
4x1
motores:
6 x 1.5 mm
2
hasta 20 m
6 x 2.5
"
"
30 m
Inhaltsverzeichnis

Verwandte Anleitungen für CAME FERNI series


Inhaltszusammenfassung für CAME FERNI series
- Seite 1 SERIE FERNI FERNI SERIES SÉRIE FERNI BAUREIHE FERNI SERIE FERNI Documentazione Tecnica rev. 05/2002 © CAME CANCELLI F1000 - F1100 - F1024 AUTOMATICI 119D69 CANCELLI AUTOMATICI AUTOMAZIONE ESTERNA A BRACCI SNODATI PER CANCELLI A BATTENTE EXTERNAL AUTOMATION SYSTEM WITH ARTICULATED ARMS FOR HINGED GATES AUTOMATISME EXTERIEUR A BRAS ARTICULES POUR PORTAILS A BATTANT ÄUSSERE AUTOMATISMUS MIT GELENKIGEN ARMEN FÜR FLÜGELTOREN...
-
Seite 2: Caratteristiche Generali
- Apertura dell’anta: max 90°. - Per uso intensivo si consiglia l’utilizzo della versione F 1024. Attenzione! Controllate che le apparecchiature di comando, di sicurezza e gli accessori siano originali CAME; ciò garantisce e rende l'impianto di facile esecuzione e manutenzione. -
Seite 3: Allgemeine Merkmale
- Pour des usages intensifs, il est conseillé d’utiliser la version F 1024. Attention ! Vérifiez que l’appareillage de commande, de sécurité et les accessoires sont des produits originaux CAME afin de garantir l’installation et d’en faciliter le montage et l’entretien. - Seite 4 1024. Atención! Atención! Atención! Atención! Atención! Comprobar que los equipos de mando, de seguridad y los acesorios sean originales CAME; lo cual garantiza y facilita el uso y el mantenimiento del aparato. // T // C // T // D...
- Seite 5 // E // I // E ’ // E SEMPI DI APPLICAZIONE XEMPLES OF APPLICATIONS XEMPLES D APPLICATION NSTALLATIONSBEISPIELE JEMPLOS DE APLICACIONES Al pilastro To the pillar Au piller An den pleifer Al pilar Ad anta fissa With fixed shutter Avec ante fixe Mit fester Tür A puerta fija...
- Seite 6 ’ ... / B ... / A ’ ’ RIMA DELL INSTALLAZIONE EFORE INSTALLING VANT D INSTALLER L AUTOMATISME ... / A OR DEN INSTALLATION ÜBERPRÜFEN NTES DE INSTALAR EL AUTOMATISMO Battuta d’arresto Battuta d’arresto Battuta d’arresto Battuta d’arresto Battuta d’arresto Mechanical stop Cerniera Cerniera...
- Seite 7 “A” // A PPLICAZIONE DELLA PIASTRA BASE E DELLA STAFFA PPLICATION OF THE BASIS PLATE AND OF THE STIRRUP // M ’ PPLICATION DE LA PIASTRE GUIDE ET DE L ÉTRIER ONTAGE DER ÜHRUNGSSCHIENEN ASIS UND DES TEIGBÜGELS “A” PPLICACION PLACA BASE Y ESTRIBO Staffa “A”...
-
Seite 8: Installazione
// I // I // I // I NSTALLAZIONE NSTALLATION NSTALLATION NSTALLATION NSTALACIÓN M 8 x 110 Fig. 1 - Inserire il motore nella piastra-base e fissarlo con le due viti M8x110 e relativi dadi in dotazione. - Insert the motor into the plate-base and secure it with the two screws M8x110 and related nuts (supplied). - Placer le moteur dans la plaque de base et le fixer avec les deux vis M8x110 ainsi qu’avec les écrous correspondants fournis de série. -
Seite 9: Montage Von
// A // A PPLICAZIONE DEI BRACCI DIRITTO E CURVO PPLICATION STRAIGHT AND CURVED ARMS PPLICATION DES BRAS DROIT ET COURB ONTAGE VON // A GERADEN UND GEKRÜMMTEN PPLICACIÓN BRAZOS DERECHO Y CURVADO M6 x 20 M6 x 20 M6 x 20 M6 x 20 M6 x 20 Rondella svasata... - Seite 10 UADRI COMANDO COLLEGAMENTI ELETTRICI CONTROL PANELS ELECTRICAL CONNECTIONS RMOIRES DE COMMANDE BRANCHEMENTS ELECTRIQUES TEUERGERÄTE ELEKTRISCHE NSCHLÜSSE UADROS DE MANDO CONEXIONES ELÉCTRICAS F 1000 - F 1100 Morsettiera quadro comando Morsettiera motore Control panel terminal block Motor terminal block Plaque à bornes de l’armoire de commande Plaque à...
- Seite 11 En fermeture: débloquer la porte et la mettre dans la position de fermeture voulue. Tourner la came inférieure jusqu’à ce que le microcontact s’enclenche et visser la vis qui se trouve dans la came correspondante.
-
Seite 12: Einstellug Der Mikroschalter Fürt
En fermeture: débloquer la porte et la mettre à environ 100 mm de la butée d’arrêt en fermeture. Tourner la came inférieure jusqu’à ce que le microcontact s’enclenche et visser la vis qui se trouve dans la came correspondante. -
Seite 13: Sblocco Di Emergenza
Dopo aver ultimato le operazioni di montaggio, collegamenti elettrici e regolazioni, procedere a ribloccare il motore ed inserire il coperchio fissandolo mediante le quattro viti in dotazione. After assembling the unit, connecting up the wiring and performing adjustments, proceed to jam the motor again and insert the cover fitting it using the four screws supplied with the unit. - Seite 14 // O // A // Z // A CCESSORI OPZIONALI PTIONAL ACCESSORIES CCESSOIRES SUR DEMANDE UBEHÖR AUF NFRAGE CCESORIOS OPCIONALES H3000: Dispositivo di sblocco a cordino (L = 5 m.) completo di contenitore di sicurezza, manopola di sblocco e pulsante. NOTA: evitare di formare con il cordino di sblocco angoli acuti (1) o retti (2).
- Seite 15 F 1001 Braccio telescopico diritto (per ante singole da 0,5 a 2 m. - F3000 - F3024: 1,5 m. max). Straight telescopic arm (for single gate wings that are 0,5 to 2 m. long - Models F3000 - F3024: max. lenght is 1,5 m.). Bras télescopique droit (pour un seul vantail de 0,5 à...
-
Seite 16: Manutenzioni Periodiche
Tutti i dati riportati nel presente libretto sono indicativi. La CAME s.p.a. si riserva di apportare eventuali modifiche inerenti all'evoluzione tecnologica dei prodotti. All data mentioned in the present booklet are for information only. CAME SPA reserves the right to introduce changes relating to technological improvements of the products.