Inhaltsverzeichnis
Werbung
Verfügbare Sprachen
Verfügbare Sprachen
Werbung
Inhaltsverzeichnis

Verwandte Anleitungen für U.N.O. Multi-Gym SMART


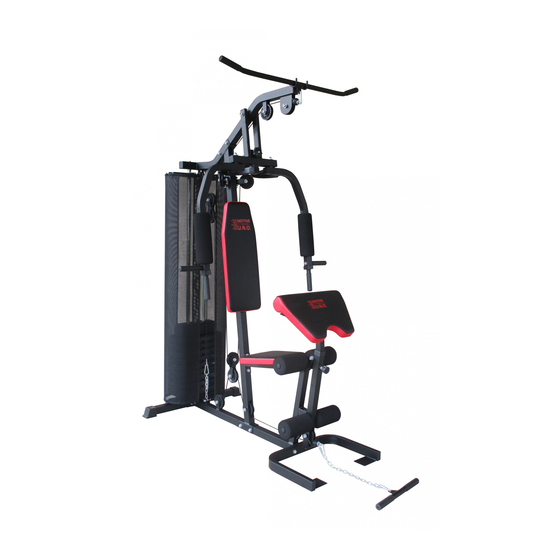
Inhaltszusammenfassung für U.N.O. Multi-Gym SMART
- Seite 1 J62216 - xx Multi-Gym SMART Assembly & User Manual Aufbau- & Benutzerhandbuch...
-
Seite 2: Inhaltsverzeichnis
Content / Inhalt Section Page General Information ..3 Before You Start ... 4 Safety ..... 5 Exercise Information . -
Seite 3: General Information
General Information Quality Guarantee This exercise product has been designed and Beny Sports Co. UK Ltd. guarantee's its product range for manufactured to comply with the latest (BS EN 957) DOMESTIC USE ONLY for a period of 1 YEAR from the British and European Safety Standards. -
Seite 4: Before You Start
Before You Start Tools To enable you to successfully assemble your product. You will require 2 x 14mm, 2 x 17mm and 2 x 19mm combination spanners, you may also find it beneficial to have a soft-headed hammer and perhaps an adjustable spanner handy as this may help. -
Seite 5: Safety
Safety Before you undertake any programme of exercise that will increase cardiovascular activity please be sure to consult with your doctor. Frequent strenuous exercise should be approved by your doctor and proper use of your product is essential. Please read this manual carefully before commencing assembly of your product or starting to exercise. - Seite 6 Exercising Information Beginning How you begin to exercise will vary from person to person. If you have not exercised for a long period of time, have been inactive for a while, or are severely overweight you MUST start slowly, increasing your exercise time gradually, by perhaps only a few minutes for each session per week.
-
Seite 7: Exercise Information
Exercising Information Warm Up A successful exercise programme consists of three parts, Warm Up, Aerobic Exercise and Cool Down. Never start a training session without warming up. Never finish one without cooling down correctly. Perform between five and ten minutes of stretching before starting your workout to prevent muscle strains, pulls and cramps. - Seite 8 Exercising Information USERS UNCONDITIONED CONDITIONED TARGET ZONE - A TARGET ZONE - B (Years) (Beats per Minute) (Beats per Minute) 20-24 145 - 165 155 - 175 25-29 140 - 160 150 - 170 30-34 135 - 155 145 - 165 35-39 130 - 150 140 - 160...
- Seite 9 Exercising Information Shoulder Lift Rotate and lift your right shoulder up towards your ear for one count. Relax then repeat for the left shoulder. Repeat 3 - 4 times. Calf / Achilles Stretch Turn towards the wall and place both hands on it. Support yourself with one leg while the other is placed behind you with the sole flat on the floor.
- Seite 10 Exercising Information Basic Aerobic Training Programme For your basic Aerobic Exercise routine we suggest that you try the following. Remember, breathe correctly, exercise at your own pace and do not over-train as injury may result. Week 1 & 2 Exercise 4 minutes at 'A' Rest 1 minute Warm Up 5 - 10 Minutes Exercise 2 minutes at 'A'...
-
Seite 11: Allgemeines
Allgemeines Qualität Garantie Ihr Trainingsgerät wurde gemäß der aktuellen Beny Sports Germany GmbH gewährt Garantieleistungen Europäischen Sicherheitsstandards (EN 957) nur im Rahmen der HEIMBENUTZUNG für die Dauer von entworfen und hergestellt. 2 Jahren ab dem Kaufdatum. Während der Garantiedauer behalten wir uns das Recht vor: Fragen a). -
Seite 12: Bevor Sie Beginnen
Bevor Sie Beginnen Werkzeug Falls erforderlich, werden alle unsere Geräte mit den wichtigsten Werkzeugen geliefert, die für einen erfolgreichen Aufbau benötigt werden. Es kann jedoch vorteilhaft sein, einen Gummihammer und einen Universalschraubenschlüssel zur Hand zu haben. Vorbereitung des Arbeitsplatzes Wichtig ist, dass Sie ihr Gerät an einer sauberen, freien und aufgeräumten Stelle aufbauen. -
Seite 13: Sicherheit
Sicherheit Bevor Sie ein Trainingsprogramm beginnen, das Ihre Herz-Kreislaufaktivität steigert, sprechen Sie bitte mit Ihrem Arzt. Regelmäßiges, anstrengendes Training sollte von Ihrem Arzt bewilligt werden und es ist erforderlich, dass Sie Ihr Gerät richtig verwenden. Bitte lesen Sie diese Gebrauchsanleitung genau, bevor Sie den Aufbau und das Training beginnen. -
Seite 14: Trainingsinformation
Trainingsinformation Zu Beginn Wie Sie mit dem Training beginnen, unterscheidet sich von Mensch zu Mensch. Haben Sie lange nicht trainiert, waren Sie für eine Weile inaktiv, oder sind Sie extrem übergewichtig, MÜSSEN Sie langsam anfangen, und die Trainingszeit langsam stufenweise erhöhen, eventuell nur ein paar Minuten pro Einheit pro Woche. -
Seite 15: Aufwärmen
Trainingsinformation Aufwärmen Ein erfolgreiches Trainingsprogramm besteht aus drei Teilen: Aufwärmen, Aerobic, und Cool Down. Beginnen Sie das Training niemals ohne Aufwärmen. Beenden Sie es nie ohne Cool Down. Dehnen Sie sich für 5-10 Minuten vor dem Training, um Überdehnungen, Zerrungen und Krämpfe zu vermeiden. -
Seite 16: Aufwärm- Und Cool Down Übungen
Trainingsinformation Untrainiert Trainiert Alter Zielzone A Zielzone B (Jahre) (Schläge pro Minute) (Schläge pro Minute) 20-24 145 - 165 155 - 175 25-29 140 - 160 150 - 170 30-34 135 - 155 145 - 165 35-39 130 - 150 140 - 160 125 - 145 40-44... - Seite 17 Trainingsinformation Schulter Heben Rotieren und heben Sie die rechte Schulter in Richtung Ohr, dann entspannen. Dasselbe tun Sie mit der linken Schulter. Wiederholen Sie drei bis vier Mal. Wade / Achilles Stretch Drehen Sie sich in Richtung Wand und legen Sie beide Hände daran. Stützen Sie sich mit einem Bein, während Sie das andere hinter sich mit der ganzen Sohle flach auf dem Boden positionieren.
- Seite 18 Trainingsinformation Grundlegendes Aerobic Trainingsprogramm Wir schlagen die folgenden Aerobic Trainingsprogramme vor. Denken Sie daran, richtig zu atmen, die Übungen in Ihrem eigenen Tempo zu absolvieren und es nicht zu übertreiben, um Verletzungen zu vermeiden. Woche 1 & 2 4 Minuten in Zielzone 'A' trainieren 1 Minute Ausruhen Aufwärmen 5 - 10 Minuten 2 Minuten in Zielzone 'A' trainieren...
-
Seite 19: Parts List
Assembly Parts List Carefully unpack each component, checking against the parts list that you have all the necessary parts to complete the assembly of your product. Please note that some of the parts may be pre-fitted to major components Item 4 Item 6 Upper Cross Beam Item 1... - Seite 20 Assembly Item 39 Item 42 Item 43 Item 40 Item 41 Spring Locking Knob Item 38 Qty 1 Flat Washer Nylon Lock Nut Flat Washer Nylon Lock Nut Preacher Pad Qty 29 Qty 4 Qty 3 Qty 64 Item 37 Qty 1 Seat Qty 1...
-
Seite 21: Teileliste
Aufbau Teileliste Dies ist das Zubehör, das Sie für den Aufbau Ihres Produktes benötigen werden. Das folgende Zubehör wird in einem Pack geliefert und sollte auf Vollständigkeit geprüft werden, bevor Sie den Aufbau beginnen. Artikel 4 Artikel 6 Lat-Rahmen Artikel 1 Artikel 2 Rechter Butterfly 1 Stk. - Seite 22 Aufbau Artikel 42 Artikel 40 Artikel 41 Artikel 43 Artikel 38 Artikel 39 Unterlegscheibe M12 Nylonmutter Unterlegscheibe Nylonmutter Arm-Polster Drehknopf 4 Stk. 3 Stk. 64 Stk. 29 Stk. Artikel 37 1 Stk. 1 Stk. Sitz-Polster 1 Stk. Artikel 45 Artikel 46 Artikel 47 Artikel 48 Artikel 49...
- Seite 23 Assembly / Aufbau Fit 2 x Square Foot End Caps (27) onto the Rear Floor Frame (2). Remove 2 x M10 x 20mm Hex Bolts (45) and 2 x M10 Flat Washers (40) from both the Weight Guide Tubes (15). Insert both Weight Guide Tubes (15) into the Rear Floor Frame (2) and loosely fit 2 x M10 x 20mm Hex Bolts (45) and 2 x M10 Flat Washers (40) fitted from under the frame.
- Seite 24 Assembly / Aufbau...
- Seite 25 Assembly / Aufbau Slide 2 x Rubber Bump Stops (33) onto both Weight Guide Tubes (15). Slide 9 x Weight Plates (54) then the Crown Top Weight (53) onto and down the Weight Guide Tubes (15). Making sure they are the correct way round with the center edge slot at the bottom of each weight.
- Seite 26 Assembly / Aufbau...
- Seite 27 Assembly / Aufbau Attach the Support Frame (3) to the Middle Floor Frame (1), using 2 x M10 x 65mm Hex Bolts (46), 4 x M10 Flat Washers (40) and 2 x M10 Nylon Lock Nuts (41). Slide the Upper Cover Bracket (79) onto the Weight Guide Tubes (15), secure part way down the Guide Tubes using 2 x M8 x 15mm Hex Bolts (49).
- Seite 28 Assembly / Aufbau...
- Seite 29 Assembly / Aufbau Attach the Press Frame (5) to the Upper Cross Beam (4) using 2 x Oil Bushings (small) (77), 1 x M12 x 120mm Hex Bolt (50), 2 x M12 Flat Washers (42) and 1 x M12 Nylon Lock Nut (43). Attach the Left Pec Arm (7) and the Right Pec Arm (6) to the Press Frame (5) using 4 x Oil Bushings (large) (58), 2 x M12 Flat Washers (42) and 2 x M12 Nylon Lock Nuts (43).
- Seite 30 Assembly / Aufbau...
- Seite 31 Assembly / Aufbau Attach the Backrest (36) to the Support Frame (3) using 2 x M8 x 60mm Hex Bolts (48) and 2 x M8 Flat Washers (44). Attach the Front Support Frame (9) to the Middle Floor Frame (1) using 1 x M10 x 65mm Hex Bolt (46), 2 x M10 Flat Washers (40) and 1 x M10 Nylon Lock Nut (41).
- Seite 32 Assembly / Aufbau...
- Seite 33 Assembly / Aufbau Assembly of the Weight/Lat Cable (71). a. Sit the rubber ball end of the Weight/Lat Cable (71) into the pulley bracket (No1) at the front of the Upper Cross Beam (4). now fit 1 x Pulley (65) between the bracket using 1 x M10 x 45mm Hex Bolt (66) 2 x M10 Flat Washers (40) and 1 x M10 Nylon Lock Nut (41).
- Seite 34 Assembly / Aufbau g. Install (No14) Pulley (65) into the Double Pulley Bracket (62), using 1 x M10 x 60mm Hex Bolt (47), 2 x M10 Flat Washers (40) and 1 x M10 Nylon Lock Nut (41). h. Attach one end of the Chain (short) (69) using 1 x Carabiner (60) to the end of the Leg Cable (72).
- Seite 35 Assembly / Aufbau No/Nr.1 No/Nr.2 No/Nr.3 No/Nr.6&8 No/Nr.5 41 73 No/Nr.4&14 No/Nr.7&12 No/Nr.9 No/Nr.10 No/Nr.11 No/Nr.13 41 40 41 40 59 47...
- Seite 36 Assembly / Aufbau 6&8...
- Seite 37 Assembly / Aufbau Insert the U-type Shaft (82) into the both up and down ends of the Safety Cover (81). Attach the Safety Cover (81) to the Lower Fixed Tube (80) and the Upper Fixed Tube (79), and rise the Upper Fixed Tube (79) to tighten the Safety Cover (81), and then M8 x 15mm Hex Bolts (49) to fix the Upper Fixed Tube (79) on the Weight Guide Tube (15).
- Seite 38 Assembly / Aufbau...
-
Seite 39: Exploded Drawing / Explosionszeichnung
Assembly / Aufbau Exploded drawing / Explosionszeichnung 80 49... - Seite 40 Beny Sports Co. UK Ltd. Beny Sports Germany GmbH Unit 8, Riparian Way, The Crossings, Cross Hills, Klingenhofstr. 51 West Yorkshire D-90411 Nürnberg BD20 7BW CUSTOMER SUPPORT KUNDENDIENST is open from 9.00am to 5.00pm from Monday to Friday Erreichbar Montag bis Freitag von 9:00 bis 15:00 Uhr Tel: 01535 637711 Tel: 0911 / 975978 –...