Sony CBK-NC01 Installationsanleitung
Network adaptor
Inhaltsverzeichnis
Verfügbare Sprachen
Verfügbare Sprachen
Quicklinks
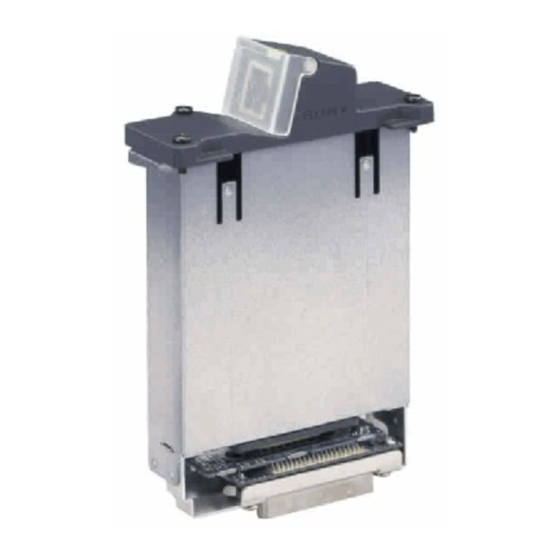
Network Adaptor
CBK-NC01
Installation Manual
電気製品は、安全のための注意事項を守らないと、
火災や人身事故になることがあります。
• ご使用にあたっては、 カムコーダーに付属のオペレーションマニュアルの 「安全
のために」をよくお読みください。
• 本機を誤って装着すると、火災・感電やその他の事故により、けがをしたり周辺
の物品に損害を与えたりすることがあります。
このインストレーションマニュアルには、 事故を防ぐための重要な注意事項と製品
の取り扱いかたを示してあります。 このインストレーションマニュアルをよくお読
みのうえ、製品を安全にお使いください。お読みになったあとは、いつでも見られ
るところに必ず保管してください。
本機 (CBK-NC01) は、端末機器技術基準適合品です。
1st Edition
Kapitel
Inhaltsverzeichnis

Verwandte Anleitungen für Sony CBK-NC01


Inhaltszusammenfassung für Sony CBK-NC01
- Seite 39 WARNUNG Für Kunden in Europa Dieses Produkt besitzt die CE-Kennzeichnung und erfüllt die EMV-Richtlinie (89/336/EWG) der EG-Kommission. Angewandte Normen: • EN55103-1: Elektromagnetische Verträglichkeit (Störaussendung) • EN55103-2: Elektromagnetische Verträglichkeit (Störfestigkeit) für die folgenden elektromagnetischen Umgebungen: E1(Wohnbereich), E2 (kommerzieller und in beschränktem Maße industrieller Bereich), E3 (Stadtbereich im Freien) und E4 (kontrollierter EMV-Bereich, z.
- Seite 40 Inhalt Überblick ................41 Vorsicht ..................41 Einsetzen ................41 Anzeigen .................44 Herausziehen des Netzwerkkabels .........44 Nichtverwendung des Netzwerkanschlusses ....44 Anschlussbeispiel ..............44 Einstellungen .................45 Netzwerkeinstellungen ...........45 FTP-Anmeldeeinstellungen ..........46 Anhang ...................47 Technische Daten ............47 Verwenden der PDZ-1 Proxy Browsing Software ..48...
-
Seite 41: Überblick
Überblick Einsetzen • Wenn der CBK-NC01 Network Hinweis Adaptor in den WRR-Einschub Stellen Sie den Schalter POWER aus, eines PDW-510/510P/530/530P bevor Sie den Adapter einsetzen. Professional Disc Camcorder eingesetzt ist, können im Camcorder Lösen Sie die vier Schrauben gespeicherte Dateien über die (+B2.6 ×... - Seite 42 Bewahren Sie die WRR- angeschlossen sein. Ziehen Abdeckung und die WRR- Sie dann die vier Schrauben Komponente gut auf, da sie für (+B2.6 × 10) am CBK-NC01 an. den Anschluss des WRR-855 UHF Synthesizer Tuner Unit benötigt werden. Setzen Sie den CBK-NC01 in den Einschub ein.
- Seite 43 Hinweis • Wenn der Ferritkern nicht mit dem Kabel verbunden ist, werden die elektronischen Geräte im umliegenden Bereich möglicherweise gestört. • Um die Strahlungsstandards einzuhalten, bringen Sie den mitgelieferten Ferritkern am Kabel an. Ferritkern Hinweise • Aus Sicherheitsgründen dürfen beim Anschließen von Geräten 35 mm an diesen Anschluss keine 15 mm...
-
Seite 44: Anzeigen
• Wenn der Camcorder angeschlossen ist, leuchtet die Anzeige POWER Halten Sie in diesem Fall die unter dem Netzwerkanschluss grün. Abdeckung des Netzwerkanschlusses • Wenn das CBK-NC01 mit dem geschlossen. Netzwerk verbunden ist, blinkt die Anzeige ACT/LINK grün. • Wenn die Übertragungsgeschwindigkeit... -
Seite 45: Einstellungen
Drehen Sie den Regler MENU, bis der Pfeilcursor auf Je nach Version der Camcorder- MAINTENANCE zeigt, und Firmware sind einige Funktionen drücken Sie den Regler MENU. des CBK-NC01 möglicherweise nicht verfügbar. Weitere Informationen erhalten Sie beim Servicepersonal <TOP MENU> von Sony. USER... -
Seite 46: Ftp-Anmeldeeinstellungen
Drehen Sie den Regler MENU, Öffnen Sie die Abdeckung des bis der Pfeilcursor auf die Menüfunktionsbereichs und vorzunehmende Einstellung zeigt, stellen Sie den Schalter MENU und drücken Sie den Regler ON/OFF auf ON, während Sie MENU. die Taste MENU drücken. Es wird das TOP menu angezeigt. -
Seite 47: Anhang
Drücken Sie den Regler MENU Anhang erneut, drehen Sie den Regler, bis der Pfeilcursor auf NETWORK/THUMB zeigt, und drücken Sie den Regler. Technische Daten Drehen Sie den Regler MENU, Erfüllte Standards bis NETWORK/THUMB auf IEEE 802.3 10BASE-T, STBY eingestellt ist, und drücken IEEE 802.3u Sie den Regler. -
Seite 48: Verwenden Der Pdz-1 Proxy Browsing Software
Hinweise Verwenden der PDZ-1 Hinweis Proxy Browsing Software • Stellen Sie sicher, dass das Wenn ein Computer mit PDZ-1 Proxy Laufwerk, auf dem der Ordner Browsing Software mit dem Gerät gespeichert werden soll, über ausreichend genügend verbunden ist, können Sie die Proxy- Speicherkapazität verfügt. - Seite 49 Das in dieser Anleitung enthaltene Material besteht aus Informationen, die Eigentum der Sony Corporation sind, und ausschließlich zum Gebrauch durch den Käufer der in dieser Anleitung beschriebenen Ausrüstung bestimmt sind. Sony Corporation untersagt ausdrücklich Vervielfältigung jeglicher Teile dieser Anleitung oder den Gebrauch derselben für irgendeinen anderen Zweck als die...