Ergotron MX Benutzerhandbuch
Wallmount lcd arm
Quicklinks
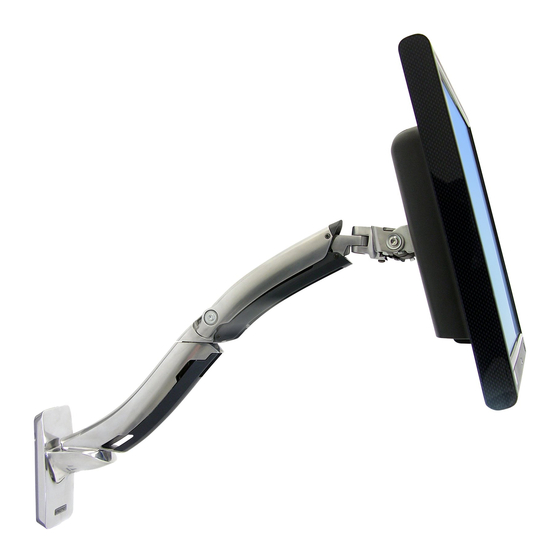
MX Wallmount LCD Arm
Includes
Constant Force™
Technology
User Guide
Guía del usuario
Manuel de l'utilisateur
Gebruikersgids
ユーザーガイド
www.ergotron.com: English, Español, Français, Deutsch, Nederlands, Italiano, Türkçe, 日本語, 汉语
www.ergotron.com |
|
|
|
USA: 1-800-888-8458
Europe: +31 (0)33-45 45 600
China: 400-120-3051
Japan: japansupport@ergotron.com
rev J • 04/19
-
-
-W-
of

Verwandte Anleitungen für Ergotron MX


Inhaltszusammenfassung für Ergotron MX
- Seite 1 Constant Force™ Technology User Guide Guía del usuario Manuel de l’utilisateur Gebruikersgids ユーザーガイド www.ergotron.com: English, Español, Français, Deutsch, Nederlands, Italiano, Türkçe, 日本語, 汉语 www.ergotron.com | USA: 1-800-888-8458 Europe: +31 (0)33-45 45 600 China: 400-120-3051 Japan: japansupport@ergotron.com rev J • 04/19...
-
Seite 2: Überblick Über Die Gefahrensymbole
安全性 Safety Seguridad Sécurité Sicherheit Hazard Symbols Review These symbols alert users of a safety condition that demands a ention. All users should be able to recognize and understand the signifi - cance of the following Safety Hazards if encountered on the product or within the documentation. Children who are not able to recognize and respond appropriately to Safety Alerts should not use this product without adult supervision! Revisión de los símbolos de peligro Estos símbolos alertan a los usuarios sobre un tema de seguridad que requiere su atención. - Seite 3 安全性 Safety Seguridad Sécurité Sicherheit Important! You will need to adjust this product a er installation is complete Make sure all your equipment is properly installed on the product before a empting adjustments This product should move smoothly and easily through the full range of motion and stay where you set it If movements are too easy or diffi...
- Seite 4 安全性 Safety Seguridad Sécurité Sicherheit WARNING! Pinch Point ADVERTENCIA Peligro de pellizco AVERTISSEMENT! Point de pincement WAARSCHUWING! A nelpunt 警告: ピンチポイントです。 WARNING! Stored Energy Hazard The arm mechanism is under tension and will move up rapidly on its own as soon as a ached equipment is removed For this reason DO NOT remove equipment unless the arm has been moved to the highest position! Failure to follow this instruction may result in serious personal injury and/or equipment damage!
- Seite 5 Features & Specifi cations Características y especifi caciones técnicas Caractéristiques et spécifi cations Produkteigenscha en & Technische Daten CAUTION DO NOT EXCEED MAXIMUM LISTED WEIGHT CAPACITY SERIOUS INJURY OR PROPERTY DAMAGE MAY 特長と仕様 OCCUR! PRECAUCIÓN NO SUPERE LA CAPACIDAD DE PESO MÁXIMA INDICADA PODRÍA OCURRIR DAÑOS MATERIALES GRAVES O LESIONES FÍSICAS ATTENTION NE PAS DÉPASSER LA CAPACITÉ...
- Seite 6 Tools Needed Herramientas necesarias Outillage requis Benötigtes Werkzeug 必要なツール Concrete Wood Concreto Madera Béton Bois Massivbeton Solide Holzbalkenträger コンクリート 木 Ø 3/8" (9.5 mm) Ø 3/16" (5 mm) Stud Finder 1/2" (13mm) 1/2" (13mm) rev J • 04/19...
- Seite 7 Mounting Height for Ergonomic Workstation This mounting height is a recommendation for an ergonomic workstation that accommodates user heights of ' "- ' " cm when set up for standing and user heights of ' "- ' " cm when set up for si ing If user heights are diff...
- Seite 8 Mounting Height for Ergonomic Workstation Altura de montaje de la estación de trabajo ergonómica Hauteur de montage pour un poste de travail ergonomique Montagehöhe für ergonomischen Arbeitsplatz 1.125” 0.86” (28.6 mm) (22 mm) 人間工学ワークステーションの取り付け高さ 4.1” (104 mm) 6” (152 mm) 4.41”...
- Seite 9 Choose Mounting Method. Ergotron product. NOTE: Wall Track and Brackets sold separately. Elija el método de montaje. Producto Ergotron. Guía y soporte de pared Vendido por separado Choisissez une méthode de fi xation. Produit Ergotron. Montant mural et fi xation Vendu séparément Wählen Sie die Befestigungsmethode.
- Seite 10 Concrete Concreto Béton Massivbeton コンクリート 3-1/8" (80 mm) Ø 3/8" (10 mm) WARNING: WARNING: Mounting holes must be at least 3-1/8” (80mm) deep and must be located Anchors that are not fully set in solid concrete will not support the applied load within solid concrete, not mortar or covering material.
- Seite 11 Wood Madera Bois Solide Holzbalkenträger 木 Ø 3/16" (5 mm) M8 x 80mm 1/2" (13mm) CAUTION: Make sure the wall mount bracket is level, fl ush and snug to the wall surface. DO NOT OVERTIGHTEN THE BOLTS. PRECAUCIÓN: Asegúrese de que la fi jación de la montura en pared está...
- Seite 12 0˚ M3 x 6mm Check size of TV/Monitor hole pattern Verifi que el tamaño del patrón de orifi cios del TV/monitor Repérez la disposition et l’écartement des trous du téléviseur ou de l’écran. Größe des TV/Monitor-Lochmusters prüfen テレビ/モニターの穴位置間隔を確認します VESA Adapter Confi gurations Confi...
- Seite 13 Mount Type A TV/Monitor to Arm Instale el TV/monitor tipo A en el brazo B, C, D Montage d’un téléviseur ou d’un écran de type A sur le bras TV/Monitor vom Typ A am Arm befestigen. タイプAのテレビ/モニターをアームに取り付ける 100mm (3-15/16”) 75mm (2-15/16”) 75 x 75mm M4 x 10mm M4 x 10mm...
- Seite 14 100x200mm 200x200mm 200x100mm 100mm (3-15/16”) 200mm (7-7/8”) 200mm (7-7/8”) Mount VESA Adapters to Arm based on TV/Monitor hole pattern size (B, C, or D) . Instale los adaptadores VESA en el brazo basándose en el tamaño del patrón de orifi cios del TV/monitor (B, C o D) . Fixez les adaptateurs VESA au bras en fonction de la confi...
- Seite 15 M M KIT Instructions M M KIT Instructions Instrucciones del KIT M M Instructions du kit M M Anleitung zum M M -Satz M8M5キットの取り付け方 NOTE Follow this step only if your TV/monitor has M holes which need to be reduced to M Install M M reducer bushing to TV/Monitor and use M x mm monitor screws to secure NOTA Siga este paso solamente si su televisor/monitor cuenta con orifi...
- Seite 16 M M KIT Instructions M M KIT Instructions Instrucciones del KIT M M Instructions du kit M M Anleitung zum M M -Satz M8M5キットの取り付け方 NOTE Follow this step only for Samsung models using the holder ring Install M M reducer bushing to TV/Monitor then use M x mm monitor screws and Samsung holder ring to secure NOTA Siga este paso solamente en modelos Samsung empleando la arandela de soporte...
- Seite 17 2.5mm rev J • 04/19...
- Seite 18 Cable Routing Guía de cableado Câblage Kabelführung ケーブルの配線 NOTE Leave enough slack in cable to allow full range of motion Caution To avoid the potential to pinch cables it is important to follow the cable routing instructions in this manual Failure to follow these instructions may result in equipment damage or personal injury NOTA Deje sufi...
- Seite 19 調節ステップ Adjustment Step Etapa de ajuste Étape de réglage Einstellschri Important! You will need to adjust this product a er installation is complete Make sure all your equipment is properly installed on the product before a empting adjustments This product should move smoothly and easily through the full range of motion and stay where you set it If movements are too easy or diffi...
- Seite 20 Tilt – Forward and Backward Inclinación (adelante y atrás) Inclinaison : Avant et arrière Neigung – vor und zurück チルト (前後) ˚ Increase Li Strength Decrease Li Strength ˚ If the mounted weight is too heavy If the mounted weight is too light or this product does not stay up or this product does not stay down when raised, then you'll need to...
- Seite 21 For Warranty visit: www.ergotron.com/warranty For Service visit: www.ergotron.com For local customer care phone numbers visit: http://contact.ergotron.com Para acceder a la última versión de la Guía de instalación para el usuario, ingrese a www.ergotron.com Para Garantía, visite: www.ergotron.com/warranty Para servicio, visite: www.ergotron.com Para conocer los números telefónicos locales de atención al cliente, visite: http://contact.ergotron.com...
- Seite 22 MX Wallmount LCD Arm Includes Constant Force™ Technology 用户指南 Benutzerhandbuch Guida per l’utente Kullanıcı Kılavuzu www.ergotron.com: English, Español, Français, Deutsch, Nederlands, Italiano, Türkçe, 日本語, 汉语 www.ergotron.com | USA: 1-800-888-8458 Europe: +31 (0)33-45 45 600 China: 400-120-3051 Japan: japansupport@ergotron.com rev J • 04/19...
- Seite 23 安全性 Veiligheid Sicurezza Güvenlik Overzicht symbolen voor gevaren Deze symbolen waarschuwen gebruikers voor een veiligheidsomstandigheid waaraan aandacht besteed moet worden. Alle gebruikers moeten het belang van de volgende Veiligheidsgevaren kunnen herkennen en begrijpen als zij daarmee geconfronteerd worden op het product of in de documentatie.
- Seite 24 安全性 Veiligheid Sicurezza Güvenlik Belangrijk! U moet dit product bijstellen nadat de installatie voltooid is Overtuig u ervan dat al uw apparatuur op de juiste wijze geïnstalleerd is op het product voordat u probeert bijstellingen uit te voeren Dit product moet soepel en makkelijk bewegen door alle bewegingen en blijven staan waar u het zet Als het te makkelijk of moeilijk beweegt of als het product niet in de gewenste posities blij staan volg dan de instructies voor het bijstellen om te zorgen voor soepele en makkelijke bewegingen A ankelijk van uw product en de bijstelling moet u mogelijk veel aan de schroeven en knoppen draaien om een verschil te merken Elke keer als apparatuur toegevoegd of...
- Seite 25 安全性 Veiligheid Sicurezza Güvenlik WARNUNG! Quetschkante AVVERTENZA! Punto di possibile schiacciamento UYARI! KISTIRMA NOKTASI 警告! 小心被夹 WARNUNG! Gefährdung durch gespeicherte Energie Der Arm-Mechanis- mus der Arbeitsfl äche steht unter Spannung und bewegt sich von allein und schnell nach oben sobald das befestigte Gerät abgenommen wird Entfernen Sie aus diesem Grund die Geräte nur wenn sich der Arm auf der höchsten Position befi...
- Seite 26 Kenmerken en specifi caties Cara eristiche e dati tecnici Nitelikler ve Teknik Özellikler 特点和规格 VOORZICHTIG: OVERSCHRIJD DE MAXIMUM OPGEGEVEN GEWICHTSCAPACITEIT NIET. DIT KAN LEIDEN TOT ERNSTIGE VERWONDINGEN OF BESCHADIGING VAN BEZIT. ATTENZIONE: NON SUPERARE LA CAPACITÀ DI CARICO MASSIMA INDICATA. POTREBBERO VERIFICARSI INFORTUNI O DANNI AGLI OGGETTI! DİKKAT: BELİRTİLEN EN YÜKSEK AĞIRLIK SINIRINI AŞMAYIN.
- Seite 27 Benodigde gereedschappen Utensili necessari Gerekli Aletler 需要的工具 Beton Massief Houten Pilaren Cemento Due montanti in legno massiccio Beton Ahşap 水泥质 木质 Ø 3/8" (9.5 mm) Ø 3/16" (5 mm) Stud Finder 1/2" (13mm) 1/2" (13mm) rev J • 04/19...
- Seite 28 Opstellingshoogte voor een ergonomisch werkstation Deze opstellingshoogte wordt aanbevolen voor een ergonomische werkplek geschikt voor gebruikers die ' "- ' " lang zij als deze opstelling gebruikt wordt om staande te werken en gebruikers die ' "- '" cm zijn en die zi en Als de lengte van de gebruikers anders is moet u de opstelling aanpassen aan de lengte van de gebruiker Verander de opstelhoogte met cm voor elke...
- Seite 29 Opstellingshoogte voor een ergonomisch werkstation Altezza di montaggio per postazione di lavoro ergonomica Ergonomik İş İstasyonu için Montaj Yüksekliği 人体工程学工作站的安装高度 1.125” 0.86” (28.6 mm) (22 mm) 4.1” (104 mm) 6” (152 mm) 4.41” (112 mm) 10-24 x 3/8" 0.70” 3.03” 5’4”...
- Seite 30 Kies de montagemethode. Ergotron-product. Muurrail en -beugel Apart leverbaar Scegliere il metodo di montaggio. Prodotto Ergotron. Wall Track e staff a Venduta separatamente Montaj Yöntemini Seçin. Ergotron ürünü. NOT: Duvar Rayı ve Braketler, ayrı satılır. 选取安装方法. Ergotron 产品. 墙轨和托架单独出售。 1/8"...
- Seite 31 Beton Cemento Beton 水泥质 3-1/8" (80 mm) Ø 3/8" (10 mm) WAARSCHUWING: WAARSCHUWING: De bevestigingsgaten moeten tenminste 80 mm diep zijn en mogen alleen in Pluggen die niet volledig in het beton zijn verankerd zullen de op te hangen apparatuur massief metselwerk of beton worden geboord, niet in de voegen of in de wandaf- niet kunnen dragen, dit zal leiden tot een onveilige en onstabiele situatie wat licha- werking.
- Seite 32 Massief Houten Pilaren Due montanti in legno massiccio Ahşap 木质 Ø 3/16" (5 mm) M8 x 80mm 1/2" (13mm) LET OP: zorg ervoor dat de muurbevestigingsbeugel recht is, gelijk aan en nauwsluitend met het muuroppervlak. DRAAI DE BOUTEN NIET TE VAST. ATTENZIONE: verifi...
- Seite 33 0˚ M3 x 6mm Controleer de afmeting van het gatenpatroon van de TV/Monitor Controllare le dimensioni dello schema di foratura della TV/del Monitor TV/Monitör deliğinin ölçüsünü kontrol edin 检查电视/显示器孔眼形状尺寸 Confi guraties VESA-adapter Confi gurazioni di adattatore VESA VESA Adaptör Konfi gürasyonları VESA 适配器配置...
- Seite 34 Bevestig een TV/Monitor van het type A aan de arm Montare sul braccio una TV/un Monitor di tipo A B, C, D Tip A TV/Monitörü Kola Monte Edin 将 A 型电视/显示器安装到支臂 100mm (3-15/16”) 75mm (2-15/16”) 75 x 75mm M4 x 10mm M4 x 10mm 100 x 100mm M4 x 10mm...
- Seite 35 100x200mm 200x200mm 200x100mm 100mm (3-15/16”) 200mm (7-7/8”) 200mm (7-7/8”) Bevestig de VESA-adapters aan de arm afhankelijk van de afmetingen van het TV/Monitor gatenpatroon (B, C of D). Fissare gli adattatori VESA al braccio in base alle dimensioni dello schema di foratura della TV/del Monitor (B, C o D). TV/Monitör delik ölçüsüne göre VESA Adaptörleri Kola Monte Edin (B, C veya D).
- Seite 36 Instructies voor de M M KIT Istruzioni KIT M M M M SETİ Talimatları M8M5 套件说明 OPMERKING Volg deze stap wanneer uw tv/monitor voorzien is van gaten met diameter M die verkleind moeten worden tot diameter M Installeer een verloopbus M M aan de tv/monitor en gebruik de M x mm-schroeven om de monitor vast te ze en NOTA eseguire questo passaggio soltanto se la TV/il monitor presenta fori M da ridurre a M...
- Seite 37 Instructies voor de M M KIT Istruzioni KIT M M M M SETİ Talimatları M8M5 套件说明 OPMERKING Volg deze stap enkel voor modellen van Samsung die de bevestigingsring gebruiken Installeer een verloopbus M M aan de tv/monitor en gebruik daarna de M x mm-schroeven en de bevestigingsring van Samsung om de monitor vast te ze en NOTA eseguire questo passaggio solo per i modelli Samsung che utilizzano l'anello di ritenuta...
- Seite 38 2.5mm rev J • 04/19...
- Seite 39 Kabels trekken Disposizione dei cavi Kablo Yönlendirmesi 电缆敷设 LET OP Laat voldoende speling in de kabel om volledige bewegingsbereik mogelijk te maken Voorzichtig Om te voorkomen dat de snoeren mogelijk beklemd raken dient u de instructies voor het leiden van de snoeren in dit handboek te volgen Nalaten deze instructies te volgen kan de apparatuur beschadigen of persoonlijk letsel veroorzaken NOTA Lasciare suffi...
- Seite 40 调整步骤 Stap voor het bijstellen Fase di regolazione Ayar Belangrijk! U moet dit product bijstellen nadat de installatie voltooid is Overtuig u ervan dat al uw apparatuur op de juiste wijze geïnstalleerd is op het product voordat u probeert bijstellingen uit te voeren Dit product moet soepel en makkelijk bewegen door alle bewegingen en blijven staan waar u het zet Als het te makkelijk of moeilijk beweegt of als het product niet in de gewenste posities blij staan volg dan de instructies voor het bijstellen om te zorgen voor soepele en makkelijke bewegingen A ankelijk van uw product en de bijstelling moet u mogelijk veel aan de schroeven en knoppen draaien om...
- Seite 41 Kantel – Naar voren en naar achteren Inclinazione – Avanti ed Indietro Eğin - Öne ve Geriye 倾斜 – 前后 ˚ De tilsterkte verhogen De tilsterkte verlagen ˚ Als het geïnstalleerde gewicht Als het geïnstalleerde gewicht te te zwaar is of als dit product niet licht is of als dit product niet omlaag omhoog blij staan als het omhoog blij staan als het naar beneden...
- Seite 42 Ga voor garantie naar: www.ergotron.com/warranty Ga voor service naar: www.ergotron.com Plaatselijke telefoonnummers voor de klantendienst kunt u vinden op: http://contact.ergotron.com Per la versione più recente della Guida all’installazione per l’utente, visitare il sito web: www.ergotron.com Per la garanzia visitare: www.ergotron.com/warranty Per assistenza visitare: www.ergotron.com Per conoscere i numeri di telefono dell’assistenza clienti locale, visitare: http://contact.ergotron.com...