Herunterladen Inhalt Inhalt Diese Seite drucken
Novoferm NovoSpeed Alu S Installationsanleitung

Novoferm NovoSpeed Alu S Installationsanleitung

Aluminium-schnelllaufrolltor

Werbung

Verfügbare Sprachen
  • DE

Verfügbare Sprachen

  • DEUTSCH, seite 12
Assembly instructions
Aluminum Speedroller Door NovoSpeed Alu S
Montageanleitung
Aluminium-Schnelllaufrolltor NovoSpeed Alu S
Manuel d'application
Porte a enroulement rapide NovoSpeed Alu S
Montagehandleiding
Aluminium Snelroldeur NovoSpeed Alu S
Manual de instalación
Puerta de Alta Velocidad NovoSpeed Alu S
Manual de instalação
Porta de alta velocidade NovoSpeed Alu S
GB
DE
FR
NL
ES
PT

Werbung

Inhaltsverzeichnis
loading

Inhaltszusammenfassung für Novoferm NovoSpeed Alu S

  • Seite 1 Assembly instructions Aluminum Speedroller Door NovoSpeed Alu S Montageanleitung Aluminium-Schnelllaufrolltor NovoSpeed Alu S Manuel d‘application Porte a enroulement rapide NovoSpeed Alu S Montagehandleiding Aluminium Snelroldeur NovoSpeed Alu S Manual de instalación Puerta de Alta Velocidad NovoSpeed Alu S Manual de instalação...
  • Seite 2: Inhaltsverzeichnis

    4. Installation ..........70 5. Final Inspection ........78 English Dear Customer, Thank you for choosing a Novoferm quality product. This product has been designed and manufactured in accordance with the ISO 9001 quality system. We hope that you are satisfied and that it exceeds your expectations.
  • Seite 3: Introduction

    1. Introduction • The used components are manufactured Tolerances • Novoferm is not liable for damage and / or from high quality, durable and solid injury caused as a result of actions which All parts are produced to standard tolerances Read this first! materials.
  • Seite 4: Preparation

    NovoSpeed Alu S doors HL = HR? The NovoSpeed Alu S consists of the following main sections: • A top roller that consists of a door roller surrounded by a plastic door panel (cloth).
  • Seite 5 Einbaumaße Typ ASE-S ohne Abdeckhaube 2.10 2.11 Dimensions NovoSpeed Alu S without hood Dimensions NovoSpeed Alu S with hood Einbaumaße Typ ASE-S mit Abdeckhaube 250 B B + 800 H + max.650 Attachment points Attachment points Befestigungsbereiche within this range...
  • Seite 6: Parts

    3. Parts Pos. Description: Order No. torque rod 2030100 Drive 2030200 end plate 2030300 block bearing 2030400 aluminium pulley 2030500 NovoSpeed Alu console 2030600 shaft 2030700 guide roller 2030800 9a/b a: light curtain / b: photocell 2030900 light curtain holder 2031000 slip rubber 2031100...
  • Seite 7: Installation

    4. Installation Checking the clearance and the required the installation space Attaching the column to the driving side ≥ 650 (700*) ≥ 350 ≥ 250 (450*) (350*) • Use the sealing profile for the top side as a connection between the vertical gui- •...
  • Seite 8 Attaching the column to the side that is driven Pre-installation of the top roller Aluminium pulley Aluminium pulley Top roller Block bearings Mount block bearings Mount block bearings on to the console on to the console Torque support Drive • Erect the column of the driven side to match the width of the sealing •...
  • Seite 9 Installation of the complete top roller Attaching the tension belts Tighten and secure M8 hex screws the free end manually! (2X) Aluminium pulley Flush-mounted M8 Clamping washer screws (2X) Wrap the tension belt 1.5 - 2 times around it Reverse plate Clamping washer Plastic guide rail Belt holder with...
  • Seite 10 Electrical installation Check that the block bearings, pulleys and the drive are placed correctly on the shaft. On the driving side, lead an electrical cable from the photocell through the column upwards and over the horizontal distance profile, straight to the junction box. Connect the cable as shown in illustration 4.7.
  • Seite 11: Final Inspection

    5. Final Inspection Control box approved Security approved   23. Push buttons on the box 34. Safety photocell *   24. Stop switch 35. Safety edge protection * CHECK Conformity   25. General cabling 36. Light screen * ...
  • Seite 12: Aluminium-Schnelllaufrolltor

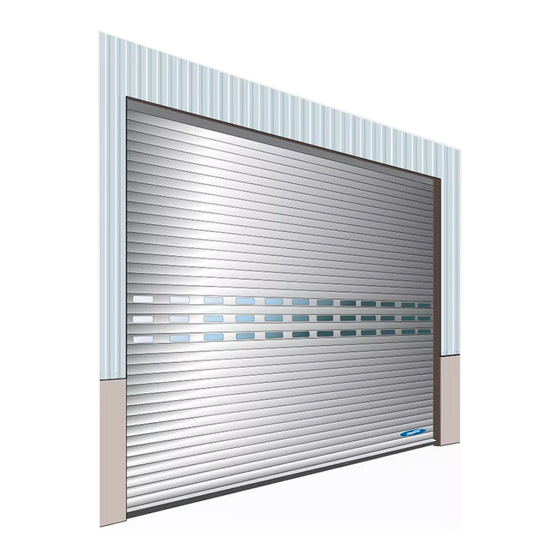
    Inhalt Installationsanleitung 1. Einführung ..........56 2. Vorbereitung ..........58 Aluminium-Schnelllaufrolltor 3. Teile ............60 NovoSpeed Alu S 4. Installation ..........62 5. Endkontrolle ..........70 Deutsch Sehr geehrter Kunde, vielen Dank, dass Sie sich für ein hochwerti- ges Novoferm-Produkt entschieden haben. Dieses Produkt wurde gemäß dem ISO 9001 Qualitätssystemen entwickelt und hergestellt.
  • Seite 13: Einführung

    Schleifen vorhanden ist, da Staub und andere brennbare Substanzen eine • Nichtbefolgen dieser Anleitung kann • Novoferm Nederland BV übernimmt keine Explosionsgefahr verursachen können. schwere Verletzung oder Sachschäden Haftung für Schäden, die durch falschen verursachen.
  • Seite 14: Vorbereitung

    Steigen Sie nicht auf das Tuch (Torblatt)! • Die folgenden Anweisungen gelten für NovoSpeed Alu S-Standardtore. HL = HR? Das NovoSpeed Alu S besteht aus den folgenden Hauptteilen: • Einer oberen Laufrolle, die aus einer Torlaufrolle besteht, die von einem Kunststofftorblatt (Stoff) umgeben ist.
  • Seite 15 Einbaumaße Typ ASE-S ohne Abdeckhaube 2.10 2.11 Abmessungen NovoSpeed Alu S ohne Haube Abmessungen NovoSpeed Alu S mit Haube Einbaumaße Typ ASE-S mit Abdeckhaube 250 B B + 800 H + max.650 Befestigungspunkte Befestigungspunkte Befestigungsbereiche in diesem Bereich in diesem Bereich...
  • Seite 16: Teile

    3. Teile Pos. Beschreibung: Bestellnr. Drehmomentstütze 2030100 Antrieb 2030200 Endplatte 2030300 Blocklager 2030400 Aluminium-Gurtroller 2030500 NovoSpeed Alu-Endplatte 2030600 Welle 2030700 Führungsrolle 2030800 9a/b a: Lichtschranke / b: Fotozelle 2030900 Lichtschrankenhalter 2031000 Rutschgummi 2031100 Untere Platte 2031200 Federhalter 2031300 Klauenriemenbefestigung 2031400 Spannriemen 2031500 Spannfeder...
  • Seite 17: Installation

    4. Installation Prüfung des Abstands und des erforderlichen Platzes für die Installation Befestigen des Pfeilers an der Antriebsseite ≥ 650 (700*) ≥ 350 ≥ 250 (450*) (350*) • Verwenden Sie das Dichtungsprofil für die Oberseite als Verbindung zwischen den • Legen Sie den Pfeiler mit der Antriebsseite auf den Boden, um die senkrechten Führungsschienenpfeilern (dies dient auch dem Überprüfen des Breite des Dichtungsprofils anzupassen, und stellen Sie ihn aufrecht.
  • Seite 18 Befestigen Sie den Pfeiler an der Seite, die angetrieben wird. Vorinstallation der oberen Laufrolle Aluminium-Gurtroller Aluminium-Gurtroller Obere Laufrolle Blocklager Montieren Sie die Montieren Sie die Blocklager an der Blocklager an der Endplatte. Endplatte. Drehmomentstütze Antrieb • Stellen Sie den Pfeiler an der angetriebenen Seite auf, um die Breite des • Lösen Sie die Schrauben aus der Holzverpackung und entfernen Sie die Seiten.
  • Seite 19 Befestigen der Spannriemen Installation der vollständigen oberen Laufrolle, die automatisch unter Druck gesetzt wird Sechtkantschraube M8 Ziehen Sie das freie Ende von Hand fest und befestigen Sie es! (2X) Aluminium-Gurtroller Bündig montiert M8 (2X) Klemmbeilagscheibe Wickeln Sie den Spannrie- men 1,5 bis 2 Mal herum. Umlenkplatte Klemmbeilagscheibe Kunststoff-Führungs-...
  • Seite 20 Elektrische Installation Prüfen Sie, ob die Blocklager, Gurtroller und der Antrieb richtig an der Welle platziert sind. Führen Sie an den Antriebsseite ein Stromkabel von der Fotozelle durch den Pfeiler nach oben und über das waagrechte Distanzprofil gerade zum Anschlusskasten. Schließen Sie die Kabel wie in Abb.
  • Seite 21: Endkontrolle

    5. Endkontrolle Steuerkasten genehmigt Sicherheit genehmigt   23. Drucktasten am Kasten 34. Sicherheitsfotozelle *   24. Stoppschalter 35. Sicherheitskantenschutz * CHECK Conformity   25. Allgemeine Verkabelung 36. Lichtschranke *  37. Iris * Bedienung genehmigt  26. Drucktasten* Haube * genehmigt ...
  • Seite 22 Inspection finale ........70 Français Cher client, Nous vous remercions d'avoir choisi un produit de qualité Novoferm. Ce produit a été conçu et produit conformément au système de qualité ISO 9001. Nous espérons qu'il répondra à vos attentes et bien plus.
  • Seite 23: Introduction

    Utilisez toujours des vous soudez ou meulez, car la poussière et Par exemple, immobilisez le rouleau supéri- • Novoferm Nederland BV décline toute outils spéciaux pour cela. d'autres substances inflammables eur avec un chariot élévateur avant de le responsabilité...
  • Seite 24: Préparation

    • Les instructions suivantes s'appliquent aux portes NovoSpeed Alu S. HL = HR? La NovoSpeed Alu S est composée des éléments principaux suivants • Un rouleau supérieur consistant en un rouleau de porte entouré d'un panneau de porte en plastique (tissu).
  • Seite 25 Einbaumaße Typ ASE-S ohne Abdeckhaube 2.10 2.11 Dimensions NovoSpeed Alu S sans capot Dimensions NovoSpeed Alu S avec capot Einbaumaße Typ ASE-S mit Abdeckhaube 250 B B + 800 H + max.650 Points de fixation Befestigungsbereiche Points de fixation dans cette gamme...
  • Seite 26 3. Éléments Pos. Description N° commande Barre stabilisatrice 2030100 Moteur 2030200 Console 2030300 Palier de bloc 2030400 Poulie de courroie aluminium 2030500 Console NovoSpeed Alu 2030600 Arbre 2030700 Poulie de guidage 2030800 9a/b a: rideau lumineux / b: cellule photoélectrique 2030900 Support de rideau lumineux 2031000...
  • Seite 27: Installation

    4. Installation Vérifiez l'espace disponible et l'espace nécessaire pour l'installation. Installation du montant côté entraînement ≥ 650 (700*) ≥ 350 ≥ 250 (450*) (350*) • Utilisez le profil d'étanchéité du côté supérieur comme raccord entre les montants • Placez le montant avec le côté entraîné au sol en fonction de la largeur du rail de guidage vertical (cela permet également de vérifier l'écartement de la du profil d'étanchéité...
  • Seite 28 Fixation du montant sur le côté entraîné Pré-installation du rouleau supérieur Poulie de courroie aluminium Poulie de courroie aluminium Rouleau supérieur Paliers de bloc Montez les Montez les paliers de paliers de bloc sur la bloc sur la console. console. Support de couple Moteur •...
  • Seite 29 Installation du rouleau supérieur complet Fixation des courroies mis automatiquement sous tension Serrez et fixer l'extrémité libre à la main ! Boulons hex. M8 (2X) Poulie de courroie aluminium Montage affleurant Rondelle de fixation M8 (2X) Enroulez 1,5 - 2 fois la courroie autour Poulie d'inversion Rondelle de fixation...
  • Seite 30 Installation électrique Assurez-vous que les blocs de palier, les poulies de courroie et le moteur sont correctement placés sur l'arbre. Sur le côté entraîné, tirez un câble électrique depuis la cellule photoélectrique à travers le montant, puis par-dessus le profil d'écartement horizontal, et directement vers la boîte de jonction.
  • Seite 31: Inspection Finale

    5 Inspection finale Boîtier de commande approuvé Sécurité approuvé   Boutons-poussoirs sur le boîtier 34. Cellule photoélectrique de sécurité *   24. Interrupteur d'arrêt 35. Lame palpeuse * CHECK Conformity   25. Câblage général 36. Rideau lumineux * ...
  • Seite 32 4. Montage ..........70 5. Eindcontrole ..........78 Nederlands Geachte klant, Dank u voor het kiezen van een Novoferm kwaliteits produkt. Dit product is ontworpen en geproduceerd volgens het ISO-9001 kwaliteitssysteem. We hopen dat u er tevreden over bent en dat het al uw verwachtingen overtreft.
  • Seite 33: Inleiding

    1. Inleiding • De te gebruiken componenten zijn Toleranties de montage-instructies is Novoferm vervaardigd uit kwalitatief hoogwaardige, Nederland BV niet aansprakelijk. Alle onderdelen worden met de uiterste Belangrijk! duurzame en solide materialen. Desondanks preciesie geproduceerd binnen de standaard • Houd er alstublieft rekening mee dat de moet tijdens de montage de nodige toleranties.
  • Seite 34: Voorbereiding

    NovoSpeed Alu S deuren HL = HR? De NovoSpeed Alu S bestaat uit de volgende hoofddelen: • Een bovenrol bestaande uit een deurwals met een kunststof deurplaat(doek) eromheen. Twee kolommen die de bovenrol ondersteunen en het deurblad geleiden.
  • Seite 35 Einbaumaße Typ ASE-S ohne Abdeckhaube 2.10 2.11 Afmetingen NovoSpeed Alu S zonder kap Afmetingen NovoSpeed Alu S met kap Einbaumaße Typ ASE-S mit Abdeckhaube 250 B B + 800 H + max.650 Bevestigingspunten Bevestigingspunten Befestigungsbereiche in dit bereik in dit bereik...
  • Seite 36: Onderdelen

    3. Onderdelen Pos. Beschrijving Order Nr. reactie stang 2030100 aandrijving 2030200 kopplaat 2030300 bloklager 2030400 aluminium riemspoel 2030500 NovoSpeed Alu console 2030600 2030700 geleiderol 2030800 9a/b a: lichtgordijn / b: fotocel 2030900 lichtgordijn houder 2031000 glijrubber 2031100 bodemplaat 2031200 veerbevestiging 2031300 riemklem met kunststof slede 2031400...
  • Seite 37: Montage

    4. Montage Controle van de speling en de benodigde inbouwruimte Bevestiging van de kolom aan de aandrijf zijde ≥ 650 (700*) ≥ 350 ≥ 250 (450*) (350*) • Gebruik het afdichtingsprofiel voor de bovenzijde als verbinding tussen de verticale • Leg de kolom aan de aandrijfzijde op de grond in overeenstemming met looprail kolommen (dit dient tevens om de afstand van de interne breedte te contro- de breedte van het afdichtingsprofiel en zet hem rechtop.
  • Seite 38 Bevestiging van de kolom aan de gedreven zijde Voormontage van de bovenrol Aluminium riemspoel Aluminium riemspoel Bovenrol Bloklagers Bloklager Bloklager monteren monteren op console op console Reactiesteun Aandrijving • Zet de kolom van de gedreven zijde in overeenstemming met de breedte van • Draai de schroeven uit de houten verpakking en verwijder de zijkanten.
  • Seite 39 Montage van de complete bovenrol Bevestiging van de spanriemen Het vrije uiteinde met de hand Hex M8 (2X) aantrekken en vast zetten! Aluminium riemspoel Verzonken M8 (2X) Klemplaatje Wikkel de spanriem 1,5 - 2 keer er om Keerschijf Klemplaatje Kunststof slede Riemhouder met kunststof slede •...
  • Seite 40 Elektrische installatie Controleer of de bloklagers, riemspoelen en de aandrijving goed op de as vastzitten. Voer aan de gedreven zijde een elektrische kabel van de fotocel door de kolom naar boven en over het horizontale afstandprofiel, recht naar de verdeeldoos. Sluit de kabel aan zoals aangegeven in afbeelding 4.7.
  • Seite 41: Eindcontrole

    5. Eindcontrole Schakelkast goedgekeurd Beveiliging goedgekeurd   23. Drukknoppen op de kast 34. Veiligheidsfotocel *   24. Stop schakelaar 35. Kantbeveiliging * CHECK Conformity   25. Bekabeling algemeen 36. Lichtscherm *  37. Iris * Bediendingen goedgekeurd ...
  • Seite 42 Índice Manual de instalación 1. Introducción ..........56 2. Preparación ..........58 Puerta enrollable rápida de aluminio NovoSpeed Alu S 3. Piezas ............60 4. Instalación ..........62 5. Inspección final ........70 Español Estimado Cliente: Gracias por elegir un producto de calidad Novoferm. Este producto se ha diseñado y fabricado de acuerdo con el sistema de calidad ISO 9001.
  • Seite 43: Instrucciones Generales

    • Preste especial atención a todos los peligros amolado, ya que el polvo y otras sustancias que puedan derivarse de tensar los resortes. • Novoferm Nederland BV no se hace inflamables pueden suponer un riesgo de ¡Utilice siempre herramientas especializadas responsable de ningún daño causado...
  • Seite 44: Observaciones Preliminares

    ámbito • Informe inmediatamente de cualquier daño de transporte a Novoferm Netherlands BV. de alcance de la puerta sea suave y + ¡oBSeRVACIóN! +++ ¡oBSeRVACIóN! +++ ¡oBSeRVACIóN! +++ ¡oBSeRVACIóN! +++ ¡oBSeRVACIóN! + esté llano.
  • Seite 45 Einbaumaße Typ ASE-S ohne Abdeckhaube 2.10 2.11 Dimensiones NovoSpeed Alu S sin cubierta Dimensiones NovoSpeed Alu S con cubierta Einbaumaße Typ ASE-S mit Abdeckhaube 250 B B + 800 H + max.650 Puntos de sujeción Puntos de sujeción Befestigungsbereiche dentro de este dentro de este ámbito...
  • Seite 46 3. Piezas Pos. Descripción: Núm. pedido barra de torsión 2030100 Accionamiento 2030200 placa de cierre 2030300 Cojinete 2030400 polea de correa de aluminio 2030500 Consola NovoSpeed Alu 2030600 2030700 rodillo guía 2030800 9a/b a: cortina de luz / b: célula fotoeléctrica 2030900 soporte de cortina de luz 2031000...
  • Seite 47 4. Instalación Comprobación de la holgura y el espacio de instalación requerido Fijación de la columna al lado de accionamiento ≥ 650 (700*) ≥ 350 ≥ 250 (450*) (350*) • Utilice el perfil de sellado para la parte superior como conexión entre las columnas •...
  • Seite 48 Fijación de la columna hacia el lado que está accionada Pre-instalación del rodillo superior Bobina de correa de aluminio Bobina de correa de aluminio Rodillo superior Cojinetes Monte los Monte los cojinetes en cojinetes en la placa final la placa final Soporte de par Accionamiento •...
  • Seite 49 Instalación del rodillo superior completo Fijación de las correas tensoras ¡Apriete y fije el extremo Tornillo hex. M8 (2X) libre manualmente! Bobina de correa de aluminio M8 montado empotrado Arandela de sujeción (2X) Envuelva la correa tensora 1,5 - 2 veces alrededor Placa de retorno Arandela de sujeción...
  • Seite 50 Instalación eléctrica Compruebe que los cojinetes, las bobinas de correas y el accionamiento están colocados correctamente en el eje. En el lado de accionamiento, lleve un cable eléctrico de la célula fotoeléctrica a través de la columna hacia arriba, por encima del perfil distancia horizontal, directamente a la caja de empalmes.
  • Seite 51: Lista De Comprobación

    5. Inspección final Caja de control aprobado Seguridad aprobado   23. Pulsadores de la caja 34. Célula fotoeléctrica de seguridad *   24. Interruptor de parada 35. Protección de bordes * CHECK Conformity   25. Cableado general 36.
  • Seite 52: Manual De Instalação

    5. Inspecção final ........70 Estimado cliente, Português Obrigado por optar por um produto de qualidade Novoferm. Este produto foi concebi- do e fabricado de acordo com o sistema de qualidade ISO 9001. Esperamos que exceda as suas expectativas. O funcionamento correcto e manutenção adequada têm um grande impacto no...
  • Seite 53: Instruções Gerais

    • A Novoferm Nederland BV não deve ser nos objectos. Por exemplo, fixe o rolo superior outras substâncias inflamáveis poderão • Os componentes são elaborados com considerada responsável por quaisquer...
  • Seite 54 • Comunique quaisquer danos de transporte imediatamente à Novoferm Netherlands BV. niveladas. ta se encontra desobstruído e +++ AteNção! +++ AteNção! +++ AteNção! +++ AteNção! +++ AteNção! +++ AteNção! +++...
  • Seite 55 Einbaumaße Typ ASE-S ohne Abdeckhaube 2.10 2.11 Dimensões da NovoSpeed Alu S sem cobertura Dimensões da NovoSpeed Alu S com cobertura Einbaumaße Typ ASE-S mit Abdeckhaube 250 B B + 800 H + max.650 Pontos de fixação Pontos de fixação...
  • Seite 56 3. Peças Pos. Descrição N. º de encomenda haste de binário 2030100 Mecanismo de accionamento 2030200 consola 2030300 rolamento de bloco 2030400 polia de correia em alumínio 2030500 consola NovoSpeed Alu 2030600 eixo 2030700 rolo guia 2030800 9a/b a: barreira óptica/b: célula fotoeléctrica 2030900 suporte da barreira óptica 2031000...
  • Seite 57: Instalação

    4. Instalação Verificar a folga e o espaço para instalação necessário Fixação da coluna para o lado de accionamento ≥ 650 (700*) ≥ 350 ≥ 250 (450*) (350*) • Use o perfil de vedação para a parte de cima como uma ligação entre as colunas da •...
  • Seite 58 Fixação da coluna para o lado que é accionado Pré-instalação do rolo superior Polia de correia em alumínio Polia de correia em alumínio Rolamentos de bloco Rolo superior Monte os Monte os rolamentos rolamentos de bloco na de bloco na consola consola Suporte de binário...
  • Seite 59 Instalação do rolo superior completo Fixar as correias de tensão Aperte e fixe Parafuso sextavado M8 a extremidade livre manualmente! (2X) Polia de correia em alumínio Montagem embutida M8 Arruela de fixação (2X) Enrole a correia de tensão 1,5 - 2 vezes em volta Placa de inversão Arruela de fixação...
  • Seite 60 Instalação eléctrica Verifique se os rolamentos de bloco, as polias de correia e o mecanismo de accionamen- to estão correctamente colocados no eixo. No lado de accionamento, passe um cabo eléctrico da célula fotoeléctrica através da coluna na direcção vertical e sobre o perfil de distância horizontal, directamente para a caixa de passagem.
  • Seite 61: Lista De Verificação

    5. Inspecção final Caixa de controlo aprovado Segurança aprovado   23. Botões na caixa 34. Célula fotoeléctrica de segurança *   24. Interruptor de paragem 35. Protecção do batente de segurança * CHECK Conformity   25. Cablagem geral 36.
  • Seite 62 Copyright English Deutsch All rights reserved. Nothing in this publication Alle Rechte vorbehalten. Diese Unterlage may be reproduced and/or published by means einschließlich aller Zeichnungen. Schemata of printing, photocopy, microfilm or any other etc. darf nicht ohne unser ausdrückliche means without the prior written permission of schriftliche Genehmigung durch Druck, the supplier.
  • Seite 63 NOVOFERM NEDERLAND B.V. Postbus 33 4180 BA Waardenburg NL Tel.: 0418-654700 E-Mail: industrie@novoferm.nl www.novoferm.nl NOVOFERM INTERNATIONAL Tel.: 088-8888-240 E-Mail: export@novoferm.nl...

Inhaltsverzeichnis