
Verwandte Anleitungen für Carrier 42N 16-AQUASMART


Inhaltszusammenfassung für Carrier 42N 16-AQUASMART
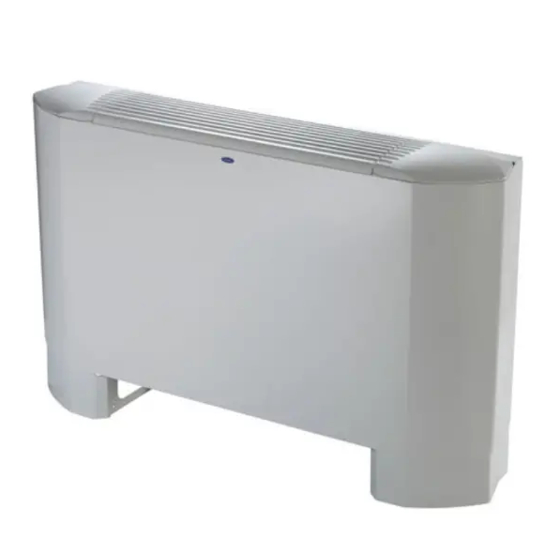
- Seite 1 42N - AQUASMART FAN COIL UNITS Installation manual VENTILCONVETTORI Manuale d’installazione VENTILO-CONVECTEURS Manuel d’installation VENTILATOR-KONVEKTOREN Installationsanweisungen UNIDADES FAN COIL Manual de instalación...
-
Seite 2: Inhaltsverzeichnis
This manual details fan coil unit ventilconvettore. installation and maintenance. Per quanto riguarda la descrizione del Refer to Carrier Instruction Manual funzionamento della regolazione 8137-76 for AQUASMART adjustment AQUASMART fare riferimento al procedures. manuale d'istruzione Carrier 8137-76. - Seite 3 Für die Funktions- und Por lo que respecta a la descripción del du système de régulation AQUASMART funcionamiento de la regulación Einstellungsbeschreibung des se rapporter au mode d’emploi Carrier AQUASMART siehe die AQUASMART referirse al manual de 8137-76. instrucciones Carrier 8137-76.
-
Seite 4: Operating Limits
Technical data / Dati tecnici / Caractéristiques techniques / Technische Daten / Datos técnicos Table I: Operating limits Water circuit Water-side maximum pressure: Incoming water temperature with heater: +2°C min - +45°C max 1400 kPa (142 m WG) Incoming water temperature without heater: +2°C min - +80°C max. Indoor temperature Minimum temperature: 5°C Maximum temperature: 32°C... - Seite 5 Technical data / Dati tecnici / Caractéristiques techniques / Technische Daten / Datos técnicos Table II: Electrical data (fan motor) / Tabella II: Assorbimenti elettrici (motore ventilatore) / Tableau II : caractéristiques électriques (moteur du ventilateur) / Tabelle II: Elektrische Daten (Ventilatormotor) / Tabla II: Datos eléctricos (motor del ventilador) Current drawn / Corrente assorbita / Intensité...
-
Seite 6: General Information
Avvertenze generali General information Installazione dell’unità Unit installation Leggere accuratamente questo manuale Read this instruction manual thoroughly prima di procedere all’installazione. before using the unit. • L’apparecchio è conforme alle direttive • This unit complies with low-voltage bassa tensione (CEE 73/23 - EN60335-2-40) (EEC/73/23 - EN60335-2-40) and e compatibilità... -
Seite 7: Généralités
Allgemeine Généralités Información general Informationen Installation de l’unité Geräte-Installation Para la instalación Lire attentivement le présent manuel Dieses Handbuch sorgfältig durchlesen, Leer este manual cuidadosamente antes de d’installation avant d’utiliser l’unité. ehe das Gerät benutzt wird. comenzar la instalación. • L’unité est conforme aux Directives Basse •... -
Seite 8: Warnings: Avoid
Avvertenze: evitare… Warnings: avoid… … di ostruire la mandata e la ripresa … any obstruction of the unit air outlet or return. Leave 1 metre minimum of free dell’aria, lasciando uno spazio libero space. minimo di 1 metro. … exposure to oil vapours. …... - Seite 9 Vorsicht: vermeiden… Attention : éviter… Advertencias: evitar ... … Tout obstacle devant l’ouverture de … dass Luftein- oder Luftaustritt behindert … Cualquier obstrucción de la salida o retomo del aire de la unidad. soufflage d’air ainsi que devant celle de werden.
- Seite 10 Warnings: avoid… Avvertenze: evitare… … in raffrescamento l’irraggiamento … exposure to direct sunshine, when unit is operating in cooling mode; always use diretto in ambiente: tirare le tende. shutters or shades. … positions too close to heating sources … luoghi vicini a fonti di calore che which may damage the unit.
- Seite 11 Vorsicht: vermeiden… Advertencias: evitar ... Attention : éviter… … De placer l’unité directement en plein … Bei Kühlbetrieb des Geräts direkte … La luz solar proyectándose soleil ; lorsqu’elle est en mode Sonneneinstrahlung in den Raum; immer directamente sobre la unidad; cuando la refroidissement, toujours fermer les volets unidad está...
-
Seite 12: Installation
Installation Installazione Fig./ Abb . A Receipt of unit Ricevimento dell’unità • Verificare l’integrità dell’imballo. • Check that packaging is undamaged. • Estrarre l’unità ed ispezionarla per accertarsi • Unpack unit and check immediately for che non abbia subito danni durante il trasporto. damage during transportation. - Seite 13 Installation Installation Instalación Supporting feet and cover panels assembly for floor- mounted vertical unit Montaggio piedi e zoccoli per installazione verticale a pavimento Assemblage des pieds de support et des panneaux protecteurs pour fixation verticale au sol A max 285 mm 285 mm Montage Füße und Sockel für Bodenmontiertes Vertikalgerät...
- Seite 14 Installazione Installation Floor-mounted vertical unit Installazione unità verticale a pavimento The unit is provided with supporting feet and cover panels (models with cabinet). L’unità é provvista di piedi di sostegno e 160 mm • For positioning and drilling use the template zoccoli di copertura (versioni con mobile).
- Seite 15 Installation Installation Instalación Unité verticale fixée au sol Bodenmontiertes Vertikalgerät Unidad vertical de pie L’unité est munie de pieds de support et de Das Gerät verfügt über Stützfüße und La unidad está dotada de patas de soporte y panneaux protecteurs (version carrossée). Abdeckungssockel (Version mit Gehäuse).
-
Seite 16: Water Connections
Collegamenti idraulici Water connections Space for water connections / Spazi per allacciamenti idraulici / Espace nécessaire pour les branchements d’eau / Platz für Wasseranschlüsse / Espacio para conexiones hidráulicas Front view / Vista frontale / Vue de front / Vorderansicht / Alzado 130 mm Ø... -
Seite 17: Conexiones Hidráulicas
Wasseranschlüsse Branchements d’eau Conexiones hidráulicas Space for water connections / Spazi per allacciamenti idraulici / Espace nécessaire pour les branchements d’eau / Platz für Wasseranschlüsse / Espacio para conexiones hidráulicas Top view / Vista in pianta / Vue en plan / Ansicht von oben / Planta 116 mm 130 mm 196 mm... - Seite 18 Water connections Collegamenti idraulici Valvole automatiche di controllo Automatic water valves acqua The units are equipped with valves, both in Le unità sono equipaggiate con valvole, sia 2-pipe or 4-pipe versions. nell’esecuzione due tubi che quattro tubi. The valve heads are thermal type with Le teste delle valvole sono del tipo ad azionamento termico alimentate a 230V, 230V power supply, average consumption...
- Seite 19 Wasseranschlüsse Conexiones hidráulicas Branchements d’eau Control box panel Quadro elettrico “Room Controller” control Comando “Room Controller” Temperature sensor Sensore di temperatura No. 2 screws for coil earthing N° 2 viti per collegamento di Front drain pan messa a terra della batteria Rubber tabs for coil hook Bacinella anteriore Thermoelectric valve head...
-
Seite 20: Electrical Connections
Collegamenti elettrici Electrical connections IMPORTANT: IMPORTANTE: • Make earth connection prior to any • Eseguire il collegamento di messa a terra prima dei collegamenti elettrici. other electrical connections. • Disconnect the power supply to all • Togliere l’alimentazione elettrica a tutti circuits prior to handling any electrical i circuiti prima di accedere alle parti components. -
Seite 21: Branchements Électriques
Branchements Elektrische Anschlüsse Conexiones eléctricas électriques IMPORTANTE: WICHTIG: IMPORTANT : • Realizar las conexiones a tierra antes • Ehe irgendwelche anderen elektrischen • Effectuer la mise à la masse avant tout de cualquier otra conexión eléctrica. Anschlüsse vorgenommen werden, autre branchement électrique. •... - Seite 22 Electrical connections / Collegamenti elettrici / Branchements électriques Elektrische Anschlüsse / Conexiones eléctricas Control box panel / Quadro elettrico Panneau du boîtier de commande / Schaltkasten-Abdeckung / Cuadro eléctrico P1 J3 L1 HR 1 2 3 4 5 6 7 1 2 3 4 5 6 7 230V...
- Seite 23 Electrical connections / Collegamenti elettrici / Branchements électriques Elektrische Anschlüsse / Conexiones eléctricas Legend: Wire colours HY-NEC (Prime) board Mains power supply terminal block Presence contact Brown Transformer Cable fastener Window contact B Blue HY-NEC board Motor terminal block CRC Room Controller C Black Valves terminal block G Grey...
- Seite 24 Collegamenti elettrici Electrical connections Factory configurations Configurazioni di fabbrica Le seguenti configurazioni sono realizzate The following configurations ere made on the HY-NEC board (see electical diagrams) sulla scheda HY-NEC (vedere schemi as follows: elettrici) come segue: Versione Version 2 Tubi (No cavalotto su J10) 2 pipes (No jumper on J10)
- Seite 25 Branchements Elektrische Anschlüsse Conexiones eléctricas électriques Configurations effectuées à Werkseitige Einstellung Configuraciones de fábrica l’usine Folgende Einstellungen werden auf der Las configuraciones indicadas a continuación Karte HY-NEC (siehe elektrische se realizan en la tarjeta HY-NEC (véanse La carte HY-NEC est configurée de la Schaltpläne) wie folgt ausgeführt: esquemas eléctricos) de la manera siguiente: façon suivante (voir schémas électriques):...
- Seite 26 Collegamenti elettrici Electrical connections Window Contact Contatto finestra If the window contact indicates an open Se il contatto finestra indica uno stato di window status for more than one minute, finestra aperta per più di un minuto, l’unità the unit operates in the “Frost protection” viene abilitata al funzionamento “Frost mode.
- Seite 27 Branchements Elektrische Anschlüsse Conexiones eléctricas électriques Fensterkontakt Branchements électriques Contacto ventana Gibt der Fensterkontakt den Zustand Si le contact fenêtre indique un état de Si el contacto ventana indica un estado de fenêtre ouverte pendant plus d’une minute, “Fenster geöffnet” länger als 1 Minute an, “ventana abierta”...
-
Seite 28: Room Controller
Room controller Room controller Functions Display Temperature increase button Temperature decrease button Fan speed selection button Operating mode selection button Fig./ Abb . 1 Funzioni Display Installation on the machine: Montaggio a bordo macchina: Tasto aumento della temperatura Tasto diminuizione della temperatura To install the room controller on the Per il posizionamento del room controller Tasto per la selezione della velocità... -
Seite 29: Room Controller
Room controller Room controller Room controller Fig./ Abb . 2 Fig./ Abb . 3 Installation sur la machine: Montage an der Maschine: Montaje a bordo de la máquina: Pour installer le Room Controller sur la Zur Positionierung des Room Controllers Para la colocación del room controller a bordo machine suivre les instructions: an der Maschine wie folgt vorgehen:... -
Seite 30: Manutenzione
Manutenzione Maintenance IMPORTANT: Disconnect the mains power IMPORTANTE: Prima di ogni operazione di supply prior to any maintenance operations or manutenzione e prima di accedere alle parti interne prior to handling any internal parts of the unit. della unità, togliere l’alimentazione elettrica. Air filter Filtro aria Check and make sure that the filter is cleaned at... -
Seite 31: Wartung
Wartung Mantenimiento Entretien IMPORTANT: Couper l’alimentation secteur WICHTIG: Vor allen Wartungsarbeiten oder vor IMPORTANTE: Desconectar la alimentación avant toute opération d’entretien ou avant de der Arbeit an irgendwelchen internen Geräteteilen eléctrica antes de cualquier operación de manipuler des composants internes de l’unité. immer die Stromversorgung abtrennen. - Seite 32 L010125H35 - 0203 Via R. Sanzio, 9 - 20058 Villasanta (MI) Italy - Tel. 039/3636.1 The manufacturer reserves the right to change any product specifications without notice. La cura costante per il miglioramento del prodotto può comportare senza preavviso, cambiamenti o modifiche a quanto descritto. Le fabricant se réserve le droit de modifier sans préavis les spécifications du produit.