Herunterladen Inhalt Inhalt Diese Seite drucken
Inhaltsverzeichnis

Werbung

Verfügbare Sprachen

Verfügbare Sprachen

MobileMapper
Getting Started Guide
English
Français
German
Español
(Includes Packing List)
Pro

Werbung

Inhaltsverzeichnis
loading

Inhaltszusammenfassung für Magellan MobileMapper Pro

  • Seite 1 MobileMapper ™ Getting Started Guide English Français German Español (Includes Packing List)
  • Seite 3 MobileMapper Pro Getting Started Guide...
  • Seite 5: Inhaltsverzeichnis

    Importing Data to MobileMapper Office..........20 Uploading GIS Files to MobileMapper Pro ......... 21 Using MobileMapper Pro to Revisit and Update Existing GPS/GIS Jobs 21 Opening an existing job ..............22 Selecting the job you want to update ..........22 A note on feature library selection when updating existing jobs....
  • Seite 6 Glossary Field: Any area on MobileMapper Pro’s screen dedicated to displaying the value of a parameter. Some fields are user-editable, some others are not. Feature: Any element located in the field that you wish to record for further upload- ing into a GIS database for example. A feature can represent a real object (stree- tlight, park, electrical transformer, etc.) or on the contrary, something invisible or...
  • Seite 7: Introduction

    SD Card and Batteries You will find the SD card and the two AA batteries inside the MobileMapper Pro box. To install the SD card and then the batteries, do the following: Battery Life - Slide the two tabs on the...
  • Seite 8: Basic Functions

    - Insert the two batteries according to the diagram inside the receiver. Be sure to observe the proper polarity. - Reinstall the battery compartment door making sure to slide the tabs to the right to ensure a watertight seal. Basic Functions Under the screen you will see 8 buttons located around a large oval “scrolling”...
  • Seite 9: Turn The Receiver On

    Pro, press the red power button (PWR) on the front of the re- Press PWR, wait for the ceiver. You will see the MobileMapper Pro screen. You can ei- unit to beep and then ther wait a couple of seconds or press the ENTER button for press ENTER three times.
  • Seite 10: Setting Up The Receiver

    Scroll down to the Initialize option and press ENTER. Scroll down the list of continents to highlight the continent where you are located and then press the ENTER button. Similarly, indicate the country where you are located and then press EN- TER.
  • Seite 11: Coordinate System (Coord System)

    Coordinate system (Coord System) MobileMapper Pro can display your position in a variety of co- ordinate systems, both geographic and grid systems. Unless you know which one you want to use, you can use the default choice (Lat/Lon) for the primary system. You can always trans- form any data you collect in the field to the coordinate system used by your GIS when you get back to the office.
  • Seite 12: Logging New Gps/Gis Data

    (see page 17) - Name the job The name of a MobileMapper Pro job can be any combina- tion of up to eight letters and/or numbers. For the pur- poses of this exercise you might want to type in the first four letters of your name and use four numbers to indicate today's date.
  • Seite 13: Select A Feature Library

    There is a backup key, a space bar and a shift key. Select Done when you have spelled the name. - Select a feature library MobileMapper Pro uses lists of features called “feature libraries” that make describing features in the field easy and fast. Feature libraries are made up essentially of three...
  • Seite 14: Selecting An Attribute

    The receiver is now ready to log descriptions as well. It is fine (actually advantageous) for the receiver to begin log- ging GPS positions while you prepare to record descrip- tions. - Selecting an attribute Each feature can also have a number of attributes. Note that there are three categories of attributes: •...
  • Seite 15: Recording A Line Feature

    This takes you to a screen where you input the number of bulbs on the streetlight. Use MobileMapper Pro's left or right arrow to position the cursor over the digit you wish to change. Use the up or down arrow to scroll through the numbers one through zero.
  • Seite 16: Pausing The Logging Of A Feature

    You can select the level of detail you want in your line fea- ture by setting the logging interval. For this exercise, select the logging interval By Time. Then make set the interval to 5 seconds. Then walk for about 30 m (or 100 feet) in any direction. - Pausing the logging of a feature Now you will pause the logging of a feature.
  • Seite 17: Closing A Nested Feature

    If you close a feature and want to record the location of utility works for any another feature of the same type and with an identical point, line or area fea- description, you can use MobileMapper Pro's “Repeat ture - but not for a grid Feature” function. network of point fea- To most easily familiarize yourself with the “Repeat Fea-...
  • Seite 18: Offsetting A Point Feature

    By combining the receiver's position with the bearing and dis- tance to the feature, MobileMapper Pro will automatically calculate and record the position of the feature. To input an offset for a point feature, highlight Str Light from the New Feature screen and press ENTER.
  • Seite 19: Recording An Area Feature

    Bearing field (see previous MobileMapper Pro will connect the first and last recording page, Offsetting a point positions for all area features. In the same way as you did feature).
  • Seite 20: Introducing Grid Features

    - Introducing grid features MobileMapper Pro's Grid Mapping Utility is an easy way to log GPS positions and GIS data at waypoints arranged in an evenly spaced grid. This allows you to gather measure- ments made by field sensors in an organized fashion with an easy-to-use navigation feature.
  • Seite 21: Navigating To The Next Grid Point

    Therefore, make sure that you are standing on the lower left corner of the grid you want to record. You will now see the feature attribute screen. You record your observations or measurements as you would for any point feature. - Navigating to the next grid point When you have finished recording the first point feature, you can select Next Pt.
  • Seite 22: Gps Quality Indicators

    To close a job, press MENU, highlight the Close Job option (first option in the list) and press ENTER. You cannot accidentally lose data with a MobileMapper Pro receiver unless you open the receiver and lose the internal memory card, or somehow if you corrupt the data on the card,...
  • Seite 23: Logging New Gps/Gis Data Using The "Post-Processing" Job Mode

    MENU and selecting Close Job - Press LOG. MobileMapper Pro displays the Welcome screen. This screen shows three options (instead of the two that you can see on a MobileMapper Pro without the post-procesing option being enabled). Welcome screen with - Highlight Create New Job and press ENTER.
  • Seite 24: Downloading Data To The Pc

    ENTER. The screen now lists all the features available from the selected feature library. - At this stage, use MobileMapper Pro in exactly the same way as you would without the post-processing option. See page 7 and following. In particular, you will download the job exactly in the same way as you would without the Post- Processing option.
  • Seite 25 You will use the data cable almost all of the time so we’ll start there. - MobileMapper Pro includes a data communication cable that attaches to the 4-pin connector on the back of the receiver (see opposite) and to the serial port on your PC.
  • Seite 26: Exporting Data To A Gis

    Open to see what files are loaded into the MobileMapper Of- MapInfo. fice. Click on the file you just recorded and it will be displayed MobileMapper Pro on the screen. Now click on File and Export. Select one of the supports converting your data into ESRI’s...
  • Seite 27: Uploading Gis Files To Mobilemapper Pro

    10.Using MobileMapper Pro to Revisit and Update Existing GPS/ GIS Jobs You can use MobileMapper Pro not only to position and de- scribe new GIS features but also to update information gath- ered previously. This is particularly useful when collecting...
  • Seite 28: Opening An Existing Job

    - Opening an existing job As you did when creating a new job, you press the LOG button. But this time, select the Open Existing Job option. - Selecting the job you want to update The first screen you see after selecting the Open Existing Job option is the Job Selection screen.
  • Seite 29 Let's choose one of the streetlights. When the cursor is over the selected target, you will see the feature type (Str light) displayed at the bottom of the screen. Press ENTER to select this feature. Its attribute screen will be displayed and you can read all the descriptions that were previously recorded.
  • Seite 30 Map screen Navigation Sat Status screen Compass screen screens Speedometer screen Large Data screen Press NAV Data screen Position screen Road screen Turning off unused Map screen: Shows a map of the area around your current location. screens: Use the IN and OUT buttons to adjust the scale. Because some of the Compass screen: Displays your heading graphically.
  • Seite 31: Arriving At The Feature

    As you walk toward the target feature, if you pass a feature that you wish to map, you may do so by pressing the LOG button and adding to the job file. When you are done, you may reselect the original target feature and continue navi- gating to it.
  • Seite 32: Repositioning The Feature

    In the meantime, we urge you to go out and experiment for a The more you use while. Take the MobileMapper Pro along with you to lunch and MobileMapper Pro, the map the locations and descriptions of your favorite restau- easier it will be to get rants.
  • Seite 33 MobileMapper Pro Guide de Démarrage...
  • Seite 35 Export de données vers un SIG............20 Importer des données dans MobileMapper Office ....... 20 Charger des fichiers SIG dans MobileMapper Pro ....... 21 Vérifier et mettre à jour des jobs GPS/SIG existants......21 Ouvrir un job existant ................ 22 Sélectionner le job à...
  • Seite 36 Glossaire Champ : Une zone sur l’écran de votre MobileMapper Pro dédiée à l’affichage d’un paramètre quelconque. Certains champs sont modifiables par l’utilisateur, d’autres pas. Entité : Tout élément sur le terrain que vous souhaitez enregistrer pour pouvoir en- suite alimenter une base de données SIG. Une entité peut désigner un objet con- cret (lampadaires, jardins publics, transformateurs d’électricité, etc.) ou au...
  • Seite 37: Introduction

    Carte mémoire interne (SD Card) et piles Vous trouverez la carte mémoire interne (SD Card) et les deux piles AA à l’intérieur de la boîte du MobileMapper Pro. Pour Durée de vie des piles installer la SD Card, puis les piles, procédez comme suit : Vous pouvez obtenir - Faire glisser les deux languettes au dos du récepteur vers...
  • Seite 38: Fonctions De Base

    à fond vers la droite de façon à assurer l’étanchéité du boîtier. Fonctions de base Sous son écran, MobileMapper Pro est équipé de 8 boutons disposés autour d’un gros bouton de défilement ovale compor- tant lui-même 4 flèches de direction.
  • Seite 39: Mise Sous Tension

    Mise sous tension Une fois les piles insérées, appuyez sur le bouton rouge (PWR) Démarrage rapide : en face avant. L’écran du MobileMapper Pro s’allume. Vous Appuyer sur PWR, pouvez soit attendre 1 à 2 secondes, soit appuyer sur le bou- attendre le bip puis ton ENTER pour faire apparaître l’écran de copyright.
  • Seite 40: Configuration Du Récepteur

    Sélectionnez l’option Initialiser et appuyez sur ENTER. Parcou- rez la liste des continents pour sélectionner celui où vous vous situez, puis appuyez sur ENTER. De la même manière, indi- quez le pays où vous vous situez puis appuyez sur ENTER. Enfin, indiquez la date et l’heure courantes.
  • Seite 41: Système De Coordonnées (Syst Coord)

    Système de Coordonnées, vous pouvez utiliser le choix par dé- faut (WGS 84) pour le format de carte primaire. MobileMapper Pro peut calculer votre position dans deux formats dif- férents avec pour chacun d’entre eux la possibilité d’utiliser un systè- me de coordonnées spécifique.
  • Seite 42: Enregistrer De Nouvelles Données Gps/Sig

    4. Enregistrer de nouvelles données GPS/SIG Votre récepteur devrait maintenant commencer à recevoir des satellites, ce qui va vous permettre de démarrer l’enregistre- ment de données. Vérifiez que votre position est maintenant connue par appui sur le bouton NAV et recherche du triangle “Vous êtes ici”...
  • Seite 43: Sélectionner Une Bibliothèque D'entités

    Vous disposez aussi de touches “retour arrière”, “espace” . Sélectionnez OK après avoir entré le nom. - Sélectionner une bibliothèque d’entités MobileMapper Pro utilise des listes d’entités appelées “bibliothèques d’entités” qui permettent de décrire facile- ment et rapidement les entités rencontrées sur le terrain.
  • Seite 44: Sélectionner Un Attribut

    Le récepteur est également prêt à enregistrer des descrip- tions. Le fait que le récepteur commence à enregistrer des positions alors que vous n’avez pas encore entré de des- cription n’est pas un inconvénient en soi, bien au con- traire. - Sélectionner un attribut Chaque entité...
  • Seite 45: Enregistrer Une Entité Ligne

    Puis, sélectionnez l’attribut # of bulbs. (# of bulbs est un attribut de type numérique.) Un nouvel écran s’affiche à partir duquel vous pouvez entrer le nombre d’ampoules du lampadaire. Utilisez le bouton flèche Droite ou Gauche pour positionner le curseur sur le chiffre à modifier. Utili- sez le bouton flèche Haut ou Bas pour faire défiler les valeurs 0 à...
  • Seite 46: Suspendre L'enregistrement D'une Entité

    Pour le cas présent, sélectionnez Temps. Puis, fixez la cadence à 5 secondes. Puis marchez sur une distance d’environ 30 mètres dans une direction quelconque. - Suspendre l’enregistrement d’une entité Vous allez maintenant suspendre l’enregistrement de la route. Il suffit pour cela d’appuyer sur le bouton MENU, alors que l’écran affiche l’écran Enregistrement d’entité, puis de sélectionner l’option Pause Road et enfin d’appuyer sur ENTER.
  • Seite 47: Fermer Une Entité Imbriquée

    - Fermer une entité imbriquée La fermeture d’une entité, qu’elle soit imbriquée ou non, est obtenue en sélectionnant le champ Fermer situé en bas de l’écran affichant le nom de cette entité dans sa partie supérieure. Sélectionnez le champ Fermer sur l’écran d’enregistrement du lampadaire puis appuyez sur ENTER.
  • Seite 48: Déporter Une Entité Point

    Vous pouvez dans ce cas utili- ser la fonction déport pour localiser cette entité. En com- binant la position du récepteur avec le relèvement et la distance à cette entité, MobileMapper Pro pourra calculer automatiquement et enregistrer la position de l’entité. Sélection de l’option Pour entrer un déport pour un point, sélectionnez Str light...
  • Seite 49: Enregistrer Une Surface

    Déporter un point) est cisément la totalité de la surface, il faut également que remplacé par le champ MobileMapper Pro puisse lier la dernière position enregis- Direction. Dans le trée à la première. Comme vous l’avez fait pour l’entité champ Direction, vous ligne, fixez une cadence d’enregistrement pour l’entité...
  • Seite 50: Introduction Aux Entité Grille

    - Introduction aux entité grille La fonction Cartographie de grille de MobileMapper Pro offre une façon simple d’enregistrer des positions GPS et des données SIG sur une grille de points uniformément répartis. Ceci permet de collecter des mesures effectuées avec un capteur quelconque, de manière organisée et avec un outil de navigation facile à...
  • Seite 51: Naviguer Vers Le Point Suivant

    Par conséquent, assurez-vous que vous êtes bien situé sur le coin inférieur gauche de la grille avant de démarrer l’enregistrement. L’écran d’enregistrement de la grille étant maintenant affi- ché, enregistrez vos observations et vos mesures comme vous le feriez pour n’importe quelle entité point. - Naviguer vers le point suivant Lorsque vous avez terminé...
  • Seite 52: Indicateurs De Qualité Gps

    Fermer Job (1ère option dans la liste) et appuyez sur ENTER. Il est impossible de perdre accidentellement des données avec MobileMapper Pro, sinon en ouvrant le récepteur et en égarant la carte mémoire interne, ou encore en corrompant d’une manière ou d’une autre les...
  • Seite 53: Enregistrer De Nouvelles Données Gps/Sig En Mode "Post-Traitement

    - Si un job est déjà ouvert, fermez le en appuyant sur MENU puis en sélectionnant Fermer Job - Appuyez sur LOG. MobileMapper Pro affiche l’écran de bienvenue. Cet écran affiche trois options (au lieu de deux lorsque l’option post-traitement n’est pas validée).
  • Seite 54: Décharger Les Données Dans Le Pc

    PC sur lequel tourne le logiciel MobileMapper Offi- ce. Il existe deux manières différentes de faire communiquer le récepteur MobileMapper Pro et le logiciel Mobile-Mapper Office : par le câble de données du MobileMapper Pro ou par sa carte mémoire interne (SD card).
  • Seite 55 La plupart du temps vous utiliserez le câble, comme décrit ci- après : - MobileMapper Pro est livré avec un câble de liaison de données qui se connecte à l’arrière du récepteur, sur le connecteur 4 broches (voir ci-contre) et au port série côté...
  • Seite 56: Export De Données Vers Un Sig

    Pour convertir vos données en SHP, DXF ou MIF, cliquez sur desk Map et MapInfo. Fichier puis Ouvrir pour voir les fichiers chargés dans Mobile- MobileMapper Pro Mapper Office. Cliquez sur le fichier que vous venez d’enre- peut convertir vos don- nées au format .shp...
  • Seite 57: Charger Des Fichiers Sig Dans Mobilemapper Pro

    MobileMapper Office 10.Vérifier et mettre à jour des jobs GPS/SIG existants Vous pouvez utiliser MobileMapper Pro non seulement pour localiser et décrire de nouvelles entités SIG, mais aussi pour mettre à jour des informations collectées précédemment. Cet- te fonctionnalité est particulièrement utile lorsqu’on collecte des données sur des éléments qui évoluent avec le temps :...
  • Seite 58: Ouvrir Un Job Existant

    - Ouvrir un job existant Comme pour créer un nouveau job, appuyez sur le bouton LOG. Mais cette fois, sélectionnez l’option Ouvrir job exis- tant. - Sélectionner le job à mettre à jour C’est l’écran Sélection d’un job qui s’affiche après sélec- tion de l’option Ouvrir job existant.
  • Seite 59 Choisissez un des lampadaires. Lorsque vous aurez posi- tionné le curseur sur la cible choisie, vous verrez le type La fonction Goto peut d’entité s’afficher en bas de l’écran (Str light). Appuyez être utilisée pour sur ENTER pour sélectionner cette entité. L’écran d’attri- n’importe quel point buts associés s’affiche sur lequel vous pouvez lire toutes d’intérêt stocké...
  • Seite 60 Ecran Carte Ecrans de Ecran Etat Satellites Ecran Compas Navigation Ecran vitesse Ecran Gros Caractères Appuyez sur NAV Ecran Données Ecran Position Ecran Route Dévalider les écrans Ecran Carte : Affiche une carte montrant la zone entourant votre po- inutilisées : sition courante.
  • Seite 61: Arrivée Sur L'entité

    Lors de votre déplacement vers l’entité, si vous passez devant une autre entité que vous souhaitez enregistrer, ceci est possible par appui sur le bouton LOG et ajout de cette entité au fichier job. Lorsque vous avez terminé d’enregistrer cette entité, vous pouvez revenir à l’entité cible originale et continuer de naviguer vers elle.
  • Seite 62: Re-Positionner L'entité

    MobileMapper Pro, temps sur le terrain à expérimenter le système. A l’heure du plus il vous sera aisé déjeuner par exemple, prenez le MobileMapper Pro avec vous de collecter une grande et enregistrez la position, ainsi qu’une description rapide, de quantité...
  • Seite 63 MobileMapper Pro Kurzanleitung...
  • Seite 65 Übertragen von Daten auf den PC ............18 Exportieren von Daten zu einem GIS ............20 Importieren von Daten in MobileMapper Office ........20 Übertragen von GIS-Dateien zum MobileMapper Pro......... 21 Verwenden von MobileMapper Pro zum Durchsehen und Aktualisieren bestehender GPS/GIS-Projekte ........21 Öffnen eines bestehenden Projekts .............
  • Seite 66 Glossar Feld: Jeder Bereich auf dem Bildschirm des MobileMapper Pro zur Anzeige des Wertes eines Parameters. Manche Felder können vom Anwender bearbeitet wer- den, andere nicht. Feature: Jedes Element, das sich in dem Feld befindet, das Sie zur späteren Über- tragung zum Beispiel in eine GIS-Datenbank aufzeichnen möchten.
  • Seite 67: Einführung

    1. Einführung Danke, dass Sie einen MobileMapper Pro von Magellan ge- kauft haben. Was ist MobileMapper Pro? MobileMapper Pro ist ein mobiles Navigations- und Positio- MobileMapper Pro bie- nierungssystem, das es Ihnen ermöglicht, die Features, die tet allgemeine Kartie- kartiert werden, zu beschreiben und anschließend die Daten rungs- und Verwal- zu formatieren und auf ein GIS zu übertragen.
  • Seite 68: Grundfunktionen

    - Legen Sie die beiden Batterien gemäß der Abbildung im Empfänger ein. Achten Sie dabei auf die richtige Polarität. - Schließen Sie das Batteriefach und achten Sie darauf, die Verschlussschieber ganz nach rechts zu stellen, damit das Fach wasserdicht abschließt. Grundfunktionen Unterhalb des Displays sehen Sie 8 Tasten, die um die große ovale "Scrolling"-Taste mit 4 Richtungspfeilen angeordnet...
  • Seite 69: Einschalten Des Empfängers

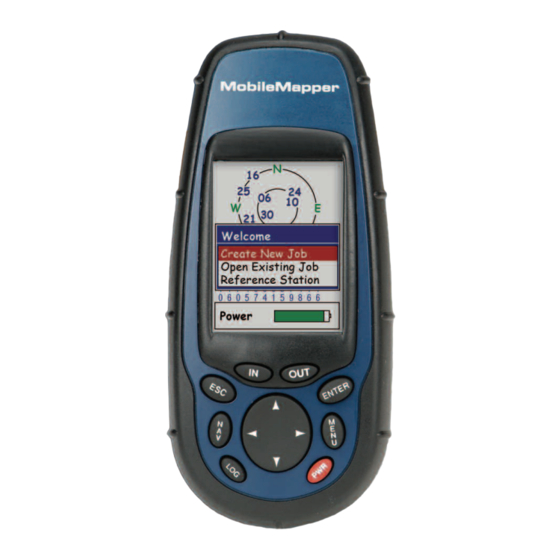
    Einschalten des Empfängers Wenn Sie die Batterien in Ihren MobileMapper Pro eingelegt haben, drücken Sie die rote Einschalttaste (PWR) auf der Vor- derseite des Empfängers. Sie sehen den MobileMapper Pro- Schnellstart: Bildschirm. Sie können entweder ein paar Sekunden warten Drücken Sie auf PWR, oder auf die ENTER-Taste drücken, damit der Copyright-Bild-...
  • Seite 70: Einrichten Des Empfängers

    Scrollen Sie nach unten zur Option Initialisieren und drücken Sie auf ENTER. Scrollen Sie auf der Liste der Kontinente nach unten, um den Kontinent hervorzuheben, auf dem Sie sich befinden, und drücken Sie dann auf die ENTER-Taste. Geben Sie auf dieselbe Weise das Land an, in dem Sie sich befinden, und drücken Sie dann ENTER.
  • Seite 71: Koordinatensystem (Koord-System)

    Koordinatensystem (Koord-System) MobileMapper Pro kann Ihre Position in einer Vielzahl von Ko- ordinatensystemen anzeigen, sowohl geografische als auch Rastersysteme. Wenn Sie nicht wissen, welches Sie verwen- den wollen, können Sie die Grundeinstellung (Br./Lä.) als pri- märes System verwenden. Sie können jederzeit alle Daten, die Sie im Feld sammeln, in das von Ihrem GIS verwendete Koor- dinatensystem umwandeln, wenn Sie zurück im Büro sind.
  • Seite 72: Protokollieren Neuer Gps/Gis-Daten

    Sie ENTER. aktiviert ist (siehe page 17) - Projektname Der Name eines MobileMapper Pro-Projekts kann eine Kombination von bis zu acht Buchstaben und/oder Zahlen sein. Zum Zwecke dieser Übung sollten Sie vielleicht die ersten vier Buchstaben Ihres Namens eingeben und vier Zahlen verwenden, um das heutige Datum anzuzeigen.
  • Seite 73: Wählen Sie Eine Featurebibliothek

    Umschalt-Taste. Wählen Sie Fertig, wenn Sie den Namen buchstabiert haben. - Wählen Sie eine Featurebibliothek MobileMapper Pro verwendet Listen von Merkmalen oder Features, die als "Featurebibliotheken" bezeichnet werden und das Beschreiben von Features im Feld leicht und schnell machen. Featurebibliotheken bestehen im Wesent-...
  • Seite 74: Auswählen Eines Attributs

    - Auswählen eines Attributs Jedes Feature kann eine Anzahl von Attributen haben. Beachten Sie, dass es drei Kategorien von Attributen gibt: • Menü-Stil, bei dem die Attributwerte Wörter oder kurze Sätze sind, die Sie aus einer Liste auswählen • Numerischer Stil, bei dem Sie eine Zahl aus einer bestimmten Spanne auswählen •...
  • Seite 75: Aufzeichnen Eines Linienfeatures

    Sie ENTER. (Nächste Hausnr ist ein Attribut- Textstil.) Verwenden Sie den Tastaturbildschirm, um den Straßennamen und die Hausnummer einzutippen, indem Sie die Pfeiltaste des MobileMapper Pro verwenden, um ein Zeichen oder Leerzeichen hervorzuheben und auf ENTER drücken, um das Zeichen zu übernehmen. Es gibt ebenfalls eine Umschaltetaste, um zwischen Groß- und...
  • Seite 76: Anhalten Des Protokollierens Eines Features

    Sie können das Detailniveau für Ihr Linienfeature wählen, indem Sie das Protokollintervall einstellen. Nach Wählen Sie für diese Übung das Protokollintervall Zeit . Stellen Sie dann das Intervall auf 5 Sekunden ein. Gehen Sie dann 30m in beliebiger Richtung. - Anhalten des Protokollierens eines Features Jetzt werden Sie das Protokollieren eines Features anhalten.
  • Seite 77: Schließen Eines Eingebetteten Features

    Features desselben Typs und mit identischer wiederholen" funktio- Beschreibung aufzeichnen wollen, können Sie die Funktion niert für jedes Punkt-, "Feature wiederholen" des MobileMapper Pro verwenden. Linien- oder Flächen- Um sich am einfachsten mit der Funktion "Feature wieder- feature - aber nicht für holen"...
  • Seite 78: Offset Eines Punktfeatures

    Dann können Sie das Feature mit der Off- set-Funktion kartieren. Durch Kombinieren der Position des Empfängers mit der Peilung und Entfernung des Fea- tures berechnet MobileMapper Pro automatisch die Posi- tion des Features und zeichnet sie auf. Um ein Offset für ein Punktfeature einzugeben, heben Auswählen der...
  • Seite 79: Aufzeichnen Eines Flächenfeatures

    Flächenfeatures begonnen haben. Der schirm ersetzt das Grund dafür ist, außer der vollständigen Kartierung des Richtungsfeld das Pei- Flächenfeatures, dass MobileMapper Pro die erste und lungsfeld (siehe vorhe- letzte Aufzeichungsposition für alle Flächenfeatures ver- rige Seite, Ermitteln bindet. Stellen Sie beim Flächenfeature wie beim Linien- eines Punktfeatures).
  • Seite 80: Rasterfeatures

    - Rasterfeatures Die Rasterkartierungsfunktion von MobileMapper Pro bie- tet eine einfache Möglichkeit, um GPS-Positionen und GIS-Daten an Wegpunkten in einem gleichmäßigen Raster zu protokollieren. Dies ermöglicht es Ihnen, Messungen von Feldsensoren in organisierter Weise mit einem einfach zu handhabenden Navigationsfeature zu sammeln.
  • Seite 81: Navigieren Zum Nächsten Rasterpunkt

    Stellen Sie daher sicher, dass Sie sich in der linken unte- ren Ecke des Rasters befinden, das Sie aufzeichnen möchten. Sie sehen jetzt den Featureattributbildschirm. Sie zeich- nen Ihre Beobachtungen oder Messungen auf, wie Sie dies für jedes Punktfeature tun würden. - Navigieren zum nächsten Rasterpunkt Wenn Sie mit dem Aufzeichnen des ersten Punktfeatures Rasterprotokoll-...
  • Seite 82: Gps-Qualitätsindikatoren

    Sie die Option Projekt schließen hervor (erste Option auf der Liste) und drücken Sie ENTER. Sie können mit einem MobileMapper Pro-Empfänger keine Daten verlieren, es sei denn, Sie öffnen den Empfänger und verlieren die interne Speicherkarte, oder wenn Sie die Daten auf der...
  • Seite 83: Aufzeichnung Neuer Gps-/Gis-Daten Im Projektmodus "Post-Processing

    • Echtzeit: In diesem Projektmodus arbeitet MobileMap- per Pro, als wäre keine Post-Processing-Option verfüg- • Post-Processing: In diesem Projektmodus zeichnet MobileMapper Pro die Daten so auf, dass ein Post-Pro- cessing mit MobileMapper Office möglich ist. In die- sem Projektmodus legt MobileMapper Pro neben den üblichen MMJ-Projektdateien auch eine Datei für...
  • Seite 84: Verwenden Von Mobilemapper Pro Als Referenzstation

    Ab und drücken Sie ENTER. Der Bildschirm führt jetzt alle in der ausgewählten Featurebibliothek verfügbaren Features auf. - Ab hier bedienen Sie MobileMapper Pro genau wie in einem Projekt ohne Post-Processing. Siehe auch Seite 7 und folgende. Wichtig ist, Sie übertragen das Projekt genau wie ein Projekt ohne Post-Processing.
  • Seite 85 Sie werden fast immer das Datenkabel verwenden, daher fan- gen wir damit an. - MobileMapper Pro enthält ein Datenkabel, das mit dem 4- Pin-Anschluss an der Rückseite des Empfängers (siehe Abbildung) verbunden werden kann und mit dem seriellen Anschluss an Ihrem PC. Wenn Sie das Kabel mit dem Empfänger und dem PC verbunden haben, schalten Sie...
  • Seite 86: Exportieren Von Daten Zu Einem Gis

    ArcView, Autodesk Map tei. und MapInfo. Um Ihre Daten in SHP, DXF oder MIF umzuwandeln, klicken MobileMapper Pro Sie auf Datei und Öffnen, um zu sehen, welche Dateien in Mo- unterstützt die Konver- tierung Ihrer Daten bileMapper Office geladen sind. Klicken Sie auf die Datei, die zum .shp-Format von...
  • Seite 87: Übertragen Von Gis-Dateien Zum Mobilemapper Pro

    10.Verwenden von MobileMapper Pro zum Durchsehen und Aktua- lisieren bestehender GPS/GIS- Projekte Sie können MobileMapper Pro nicht nur zum Positionieren und Beschreiben neuer GIS-Features verwenden, sondern auch zum Aktualisieren zuvor gesammelter Informationen. Dies ist besonders nützlich beim Sammeln von Daten über Dinge, die sich mit der Zeit ändern: Glühbirnen von Straßen-...
  • Seite 88: Öffnen Eines Bestehenden Projekts

    - Öffnen eines bestehenden Projekts Wie beim Erstellen eines neuen Projekts drücken Sie die LOG-Taste. Wählen Sie diesmal jedoch die Option Proj. öffn.. - Auswählen des Projekts, das Sie aktualisieren möchten Der erste Bildschirm, den Sie sehen, nachdem Sie die Option Proj.
  • Seite 89 Lassen Sie uns eine der Straßenbeleuchtungen auswäh- len. Wenn der Cursor über dem gewählten Ziel ist, sehen Sie den Featuretyp (Str-Bel.) unten auf dem Bildschirm angezeigt. Drücken Sie ENTER, um dieses Feature auszu- wählen. Sein Attributbildschirm wird angezeigt und Sie können alle zuvor aufgezeichneten Beschreibungen lesen.
  • Seite 90 Kartenbildschirm Navigations- Satellitenstatusbildschirm Kompassbildschirm bildschirme Tachometerbildschirm Großschriftbildschirm Drücken Sie NAV Positionsbildschirm Datenbildschirm Straßenbildschirm Abschalten nicht genutz- Bildschirm Karte: Zeigt eine Karte des Gebietes um Ihren aktuellen ter Bildschirme: Ort. Verwenden Sie die Schaltflächen EIN und AUS, um den Maßstab Da einige der verfüg- zu ändern.
  • Seite 91: Ankunft Am Feature

    Während Sie auf das Zielfeature zugehen, können Sie ein Feature kartieren, an dem Sie vorbeikommen, indem Sie die LOG-Taste drücken und zur Projektdatei hinzufügen. Wenn Sie fertig sind, können Sie das Originalzielfeature erneut auswählen und weiter zu ihm navigieren. - Ankunft am Feature Sie merken, dass Sie nahe bei dem Feature sind, wenn die Entfernung zum Ziel auf Null oder fast Null geht, oder ein- fach weil Sie es im Feld eindeutig sehen können.
  • Seite 92: Repositionieren Des Features

    Zeit lang herumzuprobieren. Nehmen Sie den Mobi- Ihrer Arbeit schneller leMapper Pro mit in die Mittagspause und kartieren Sie die zu werden. Orte und Beschreibungen Ihrer Lieblingsrestaurants. Nehmen Sie MobileMapper Pro mit auf Ihre Wochenendtouren und hal- ten Sie Ihre Ausflüge in Karten fest.
  • Seite 93 MobileMapper Pro Guía básica de utilización...
  • Seite 95 Exportar datos a un SIG................20 Importar datos a MobileMapper Office ............20 Enviar archivos SIG al MobileMapper Pro ............21 Cómo usar MobileMapper Pro para revisar y actualizar trabajos GPS/SIG existentes21 Abrir un trabajo existente..............22 Seleccionar el trabajo que desee actualizar ......... 22 Nota sobre la selección de listas de entidades al actualizar...
  • Seite 96 Véase el Manual de usuario en el CD-ROM. Registrar una entidad: Significa guardar las características de una entidad en la memoria del MobileMapper Pro. El usuario es el encargado de introducir la de- scripción de dicha entidad, mientras que el receptor se ocupa de guardar la posición o posiciones GPS que ha determinado para la entidad.
  • Seite 97: Introducción

    1. Introducción Gracias por comprar un MobileMapper Pro de Magellan. ¿Qué es MobileMapper Pro? MobileMapper Pro es un sistema portátil de navegación y po- sicionamiento que le permite describir las entidades repre- MobileMapper Pro sentadas y luego dar formato a los datos y enviarlos a un SIG ofrece funciones de (Sistema de Información Geográfica).
  • Seite 98: Funciones Básicas

    - Introduzca las dos pilas de acuerdo con el esquema que hay dentro del receptor. Asegúrese de respetar la polari- dad adecuada. - Vuelva a poner la tapa del compartimiento de las pilas, y asegúrese de deslizar las pestañas hacia la derecha, para que quede herméticamente cerrada.
  • Seite 99: Encender El Receptor

    Encender el receptor Una vez haya introducido las pilas en el MobileMapper Pro, Inicio rápido: pulse el botón rojo de encendido (PWR) en la parte frontal del Pulse PWR, espere a receptor. Verá la pantalla del MobileMapper Pro. Puede espe- que el aparato emita rar un par de segundos o bien pulsar el botón ENTER para que...
  • Seite 100: Configuración Del Receptor

    Desplácese hacia abajo hasta la opción Inicializar y pulse EN- TER. Desplácese por la lista de continentes hasta resaltar el continente en el que se encuentra, y a continuación pulse el botón ENTER. Del mismo modo, indique el país en el que se encuentra y luego pulse ENTER.
  • Seite 101: Sistema De Coordenadas (Sistema Coord.)

    (WGS 84). MobileMapper Pro puede calcular y visualizar su posición en dos da- tums de mapa distintos, cada uno de los cuales con su propio sistema de coordenadas. En esta guía sólo tiene que definir el sistema de co- Selección de WGS84...
  • Seite 102: Registro De Nuevos Datos Gps/Sig

    3ª opción (Esta- ción de referencia). - Asigne un nombre al trabajo El nombre de un trabajo MobileMapper Pro puede ser cualquier combinación de hasta ocho letras y/o números. Para la realización de este ejercicio, puede introducir las cuatro primeras letras de su nombre y luego cuatro núme- ros para indicar la fecha de hoy.
  • Seite 103: Seleccionar Una Lista De Entidades

    Mayús. Seleccione Listo cuando haya acabado de escribir el nombre. - Seleccionar una lista de entidades MobileMapper Pro emplea listas de entidades para facili- tar y agilizar la descripción de entidades sobre el terreno. Las listas de entidades constan esencialmente de tres ele-...
  • Seite 104: Seleccionar Un Atributo

    El receptor ya está listo para registrar también descripcio- nes. El receptor puede empezar a registrar posiciones GPS (de hecho resulta ventajoso hacerlo) mientras usted se prepara para grabar descripciones. - Seleccionar un atributo Cada entidad puede tener una serie de atributos. Observe que hay tres categorías de atributos: •...
  • Seite 105: Grabar Una Entidad Lineal

    Utilice la flecha a la izquierda o la derecha del MobileMapper Pro para colocar el cursor sobre el dígito que desea modificar. Utilice la fle- cha arriba o abajo para desplazarse por los números entre...
  • Seite 106: Pausar El Registro De Una Entidad

    Puede seleccionar el grado de detalle que quiere que tenga la entidad lineal definiendo el intervalo de registro. Para este ejercicio, seleccione el intervalo de registro Por tiempo. A continuación, ajuste el intervalo a 5 segundos. Acto seguido, camine unos 30 m (100 pies) en cualquier dirección.
  • Seite 107: Cerrar Una Entidad Insertada

    - Cerrar una entidad insertada Para cerrar una entidad insertada - o cualquier entidad -, debe desplazarse hasta el campo Cerrar en cualquier pan- talla de registro de entidades que muestre el nombre de la entidad en la parte superior. Resalte el campo Cerrar en la pantalla Insertar: Farola, y pulse ENTER.
  • Seite 108: Desplazamiento De Una Entidad Puntual

    Com- binando la posición del receptor con el rumbo y la distan- cia a la entidad, MobileMapper Pro calculará y grabará automáticamente la posición de la misma. Para introducir un desplazamiento para una entidad pun- Selección de la opción...
  • Seite 109: Grabar Una Entidad De Área

    Dirección reemplazará para obtener una representación completa de la entidad al campo Rumbo de área, es que MobileMapper Pro conecta la primera y la (véase la página ante- última posición de grabación en todas las entidades de rior, Desplazamiento de área.
  • Seite 110: Presentación De Entidades De Cuadrícula

    - Presentación de entidades de cuadrícula La utilidad Grid Mapping del MobileMapper Pro ofrece una manera sencilla de registrar posiciones GPS y datos SIG en waypoints dispuestos en una cuadrícula uniforme- mente espaciada. Esto le permite reunir medidas realiza- das por sensores de campo de manera ordenada con una función de navegación de fácil utilización.
  • Seite 111: Navegar Al Siguiente Punto De La Cuadrícula

    Por tanto, asegúrese de que se encuentra en la esquina inferior izquierda de la cuadrícula que desea grabar. Seguidamente, verá la pantalla de atributos de la entidad. Puede grabar sus observaciones o medidas como lo haría con cualquier entidad puntual. Pantalla de registro de cuadrícula - Navegar al siguiente punto de la cuadrícula...
  • Seite 112: Indicadores De Calidad De Gps

    Para cerrar un trabajo, pulse MENU, resalte la opción Cer- rar trabajo (la primera de la lista) y luego pulse ENTER. Con MobileMapper Pro, no pueden producirse pérdidas accidentales de datos, a menos que abra el receptor y pierda la tarjeta de memoria interna, o si daña la tarjeta...
  • Seite 113: Registro De Nuevos Datos Gps/Sig Utilizando El Modo De Trabajo "Posprocesado

    Cerrar trabajo. - Pulse LOG. MobileMapper Pro mostrará la pantalla de bienvenida. Esta pantalla muestra tres opciones (en lugar de las dos que vería en un MobileMapper Pro sin la opción Pantalla de bienvenida de posprocesado habilitada). con la opción de pospro- - Resalte Crear nuevo trabajo y pulse ENTER.
  • Seite 114: Descargar Datos Al Pc

    Uso del MobileMapper Pro como estación de refe- rencia - Monte el MobileMapper Pro en un trípode colocado sobre un punto de control y encienda el receptor. - Pulse LOG. MobileMapper Pro mostrará la pantalla de bienvenida.
  • Seite 115 La mayoría de las veces utilizará el cable de datos, de modo que empezaremos por ahí. - El MobileMapper Pro incluye un cable de comunicación de datos que se enchufa al conector de 4 patillas de la parte posterior del receptor (véase el diagrama adjunto) y al puerto serie de su PC.
  • Seite 116: Exportar Datos A Un Sig

    Para convertir los datos a formato SHP, DXF o MIF, haga clic y MapInfo. en Archivo y en Abrir para ver qué archivos están cargados en MobileMapper Pro per- el MobileMapper Office. Haga clic en el archivo que acaba de mite la conversión de datos a formato .shp de...
  • Seite 117: Enviar Archivos Sig Al Mobilemapper Pro

    10.Cómo usar MobileMapper Pro para revisar y actualizar trabajos GPS/SIG existentes Puede utilizar MobileMapper Pro no sólo para posicionar y describir nuevas entidades SIG, sino también para actualizar información recogida con anterioridad. Esto resulta particular- mente útil al recoger datos de objetos que cambien en el tiem- po: bombillas fundidas de farolas, nuevas carreteras añadidas...
  • Seite 118: Abrir Un Trabajo Existente

    - Abrir un trabajo existente Del mismo modo que cuando crea un nuevo trabajo, pulse el botón LOG. En esta ocasión, sin embargo, seleccione la opción Abrir trabajo existente. - Seleccionar el trabajo que desee actualizar La primera pantalla que aparecerá tras seleccionar la opción Abrir trabajo existente es la pantalla Selección de trabajo.
  • Seite 119 Escojamos ahora una de las farolas. Cuando el cursor esté sobre el objetivo seleccionado, verá el tipo de entidad (Farola) en la parte inferior de la pantalla. Pulse ENTER para seleccionar esta entidad. Se visualizará la pantalla de atributos de la misma, y podrá leer todas las descripciones que se han grabado anteriormente.
  • Seite 120 Pantallas de Pantalla Mapa Pantalla Estado Pantalla Brújula de satélites navegación Pantalla Velocímetro Pantalla Datos grandes Pulse NAV Pantalla Posición Pantalla Datos Pantalla Carretera Desactivación de Pantalla Mapa: Muestra un mapa de la zona alrededor de su ubicación pantallas no utilizadas: actual.
  • Seite 121: Llegar A La Entidad

    Mientras camina hacia la entidad objetivo, si pasa por una entidad que desea representar, puede hacerlo pulsando el botón LOG y añadiéndola al archivo de trabajo. Cuando haya acabado de hacerlo, puede volver a seleccionar la entidad objetivo original y seguir navegando hacia ella. - Llegar a la entidad Sabrá...
  • Seite 122: Reposicionar La Entidad

    Mientras tanto, le animamos a salir y experimentar durante un ¡Cuanto más utilice el rato. Lleve el MobileMapper Pro consigo a comer fuera y regis- MobileMapper Pro, tre las ubicaciones y descripciones de sus restaurantes favori- más sencillo le resul- tos.
  • Seite 124 Magellan follows a policy of continuous product improvement; specifications and descriptions are thus subject to change without notice. Please contact Magellan for the latest product information. ©2004-2007 Magellan Navigation, Inc. All rights reserved. MobileMapper is a trademark of Magellan Navigation, Inc. All other product and brand names are trademarks of their respective holders. P/N 631098-01D...

Inhaltsverzeichnis