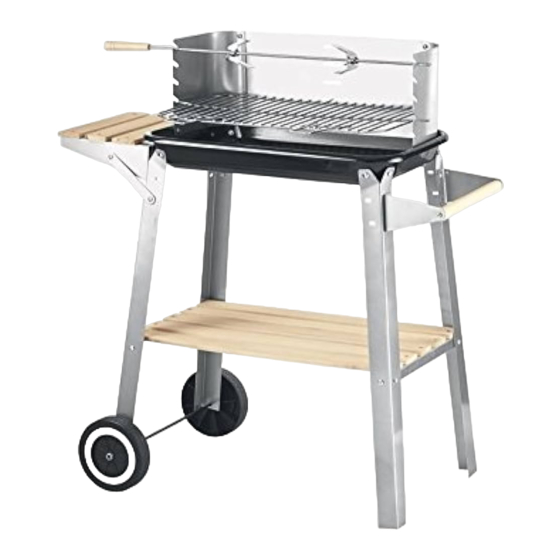
FLORABEST FGW 84 A1 Montage- Und Bedienungsanleitung
Grillwagen
Vorschau ausblenden
Andere Handbücher für FGW 84 A1:
- Montage- und bedienungsanleitung (86 Seiten) ,
- Bedienungsanleitung (76 Seiten) ,
- Betriebsanleitung (74 Seiten)
Inhaltsverzeichnis
Werbung
Verfügbare Sprachen
Verfügbare Sprachen
Quicklinks
5
KOMPERNASS GMBH · BURGSTRASSE 21 · D - 44867 BOCHUM
www.kompernass.com
ID-Nr.: FGW 84 A1-10/11-V2
IAN: 70649
Barbacoa rectangular con ruedas FGW 84 A1
GRILLWAGEN
Barbecue con carrello
®
Barbacoa rectangular con ruedas
Instrucciones de uso y de montaje
Barbecue con carrello
Montaggio e istruzioni per l'uso
Grelhador com rodas
Manual de montagem e de operação
Trolley Barbecue
Assembly and Operating Instructions
Grillwagen
Montage- und Bedienungsanleitung
Werbung
Kapitel
Inhaltsverzeichnis

Verwandte Anleitungen für FLORABEST FGW 84 A1


Inhaltszusammenfassung für FLORABEST FGW 84 A1
- Seite 1 Barbacoa rectangular con ruedas FGW 84 A1 GRILLWAGEN Barbecue con carrello ® Barbacoa rectangular con ruedas Instrucciones de uso y de montaje Barbecue con carrello Montaggio e istruzioni per l’uso Grelhador com rodas Manual de montagem e de operação Trolley Barbecue...
- Seite 2 FGW 84 A1...
-
Seite 3: Inhaltsverzeichnis
Importador ............. 12 FGW 84 A1... -
Seite 4: Introducción
Información sobre estas instrucciones de uso Estas instrucciones de uso forman parte de la barbacoa rectangular con ruedas FGW 84 A1 (denominado en lo sucesivo como aparato o barbacoa) y proporcio- nan información importante para el uso conforme a lo previsto, la seguridad, el montaje y manejo del aparato. -
Seite 5: Seguridad
8. No utilice nunca agua para apagar el carbón vegetal. ADVERTENCIA ¡Advertencia de asfi xia! ► ¡Utilice la barbacoa solamente al aire libre! ► No encienda la barbacoa en lugares cerrados o bajo superfi cies con techo. FGW 84 A1... -
Seite 6: Volumen De Suministro
2 travesaños 5 tablas de almacenamiento, largas 2 ruedas 1 eje 2 patas para ruedas 2 soportes de almacenamiento, largos 2 puntales de refuerzo 3 tablas de almacenamiento, cortas Elementos de unión M5x10 M5x12 Ø4x10 Ø5.4 M4x10 FGW 84 A1... -
Seite 7: Montaje
En aras de su seguridad y a fi n de prevenir posibles daños, las cabezas de los tornillos deben estar orientadas siempre hacia fuera. ATENCIÓN ► No apriete las uniones atornilladas hasta fi nalizar el montaje, para impe- dir que los materiales sufran tensiones innecesarias. FGW 84 A1... -
Seite 8: Pasos De Montaje
M5x12, arandelas Ø5.4, tornillos M5x10 y tuercas M5. Para esta operación deberá utilizar el orifi - cio superior de las patas fi jas M5x10 M5x10 FGW 84 A1... - Seite 9 . Atorníllelas con arandelas Ø5.4, tornillos M5x12 y tuercas M5. Paso 4 ♦ Monte las tres tablas de almacenamiento sobre el soporte de almacena- miento utilizando arandelas Ø5.4, tornillos M5x12 y tuercas M5. FGW 84 A1...
- Seite 10 2 3 4 tuercas M5 (solamente arriba). A continuación, atornille los paravientos desde dentro a la bandeja para carbón utilizando arandelas 2 3 4 Ø5.4, 2 tornillos M5x12, 3 tornillos M5x10 y tuercas M5. M5x10 M5x10 M5x10 M5x10 M5x10 FGW 84 A1...
- Seite 11 Fije las horquillas de sujeción con las armellas M4x10. ♦ Fije las dos asas a la parrilla Paso 8 ♦ Coloque la parrilla y el juego de rustidor en el paraviento 2 3 4 ♦ Para fi nalizar el montaje, apriete todas las uniones roscadas. FGW 84 A1...
-
Seite 12: Puesta En Funcionamiento
Esta circunstancia indica el estado de brasas óptimo. ■ Reparta el carbón vegetal uniformemente en la bandeja para carbón utili- zando un utensilio de metal apropiado. ■ Enganche la parrilla y empiece a cocinar. FGW 84 A1... -
Seite 13: Limpieza Y Cuidado
El material de embalaje debe desecharse de forma respetuosa con el medio ambiente. Anexo Características técnicas Dimensiones (montada) aprox. 83 x 86,5 x 43,5 cm Parrilla aprox. 48,3 x 28,3 cm Peso aprox. 7 kg Combustible Carbón vegetal Capacidad de la bandeja para max. 1 kg carbón FGW 84 A1... -
Seite 14: Garantía
Asistencia técnica Servicio España Tel.: 902 59 99 22 (0,08 EUR/Min. + 0,11 EUR/llamada (tarifa normal)) (0,05 EUR/Min. + 0,11 EUR/llamada (tarifa reducida)) E-Mail: kompernass@lidl.es IAN 70649 Importador KOMPERNASS GMBH BURGSTRASSE 21 44867 BOCHUM, GERMANY www.kompernass.com FGW 84 A1... - Seite 15 Importatore ............24 FGW 84 A1...
-
Seite 16: Introduzione
Informazioni sul presente manuale di istruzioni Il presente manuale di istruzioni è parte integrante del barbecue con carrello FGW 84 A1 (di seguito denominato apparecchio o grill) e fornisce informa- zioni importanti per l’uso conforme, la sicurezza, il montaggio e il collegamen- to nonché... -
Seite 17: Sicurezza
7. Prima della pulizia, fare raff reddare completamente il grill. 8. Non utilizzare mai acqua per spegnere la brace. AVVISO Avviso relativo al pericolo di soff ocamento! ► Utilizzare il grill solo all’aperto! ► Non utilizzare il grill in ambienti chiusi o su superfi ci coperte. FGW 84 A1... -
Seite 18: Volume Della Fornitura
5 x piani di appoggio, lunghi 2 x ruote 1 x asse 2 x puntelli delle ruote 2 x supporti, lunghi 2 x puntelli di rinforzo 3 x piani di appoggio, corti Elementi di connessione M5x10 M5x12 Ø4x10 Ø5.4 M4x10 FGW 84 A1... -
Seite 19: Montaggio
Le teste delle viti, per la sicurezza dell’utente, devono essere orientate sempre verso l’esterno, al fi ne di evitare lesioni. ATTENZIONE ► Serrare tutte le viti solo al termine del montaggio, per evitare tensioni errate del materiale. FGW 84 A1... -
Seite 20: Fasi Di Montaggio
M5 x 12, rondelle Ø5,4, viti M5 x 10 e dadi M5. In tal caso è necessario utilizzare il foro superiore del puntello di sostegno M5x10 M5x10 FGW 84 A1... - Seite 21 Fissare i cinque piani di appoggio sui puntelli trasversali . Avvitarli con rondelle Ø 5,4 viti M5x12 e dadi M5. Passaggio 4 ♦ Montare i tre piani di appoggio sui supporti tramite rondelle Ø5,4, viti M5x12 e dadi M5. FGW 84 A1...
- Seite 22 2 viti M5x10, rondelle Ø5,4 e dadi M5 2 3 4 (solo in alto). Quindi avvitare i paraventi dall’interno al vassoio 2 3 4 portacarbone tramite rondelle Ø 5,4, 2 viti M5x12 e dadi M5. M5x10 M5x10 M5x10 M5x10 M5x10 FGW 84 A1...
- Seite 23 ♦ Fissare le due maniglie alla griglia di cottura Passaggio 8 ♦ Inserire la griglia di cottura e lo spiedo completo nei paraventi 2 3 4 ♦ Infi ne, a conclusione del montaggio, serrare tutte le viti. FGW 84 A1...
-
Seite 24: Messa In Funzione
Dopo circa 20 minuti, sul carbone si creerà uno strato bianco di cenere. Ciò indica il raggiungimento di uno stato di combustione ideale. ■ Distribuire il carbone uniformemente nel vassoio portacarbone tramite un utensile di metallo idoneo. ■ Sospendere la griglia di cottura e cominciare ad arrostire. FGW 84 A1... -
Seite 25: Pulizia E Cura
Smaltire tutti i materiali dell’imballaggio in modo ecocompatibile. Appendice Dati tecnici Dimensioni (montato) ca. 83 x 86,5 x 43,5 cm Griglia di cottura ca. 48,3 x 28,3 cm Peso ca. 7 kg Combustibile Carbone di legna Capacità della vaschetta max. 1 kg portacarbone FGW 84 A1... -
Seite 26: Garanzia
Le riparazioni eseguite dopo la scadenza della garanzia sono a pagamento. Assistenza Assistenza Italia Tel.: 02 36003201 E-Mail: kompernass@lidl.it IAN 70649 Assistenza Malta Tel.: 80062230 E-Mail: kompernass@lidl.com.mt IAN 70649 Importatore KOMPERNASS GMBH BURGSTRASSE 21 44867 BOCHUM, GERMANY www.kompernass.com FGW 84 A1... - Seite 27 Importador ............. 36 FGW 84 A1...
-
Seite 28: Introdução
Introdução Informações acerca deste manual de instruções Este manual de instruções é parte integrante do grelhador com rodas FGW 84 A1 (de seguida designado de aparelho ou grelhador) e fornece-lhe indicações importantes para uma utilização correcta, segurança, montagem e operação do aparelho. -
Seite 29: Segurança
7. Deixe o grelhador arrefecer por completo antes da limpeza. 8. Nunca utilize água para apagar carvão de madeira. AVISO Aviso relativo a asfi xia! ► Utilize o grelhador apenas ao ar livre! ► Não utilize o grelhador em espaços fechados nem em superfícies cobertas. FGW 84 A1... -
Seite 30: Volume De Fornecimento
2 x rodas 1 x eixo 2 x traves para as rodas 2 x suportes de apoio, compridos 2 x traves de reforço 3 x tábuas de apoio, pequenas Elementos de ligação M5x10 M5x12 Ø4x10 Ø5.4 M4x10 FGW 84 A1... -
Seite 31: Montagem
Por motivos de segurança, as cabeças dos parafusos devem estar sempre voltadas para fora, a fi m de evitar ferimentos. ATENÇÃO ► Aperte todas as uniões roscadas depois de concluída a montagem, caso contrário, podem ocorrer indesejadas tensões do material. FGW 84 A1... -
Seite 32: Passos De Montagem
M5 x 12 parafusos, arruelas planas Ø5.4, M5 x 10 parafusos e porcas M5. Para tal, é necessário o orifício superior das traves para as rodas M5x10 M5x10 FGW 84 A1... - Seite 33 às traves transversais . Aparafuse-as com as arruelas planas Ø5.4, M5x12 parafusos e porcas M5. Passo 4 ♦ Monte as três tábuas de apoio nos suportes de apoio com as arruelas planas Ø5.4, M5x12 parafusos e porcas M5. FGW 84 A1...
- Seite 34 , a partir do 2 3 4 interior, na bandeja para carvão através de arruelas planas Ø5.4, 2 M5x12 parafusos, 3 M5x10 parafusos e porcas M5. M5x10 M5x10 M5x10 M5x10 M5x10 FGW 84 A1...
- Seite 35 Fixe as pinças para carne com os parafusos com olhal M4x10. ♦ Fixe ambas as pegas na grelha Passo 8 ♦ Insira a grelha e o conjunto de espetos na protecção contra o vento 2 3 4 ♦ Aperte todas as uniões roscadas para concluir a montagem. FGW 84 A1...
-
Seite 36: Colocação Em Funcionamento
Após 20 minutos, forma-se uma camada branca de cinzas sobre o carvão ■ de madeira. Agora foram conseguidas as condições ideais para grelhar. ■ Distribua o carvão uniformemente na bandeja com uma ferramenta de metal adequada. ■ Coloque a grelha e inicie os grelhados. FGW 84 A1... -
Seite 37: Limpeza E Tratamento
Elimine todos os materiais da embalagem de forma ecológica. Anexo Dados técnicos Dimensões (montado) aprox. 83 x 86,5 x 43,5 cm Grelha aprox. 48,3 x 28,3 cm Peso aprox. 7 kg Combustível Carvão de madeira Capacidade da bandeja para max. 1 kg carvão FGW 84 A1... -
Seite 38: Garantia
Depois de expirada a garantia, as reparações necessárias estão sujeitas a pagamento. Assistência Técnica Assistência Portugal Tel.: 70778 0005 (0,12 EUR/Min.) E-Mail: kompernass@lidl.pt IAN 70649 Importador KOMPERNASS GMBH BURGSTRASSE 21 44867 BOCHUM, GERMANY www.kompernass.com FGW 84 A1... - Seite 39 Importer ............. . . 48 FGW 84 A1...
-
Seite 40: Introduction
Introduction Information for these operating instructions These operating instructions are a component of the Trolley Barbeque FGW 84 A1 (hereafter referred to as the appliance or grill) and they supply you with impor- tant information about the intended use, safety and assembly as well as operation of the appliance. -
Seite 41: Safety
7. Allow the grill to cool down completely before cleaning it. 8. NEVER use water to extinguish the glowing charcoal. WARNING Warning in regard to suff ocation! ► Use the grill ONLY outdoors! ► Do NOT operate the grill in enclosed spaces or roofed-over areas. FGW 84 A1... -
Seite 42: Items Supplied
2 x Cross braces 5 x Storage slats, long 2 x Wheels 1 x Axle 2 x Wheel brace 2 x Storage holder, long 2 x Reinforcing braces 3 x Storage slats, short Connection elements M5x10 M5x12 Ø4x10 Ø5.4 M4x10 FGW 84 A1... -
Seite 43: Assembly
WARNING Warning about physical injuries! ► To avoid possible injury, the screw heads should always face outwards. IMPORTANT ► First tighten all screw connections down when the assembly is complete, this will help avoid undesirable material tensions. FGW 84 A1... -
Seite 44: Assembly Procedure
, with the assembled handle, to the right of the fi re bowl by means of M5 x 12 screws, washers Ø 5.4, M5x10 screws and nuts M5. For this, use the upper hole in the stand braces M5x10 M5x10 FGW 84 A1... - Seite 45 . Screw these together by means of the washers Ø 5.4, M5x12 screws and nuts M5. Step 4 ♦ Assemble the three storage slats on the storage holder by means of the washers Ø 5.4, M5x12 screws and nuts M5. FGW 84 A1...
- Seite 46 Ø 5.4 and nuts M5 (only at the top). When done, screw the wind protector elements from inside onto the fi rebowl by means of 2 3 4 the washers Ø 5.4, 2 M5 x 12 screws, 3 M5 x 10 screws and nuts M5. M5x10 M5x10 M5x10 M5x10 M5x10 FGW 84 A1...
- Seite 47 Assemble the two handles onto the grill grate Step 8 ♦ Place the grill grate and the skewer garniture into the wind protector 2 3 4 ♦ To fi nish the assembly, tighten all screw connections fi rmly. FGW 84 A1...
-
Seite 48: Initial Use
After about 20 minutes the charcoal will display a white coating of ash. The optimal burning temperature has now been reached. ■ Distribute the charcoal, using a suitable metallic implement, evenly in the fi rebowl. ■ Insert the grill grate and start the barbecue. FGW 84 A1... -
Seite 49: Cleaning And Care
Dispose of all packaging materials in an environmentally friendly manner. Appendix Technical data Dimensions (assembled) approx. 83 x 86.5 x 43.5 cm Grill grate approx. 48.3 x 283 cm Weight approx. 7 kg Fuel Charcoal Firebowl capacity max. 1 kg FGW 84 A1... -
Seite 50: Warranty
Repairs made after the lapse of the warranty period are subject to charge. Service Service Great Britain Tel.: 0871 5000 720 (£ 0.10/Min.) E-Mail: kompernass@lidl.co.uk IAN 70649 Service Malta Tel.: 80062230 E-Mail: kompernass@lidl.com.mt IAN 70649 Importer KOMPERNASS GMBH BURGSTRASSE 21 44867 BOCHUM, GERMANY www.kompernass.com FGW 84 A1... - Seite 51 Importeur ............. . 60 FGW 84 A1...
-
Seite 52: Einführung
Einführung Einführung Informationen zu dieser Bedienungsanleitung Diese Bedienungsanleitung ist Bestandteil des Grillwagens FGW 84 A1 (nachfolgend als Gerät oder Grill bezeichnet) und gibt Ihnen wichtige Hinweise für den bestimmungsgemäßen Gebrauch, die Sicherheit, den Aufbau sowie die Bedienung des Gerätes. Die Bedienungsanleitung muss ständig in der Nähe des Gerätes verfügbar sein. -
Seite 53: Sicherheit
7. Lassen Sie den Grill vor der Reinigung vollständig abkühlen. 8. Verwenden Sie niemals Wasser zum Löschen der Holzkohle. WARNUNG Warnung vor Erstickung! ► Verwenden Sie den Grill nur im Freien! ► Betreiben Sie den Grill nicht in geschlossenen Räumen, oder auf überdach- ten Flächen. FGW 84 A1... -
Seite 54: Lieferumfang
2 x Griff halter, kurz 2 x Standstrebe 2 x Querstrebe 5 x Ablagebrett, lang 2 x Rad 1 x Achse 2 x Radstrebe 2 x Ablagehalter, lang 2 x Verstärkungsstrebe 3 x Ablagebrett, kurz Verbindungselemente M5x10 M5x12 Ø4x10 Ø5.4 M4x10 FGW 84 A1... -
Seite 55: Montage
Warnung vor Verletzungen! ► Die Schraubenköpfe sollten zu Ihrer Sicherheit immer nach außen zeigen, um Verletzungen zu vermeiden. ACHTUNG ► Ziehen Sie erst nach Beendigung der Montage alle Schraubverbindungen fest an, sonst kommt es zu unerwünschten Materialspannungen. FGW 84 A1... -
Seite 56: Montageschritte
Sie diesen mittels Ø4x10-Holzschrauben fest. ♦ Montieren Sie die Standstreben mit dem montierten Griff rechts an die Kohleschüssel mittels M5 x 12-Schrauben, Unterlegscheiben Ø5.4, M5 x 10-Schrauben und Muttern M5. Hierfür wird das obere Loch der Stand- streben benötigt. M5x10 M5x10 FGW 84 A1... - Seite 57 Fixieren Sie die fünf Ablagebretter auf den Querstreben . Verschrauben Sie diese mittels Unterlegscheiben Ø5.4, M5x12-Schrauben und Muttern M5. Schritt 4 ♦ Montieren Sie die drei Ablagebretter auf die Ablagehalter mittels Unterlegscheiben Ø5.4, M5x12-Schrauben und Muttern M5. FGW 84 A1...
- Seite 58 2 3 4 Unterlegscheiben Ø5.4 und Muttern M5 (nur oben). Danach verschrauben Sie die Windschutzteile von innen an der Kohleschüssel mittels 2 3 4 Unterlegscheiben Ø5.4, 2 M5x12-Schrauben, 3 M5x10-Schrauben und Muttern M5. M5x10 M5x10 M5x10 M5x10 M5x10 FGW 84 A1...
- Seite 59 ♦ Befestigen Sie die beiden Handgriff e am Grillrost Schritt 8 ♦ Setzen Sie den Grillrost und die Spießgarnitur in den Windschutz ein. 2 3 4 ♦ Ziehen Sie zum Abschluss der Montage alle Schraubverbindungen fest an. FGW 84 A1...
-
Seite 60: Inbetriebnahme
Nach ca. 20 Minuten zeigt sich auf der Holzkohle eine weiße Ascheschicht. Der optimale Glutzustand ist nun erreicht. ■ Verteilen Sie die Holzkohle, mit einem geeigneten Metallwerkzeug, gleich- mäßig in der Kohleschüssel. ■ Hängen Sie den Grillrost ein und beginnen Sie mit dem Grillen. FGW 84 A1... -
Seite 61: Reinigung Und Pfl Ege
Führen Sie alle Verpackungsmaterialien einer umweltgerechten Entsorgung zu. Anhang Technische Daten Maße (montiert) ca. 83 x 86,5 x 43,5 cm Grillrost ca. 48,3 x 28,3 cm Gewicht ca. 7 kg Brennstoff Holzkohle Fassungsvermögen Kohleschüssel max. 1 kg FGW 84 A1... -
Seite 62: Garantie
IAN 70649 Service Österreich Tel.: 0820 201 222 (0,15 EUR/Min.) E-Mail: kompernass@lidl.at IAN 70649 Service Schweiz Tel.: 0842 665566 (0,08 CHF/Min., Mobilfunk max. 0,40 CHF/Min.) E-Mail: kompernass@lidl.ch IAN 70649 Importeur KOMPERNASS GMBH BURGSTRASSE 21 D-44867 BOCHUM www.kompernass.com FGW 84 A1...