Herunterladen Inhalt Inhalt Diese Seite drucken

Werbung

Verfügbare Sprachen
  • DE

Verfügbare Sprachen

  • DEUTSCH, seite 26

Werbung

Inhaltsverzeichnis
loading

Inhaltszusammenfassung für Devon & Devon Claridge

  • Seite 2: Prima Di Iniziare

    Vi ringraziamo per aver scelto un prodotto Devon&Devon. Vi preghiamo cortesemente di leggere questo manuale prima di installare il prodotto. PRIMA DI INIZIARE Verificare le predisposizioni d’impianto necessarie prima del montaggio. Verificare la presenza di tutti gli articoli al’interno dell’imballo tramite il Packing List riportato alla pagina seguente.
  • Seite 3: Packing List

    PACKING LIST (STRUTTURA) A: Gambe (x2) B: Fasce laterali (x2) C: Fascia frontale (x1) D: Viti e tasselli per fissaggio a muro (x4) E: Chiave a brugola (x1)
  • Seite 4 PACKING LIST (PIANO) F: Alzatina (x1) G: Fasce laterali (x2) H: Top in marmo (x1) I: Fascia frontale (x1)
  • Seite 5 PACKING LIST (LAVABO) J: Lavabo in ceramica (x1) K: Staffe fissaggio lavabo (x4) L: Viti fissaggio (x4) M: Dadi fissaggio (x4) N: Rondelle per viti di fissaggio (x4)
  • Seite 6: Istruzioni Di Montaggio

    ISTRUZIONI DI MONTAGGIO Rimuovere la struttura metallica, il top in marmo e il lavabo con i relativi accessori dai loro imballi per poter assemblare la struttura metallica e le fasce del top in marmo. Ogni fascia,laterale (B) o frontale (C), risulta composta da tre parti: fascia metallica esterna in finitura (1), fascia metallica interna non in finitura (2) e fascia intermedia in marmo (3).
  • Seite 7 Una volta che il silicone si è Prendere le gambe (A) e asciugato, unire fascia allentare leggermente le viti a metallica interna non in finitura brugola. (2) dalla parte non lucidata in marmo. Ripetere lo stesso assemblaggio per le fasce laterali. Qualora sia stata svitata eccessivamente una delle viti a brugola ed abbiate difficoltà...
  • Seite 8 Assemblare la gamba e la fascia frontale in modo che le viti a brugola vadano ad inserirsi nei due tagli a “U” presenti sulla fascia. Serrare le viti a brugola con Ripetere stesso la chiave apposita. procedimento per il fissaggio dell’altra gamba.
  • Seite 9 Montare con la stessa procedura anche le fasce laterali. Si noti che le fasce laterali hanno una sola estremità dotata di tagli a “U”. L’altra estremità ha, invece, due fori che servono per il fissaggio a muro. Presentare a muro la struttura così assemblata, verificando il posizionamento con una livella in direzione parallela ed ortogonale al muro.
  • Seite 10 Tracciare i fori a muro per Rimuovere la struttura dal il montaggio dei 4 tasselli di muro, eseguire le forature e fissaggio (D). inserire i tasselli a muro. Posizionare di nuovo la struttura appoggiandola a muro e bloccarla con le viti in dotazione. Appoggiare il marmo (H), dalla parte lucidata, su una superficie piana, facendo attenzione a non danneggiarlo e a non graffiarlo.
  • Seite 11 Applicare il silicone sul bordo superiore del lavabo (J). Posizionare il lavabo sulla superficie non lucidata del top in marmo e verificare che il posizionamento sia corretto, prima che il silicone si asciughi.
  • Seite 12 Fissare il lavabo al top con le staffe (K), le viti (L), i dadi (M) e le rondelle (N). Si noti che il lavabo ha 4 punti di fissaggio. Stringere le viti ed i dadi Posizionare l’insieme con una chiave da 10 mm. top-lavabo sopra la struttura fissata a muro.
  • Seite 13 Applicare il silicone sulla Posizionare l’alzatina faccia posteriore (non lucidata) centrandola rispetto al top e poi dell’alzatina (F). appoggiarla correttamente a muro. Verificare che la posizione dell’alzatina sia esatta prima dell’asciugatura del silicone. Al termine la consolle dovrà apparire come mostrato nella figura.
  • Seite 14: Before You Begin

    Thank you for choosing a Devon&Devon product. Please read this manual before installing the product. BEFORE YOU BEGIN Please check the existing layout of the system required before assembly. Verify the presence of all items inside the package using the Packing List included in the following page.
  • Seite 15 PACKING LIST (STRUCTURE) A: Metal legs (x2) B: Side panels (x2) C: Front panel (x1) D: Screws and rawlplugs for fastening to wall (x4) E: Allen wrench (x1)
  • Seite 16 PACKING LIST (TOP) F: Splashback (x1) G: Side panels (x2) H: Marble counter top (x1) I: Front panel (x1)
  • Seite 17 PACKING LIST (BASIN) J: Ceramic basin (x1) K: Basin fastening brackets (x4) L: Lock screws (x4) M: Nuts (x4) N: Washers for lock screws (x4)
  • Seite 18 ASSEMBLY INSTRUCTIONS Unpack the metal structure, the marble counter top and basin and related accessories in order to assemble the metal structure and panels of the marble counter top. Each panel (side (B) or front (C)) consists of three parts: external metal cornice (1), internal metal backing strip (2) and intermediate strip of marble (3).
  • Seite 19 Once the silicone has set, Take the legs (A) and slightly apply the internal backing strip loosen the Allen screws. (2) from the non- polished side of the marble. Repeat the same operations for the side panels. In the case of excess loosening of the one of the Allen screws and difficulty in retightening this, the cover on the top of the leg can be removed using a 17-mm pipe wrench.
  • Seite 20 Assemble the leg and the front panel so that the Allen screws are inserted in the two U-shaped cuts in the panel. Tighten the Allen screws with Repeat the same operations the specific wrench. for the other leg.
  • Seite 21 With the same procedure, fit the side panels. Note that only one end of the side panels has the U-shaped cuts. The other end has two holes for fastening to the wall. Lean the structure you have just assembled against the wall. Using a level, check that the structure is parallel and perpendicular to the wall.
  • Seite 22 Mark the fastening holes of Remove the structure from the rawlplugs (D) on the wall. the wall, drill the holes and insert the rawlplugs. Reposition the structure resting this on the wall and secure it with the screws provided. Rest the marble (H) on its polished side on a flat surface, taking care not to damage or scratch it.
  • Seite 23 Apply a bead of silicon on the upper edge of the basin (J). Position the basin on the unpolished surface of the marble counter top and check correct positioning before the silicone sets.
  • Seite 24 Fasten the basin to the top with the brackets (K), screws (L), bolts (M) and washers (N). Note that the basin has four fastening points. Tighten the screws and Position the top-basin nuts with a 10-mm wrench. structure above the structure fastened to the wall.
  • Seite 25 Apply silicon to the rear Position the splashback, side (not polished) of the centring this in relation to the splashback (F). top and then rest it correctly against the wall. Check precise positioning of the splashback before the silicone sets. Once you have finished, the console should look as shown.
  • Seite 26: Bevor Sie Anfangen

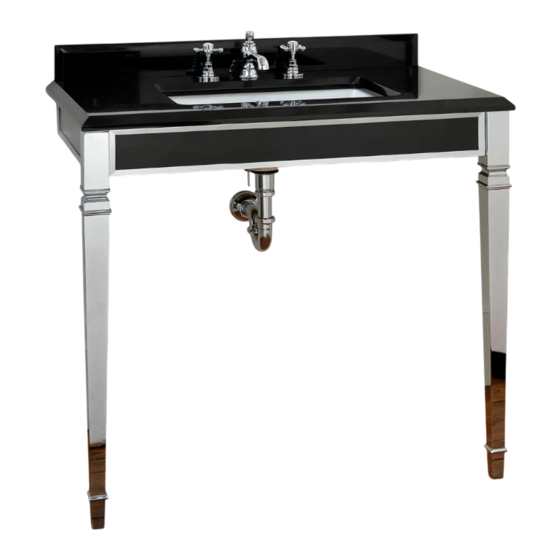
    Wir danken Ihnen, dass Sie sich für ein Produkt von Devon&Devon entschieden haben und bitten Sie, diese Anleitung zu lesen, bevor Sie das Produkt installieren. BEVOR SIE ANFANGEN Überprüfen Sie vor der Montage die nötigen Vorrichtungen in IhremBadezimmer. Überprüfen Sie mit Hilfe der Packing List auf der nächsten Seite, ob in der Verpackung alle Artikel vorhanden sind.
  • Seite 27 PACKING LIST (GESTELL) A: Metallbeine (x2) B: Seitenleisten (x2) C: Frontalleiste (x1) D: Schrauben und Dübel zur Wandfixierung (x4) E: Inbusschlüssel (x1)
  • Seite 28 PACKING LIST (TOP) F: rückwärtiger Wandabschluss (x1) G: Seitenleisten (x2) H: Marmorablage (x1) I: Frontalleiste (x1)
  • Seite 29 PACKING LIST (WASCHBECKEN) J: Keramikwaschbecken (x1) K: Fixierungsbügel Waschbecken (x4) L: Fixierungsschrauben (x4) M: Fixiermuttern (x4) N: Unterlegscheiben für Fixierungsschrauben (x4)
  • Seite 30 MONTAGEANLEITUNG Die Metallstruktur, die Marmorablage, das Waschbecken und die dazugehörigen Zubehörteile von den entsprechenden Verpackungsteilen befreien, um die Metallstruktur und die Marmorleisten zusammenstellen zu können. Jede Leiste (seitlich (B) oder frontal (C)) ist aus drei Teilen zusammengesetzt: polierter Außenrahmen Metall (1), unbearbeiteter Innenrahmen aus Metall (2) und Leiste aus Marmor (3).
  • Seite 31 Sobald der Silikon trocken An den Beinen (A) die ist, nicht bearbeitete Inbusschrauben leicht lockern. Innenleiste (2) auf das nicht poliere Marmor auflegen. Die Prozedur für die Seitenleisten wiederholen. Sollte sich eine der Inbusschrauben zu sehr gelockert haben und sollte es schwierig werden, sie wieder festzuziehen, ist es möglich, die Abdeckung an der Spitze des Beines mit einem Steckschlüssel 17 mm zu entfernen.
  • Seite 32 Das Bein und die Frontleiste so zusammenstellen, dass sich die Inbusschrauben in die beiden U-förmigen Öffnungen auf der Leiste einfügen. Nun die Inbusschrauben mit Die gleiche Prozedur für die dem entsprechenden Schlüssel Anbringung des anderen Beins festziehen. wiederholen.
  • Seite 33 Genauso auch die Seitenleisten montieren. An diesen Leisten befindet sich eine einzige U-förmige Öffnung. Die andere Extremität weist hingegen zwei Bohrungen auf, die dazu dienen, die Struktur an die Wand zu befestigen. Das Möbel nun an die Wand stellen. Mit Hilfe einer Wasserwaage die Positionierung der Struktur sowohl parallel als auch rechtwinklig zur Wand nachprüfen.
  • Seite 34 Nun Markierungen an der Die Struktur von der Wand Wand vornehmen für die 4 entfernen, die Bohrungen vornehmen Fixierungsdübel (D). und die Dübel einführen. Nun die Struktur erneut an die Wand stellen und sie mit den gelieferten Schrauben fixieren. Die Marmorablage (H) mit der polierten Seite auf eine glatte Fläche legen und dabei besonders darauf achten, sie nicht zu beschädigen oder zu verkratzen.
  • Seite 35 SilikonaufdenoberenRand des Waschbeckens (J) anbringen. Das Waschbecken auf die nicht polierte Seite der Marmorablage positionieren und die korrekte Ausrichtung prüfen, bevor das Silikon trocknen kann.
  • Seite 36 Das Waschbecken an die Marmorablage mittels der Bügel (K), der Schrauben (L), der Muttern (M) und der Unterlegscheiben (N) fixieren. Das Waschbecken hat 4 Fixierungspunkte. Schrauben und Muttern mit Das so zusammengesetzte einem 10mm Gabelschlüssel Waschbecken festziehen. Wandstruktur stellen.
  • Seite 37 Silikon auf die hintere (nicht Den rückwärtigen Wandabschluss polierte) Seite des rückwärtigen so positionieren, dass er gegenüber der Wandabschlusses (F) anbringen. Marmorablage zentriert ist und ihn dann korrekt an die Wand fixieren. Darauf achten, dass der rückwärtige Wandabschluss exakt positioniert ist, bevor das Silikon trocken ist.
  • Seite 38: Avant De Commencer

    Nous vous remercions d’avoir choisi un produit Devon&Devon et vous prions de lire ce manuel avant d’installer le produit. AVANT DE COMMENCER Vérifier les dispositions d’installation nécessaires avant le montage. Vérifier la présence de tous les articles à l’intérieur de l’emballage grâce à...
  • Seite 39: Liste Des Accessoires

    LISTE DES ACCESSOIRES (STRUCTURE) A: Pattes métalliques (x2) B: Bandes latérales (x2) C: Bande frontal (x1) D: Vis et chevilles de fixation au mur (x4) E: Clé Allen (x1)
  • Seite 40 LISTE DES ACCESSOIRES (PLAN) F: Rehausse (x1) G: Bandes latérales (x2) H: Dessus en marbre (x1) I: Bande frontal (x1)
  • Seite 41 LISTE DES ACCESSOIRES (LAVABO) J: Lavabo en céramique (x1) K: Etriers de fixation lavabo (x4) L: Vis de fixation (x4) M: Ecrous de fixation (x4) N: Rondelles pour vis de fixation (x4)
  • Seite 42: Montage

    MONTAGE Enlever de l’emballage la structure métallique, le dessus en marbre et le lavabo avec leurs accessoires afin de pouvoir assembler la structure métallique et les bandes du dessus en marbre. Chaque bande, latérale (B) ou frontale (C), est formée de trois parties: bande métallique extérieure finie (1), bande métallique intérieure non finie (2) et bande intermédiaire en marbre (3).
  • Seite 43 Une fois que la silicone s’est Prendre les jambes (A) et essuyée, joindre bande desserrer légèrement les vis à métallique intérieure non finie six pans. (2) du côté non poli en marbre. Répéter le même assemblage pour les bandes latérales. Si l’une des vis à...
  • Seite 44 Assembler la patte et la bande frontale de manière à ce que les vis à six pans s’insèrent dans les deux découpes en “U” présentes sur la bande. Serrer les vis à six pans au Répéter la même procédure moyen d’une clé appropriée. pour fixer l’autre patte.
  • Seite 45 En suivant la même procédure, monter les bandes latérales. Il faut remarquer que les bandes latérales n’ont qu’une extrémité dotée de découpes en “U”, alors que l’autre extrémité a deux trous qui servent pour la fixation au mur. Adosser au mur la structure ainsi assemblée, en vérifiant le positionnement à...
  • Seite 46 Percerlestrousaumurpour Enlever la structure du mur, monter les 4 chevilles de réaliser les trous et introduire fixation (D). les chevilles dans le mur. Positionner à nouveau la structure en l’adossant au mur et la bloquer au moyen des vis fournies. Appuyer le marbre (H) du côté...
  • Seite 47 Appliquer la silicone sur le bord supérieur du lavabo (J). Positionner le lavabo sur la surface non polie du dessus en marbre et vérifier que la position est correcte avant que la silicone ne s’essuie.
  • Seite 48 Fixer le lavabo au dessus à l’aide des étriers (K), des vis (L), des écrous (M) et des rondelles (N). Remarquer que le lavabo a 4 points de fixation. Serrer les vis et les écrous Positionner l’ensemble au moyen d’une clé de 10 mm. dessus-lavabo sur la structure fixée au mur.
  • Seite 49 Appliquer la silicone sur la Positionner la rehausse en face arrière (non polie) de la le centrant par rapport au rehausse (F). dessus et ensuite l’adosser correctement au mur. Vérifier que l’exactitude de la position de la rehausse avant que la silicone ne sèche.
  • Seite 50: Antes De Comenzar

    Les agradecemos por haber elegido un producto Devon&Devon. Les rogamos que lean este manual antes de instalar el producto. ANTES DE COMENZAR Comprobar las predisposiciones para instalación necesarias antes del montaje. Comprobar que todos los artículos se encuentran en el interior del embalaje mediante la lista de contenido (ver página siguiente) y que ninguno de sus componentes presenta defectos visibles.
  • Seite 51 LISTA DE CONTENIDO (ESTRUCTURA) A: Patas metálicas (x2) B: Barras planas laterales (x2) C: Barra plana frontal (x1) D: Tornillos y tacos para fijacion en la pared (x4) E: Llave Allen (x1)
  • Seite 52 LISTA DE CONTENIDO (ENCIMERA) F: Respaldo (x1) G: Barras planas laterales (x2) H: Encimera de mármol (x1) I: Barra plana frontal (x1)
  • Seite 53 LISTA DE CONTENIDO (LAVABO) J: Lavabo de cerámica (x1) K: Platinas de fijación del lavabo (x4) L: Tornillos de fijación (x4) M: Tuercas de fijación (x4) N: Arandelas para tornillos de fijación (x4)
  • Seite 54: Instrucciones De Montaje

    INSTRUCCIONES dE MONTAJE Saque de sus embalajes la estructura metálica, la encimera de mármol y el lavabo con sus correspondientes accesorios para poder ensamblar la estructura metálica y las barras de la encimera de mármol. Cada barra plana (lateral B) o frontal (C) está compuesta por tres partes: barra plana metálica exterior con acabado (1), barra plana metálica interior sin acabado (2) y barra intermedia de mármol (3).
  • Seite 55 Una vez que la silicona se ha Coja las patas (A) y afloje secado, úna la cara metálica ligeramente los tornillos Allen. interior sin acabado de la barra (2) a la parte sin pulir de mármol. Repita el mismo ensamblaje a la hora de montar las barras planas laterales.
  • Seite 56 Ensamble la pata y la barra plana frontal de manera que los tornillos Allen se inserten en los dos cortes en “U” situados en la barra. Apriete los tornillos Allen Repita los mismos pasos utilizando la específica llave. para fijar la otra pata.
  • Seite 57 Monte del mismo modo las barras planas laterales. Nótese que las barras planas laterales tienen solamente uno de los extremos con el corte en “U”. El otro extremo tiene, en cambio, dos agujeros que sirven para fijarla a la pared. Apoye en el muro la estructura tal y como la ha ensamblado, comprobando la posición con un nivel en dirección paralela y ortogonal respecto a la pared.
  • Seite 58 Marque en la pared los Aparte la estructura de la pared, agujeros para montar los 4 haga los agujeros en las marcas e tacos de fijación. introduzca en ellos los tacos. Vuelva a colocar la estructura apoyándola en la pared y bloquéela con los tornillos proporcionados.
  • Seite 59 Aplique la silicona en el borde superior del lavabo (J). Coloque el lavabo sobre la superficie no pulida de la encimera de mármol y compruebe que la colocación sea correcta, antes de que se seque la silicona.
  • Seite 60 Fije el lavabo a la encimera utilizando las platinas (K), los tornillos (L), las tuercas (M) y las arandelas (N). Nótese que el lavabo tiene 4 puntos de fijación. Apriete los tornillos y las Coloque conjunto tuercas utilizando una llave encimera-lavabo encima de la inglesa de 10 mm.
  • Seite 61 Aplique la silicona en la Coloque el respaldo en parte de atrás (la que no está posición central respecto a la pulida) del respaldo. encimera y, después, apóyelo correctamente en la pared. Compruebe que la posición del respaldo sea justa, antes de que se seque la silicona.
  • Seite 62: Перед Началом Сборки

    Благодарим за выбор изделия Devon&Devon. Перед установкой внимательно прочитайте настоящую инструкцию ПЕРЕД НАЧАЛОМ СБОРКИ Перед тем, как приступать к сборке, убедиться в наличии всех элементов структуры. Проверить наличие всех деталей внутри упаковки, в соответствии с Упаковочным листом, приведенным на следующей странице. Убедиться, что...
  • Seite 63 УПАКОВОЧНЫЙ ЛИСТ (ОСНОВНАЯ КОНСТРУКЦИЯ) A: Ножки металлические (x2) B: Пояса боковые (x2) C: Пояс переднии (x1) D: Винты с дюбелями для крепления к стене (x4) E: Ключ–шестигранник торцевои (x1)
  • Seite 64 УПАКОВОЧНЫЙ ЛИСТ (ТОП) F: Бортик (x1) G: Пояса боковые (x2) H: Столешница мраморная (x1) I: Пояс переднии (x1)
  • Seite 65 УПАКОВОЧНЫЙ ЛИСТ (РАКОВИНА) J: Раковина (x1) K: Скобы крепежные (x4) L: Винты крепежные (x4) M: Гайки крепежные (x4) N: Шайбы для винтов крепежных (x4)
  • Seite 66: Инструкция По Сборке

    ИНСТРУКЦИЯ ПО СБОРКЕ Извлеките из упаковки металлическую конструкцию, мраморный топ и раковину с их принадлежностями, для сборки металлической конструкции и поясов мраморного топа. Каждый боковой (В) и передний (С) пояс состоит из трех деталей: наружного металлического пояса с отделкой (1), внутреннего металлического пояса без...
  • Seite 67 После высыхания силикона Возьмите ножки (А), слегка закрепите внутренний ослабьте винты с головками металлический пояс без под ключ-шестигранник. отделки (2) на неполированной стороне мрамора. Таким же образом соберите боковые пояса. Если вы слишком сильно вывернули винт под ключ-шестигранник и не можете потом ввинтить его, можно снять крышку с верхней части...
  • Seite 68 Соедините ножку с передним поясом так, чтобы винты под шестигранный ключ вошли в U-образные вырезы, имеющиеся в поясе. Затяните винты Таким же образом соответствующим торцевым прикрепите вторую ножку. шестигранным ключом.
  • Seite 69 Тем ж е способом прикрепите боковые пояса. Следует учесть, что на боковых поясах U-образные вырезы имеются только на одном конце. На другом их конце расположены два отверстия для крепления к стене. Приставьте собранную конструкцию к стене. Проверьте с помощью уровня горизонтальность и перпендикулярность её положения...
  • Seite 70 Наметьте на стене точки Отставьте в сторону расположения 4 крепежных конструкцию, просверлите дюбелей (D). отверстия, вставьте дюбели в стену. Снова приставьте конструкцию к стене и закрепите имеющимися в комплекте винтами. Положите мраморную столешницу (Н) полированной стороной вниз так, чтобы не повредить её и не поцарапать.
  • Seite 71 Нанесите силикон на верхний борт раковины (J). Установите раковину на неполированную поверхность мраморной столешницы, проверьте правильность её положения до высыхания герметика.
  • Seite 72 Прикрепите раковину к столешнице с помощью скоб (K), винтов (L), гаек (M) и шайб (N). Следует помнить, что раковина крепится таким способом в 4 местах. Затяните болты ключом Поставьте собранные топ на 10 мм. с раковиной на установленную у стены конструкцию.
  • Seite 73 Нанесите силиконовый Установите бортик на герметик на заднюю поверхност раковину вровень с её краями (неполированную) бортика (F). и прижмите к стене. Проверьте правильность положения бортика до высыхания силикона.
  • Seite 74 Devon & Devon Viale A.Volta, 46 - 50131 Firenze Tel. 0039 055 5001173 - Fax 0039 055 5000628 www.devon-devon.com email: office@devon-devon.com...

Inhaltsverzeichnis