Herunterladen Inhalt Inhalt Diese Seite drucken

Werbung

Verfügbare Sprachen

Verfügbare Sprachen

Lama d'aria
Air Curtain Unit
Luftschleier-Einheit
LC
mod.
ISTRUZIONI PER INSTALLAZIONE, USO E MANUTENZIONE
INSTRUCTIONS FOR INSTALLATION, USE AND MAINTENANCE
HANDBUCH FUR INSTALLATION, GEBRAUCH UND WARTUNG
E 01/18
D 01/18
Cod. 4050400

Werbung

Inhaltsverzeichnis
loading

Inhaltszusammenfassung für Sabiana LC-15-W

  • Seite 1 Lama d’aria Air Curtain Unit Luftschleier-Einheit mod. ISTRUZIONI PER INSTALLAZIONE, USO E MANUTENZIONE INSTRUCTIONS FOR INSTALLATION, USE AND MAINTENANCE HANDBUCH FUR INSTALLATION, GEBRAUCH UND WARTUNG E 01/18 D 01/18 Cod. 4050400...
  • Seite 2 Gentile cliente,...
  • Seite 3 Prima della messa in funzione, leggere attentamente il manuale di istruzioni Carefully read the following instruction booklet before starting up the machine. Lesen Sie vor der Inbetriebnahme aufmerksam die Bedienungsanleitung. Attenzione! Operazioni particolarmente importanti e/o pericolose Important! Particularly important and/or delicate operations Achtung! Besonders wichtige und / oder gefährliche Arbeitsgänge.
  • Seite 4: Istruzioni Originali

    ISTRUZIONI ORIGINALI Italiano Durante l’installazione, la manutenzione e la ripara- - REGOLE FONDAMENTALI zione, per motivi di sicurezza, è necessario attenersi a DI SICUREZZA quanto segue: • Utilizzare sempre guanti da lavoro. È vietato l’utilizzo dell’apparecchio da parte di bambini o di persone inabili e senza assistenza.
  • Seite 5: Utilizzo E Conservazione Del Manuale

    Italiano - UTILIZZO E CONSERVAZIONE - SCOPO DEL MANUALE Il presente manuale di istruzioni è indirizzato all’utente PRIMA DI INSTALLARE L’APPARECCHIO LEGGERE ATTENTAMENTE QUESTO MANUALE della macchina, al proprietario al tecnico installatore e deve essere sempre a disposizione per qualsiasi even- L’apparecchio non può...
  • Seite 6 Italiano - TRASPORTO L’apparecchio viene imballato in scatole di cartone. Una volta che l’apparecchio è disinballato controllare che non vi siano danni e che corrisponda alla fornitura. In caso di danni o di sigla dell’apparecchio non corrispon- dente a quanto ordinato, rivolgersi al proprio rivenditore citando la serie e il modello.
  • Seite 7: Limiti Di Impiego

    Italiano - PESI E DIMENSIONI - LIMITI DI IMPIEGO UNITA’ IMBALLATA I dati fondamentali relativi all’apparecchiatura e allo scambiatore di calore sono i seguenti: Apparecchiatura e scambiatore di calore: 80°C. (LC-W) • Massima temperatura uscita aria: 55°C. • Pressione di esercizio massima: 1000 kPa. •...
  • Seite 8: Caratteristiche Tecniche

    Italiano - CARATTERISTICHE TECNICHE LC -W LC -E ATTACCHI IDRAULICI (mm) DIMENSIONI Grandezza 1125 1625 2160 1862 1328 PESO (kg) Unità imballata Unità non imballata Grandezza Type ATTACCHI LC-A 34,5 45,6 78,5 FEMMINA LC-W 39,5 51,6 86,5 LC-E 37,5 49,6 83,5 ASSORBIMENTO MOTORE Grandezza...
  • Seite 9: Funzionamento Eapplicazione

    Italiano - FUNZIONAMENTO E (Fig. B) APPLICAZIONE L’aria viene aspirata dall’alto ed emessa verso il basso, in modo tale da creare uno schermo sulla luce della porta e ridurre al minimo la dispersione di calore. l’intera larghezza della porta. 3,50 m di temperatura e pressione dell’aria tra gli ambienti 100 mm separati dalla lama stessa e dall’eventuale pressione...
  • Seite 10: Installazione Meccanica

    Italiano - INSTALLAZIONE MECCANICA OPTIONAL COD. 9042091 - 9042092 cod. 9042091 cod. 9042092 30 ÷ 110 mm...
  • Seite 11 Italiano - INSTALLAZIONE MECCANICA OPTIONAL COD. 9042095 - 9042096 cod. 9042095 cod. 9042096 OPTIONAL OPTIONAL COD. 9042095 COD. 9042095 OPTIONAL OPTIONAL COD. 9042096 COD. 9042096...
  • Seite 12 Italiano Aprire l'unità togliendo il pannello anteriore.
  • Seite 13: Collegamenti Elettrici

    Italiano - COLLEGAMENTI ELETTRICI Prescrizioni generali 230V - 50 Hz. • Assicurarsi che l’impianto elettrico sia adatto ad erogare, oltre alla corrente di esercizio richiesta dall’unità, anche la corrente necessaria per alimentare elettrodomestici ed apparecchi già in uso. • Effettuare i collegamenti elettrici secondo le leggi e le norme nazionali vigenti. •...
  • Seite 14: Installazione

    LC-A Italiano LAMA D’ARIA “LC-A“ SI RACCOMANDA DI LEGGERE ATTENTAMENTE QUESTE ISTRUZIONI PRIMA DI UTILIZZARE IL COMANDO. Le lame d’aria LC-A hanno a corredo un controllo elettronico predisposto per poter assolvere a diverse funzioni e modalità di regolazione così da meglio sod- disfare le esigenze di installazione.
  • Seite 15 LC-A Italiano - SCHEDA ELETTRONICA - UTILIZZO DEL COMANDO E COLLEGAMENTI (DSC) P1 = Pulsante On / Stand By / Cambio velocità DL1 = Led On / Stand By DL2 = Velocità Minima L N N DL3 = Velocità Massima •...
  • Seite 16: Collegamento Idraulico

    LC-W Italiano LAMA D’ARIA “LC-W“ Le lame d’aria LC-W sono dotate di un controllo elettro- nico predisposto per poter assolvere a diverse funzioni e modalità di regolazione così da meglio soddisfare le esigenze di installazione. Il controllo viene regolato dal comando T-MB. SI RACCOMANDA DI LEGGERE ATTEN- TAMENTE QUESTE ISTRUZIONI PRIMA DI - COLLEGAMENTO...
  • Seite 17: Collegamento Cavo Di Alimentazione

    LC-W Italiano COLLEGAMENTO CAVO Alimentare “lato comando” con dorsale 230Vac 50Hz. DI ALIMENTAZIONE PG 13,5 230VAC 50Hz N N N L L 1 COLLEGAMENTO ELETTRICO ATTUATORE VALVOLA (LC-W) N N N L L 1 UTILIZZARE ATTUATORI ON/OFF 230VAC 50HZ.
  • Seite 18 LC-E Italiano LC- 20 E LAMA D’ARIA “LC-E“ Le lame d’aria LC-E sono dotate di un controllo elettro- nico predisposto per poter assolvere a diverse funzioni e modalità di regolazione così da meglio soddisfare le esigenze di installazione. Il controllo viene regolato dal comando T-MB. ASSORBIMENTO RESISTENZE Modello 4000 W...
  • Seite 19 LC-E Italiano Alimentare “lato comando” con dorsale COLLEGAMENTI CAVI DI ALIMENTAZIONE 230Vac 50Hz. PG 13,5 230VAC 50Hz N N N L L 1 Alimentare “lato potenza” con dorsale 400Vac 50Hz 3 P Utilizzo di pressa cavo fornito a corredo 400Vac 50Hz 3P R S T...
  • Seite 20 LC-W / LC-E Italiano - SCHEDA ELETTRONICA - IMPOSTAZIONE DIP DEL COMANDO 1 2 3 4 DIP N° 1 e 2 - IMPOSTAZIONE TEMPI DI POST VENTILA- ZIONE ( Funzione associata al DSC - contatto porta ) 30 sec. 60 sec. 90 sec. 0 sec.
  • Seite 21: Funzionamento Master-Slave

    Italiano LC-W / LC-E - rispettare sempre la posizione dei colori in corrispon- - FUNZIONAMENTO denza dei punti di partenza ed arrivo del collegamento. MASTER-SLAVE Gestione di più apparecchi, in collegamento seriale, con il comando. - non posizionare mai i cavi di comunicazione in alcu- È...
  • Seite 22: Note Generali

    Italiano LC-W / LC-E INSTALLAZIONE COMANDO - COMANDO A PARETE T-MB Separare la parte frontale del comando dalla piastra (COD. 9066331E) posteriore premendo, con un cacciavite, la linguetta di bloccaggio posta sulla parte superiore del comando. NOTE GENERALI T-MB è un comando per installazione a parete col- Posizionare il pannello posteriore sul muro e segnare i legabile ad apparecchi LC-W ed LC-E equipaggiati di scheda elettronica SELV.
  • Seite 23 LC-W / LC-E Italiano Fig. 2 Selv Board T-MB ATTENZIONE! : per eseguire i collegamenti elettrici al comando T-MB occorre rimuovere la protezione isolante dal morsetto. Una volta eseguiti i collegamneti elettrici IMPOSTAZIONE DIP Rimontare la parte frontale del comando inserendo prima le due linguette presenti nella parte inferiore;...
  • Seite 24 Italiano LC-W / LC-E UTILIZZO DEL COMANDO • Premendo il tasto ON/OFF il comando viene acceso. • Premendo nuovamente il tasto ON/OFF il comando viene spento. • L’indicazione dello stato “ON” o “OFF” viene visualiz- zata sul display. °C • Premere il pulsante “ ”...
  • Seite 25 LC-W / LC-E Italiano - Premere il tasto “M”: il simbolo della modalità inizierà a lampeggiare. - Premere i tasti ( ) o ( bolo orologio “ ”; °C AUTO Confermare con il tasto “M”. - Premendo nuovamente il tasto “ ”...
  • Seite 26 LC-W / LC-E Italiano - Premere il tasto “M”; il simbolo della modalità di fun- zionamento inizierà a lampeggiare; - Premere il tasto ( ) o ( bolo orologio “ “; confermare con il tasto “M”. °C - Premere il tasto “ ”...
  • Seite 27: Risoluzione Dei Problemi

    Italiano - MANUTENZIONE - ACCESSORI - TUTTE LE UNITA’ - ATTENZIONE! Codice 9042090 PRIMA DI QUALSIASI PULIZIA E MANU- TENZIONE, TOGLIERE L’ALIMENTAZIONE ALL’APPARECCHIO Solo personale addetto alla manutenzione e precedente- mente addestrato, può intervenire sulle apparecchiature. I motori dei ventilatori e gli altri componenti non richie- dono manutenzione, tranne una regolare pulizia.
  • Seite 28: Fundamental Safety Rules

    English • Always use work gloves. - FUNDAMENTAL SAFETY RULES • • Do not place objects over the grids. Make sure the unit is earthed. sons without supervision. When moving the appliance, lift it by yourself (for weights of under 30 kg) or with the help of another person. ned users in shops, in light industry and on farms, or for commercial use by lay persons.
  • Seite 29: Identifying The Appliance

    English - USE AND PRESERVATION - APPLICATION OF THE MANUAL This instruction manual is intended for the machine’s CAREFULLY READ THIS MANUAL BEFORE INSTALLING THE APPLIANCE. user, the owner and installation technician and must always be available to be consulted, if necessary. The appliance may not be used: •...
  • Seite 30 English - TRASPORT The appliance is supplied in card-board packaging. After unpacking the appliance, make sure it is undama- ged and corresponds to the unit requested. not correspond to that ordered, contact your dealer immediately, quoting the series and model. :LC-A model only :LC-W ed LC-E model only...
  • Seite 31: Operating Limits

    English - WEIGHTS AND DIMENSIONS - OPERATING LIMITS PACKED UNIT is given below: 80°C. (LC-W) • Power supply voltage: 230V - 50Hz • Electric energy consumption: see technical data label Type Peso - Weight - Poids - Gewicht - Peso (kg) - LC-A 34,5 45,6...
  • Seite 32: Technical Characteristic

    English - TECHNICAL CHARACTERISTIC LC -W LC -E (mm) DIMENSIONS HYDRAULIC CONNECTIONS Model 2160 1125 1625 1328 1862 WEIGHT (kg) Packed Unit Unpacked Unit Model Type LC-A 34,5 45,6 78,5 CONNECTION LC-W 39,5 51,6 86,5 FEMALE LC-E 37,5 49,6 83,5 MOTOR ABSORPTION Model Type...
  • Seite 33: Application Area

    English - OPERATION AND (Fig. B) APPLICATION AREA Air is drawn in at the top of the unit and blown out downwards so that it shields the door opening and minimizes heat loss. To achieve the optimum curtain effect, the unit must 3,50 m perature, pressure differences across the doorway and 100 mm...
  • Seite 34: Mechanical Installation

    English - MECHANICAL INSTALLATION OPTIONAL COD. 90420091 - 9042092 cod. 9042091 cod. 9042092 30 ÷ 110 mm...
  • Seite 35 English - MECHANICAL INSTALLATION OPTIONAL COD. 9042095 - 9042096 cod. 9042095 cod. 9042096 OPTIONAL OPTIONAL COD. 9042095 COD. 9042095 OPTIONAL OPTIONAL COD. 9042096 COD. 9042096...
  • Seite 36 English Open the unit by removing the front panel.
  • Seite 37: Electrical Connections

    English - ELECTRICAL CONNECTIONS General instructions • Before installing the air curtain unit, make sure the rated voltage of the power supply is 230V - 50 Hz. • Make sure that, in addition to supplying the working current required by the fan coil, the mains electrical supply is also able to supply the current necessary to operate other household appliances and units.
  • Seite 38 LC-A English “LC-A“ AIR CURTAIN UNIT READ THESE INSTRUCTIONS CAREFULLY BEFORE USING THE CONTROL. The “ air curtain units have an electronic con- trol set to carry out different functions and adjustment modes, in order to meet the installation requirements. It is possible manage multiple devices in parallel connection with one single control.
  • Seite 39 LC-A English - ELECTRONIC BOARD - USING THE CONTROL AND CONNECTIONS (DSC) P1 = On / Stand By / Set the fan speed DL1 = On / Stand By led DL2 = Low speed led L N N DL3 = High speed led 230V ~ •...
  • Seite 40: Hydraulic Connections

    LC-W English “LC-W“ AIR CURTAIN UNIT The “ air curtain units have an electronic con- trol set to carry out different functions and adjustment modes, in order to meet the installation requirements. The control is adjusted by a T-MB control. READ THESE INSTRUCTIONS...
  • Seite 41: Connection Of The Power Supply

    LC-W English Connect the “Control side” with dorsal CONNECTION OF THE 230Vac 50Hz. POWER SUPPLY PG 13,5 230VAC 50Hz N N N L L 1 ELECTRICAL CONNECTION OF THE ACTUATOR VALVE (LC-W) N N N L L 1 USE ON/OFF ACTUATOR 230VAC 50HZ.
  • Seite 42 LC-E English LC- 20 E “LC-E“ AIR CURTAIN UNIT The “ air curtain units have an electronic con- trol set to carry out different functions and adjustment modes, in order to meet the installation requirements. The control is adjusted by a T-MB control. ABSORPTION ELECTRICAL RESISTANCE Models 4000 W...
  • Seite 43 LC-E English Connect the “Control side” with dorsal CONNECTION OF THE 230Vac 50Hz. POWER SUPPLY PG 13,5 230VAC 50Hz N N N L L 1 Connect the “Power side” with dorsal 400Vac 50Hz 3 P Using the supplied cable gland 400Vac 50Hz 3P R S T...
  • Seite 44 English LC-W / LC-E - ELECTRONIC BOARD - DIPSWITCHES SETTINGS OF CONTROL 1 2 3 4 SETTING TIME POST-VENTILA- DIP No 1 and DIP No 2 - TION (Function is associated with DSC - door contact) T-MB (DSC) 30 sec. 60 sec. 90 sec. 0 sec.
  • Seite 45 LC-W / LC-E English - Maintain the colour coding of all cabling throughout - MASTER-SLAVE your system. - Visually and physically inspect terminations to verify that they’re sound. Managinga group of appliances, via serial connec- tion, with the infra-red control. - Never place communications cable in any conduit, It is possible to connect multiple devices controlling or lighting circuits of any type.
  • Seite 46: General Notes

    LC-W / LC-E English CONTROL INSTALLATION - T-MB WALL-MOUNTED Separate the front of the controller from the rear plate by CONTROLLER (CODE 9066331E) using a screwdriver to press the locking tongue on the top of the controller. – GENERAL NOTES – Place the rear plate on the wall and mark the mounting The T–MB is a wall-mounted controller that can be holes.
  • Seite 47 LC-W / LC-E English Fig. 2 Selv Board T-MB ATTENTION! : To carry out the electrical connections to the T–MB control,remove the insulated protection SETTING DIP SWITCHES device from the clamp. Once the electrical connections are completed, replace the protection device, as in Fig. 2. Reassemble the front part of the control, placing Set DIP can be used to modify the functions performed CONTROL WIRING CONNECTIONS...
  • Seite 48 LC-W / LC-E English USING THE CONTROL • Press the ON/OFF button to activate the thermostat. • Press the ON/OFF button to deactivate the thermostat. • The word “ON” or “OFF” will appear in the display. °C • Press the “ ”...
  • Seite 49: Setting The Clock

    LC-W / LC-E English SETTING THE CLOCK - By pressing the “M” button: the mode symbol starts - Press buttons ( ) or ( ), until selecting the watch symbol “ ”; °C AUTO M” button. - Press button “+” again to position on CLOC mode M”...
  • Seite 50 LC-W / LC-E English - Press the “ ” button; the operation mode symbol will - Press button ( ) or ( ) until selecting the watch symbol “ M” button. °C - Press button “ ” twice; the abbreviation “ ”...
  • Seite 51: Maintenance

    English - ACCESSORIES - MAINTENANCE (ALL UNITS) IMPORTANT! Code 9042090 BEFORE CARRYING OUT CLEANING OR MAINTENANCE, MAKE SURE THE POWER TO THE UNIT IS TURNED OFF. Maintenance of the unit must be carried out by trained maintenance personnel only. Since fan motors and other components are main- tenance free, no maintenance other than cleaning is necessary.
  • Seite 52: Grundlegende Sicherheitsvorschriften

    Deutsch Während Installation, Wartung und Reparatur des Geräts müssen - GRUNDLEGENDE SICHERHEITS- aus Sicherheitsgründen folgende Anweisungen befolgt werden: VORSCHRIFTEN • Immer Arbeitshandschuhe tragen Die Verwendung des Geräts durch Kinder oder behinderte Per- • Keine Gegenstände auf den Gittern abstellen sonen ist verboten. Sicherstellen, dass das Gerät an eine Erdung angeschlossen ist.
  • Seite 53: Identifizierung Der Maschine

    Deutsch - VERWENDUNG UND AUFBEWAHRUNG - ZWECK DES HANDBUCHS Das vorliegende Bedienungshandbuch richtet sich an den VOR DER INSTALLATION DES GERÄTS MUSS DAS VORLIEGENDE HANDBUCH AUFMERKSAM Bediener der Maschine, an den Eigentümer und an den Instal- GELESEN WERDEN lateur und muss jederzeit zum Nachschlagen griffbereit sein. Das Gerät darf nicht verwendet werden: Das vorliegende Bedienungshandbuch richtet sich an den •...
  • Seite 54 Deutsch - TRANSPORT Das Gerät wird in Kartonschachteln verpackt. Nachdem das Gerät ausgepackt wurde, muss kontrolliert werden, dass keine Beschädigungen vorliegen und dass die Lieferung voll- ständig ist. Wenn Beschädigungen vorliegen oder wenn der Gerätecode nicht mit dem bestellten Code übereinstimmt, muss der Händler kontak- tiert werden und Seriennummer und Modell angeführt werden.
  • Seite 55: Gewichte Und Abmessungen Verpacktes Gerät

    Deutsch - GEWICHTE UND ABMESSUNGEN - EINSATZGRENZEN VERPACKTES GERÄT Im Anschluss werden die wichtigsten Daten des Geräts und des Wärmetauschers angeführt: Gerät und Wärmetauscher (LC-W) • Versorgungsspannung: 230 V - 50 Hz • Stromverbrauch: siehe Kennschild • Schutzgrad: IP20 Im Anschluss werden die technischen Daten der Ventile mit Type thermoelektrischem Antrieb angeführt (LC-W) : Peso - Weight - Poids - Gewicht -...
  • Seite 56: Technische Daten

    Deutsch - TECHNISCHE DATEN LC -W LC -E WASSERANSCHLÜSSE (mm) DIMENSIONEN Modell 1125 1625 2160 1328 1862 GEWICHT (kg) Verpacktes Gerät Unverpackten Geräts Modell Type Kupplungen LC-A 34,5 45,6 78,5 LC-W 39,5 51,6 86,5 LC-E 37,5 49,6 83,5 MOTORLEISTUNG Modell Type WASSERINHALTE (Liter) Watt...
  • Seite 57: Funktion Und Anwendung

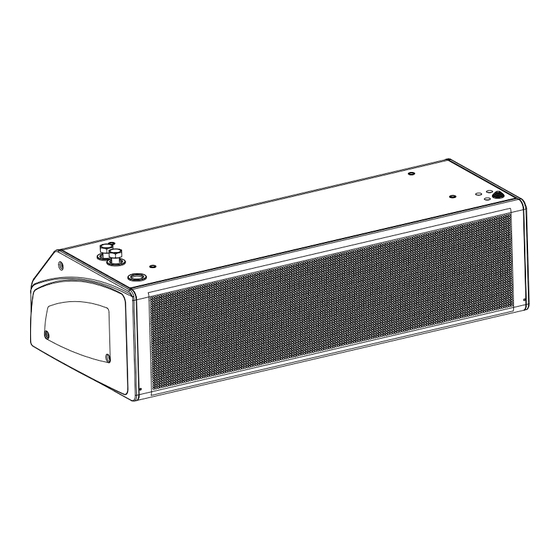
    Deutsch - FUNKTION UND (Abb. B) ANWENDUNG Die Luft wird von oben angesaugt und nach unten abgegeben, so dass ein Schutzschild über die Breite der Tür geschaffen und der thermische Verlust auf ein Minimum reduziert wird. Zur Erzielung der optimalen Leistungsfähigkeit muss die Ein- heit die gesamte Breite der Tür abdecken.
  • Seite 58: Mechanische Installation

    Deutsch - MECHANISCHE INSTALLATION ZUBEHÖR CODE 9042091 - 9042092 code 9042091 code 9042092 30 ÷ 110 mm...
  • Seite 59 Deutsch - MECHANISCHE INSTALLATION ZUBEHÖR CODE 9042095 - 9042096 code 9042095 code 9042096 ZUBEHÖR ZUBEHÖR CODE: 9042095 CODE: 9042095 ZUBEHÖR ZUBEHÖR CODE: 9042096 CODE: 9042096...
  • Seite 60 Deutsch Zum Öffnen der Einheit die Abdeckplatte auf der Vorderseite entfernen.
  • Seite 61: Elektrische Anschlüsse

    Deutsch - ELEKTRISCHE ANSCHLÜSSE Allgemeine Vorschriften • Vor der Installation des Luftschleiers muss sichergestellt werden, dass die Nenn-Versorgungsspannung 230 V - 50 Hz beträgt. • Sicherstellen, dass die Elektroanlage nicht nur für die Abgabe des von der Einheit für den Betrieb geforderten Stroms, sondern auch für die notwendige Stromabgabe zur Versorgung der bereits vorhandenen Elektrogeräte geeignet ist.
  • Seite 62: Installation

    Deutsch LC-A LUFTSCHLEIER "LC-A" ES WIRD EMPFOHLEN, DIE FOLGENDEN ANWEISUNGEN VOR DER VERWENDUNG DER STEUERUNG AUFMERK- SAM ZU LESEN. Die Luftschleier LC-A werden mit einer voreinge- stellten elektronischen Steuerung zur Durchführung unterschiedlicher Funktionen und Regulierungsmodi geliefert, so dass die Installationsanforderungen best- möglich erfüllt werden können.
  • Seite 63: Elektronische Steuerkarte

    Deutsch LC-A - ELEKTRONISCHE STEUERKARTE - VERWENDUNG DER UND ANSCHLÜSSE STEUERUNG (DSC) P1 =Taste On / Stand By / Änderung Geschwindigkeit DL1 = LED On / Stand By DL2 = Min. Geschwindigkeit L N N DL3 = • All Power On, die Steuerung übernimmt den gespeicherten Status bei einem Stromausfall 230V ~ •...
  • Seite 64: Hydraulikanschluss

    Deutsch LC-W LUFTSCHLEIER "LC-W" Die Luftschleier LC-W sind mit einer voreingestellten elek- tronischen Steuerung zur Durchführung unterschiedlicher Funktionen und Regulierungsmodi ausgestattet, so dass die Installationsanforderungen bestmöglich erfüllt werden können. Die Steuerung erfolgt über die Steuertafel T-MB. ES WIRD EMPFOHLEN, VOR VERWEN- DUNG DER STEUERUNG DIESE ANWEI- - HYDRAULIK- SUNGEN AUFMERKSAM ZU LESEN.
  • Seite 65: Anschluss Des Versorgungskabels

    Deutsch LC-W Die "Steuerseite" über ein Versorgungsnetz 230Vac ANSCHLUSS DES 50Hz speisen. VERSORGUNGSKABELS PG 13,5 230VAC 50Hz N N N L L 1 ELEKTROANSCHLUSS VENTILANTRIEB (LC-W) N N N L L 1 ON/OFF-ANTRIEBE 230 VAC 50 Hz VERWENDEN.
  • Seite 66: Absorptionsbeständigkeit

    Deutsch LC-E LC- 20 E LUFTSCHLEIER "LC-E" Die Luftschleier LC-E sind mit einer voreingestellten elek- tronischen Steuerung zur Durchführung unterschiedlicher Funktionen und Regulierungsmodi ausgestattet, so dass die Installationsanforderungen bestmöglich erfüllt werden können. Die Steuerung erfolgt über das Bedienfeld T-MB. ABSORPTIONSBESTÄNDIGKEIT Modell 4000 W 6000 W...
  • Seite 67 Deutsch LC-E Die "Steuerseite" über ein Versorgungsnetz ANSCHLUSS DER 230Vac 50Hz speisen VERSORGUNGSKABEL PG 13,5 230VAC 50Hz N N N L L 1 Die "Leistungsseite" über ein Versor- 400Vac 50Hz 3 P gungsnetz speisen. Verwendung der mitgeliefer- ten Kabelver- schraubung 400Vac 50Hz 3P R S T...
  • Seite 68: Elektronische Steuerplatine

    Deutsch LC-W / LC-E - ELEKTRONISCHE - EINSTELLUNG DIP STEUERPLATINE 1 2 3 4 DIP Nr 1 und 2 - EINSTELLUNG DER ZEITEN FÜR DIE NACH- BELÜFTUNG (Funktion an DSC - Türkontakt gekoppelt) 30 sec. 60 sec. 90 sec. 0 sec. T-MB DEFAULT POSITION...
  • Seite 69 Deutsch LC-W / LC-E Kabel an den Kabelführungen oder Sicherheitshalterungen - FUNKTION nicht quetschen. MASTER-SLAVE - Die Position der Farben an den Ausgangs- und Endpunkten der Verbindung muss immer berücksichtigt werden. Verwaltung mehrerer, in Serie geschalteter Geräte über die Steuerung. - Nach Herstellung der Verkabelung muss sichergestellt wer- Es ist möglich, mehrere Geräte miteinander zu verbinden und den, dass die Kabel unbeschädigt und korrekt verlegt sind.
  • Seite 70: Allgemeine Hinweise

    Deutsch LC-W / LC-E INSTALLATION DER STEUERUNG - STEUERTAFEL FÜR DIE Den vorderen Teil der Steuertafel von der hinteren Platte durch Drü- WANDMONTAGE T-MB (CODE 9066331E) cken mit einem Schraubenzieher auf die Blockierfeder im oberen Teil der Steuerung trennen. ALLGEMEINE HINWEISE Die T-MB ist eine Steuertafel für die Wandinstallation, Die hintere Tafel an der Wand positionieren und die Befestigungs- die mit den Geräten LC-W und LC-E...
  • Seite 71: Einstellung Dip-Schalter

    Deutsch LC-W / LC-E Abb. 2 Selv Board T-MB ACHTUNG! Zur Herstellung der Verbindungen zur Steuertafel T-MB müssen die Schutzisolierungen von den Klemmen abgenom- men werten. Nach Herstellung der elektrischen Verbindungen, die EINSTELLUNG DIP-SCHALTER Schutzvorrichtungen wie in Abbildung 2 gezeigt wieder einsetzen. Den vorderen Teil der Steuerung wieder montieren, indem zuerst die beiden Federn im unteren Teil eingesetzt werden und dann die Steuerung geschlossen wird, indem die oberen Federn...
  • Seite 72 Deutsch LC-W / LC-E VERWENDUNG DER STEUERUNG (Abb. "A") On/Off: (Abb. "A") • Durch Drücken der Taste ON/OFF wird die Steuertafel ein- geschaltet. • Durch erneutes Drücken der Taste ON/OFF wird die Steuer- tafel ausgeschaltet. • Der Status "ON" oder "OFF" wird am Display angezeigt. °C (Abb.
  • Seite 73 Deutsch LC-W / LC-E UHREINSTELLUNG (Abb. "E") (Abb. "E") - Die Taste "M" drücken, das Symbol des Betriebsmo- dus beginnt zu blinken. - Die Tasten ( ) oder ( ) drücken, bis das Uhrensymbol " " ausgewählt wurde. °C AUTO Mit der Taste "M"...
  • Seite 74 Deutsch LC-W / LC-E 2 - Programmierung (Abb. "G") (Abb. "G") - Die Taste "M" drücken; das Symbol des Betriebsmo- dus beginnt zu blinken. - Die Tasten ( ) oder ( ) drücken, bis das Uhrensym- bol " " ausgewählt wurde und mit der Taste "M" bestä- tigen.
  • Seite 75 Deutsch - WARTUNG - ZUBEHÖRTEILE - ALLE EINHEITEN ACHTUNG! Code 9042090 VOR DER DURCHFÜHRUNG VON REINIGUNGS- UND - "DSC" TÜRKONTAKT - WARTUNGSTÄTIGKEITEN MUSS IMMER DIE STROM- VERSORGUNG DER GERÄTE GETRENNT WERDEN Der Eingriff an den Geräten darf ausschließlich von zuvor geschulten Wartungstechnikern vorgenommen...
  • Seite 76: Schemi Di Collegamento

    - SCHEMI DI COLLEGAMENTO - CONNECTION DIAGRAMS LEGEND LEGENDA M1-M2 = Motoventilatore M1-M2 = Fan Motor = Scheda Elettronica di Controllo LC-A = Electronic Control Board LC-A SELV = Scheda Elettronica di Controllo LC-W e LC-E SELV = Electronic Control Board LC-W and LC-E = Valvola Acqua calda = Hot water valve R1-R3 = Resistenza Elettrica I°...
  • Seite 77 SE-0498 “LC-A” Power Supply Po Po 230Vac 50Hz 3x1.5 mmq 230V 50Hz LC 20 A 230V 50Hz...
  • Seite 78 SE-0498 “LC-A” • Controllo di più apparecchi su segnale di un unico comando remoto. • Control of multiple devices on a single remote control signal. • Contrôle de plusieurs appareils sur signal d’une unique commande à distance. • Steuerung mehrerer Geräte über ein einzelnes externes Steuersignal.
  • Seite 79 SE-0499 “LC-W” 3x1.5 mmq Power Supply 230Vac 50Hz 230V 50Hz LC 20 W 230V 50Hz T-MB DIP3=ON DIP4=ON DIP3=ON DIP5=OFF SELV Board POWER Board...
  • Seite 80 SE-0500 “LC 10/15 - E”...
  • Seite 81 SE-0502 “LC 20 - E”...
  • Seite 82 NOTE:...
  • Seite 84 The object of the declaration described above is in conformity with the relevant Union harmonization legislation. 2014/35/UE 2014/30/UE 2006/42/EC 2011/65/EC 2009/125/EC Il fascicolo tecnico è costituito presso: Sabiana S.p.A. Via Piave 53, 20011 Corbetta (MILANO-ITALY) The technical file is made at: Sabiana S.p.A. Via Piave 53, 20011 Corbetta (MILANO-ITALY)

Inhaltsverzeichnis