Herunterladen Inhalt Inhalt Diese Seite drucken
Inhaltsverzeichnis

Werbung

Verfügbare Sprachen

Verfügbare Sprachen

SMARTY XV
DE
MONTAGE- UND INSTALLATIONSANLEITUNG

Werbung

Inhaltsverzeichnis
loading

Inhaltszusammenfassung für Salda SMARTY XV

  • Seite 1 SMARTY XV MONTAGE- UND INSTALLATIONSANLEITUNG...
  • Seite 2: Inhaltsverzeichnis

    19.23. RESTORING FACTORY DEFAULTS 19.24. INDICATIONS OF FUNCTIONS, ALARMS AND WARNINGS 19.25. DISPLAY AND CONCELLATION OF ALARMS AND WARNINGS 19.26. EVENT LOG (HISTORY) 19.27. SYSTEM VERSIONS AND RUNNING TIME 20. WIRING DIAGRAM 21. CONNECTION OF ACCESSORIES | DE SMARTY XV v2019.06...
  • Seite 3 21.11. CONNECTION OF REMOTE CONTROL PANEL OR MODBUS 21.12. OPERATION AND ALARM INDICATION (SMARTY X V 1.1) 21.13. FIRE PLACE CONNECTION (SMARTY X V 1.1) 22. Į RENGINIO VIDINIŲ IR IŠORINIŲ MAZGŲ JUNGIMO ORIENTACINĖ SCHEMA 23. ÖKODESIGN DATENTABELE 24. KONFORMITÄTSERKLÄRUNG 25. GARANTIE 25.1. GARANTIESCHEIN SMARTY XV v2019.06 DE |...
  • Seite 4: Symbole Und Markierungen

    Die Anforderungen der Aufkleber mit Gefahrhinweisen auf dem Gerät sind einzuhalten. AHU000000 XXX GAMINIO PAVADINIMAS Nominal voltage frequency xxx/xx VAC/Hz Max.current x.xx A Max.power consumption Protection class x.xx kW IP xx Weight xx kg Made in Šiauliai, Lithuania BN:xxxxxx 2019/01/01 SERIAL 2514523357 | DE SMARTY XV v2019.06...
  • Seite 5: Abmessungen Und Gewicht

    Gas aus dem Schornstein oder Abgasleitung zurück in die Räume zugeführt werden. In diesem Fall wird streng empfohlen das System „Salda Antifrost“ abzuschalten und den äußeren Vorwärmer für den Schutz des Wärmetauschers gegen Frost zu benutzen (s. Die Beschreibung der Funktion von . „Salda Antifrost“ in der Anleitung der Fernbedienung).
  • Seite 6: Elektrische Daten

    8 kHz Zuluft 62,8 54,3 64,9 61,1 56,5 51,3 42,8 35,3 Abluft 47,7 42,0 54,6 45,0 36,0 28,8 19,6 22,4 Umgebung 49,0 47,2 54,8 46,1 39,5 34,2 24,9 22,6 Gemessen bei Strom/Druck /h / Pa] 267/50 | DE SMARTY XV v2019.06...
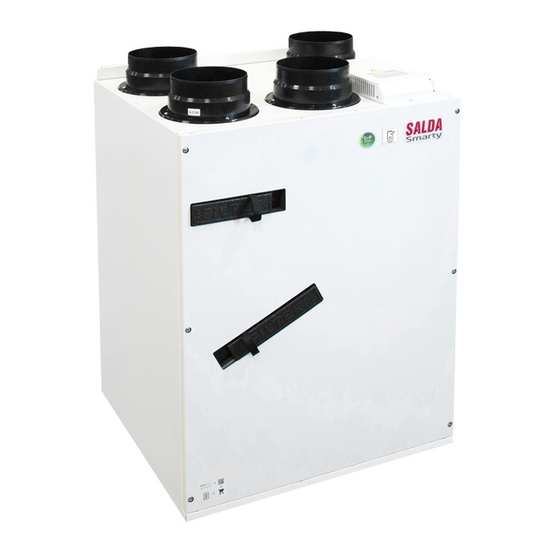
  • Seite 7: Konstruktion

    Abb. 7.2. with integrated pre-heater operating conditions (Smarty 2-3 XV pre-heater - 15 C; Smarty 4 XV pre-heater - 10 8. VERPACKUNG • Alle Anlagen werden ab Werk so verpackt, dass sie den normalen Transportbedingungen standhalten. SMARTY XV v2019.06 DE |...
  • Seite 8: Transport

    Abb. 9.1. Anheben mit Gabelstapler Ausschließlich palettierte Anlagen dürfen angehoben werden, um eine Beschädigung der Verpackung zu verhindern. 10. AUSPACKEN DES GERÄTES Gegebenenfalls sind der Anlage Zubehörteile beigepackt. Entnehmen Sie diese vor dem Transport. • Entfernen Sie die Wickel-/Schrumpffolie. | DE SMARTY XV v2019.06...
  • Seite 9: Lieferumfang

    60 mm Bracket 2 Bracket 3 12. PLATZBEDARF 1,5xL 1,5xL Freiraum zur Öffnung der Tür – L x 1,5; Freiraum zur Öffnung der Tür des Schaltschranks – H > 400 mm 13. MONTAGE Die Schutzfolie ist ein Transportschutz. Es wird empfohlen, sie nach Aufstellung der Anlage zu entfernen, da es anderenfalls zu Oxidation kommen kann. SMARTY XV v2019.06 DE |...
  • Seite 10: Anschluss Der Luftführung

    Figure 12.4 - mounting positions (W=400 mm) Figure 12.5 - mounting positions 14. ANSCHLUSS DER LUFTFÜHRUNG Durchmesser D2, je nach Anlage Right side connection Left side connection 14.1. FLOOR MOUNTING Abb. 14.1.1. floor mounting (optional accessory required) | DE SMARTY XV v2019.06...
  • Seite 11: Mounting On Wall

    Bemerkung: ist der Speicher höher positioniert, bauen Sie das System mit Kondensatpumpe auf (als Zusatz empfohlen). Vor jedem Heizzeitraum den Kondensatrohr mit Wasser nach Angaben der Inbetriebnahme füllen! 14.2. MOUNTING ON WALL 30 mm 15. MONTAGEPLAN Abb. 15.1. Smarty XV 1.1 (* Not available in "2 XV 1.1" models) SMARTY XV v2019.06 DE |...
  • Seite 12: Anschluss Der Anlage Zu Electrischen Netzwerk

    Abb. 15.2. - Smarty XV 1.2 (* Only heater or preheater can be connected at a time) Abb. 15.3. Hinweis Luftführungsanschluss Abb. 15.4. Belüftete Räumlichkeiten ODA - Aussenluft; SUP - Zuluft; ETA - Abluft; EHA - Fortluft. LISTE DER BAUTEILE Wärmertauscherplatte...
  • Seite 13: Systemschutz

    Ausschalter montiert ist, schalten Sie ihn ab. Nach Abschaltung des Gerätes ist sicherzustellen, dass es durch einen Dritten nicht eingeschaltet werden kann. Warten Sie, bis die Ventilatoren vollständig zum Stillstand gekommen sind (ca. 2 Min.). SMARTY XV v2019.06 DE |...
  • Seite 14: Deckelabnahme

    Nach Filterwechsel müssen Sie den Filter- Betriebsstundenzähler in der Bedieneinheit zurück setzen. Beschreibung der Pult- funktionen gibt es neben der technischen Dokumentation von Pulten oder auf Internetseite www.salda.lt veröffentlicht. Betrieb der Lüftungsanlage ohne Filter ist VERBOTEN! - Ventilatoranschlüsse aus der Steuerplatine herausziehen. Zuluft-Ventilator aus X15, X2, X4. Abluft-Ventilator aus X16, X2, X4. | DE SMARTY XV v2019.06...
  • Seite 15: Wärmetauscher

    • Der Wärmetauscher wird einmal im Jahr gereinigt. • Nehmen Sie die Kassette des Wärmetauschers vorsichtig aus und tauchen Sie sie in einen Behälter mit seifigem Wasser (verwenden Sie keine Soda) ein. Dann spülen Sie sie mit einem schwachen Heißwasserstrom (ein zu starker Strom kann die Tauscherplatten verbiegen). Bauen Sie den Wärmetauscher ins Aggregat wieder ein, nachdem er vollständig trocken ist. SMARTY XV v2019.06 DE |...
  • Seite 16: Abschaltung Der Bypassklappe Und Des Vorheizregisters

    - Die Anschlüsse sind laut ihren Anschlussstellen markiert. Deswegen muss beim Rückaufbau der Automatik Markierung der Anschlussstellen von Anschlüssen und vom Controller beachtet werden. Ist auf den Controlleranschlüssen keine Markierung ersichtlich, die PCB - Information auf diesem Ausweis beachten (s. Abb. 2 u. 3 in der miniMCB-Beschreibung): | DE SMARTY XV v2019.06...
  • Seite 17: Wartung Des Schaltnetzteils

    The following control board functions can be fully con trolled only with SA-Control remote con trol panel, MB-Gateway web application or SALDA AIR app. In case of Stouch remote con trol panel use the description of remote control panel functions for MCB control board.
  • Seite 18: System Control

    Preparing System is preparing for operation (pre-heating of water heaters, etc.) Opening dampers Dampers are opened BOOST function activated BOOST function is active Cooling heaters Electric heaters are cooled down prior to shutdown of fans | DE SMARTY XV v2019.06...
  • Seite 19: Setting Date And Time

    Pressure - the maximum system pressure is indicated, which based on speed settings in the adjuster environment ADJUSTER › AIR FLOWS ADJUSTING means 100 % air-flow; Air-flow (m /h) - K factors of supply and exhaust air and the maximum system air-flow (m /h) are displayed, which based on speed settings in the adjuster environment ADJUSTER › AIR FLOWS ADJUSTING means 100 %. Fans based on air-flow and pressure are controlled by PID controller and its coefficients are indicated in the adjuster environment section ADJUSTER SMARTY XV v2019.06 DE |...
  • Seite 20: Boost" Function

    Time does not correspond to the start/end interval; Exhaust air temperature drops below the set temperature; Outdoor temperature drops below the set temperature; Mode other than COMFORT was switched or the unit has been shut down. | DE SMARTY XV v2019.06...
  • Seite 21: Reduction Function

    PID controller output limits are set for rotor or bypass damper, at which their operation starts. If rotor is controlled by 0..10 V signal, at low voltages it does not rotate, the motor heats up, thus the minimum control signal output is limited. If On/ Off rotary heat exchanger is used, PID percentage for activating the rotor is indicated in the window SERVICE › HEAT EXCHANGER. SMARTY XV v2019.06 DE |...
  • Seite 22: System Monitoring

    0. 19.23. RESTORING FACTORY DEFAULTS If set parameters result in incorrect operation of the system, you can always restore the factory defaults in the service environment window SERVICE › MAIN › FACTORY SETTINGS. | DE SMARTY XV v2019.06...
  • Seite 23: Indications Of Functions, Alarms And Warnings

    Alarm! Hydronic heater frost protection. System Warning! Pre-heater automatic protection A.7 .37 stopped Warning! Too low supply temperature Alarm! Supply fan failure . A.3 Warning! Too high supply temperature Alarm! Extract fan failure . A.3 SMARTY XV v2019.06 DE |...
  • Seite 24: Event Log (History)

    X1, X2, X3, X4, X5, X6, X7 X9, X13, X14, X15, X16 X10, X11, X12, X17 MiniEX1 X19, X20, X21, X23 Power supply Automation E zone, connector Xp1 general power connection to the unit ~1/230 VAC. | DE SMARTY XV v2019.06...
  • Seite 25: Connection Of Accessories

    +24VDC PCB POWER SUPPLY 3 2 1 3 2 1 3 2 1 4 3 2 1 Abb. 21.1.2. miniMCB controller zones Connector Contactor No. Contactor name Functional block name miniMCB Not used 24VDC DI1 (HOLO) SMARTY XV v2019.06 DE |...
  • Seite 26 Extract air temperature sensor AI4 (NTC) Exhaust air temperature sensor (optional) System mode switch 3.3V_1W DI10 Fan speed switch 3.3V_1W AI4 (0-10V) A2-Extract air CO or RH (input 0-10VDC) 24VDC 24VDC Power supply for Air quality transmitter I | DE SMARTY XV v2019.06...
  • Seite 27 N(L1) Extract fans power line - IV L(L2) N(L1) 230VAC Power supply for X13, X14, X15, X16 Connector Contactor No. Contactor name Functional block name miniMCB RS422_Z RS422_Y RS422/485_A RS422/485 communication port RS422/485_B RS_GND 24VDC SMARTY XV v2019.06 DE |...
  • Seite 28: Fire Protection Signal Input (Fire Protection Input (Nc))

    Electric heater automatic protection (NC) 12VDC Filter relay/Fire place I, DI (NC) 12VDC Filter relay/Fire place II, DI (NC) 12VDC 21.2. FIRE PROTECTION SIGNAL INPUT (FIRE PROTECTION INPUT (NC)) Fire protection signal input must be normally closed, until the fire protection system is not connected a jumper is installed in the factory. Automation controller A zone X4. | DE SMARTY XV v2019.06...
  • Seite 29: Outdoor Air Pre-Heater

    21.5. EXTRACT AIR CO OR RH (INPUT 0-10VDC) Extract air CO or RH (input 0-10VDC) connection. Installation diagram. Transmitter shall be installed inside extract air duct or room. Wiring diagram. Automation controller A zone X7. SMARTY XV v2019.06 DE |...
  • Seite 30: Room Co Transmitter Installation Recommendation

    21.8. SMARTY X V 1.1 VERSION - HEATER CONTROL Product Smarty X V 1.1 version can be equipped with either electric or water heater. The electric heater can be controlled by: - On/Off – control of electric heater up to 0.6kW/230V or the circulation pump. - 0-10V – control of electric or water heater. - Electric heater control by On/Off. Installation diagram. Electric heater shall be installed inside air duct. Arrangement based on air direction Electric Heater -> Supply Air Sensor (TJ). Mini MCB | DE SMARTY XV v2019.06...
  • Seite 31 When using the supply air heater, the supply air sensor (SS) shall be installed downstream the heater (or cooler) as the sen- sor cable allows or until the first branching, bend of the air transportation system. SMARTY XV v2019.06 DE |...
  • Seite 32: Smarty X V 1.2 Version - Heater Control

    Change the settings as follows: • Service password 4444; • Service -> Heaters -> Heater and pre-heater position; • Select either the heater or pre-heater to be switched on MiniMCB basic. With the Stouch control panel, it is impossible to change the settings • Service -> Digital inputs -> Heaters protection inputs Set the manual and automated protection statuses of the heater or pre-heater – according to the standards, it should be NC. | DE SMARTY XV v2019.06...
  • Seite 33: Connection Of Supply And Extract Air Dampers

    21.10. CONNECTION OF SUPPLY AND EXTRACT AIR DAMPERS Product Smarty XV all versions can be equipped with fresh air damper and extract air drives. They are controlled by 3-point. Installation diagram.
  • Seite 34: Connection Of Remote Control Panel Or Modbus

    OFF - when connecting to BMS) 21.12. OPERATION AND ALARM INDICATION (SMARTY X V 1.1) Wiring diagram. Automation controller B zone, X21 connector. 21.13. FIRE PLACE CONNECTION (SMARTY X V 1.1) Wiring diagram. Automation controller C zone, X23 connector. | DE SMARTY XV v2019.06...
  • Seite 35: Led Indication

    EX1 status LED LED2 12V miniMCB power indication LED3 3.3V miniMCB power indication (ON mode) LED4 MiniMCB status LED LED5 Communication line Transmit indication LED6 Communication line Receive indication LED7 24V peripheral POWER ON indication SMARTY XV v2019.06 DE |...
  • Seite 36: Įrenginio Vidinių Ir Išorinių Mazgų Jungimo Orientacinė Schema

    22. ĮRENGINIO VIDINIŲ IR IŠORINIŲ MAZGŲ JUNGIMO ORIENTACINĖ SCHEMA 2019.1017.0.1.1-PS | DE SMARTY XV v2019.06...
  • Seite 37 2019.1017.0.1.2-PS SMARTY XV v2019.06 DE |...
  • Seite 38 2019.1017.0.1.3-PS | DE SMARTY XV v2019.06...
  • Seite 39 SMARTY ZP3XV-0k Smarty 3XV-PE-0k SMARTY XV v2019.06 DE |...
  • Seite 40 RD - Red - Raudonas GN/YE - Green/Yellow - Žalias/G DUTIES / NAME SIGNATURE DATE SP42 UAB"SALDA EI D. Aleksandravičius 2016-03-22 DRAWN BY (MiniMCB) EI A. Šklenikas 2016-03-22 CHECKED BY Principle connection scheme 2016-03-22 CHECKED BY SP35 | DE SMARTY XV v2019.06...
  • Seite 41 BU - Blue - Mėlyna RD - Red - Raudon GN/YE - Green/Ye DUTIES / NAME SIGNATURE DATE SP47 EI K. Vasiliauskas UAB" 2017-05-09 DRAWN BY SMARTY XV v2019.06 DE | 24.1030E EI D. Aleksandravičius 2017-05-09 CHECKED BY Principle connection scheme 2017-05-09 CHECKED BY...
  • Seite 42 SP45 | DE SMARTY XV v2019.06...
  • Seite 43: Ökodesign Datentabele

    [ kWh/a ] 9018 9018 8812 8812 8521 8521 AHS Warm [ kWh/a ] 2085 2085 2037 2037 1970 1970 ErP Compliance 2018 2018 2018 2018 2018 2018 Internet address for disassembly instructions www.salda lt SMARTY XV v2019.06 DE |...
  • Seite 44: Konformitätserklärung

    LST EN 61000-6-2:2005 – Elektromagnetische Verträglichkeit (EMV) – Teil 6-2: Fachgrundnormen – Störfestigkeit Industriebereich. LST EN 61000-6-3:2007 – Elektromagnetische Verträglichkeit (EMV) – Teil 6-3: Fachgrundnormen – Störaussendung Wohnbereich, Geschäfts- und Gewerbebereiche sowie Kleinbetriebe. Sollten Änderungen an den Produkten vorgenommen werden, ist diese Erklärung hinfällig. Unterrichtete Stelle: VšĮ Technikos priežiūros tarnyba, Naugarduko g. 41, LT – 03227 Vilnius, Litauen, Identifikationsnummer 1399. Qualität: Die Aktivitäten der Salda UAB entsprechen der internationalen Norm für Qualitätsmanagementsysteme ISO 9001:2015. Datum 01.02.2019 Giedrius Taujenis Leiter Produktentwicklung | DE SMARTY XV v2019.06...
  • Seite 45: Garantie

    Mit diesem Garantieschein bestätigt der Hersteller seine Verpflichtungen, die in den geltenden Verbraucherschutzgesetzen verankerten Vorschriften im Fall eines festgestellten Mangels zu erfüllen. Der Hersteller behält sich das Recht vor, eine kostenfreie Garantieleistung zu verweigern, wenn die nachfolgend aufgeführten Garantiebedingungen nicht eingehalten werden. SMARTY XV v2019.06 DE |...
  • Seite 46 SMARTY XV v2019.06...
  • Seite 47 SMARTY XV v2019.06...
  • Seite 48 Heat exchanger cleaning Einmal im Jahr** Filterwechsel Alle 3-4 Monate** Sehen Sie in der Produktetikett. ** - Mindestens. HINWEIS. Der Käufer ist verpfl ichtet, “Wartungstabelle des Produktes” zu füllen. MAN000011 MAN000011 Ragainės g. 100 +370 41 540 415 Šiauliai LT-78109, LITHUANIA office@salda.lt...

Inhaltsverzeichnis