Herunterladen Diese Seite drucken

Werbung

Verfügbare Sprachen
  • DE

Verfügbare Sprachen

  • DEUTSCH, seite 21
Montageanleitung
LED Tagfahrlicht
Mounting instruction
LED Daytime Running Lights
Instruction de montage
LED Feux diurnes
Monteringsanvisning
LED Varselljus
Montagehandleiding
LED Dagrijlichten
Instrucciones de montaje
LED Luces de marcha diurna
Instruzioni de montaggio
LED Luci di marcia diurna
Asennusohjeet
LED Huomiovalot
LEDayFlex II

Werbung

loading

Inhaltszusammenfassung für Hella LEDayFlex II

  • Seite 1 LED Tagfahrlicht Mounting instruction LED Daytime Running Lights Instruction de montage LED Feux diurnes Monteringsanvisning LED Varselljus Montagehandleiding LED Dagrijlichten Instrucciones de montaje LED Luces de marcha diurna Instruzioni de montaggio LED Luci di marcia diurna Asennusohjeet LED Huomiovalot LEDayFlex II...
  • Seite 2 Technische Änderungen vorbehalten Subject to alteration without notice Sous réserve de modifications techniques Vi reserverar oss för tekniska ändringar Technische wijzigingen voorbehouden Reservadas modificaciones técnicas Con riserva di modifiche tecniche Oikeus teknisiin muutoksiin pidätetään...
  • Seite 3 Lieferumfang Fourniture De levering Dotazione di fornitura Kit includes Leveransomfattning Volumen del suministro Osaluettelo 20 x 12V 2PT 980 789-851 10 x 24V 2PT 980 789-901 10 x 12 V...
  • Seite 4 Lieferumfang Fourniture De levering Dotazione di fornitura Kit includes Leveransomfattning Volumen del suministro Osaluettelo 12V 2PT 980 789-861 24V 2PT 980 789-911 24 x 12 x 10 x 12 V...
  • Seite 5 Benötigtes Werkzeug Outillage nécessaire Noodzakelijk gereegschap Utensili necessari Tools required Nödvändiga verktyg Herramientas necesarias Tarvittavat työkalut Ø 2,5 mm...
  • Seite 6 Zubehör Accessoires Toebehoren Accessori (nicht im Lieferumfang enthalten) (non fournis) (worden niet meegeleverd) (non in dotazione) Accessories Tillbehör Accesorios Lisätarvikkeet (not included with kit) (ingår ej i leveransen) (no se incluyen en el suministro) (eivät kuulu toimitukseen) 10 / 8HG 980 793-801 10 / 8HG 980 797-801 10 / 8HG 980 795-801 12 / 8HG 980 793-811...
  • Seite 7 Abmessungen Dimensions Afmetingen Dimensioni Dimensions Mått Dimensiones Mitat 31,5 19,0 45,0° 42,0 10,0 19,2 23,6 20,0 ± 0,10 Ø 4,8 16,8 23,4 41,8 2x Ø 4,2...
  • Seite 8 Montage Montage général Mantage Montaggio Mounting Montering Montaje Asennus 0 - 15 mm 90° 0 - 15 mm 90°...
  • Seite 9 Montage Montage général Mantage Montaggio Mounting Montering Montaje Asennus...
  • Seite 10 Montage Montage général Mantage Montaggio Mounting Montering Montaje Asennus 90° 2,5 mm max. 1,5 Nm...
  • Seite 11 Kombinationsbeispiele A Combinaisons possibles A Mogelijke groeperingen A Possibili raggruppamenti A Possible combination A Möjliga grupperingar A Posibles agrupaciones A Mahdolliset ryhmitykset A 90° 90° ø270...
  • Seite 12 Kombinationsbeispiele A Combinaisons possibles A Mogelijke groeperingen A Possibili raggruppamenti A Possible combination A Möjliga grupperingar A Posibles agrupaciones A Mahdolliset ryhmitykset A...
  • Seite 13 Kombinationsbeispiele B Combinaisons possibles B Mogelijke groeperingen B Possibili raggruppamenti B Possible combination B Möjliga grupperingar B Posibles agrupaciones B Mahdolliset ryhmitykset B 90° 90°...
  • Seite 14 Kombinationsbeispiele B Combinaisons possibles B Mogelijke groeperingen B Possibili raggruppamenti B Possible combination B Möjliga grupperingar B Posibles agrupaciones B Mahdolliset ryhmitykset B...
  • Seite 15 Kombinationsbeispiele C Combinaisons possibles C Mogelijke groeperingen C Possibili raggruppamenti C Possible combination C Möjliga grupperingar C Posibles agrupaciones C Mahdolliset ryhmitykset C 90° 90° 90° 90°...
  • Seite 16 Elektrischer Anschluss Connexion électrique Elektrische aansluiting Allacciamento elettrico Electrical connection Elektrisk anslutning Conexión eléctrica Sähköliitäntä 12 V schwarz black noir svart zwart negro nero musta rouge röd 15 87a rood rojo rosso punajnen grau grey gris grijs gris grigio harmaa 30 86 85...
  • Seite 17 Elektrischer Anschluss Connexion électrique Elektrische aansluiting Allacciamento elettrico Electrical connection Elektrisk anslutning Conexión eléctrica Sähköliitäntä 12 V...
  • Seite 18 Elektrischer Anschluss Connexion électrique Elektrische aansluiting Allacciamento elettrico Electrical connection Elektrisk anslutning Conexión eléctrica Sähköliitäntä 24 V schwarz black noir svart zwart negro nero musta rouge röd rood rojo rosso punajnen grau grey gris grijs gris grigio harmaa 30 86 85...
  • Seite 19 Elektrischer Anschluss Connexion électrique Elektrische aansluiting Allacciamento elettrico Electrical connection Elektrisk anslutning Conexión eléctrica Sähköliitäntä 24 V...
  • Seite 20 Technische Änderungen vorbehalten Seite Subject to alteration without notice Page Sous réserve de modifications techniques Page Vi reserverar oss för tekniska ändringar Sidan Technische wijzigingen voorbehouden Bladzijde Reservadas modificaciones técniche Página Con riserva modifiche tecniche Pagina Oikeus teknisiin muutoksiin pidätetään Sivu...
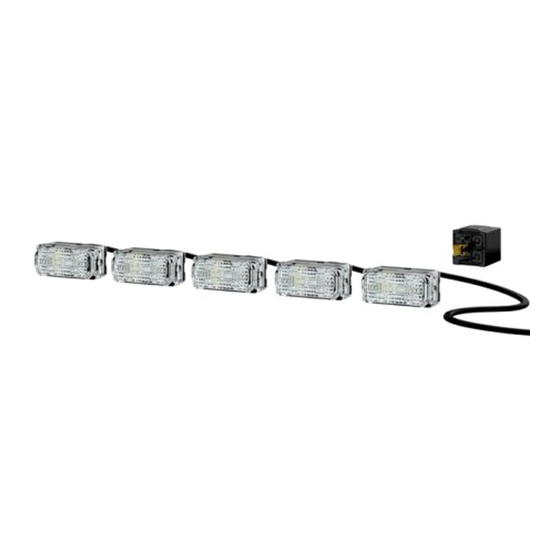
  • Seite 21 Montagevorschriften 5-er Kette Anzahl Montage- Anbau X = Abstand zwichen d= Versatz nach hinten Besonderheiten Module beispiel den Modulen (gemessen von der vordersten zu nächstliegenden Lichtscheibe) waagerecht 0-15 mm 0-40 mm ein oder mehrere Module können + - 16° gedreht werden senkrecht 12-15 mm 0-40 mm...
  • Seite 22 Montagevorschriften 6-er Kette Anzahl Montage- Anbau X = Abstand zwichen d= Versatz nach hinten Besonderheiten Module beispiel den Modulen (gemessen von der vordersten zu nächstliegenden Lichtscheibe) waagerecht 0- 15 mm 0- 40 mm ein oder mehrere Module können + - 20° gedreht werden senkrecht 12 - 15 mm 0 - 40 mm...
  • Seite 23 Montage * Bei Fahrzeugen mit einer Breite von < 1300 mm muss der Abstand min. 400 mm betragen. Leitungen nach Schaltplan verlegen und anschließen. Nach Schaltplan werden die Tagfahrleuchten automatisch mit der min. 1500 mm 250 mm Zündung eingeschaltet. Relais mit Anschlussklem- min.
  • Seite 24 Assembly specifications 5-piece chain Number Assembly Attachment X = Distance between d= displacement towards rear Special features example modules (measured from the front to the modules next lens) horizontal 0-15 mm 0-40 mm one or more modules can be rotated through + - 16° vertical 12-15 mm 0-40 mm...
  • Seite 25 Assembly specifications 6-piece chain Number Assembly Attachment X = Distance between d= displacement towards rear Special features example modules (measured from the front to the modules next lens) horizontal 0- 15 mm 0- 40 mm one or more modules can be rotated through + - 20°...
  • Seite 26 Mounting * With vehicles less than 1300 mm wide, the distance has to be at least 400 mm. Lay and connect the cables in accordance with the connection diagram. According to the connection diagram, the min. 1500 mm 250 mm daytime running lights are switched on automatically with the ignition.
  • Seite 27 Instructions de montage à 5 chaînes Nombre Exemple Montage X = Distance entre d = Décalage vers l'arrière Caractéristiques les modules (mesuré de la vitre transparente modules montage avant à la vitre suivante) horizontal 0-15 mm 0-40 mm un ou plusieurs modules peuvent être tournés de + - 16°...
  • Seite 28 Instructions de montage à chaînes Nombre Exemple Montage X = Distance entre d = Décalage vers l'arrière Caractéristiques les modules (mesuré de la vitre transparente modules montage avant à la vitre suivante) horizontal 0- 15 mm 0- 40 mm un ou plusieurs modules peuvent être tournés de + - 20°...
  • Seite 29 Montage général * Sur les véhicules d'une largeur <1300 mm, la distance minimale doit être de 400 mm. Poser et raccorder les câbles suivant le schéma électrique. D’après le branchement du schéma électrique, les feux min. 1500 mm 250 mm diurnes s’allument automatiquement lors de la mise du contact.
  • Seite 30 Monteringsföreskrifter 5:e kedjan Antal Montering Montering X = avstånd d= förskjutning bakåt Speciellt moduler sexempel mellan moduler (uppmätt från den främsta till den nästliggande linsen) vågrätt 0-15 mm 0-40 mm en eller flera moduler kan vridas + - 16° lodrätt 12-15 mm 0-40 mm en eller flera moduler...
  • Seite 31 Monteringsföreskrifter 6:e kedjan Antal Montering Montering X = avstånd d= förskjutning bakåt Speciellt moduler sexempel mellan moduler (uppmätt från den främsta till den nästliggande linsen) vågrätt 0- 15 mm 0- 40 mm en eller flera moduler kan vridas + - 20° lodrätt 12 - 15 mm 0 - 40 mm...
  • Seite 32 Montering * På fordon med en bredd på < 1 300 mm måste avståndet vara minst 400 mm. Dra och anslut ledningarna enligt kopplingsschemat. Enligt kopplingsschemat tänds varselljusen automatiskt när min. 1500 mm 250 mm tändningen slås på. Montera reläet med min.
  • Seite 33 Montagevoorschriften reeks van vijf Aantal Montage- Opbouw X = afstand tussen de d = offset naar achteren Bijzonderheden modules voorbeeld modules (gemeten vanaf het voorste tot het eerstvolgende lampglas) horizontaal 0-15 mm 0-40 mm een of meerdere modules kunnen + - 16° worden gedraaid verticaal 12-15 mm 0-40 mm...
  • Seite 34 Montagevoorschriften reeks van zes Aantal Montage- Opbouw X = afstand tussen de d = offset naar achteren Bijzonderheden modules voorbeeld modules (gemeten vanaf het voorste tot het eerstvolgende lampglas) horizontaal 0- 15 mm 0- 40 mm een of meerdere modules kunnen + - 20°...
  • Seite 35 Mantage * Bij voertuigen met een breedte <1300 mm dient de afstand min. 400 mm te zijn. Kabels in overeen- stemming met schakel- schema leggen en aansluiten. Volgens het schakel- min. 1500 mm 250 mm schema worden de dagrijlichten automatisch geactiveerd door het min.
  • Seite 36 Prescripciones de montaje cadena de 5 módulos lumínicos Nº de Ejemplo Montaje en X = distancia d = inclinación hacia detrás Características módulos superficie entre los módulos (medida desde el dispersor situado montaje más delante hasta el siguiente más cercano) horizontal 0-15 mm 0-40 mm...
  • Seite 37 Prescripciones de montaje cadena de 6 módulos lumínicos Nº de Ejemplo Montaje en X = distancia d = inclinación hacia detrás Características módulos superficie entre los módulos (medida desde el dispersor situado montaje más delante hasta el siguiente más cercano) horizontal 0- 15 mm 0- 40 mm...
  • Seite 38 Montaje * En los vehículos con un ancho inferior a 1.300 mm, la distancia debe ser de 400 mm como mínimo. Tender y conectar los cables según el esquema de conexiones. Según el esquema de conexiones, los faros min. 1500 mm 250 mm diurnos se encienden automáticamente al...
  • Seite 39 Prescrizioni di montaggio per la catena a 5 moduli Numero Esempio Montaggio X = distanza tra i moduli d = offset verso la parte posteriore Particolarità di moduli (misurato dal primo trasparente montaggio a quello più vicino) orizzontale 0-15 mm 0-40 mm È...
  • Seite 40 Prescrizioni di montaggio per la catena a 6 moduli Numero Esempio Montaggio X = distanza tra i moduli d = offset verso la parte posteriore Particolarità di moduli (misurato dal primo trasparente montaggio a quello più vicino) orizzontale 0- 15 mm 0- 40 mm È...
  • Seite 41 Montaggio * Per i veicoli con una larghezza < 1300 mm, la distanza min. deve essere di 400 mm. Posizionare i cavi e collegarli in base allo schema elettrico. Quando si inserisce l'accensione, le luci di min. 1500 mm 250 mm marcia diurna si accendono automatica- mente in base allo schema.
  • Seite 42 Asennusohjeet 5 kpl:n sarja Moduulien Asennuse Lisäys X = Moduulien väli d= Upotus taakse Erikoisuudet lukumäärä simerkki (mitattuna etummaisesta seuraavaan valoyksikköön) vaakasuora 0-15 mm 0-40 mm yhtä tai useampaa moduulia voi kääntää + - 16° pystysuora 12-15 mm 0-40 mm yhtä...
  • Seite 43 Asennusohjeet 6 kpl:n sarja Moduulien Asennuse Lisäys X = Moduulien väli d= Upotus taakse Erikoisuudet lukumäärä simerkki (mitattuna etummaisesta seuraavaan valoyksikköön) vaakasuora 0- 15 mm 0- 40 mm yhtä tai useampaa moduulia voi kääntää + - 20° pystysuora 12 - 15 mm 0 - 40 mm yhtä...
  • Seite 44 Asennus * Vähintään 400 mm erillään toisistaan, jos ajoneuvon leveys on < 1.300 mm. Asenna johdot kytkentäkaavion mukaan ja liitä. Kytkentäkaavion mukaan huomiovalot syttyvät min. 1500 mm 250 mm automaattisesti virta-avainta käännettäessä. min. 600 mm* Asenna releet liitäntäpinteiden avulla alaspäin, jottei niihin Huomio! pääse roiskumaan vettä.
  • Seite 51 Comprobar que el sistema de iluminación funciona impecablemente En caso de dudas o problemas de montaje, por favor, llame al Servicio postventa de Hella o al mayorista, o bien diríjase a su taller.
  • Seite 52 © Hella KG a A Hueck & Co., D-59552 Lippstadt 460 895-32 07.12 Printed in New Zealand...