Herunterladen Inhalt Inhalt Diese Seite drucken
Bosch DCU 220 Instandsetzungsanleitung
Vorschau ausblenden Andere Handbücher für DCU 220:

Werbung

Verfügbare Sprachen

Verfügbare Sprachen

DCU 220
de Instandsetzungsanleitung
Diagnostic Control Unit
Windows 10
en Repair instructions
Diagnostic Control Unit
Windows 10

Werbung

Inhaltsverzeichnis
loading

Inhaltszusammenfassung für Bosch DCU 220

  • Seite 1 DCU 220 de Instandsetzungsanleitung en Repair instructions Diagnostic Control Unit Diagnostic Control Unit Windows 10 Windows 10...
  • Seite 2: Inhaltsverzeichnis Deutsch

    2 | DCU 220 | Inhaltsverzeichnis Deutsch Verwendete Symbolik Arbeitsspeicher erweitern In der Dokumentation Lieferumfang 1.1.1 Warnhinweise – Aufbau und Bedeutung 3 Kompatibilität 1.1.2 Symbole – Benennung und Bedeutung 3 Arbeitsspeicher installieren Auf dem Produkt DCU 220 prüfen Benutzerhinweise Bedienung konfigurieren Sicherheitshinweise Prüfen Hardwarefehler oder Softwarefehler...
  • Seite 3: Verwendete Symbolik

    Die Bedienung des DCU 220 kann konfiguriert werden. Mehrschrittige Aus mehreren Schritten bestehende Die Funktionen der nachstehenden Programme sind in Handlung Handlungsaufforderung. der Betriebsanleitung DCU 220 (1 689 989 321) und im Einschrittige Aus einem Schritt bestehende Hand- Benutzerhandbuch (1 689 989 330) beschrieben: Handlung lungsaufforderung.
  • Seite 4: Übersicht Aufbau

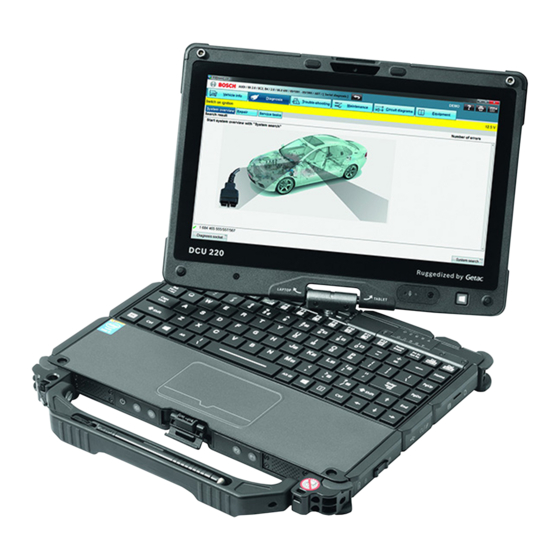
    4 | DCU 220 | Übersicht Aufbau Anschlüsse 3.2.1 Linke Seite Bedienelemente Abb. 3: Linke Seite 1 Festplatte (wechselbar) 2 Akkuschacht (Batterie 1) 3.2.2 Rechte Seite Abb. 4: Rechte Seite 1 Akkuschacht (Batterie 2) 2 USB 2.0 - Anschluss 3 Kombi-Audioanschluss Lautsprecher oder Mikrofon 4 Smart Card-Steckplatz (Funktion nicht verfügbar)
  • Seite 5: Werkzeug Und Hilfsmittel

    Per Energieanzeige: Außen am Akku befindet sich eine Energieanzeige, 4.1.2 Hilfsmittel an welcher der Akkuladezustand abgelesen werden kann, wenn der Akku nicht in DCU 220 installiert ist. Hilfsmittel Anwendung Schutz des Displays. Wir empfehlen ei- Unterlage nen harten Schaumstoff oder eine ESD- Unterlage.
  • Seite 6 6. Neue Festplatte mit der silbernen Seite nach oben Die Abdeckklappen sind mit jeweils zwei bis vier vollständig in das Fach schieben, bis sie einrastet. Schrauben an der Unterseite von DCU 220 befestigt. 7. Abdeckung schließen und danach von oben nach unten schieben, bis sie einrastet.
  • Seite 7: Recovery-Partition Aktualisieren

    4. "BootableSource_G3.zip" an einen Ort mit ausrei- chend freiem Speicherplatz entpacken (z. B. Desk- top). Eine Recovery der DCU 220 G3 mit Windows 10 ist ausschließlich mit einer Festplatte mit mindestens 64 GB möglich. Die Durchführung mit einem USB- Stick ist nicht möglich 5.
  • Seite 8 Installation gelöscht! 6. Bei Option Recovery Partition <Start> wählen. Die Spannungsversorgung während der Installation darf nicht unterbrochen werden. 1. Bootfähige Festplatte an DCU 220 anschließen. 2. DCU 220 einschalten. 3. Wenn während des Systemstarts folgender Bild- schirm erscheint, <F10> drücken.
  • Seite 9 Sekunden lang gedrückt halten. " Nach Abschluss wird das System neu gestartet und der Windows-Einrichtungsassistent startet. Falls DCU 220 das Recovery-Menü nicht öffnet, muss DCU 220 mit gedrückter <Shift >-Taste herunter- gefahren werden und der Recovery-Prozess erneut gestartet werden.
  • Seite 10: Arbeitsspeicher Erweitern

    10 | DCU 220 | Arbeitsspeicher erweitern 3. Wärmeleitpad auf der Metallplatte anbringen. Lieferumfang 4. RAM in einem 30° Winkel in die Steckvorrichtung einlegen. Abb. 13: Lieferumfang Nachrüstsatz 1 688 400 611 1 Speichermodul (RAM) 2 Sicherungsbügel 3 Befestigungsschraube (2x) 4 Wärmeleitpad...
  • Seite 11: Prüfen Hardwarefehler Oder Softwarefehler

    | DCU 220 | 11 DCU 220 prüfen Bedienung konfigurieren Die Bedienung des DCU 220 kann auch durch den End- kunden konfiguriert werden. Die Funktionen der nach- stehenden Programme sind in der Betriebsanleitung DCU 220 (1 689 989 321) und in dem Benutzerhand-...
  • Seite 12 12 | DCU 220 | Fehlersuchbaum 6.3.1 Fehlersuche DCU 220 Es gibt 2 prinzipielle Vorgehensweisen: a) GH geht zum Kunden mit Leihgerät und HD b) GH sendet nur Leihgerät und HD an Kunde HW Kunde HD Kunde Festplatte Windows Probleme mit...
  • Seite 13 | DCU 220 | 13 HW Leihgerät HD Kunde Akku und HD des Kunden in Schnelltest ohne Leihgerät Verlust von einbauen Daten HW Leihgerät HD Kunde Leihgerät mit HD Leihgerät des Kunden läuft? (HW defekt) (Keine SW-Instal- lation erforderlich) Kunde schickt...
  • Seite 14 BSCR prüft Anmerkung! defekte DCU 220 (Garantie Prüfung Leihgerät: und Inhalt) GH prüft eigene DCU 220 oder sendet geliehene DCU 220 zurück an BSCR BSCR fragt bei GH sendet defekte Garantie- GH nach wegen Kosten Nein Nein DCU 220 zurück...
  • Seite 15: Dcu 220 Tauschen

    DCU 220 tauschen Inbetriebnahme reparierter DCU 220 Verfügbarkeit 1. Am Leihgerät DCU 220 beide Akkus entnehmen. Die Abwicklung über das Service Center Repair in Mün- 2. Am Leihgerät DCU 220 die Festplatte entnehmen. chen funktioniert für Europa und den Mittleren Osten.
  • Seite 16 16 | DCU 220 | BIOS-Einstellungen Advanced Nachfolgend aufgeführt sind die BIOS-Einstellungen Name Setting ab Werk. Wake Up Capability: Any-key Wake Up from S3 state Disabled Information USB Wake Up From S3: Disabled System Policy: Balance Name Setting AC Initiation:...
  • Seite 17 | DCU 220 | 17 Boot Menu Name Setting Boot Type Order USB Floppy Drive Hard Disk Drive USB Disk Drive USB CD/DVD Drive: Network Drive: USB Floppy Drive: Hard Disk Drive: USB Disk Drive: USB CD/DVD Drive: Network Drive:...
  • Seite 18: Contents English

    DCU 220 troubleshooting Configuring operation 6.3.2 DCU 220 repair process Design overview Replacing DCU 220 Control elements Dispatch of the defective DCU 220 Ports Commissioning of rental DCU 220 3.2.1 Left side Commissioning of repaired DCU 220 3.2.2 Right side Comment concerning material defect liability 31 3.2.3...
  • Seite 19: In The Documentation

    Explanation tions of the programs cited below are described in the Attention Warns about possible property damage. operating manual DCU 220 (1 689 989 321) and in the User Handbook (1 689 989 330): Information Practical hints and other useful information.
  • Seite 20: Control Elements

    | DCU 220 | 5 Design overview Ports 3.2.1 Left side Control elements Abb. 3: Left side 1 Hard disk (exchangeable) 2 Storage battery compartment (storage battery 1) 3.2.2 Right side Abb. 4: Right side 1 Storage battery compartment (storage Storage battery 2) 2 USB 2.0 port...
  • Seite 21 20 %. The storage battery is fully discharged when none of the segments are lit. Power supply cable 1. Disconnect the power supply unit from DCU 220 and from the power supply. 2. Disconnect power supply cable from the power supply unit.
  • Seite 22 7. Close the cover and push it downward until it locks 1. Switch off the DCU 220. in place. 2. Disconnect the DCU 220 from the power supply. 8. Then push the lock into "locked" position ( ). 3. Push cover lock into "unlocked" position ( ) ().
  • Seite 23 8 | DCU 220 | Updating recovery partition 8. In STEP2, specify the path to the "G3Bootable Sour- The system and the recovery partition (HDI) of DCU 220 ce folder". can be updated manually to rectify errors that occur. For this purpose, an up-to-date system image is made available regularly.
  • Seite 24 6. Select <Start> under the option Recovery Partition. Make sure the voltage supply is not interrupted du- ring the installation process. 1. Connect the bootable hard disk to DCU 220. 2. Switch on the DCU 220. 3. If the following screen appears during the system start, press <F10>.
  • Seite 25 Make sure the voltage supply must not be interrup- ted during the recovery process. 1. Connect the DCU 220 to the power supply unit. 2. Switch on the DCU 220. 3. If the following screen appears during the system start, simultaneously hold down the keys <Ctrl>...
  • Seite 26: Scope Of Delivery

    | DCU 220 | 11 Expanding the main-memo- 3. Mount the heat conducting pad on the metal plate. ry capacity Scope of delivery 4. Place the RAM into the plug-in connector at an angle of 30°. Abb. 13: Scope of delivery, retrofit kit 1 688 400 611...
  • Seite 27 Operation of the DCU 220 can also be configured by the end customer. The functions of the programs cited below are described in the operating manual DCU 220 (1 689 989 321) and in the User Handbook (1 689 989 330): Power options...
  • Seite 28: Troubleshooting Chart

    | DCU 220 | 13 Troubleshooting chart 6.3.1 DCU 220 troubleshooting There are two possible procedures: a) WS goes to customer with loaner and HD b) WS sends loaner and HD to customer HW Customer HD Customer Windows problems with...
  • Seite 29 14 | DCU 220 | HW loaner HD customer insert battery and HD of customer in Fastcheck the loaner without dataloss HW loaner HD customer Install customer HD in loaner loaner works? (HW defect) (no SW-Instal- lation requiered) Customer send...
  • Seite 30 SW defect Customer DCU has some software problems BSRC checks Additional note! defect DCU 220 (warranty yes/no Loaner check: and content) WS check their own DCU 220 unit send BSRC unit loaner back to BSRC BSRC ask WS WS send DCU about Accepted? 220 back to...
  • Seite 31 Working through the Checklist. max. 0.15 h rage equipment. Working through Checklist and perfor- 2. Install the hard disk in the DCU 220 rental device. max. 0.50 h ming operating system recovery. 3. Install the stylus in the DCU 220 rental device.
  • Seite 32 | DCU 220 | 17 BIOS-Einstellungen Advanced Nachfolgend aufgeführt sind die BIOS-Einstellungen Name Setting ab Werk. Wake Up Capability: Any-key Wake Up from S3 state Disabled Information USB Wake Up From S3: Disabled System Policy: Balance Name Setting AC Initiation:...
  • Seite 33 18 | DCU 220 | Boot Menu Name Setting Boot Type Order USB Floppy Drive Hard Disk Drive USB Disk Drive USB CD/DVD Drive: Network Drive: USB Floppy Drive: Hard Disk Drive: USB Disk Drive: USB CD/DVD Drive: Network Drive:...
  • Seite 34 Robert Bosch GmbH Automotive Service Solutions Franz-Oechsle-Straße 4 73207 Plochingen DEUTSCHLAND www.bosch.com bosch.prueftechnik@bosch.com 1 689 975 287 | 2017-07-06...

Inhaltsverzeichnis