Herunterladen Inhalt Inhalt Diese Seite drucken
Kessel LW 400 Einbauanleitung

Kessel LW 400 Einbauanleitung

Komfortschachtsystem
Vorschau ausblenden Andere Handbücher für LW 400:
Inhaltsverzeichnis

Werbung

Verfügbare Sprachen

Verfügbare Sprachen

KESSEL Komfortschachtsystem
LW 400 / LW 800 / LW 1000
- zum Einbau ins Erdreich
Installation
Inbetriebnahme
der Anlage wurde durchgeführt von Ihrem Fachbetrieb:
Name/Unterschrift
Stand 2017/11
EINBAUANLEITUNG
LW 400
LW 800
Einweisung
Datum
Produktvorteile
Modulares System
Zulassung Z-42.1-256
LW 1000
Zulassung Z-42.1-224
LW 400; LW 800
Grundwasserbeständig
bis 0,5 m
Teleskopisches Aufsatz-
stück für stufenlose
Höhenanpassung
Anbohrbar bis DN 150
LW 1000
Ort
Stempel Fachbetrieb
D
Seite 1
GB
Page 25
F
Page 49
Sach-Nr. 010-657

Werbung

Inhaltsverzeichnis
loading

Inhaltszusammenfassung für Kessel LW 400

  • Seite 1 EINBAUANLEITUNG KESSEL Komfortschachtsystem Seite 1 LW 400 / LW 800 / LW 1000 Page 25 Page 49 - zum Einbau ins Erdreich Produktvorteile Modulares System Zulassung Z-42.1-256 LW 1000 Zulassung Z-42.1-224 LW 400; LW 800 Grundwasserbeständig bis 0,5 m Teleskopisches Aufsatz- LW 400 stück für stufenlose...
  • Seite 2: Inhaltsverzeichnis

    Bodenelement setzen ....................... 12 Seitliche Zuläufe ....................... 12 Rohrleitungssystem anschließen ..................13 3.9.1 Rohrleitungssystem für LW 400 anschließen ..............13 3.9.2 Rohrleitungssystem für LW 800 / LW 1000 anschließen ..........14 3.9.3 Rohrleitungssystem für LW 800 / LW 1000 anschließen ..........15 3.10...
  • Seite 3: Einleitung

    Die Aufsatzstücke sind in der Höhe stufenlos verschiebbar und können mit verschiedenen Abdeckungen versehen werden. Anforderungen an die Wasserundurchlässigkeit können durch den Einbau einer Dichtbahn erfüllt werden. Die KESSEL-Komfortschächte sind modular aufgebaute Systeme, welche felxibel an verschiedene Einbausituationen und Einbautiefen angepasst werden können. Lieferumfang –...
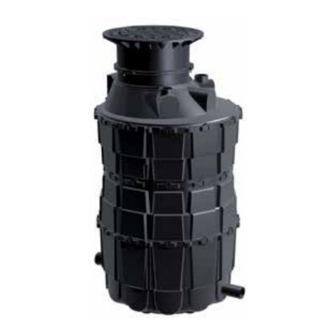
  • Seite 4: Baugruppen

    Einleitung Baugruppen LW 1000 LW 800 LW 400 Abb. [1] Bezeichnung Art.-Nr. Abdeckplatte aus GG, tagwasserdicht; Kl. A, verriegelt 860132 Abdeckplatte aus GG, tagwasserdicht; Kl. B, verriegelt 860133 Abdeckplatte aus GG, tagwasserdicht; Kl. D, verriegelt 860136 Abdeckplatte aus GG, mit Ventilation; Kl. A 860134 Abdeckplatte aus GG, mit Ventilation;...
  • Seite 5 Profillippendichtung 860114 Konus Ø 1070 860103 Konus Ø 1200 860102 Verbindungskeile (Set) für LW 1000 860111 Verbindungskeile (Set) für LW 800 840111 Verbindungskeile (Set) für LW 400 850111 Profillippendichtung Ø 1070 860112 Zwischenstück 860101 Profillippendichtung Ø 1200 860113 Steighilfen 860110...
  • Seite 6: Sicherheit

    Verwendungen von nicht originalen Ersatzteilen – Durchführungen von Reparaturen durch nicht vom Hersteller autorisierten Betrieben oder Personen können zum Verlust der Gewährleistung führen. Nachträgliche Erweiterungen von Kessel- Schachtanlagen müssen durch den Kessel-Werkskundendienst abgewickelt werden. Personalauswahl und -qualifikation Personen, die Schachtanlagen montieren, müssen –...
  • Seite 7: Gefahren, Die Vom Produkt Ausgehen

    Sicherheit Gefahren, die vom Produkt ausgehen 2.3.1 Quetschgefahr beim Verfügen der Schachtelemente Die Schachtelemente sind teilweise schwer und unhandlich. Beim Verfügen besteht die Gefahr von Quetschverletzungen der Finger und Hände. Persönliche Schutzausrüstung (Handschuhe) tragen. Quetschgefahr und Gefahr durch hohes Gewicht. Die Deckel der Aufsatzstücke sind sehr schwer. Nur mit geeigneten Hebehilfen montieren / demontieren.
  • Seite 8: Montage

    Montage Montage Allgemeines Die Zusammenstellung der Schachtelemente erfolgt entsprechend der Abb. [1]. Dabei folgendes beachten: – Baugrube muss vorbereitet sein – Kontrolle Schachttiefe. Sicherstellen, dass die Schachtelemente in montiertem Zustand der Tiefe der Baugrube entspricht. – Schachtelemente und Dichtungen frei von Verschmutzungen halten. –...
  • Seite 9: Funktionsschema/Einbausituation

    Montage Funktionsschema/Einbausituation LW 400 Abb. [2] LW 800 Abb. [3] LW 1000 Abb. [4] 2017/11 9 / 72 010-657...
  • Seite 10: Einbautiefen Lw 400

    Montage Einbautiefen LW 400 Abb. [5] DN 150 DN 200 DN 250 Bodenteil geschlossen 700-1050 mm 745-1095 mm 795-1135 mm 749-1099 mm 1050-1400 mm 1095-1445 mm 1135-1485 mm 1099-1449 mm 1400-1750 mm 1445-1795 mm 1485-1835 mm 1449-1799 mm 1750-2100 mm...
  • Seite 11: Einbautiefen Lw 1000

    Montage Einbautiefen LW 1000 Abb. [7] Einbau geschlossenes Bodenteil 1150-1650 mm 1650-2150 mm 2150-2650 mm 2650-3150 mm Baugrube vorbereiten Die Beschaffenheit des Untergrundes und seitliches Füllmaterial müssen wie folgt ausgeprägt sein: • Untergrund:.Eben, ca. 30 cm hohe und verdichtete Schotter/Kies-Schicht*. • Fixierung des Bodenelementes mit Magerbeton (sieheAbb. [26] [27]). •...
  • Seite 12: Bodenelement Setzen

    Montage Bodenelement setzen • Bodenelement waagerecht in der Baugrube ausrichten. Geringe Abweichungen machen sich bei tiefen Schächten bis nach oben deutlich bemerkbar. Die Stellfläche des Bodenelements (Boden der Baugrube) muss vollflächigenKontakt zum Bodenelement haben. • Das Bodenelement seitlich mit Magerbeton fixieren (siehe Abb. [25] [26]). Bei Krantransport beachten: •...
  • Seite 13: Rohrleitungssystem Anschließen

    Rohrleitungssystem anschließen 3.9.1 Rohrleitungssystem für LW 400 anschließen Anschlüsse wie folgt herstellen: – Zulauf <30> – Ablauf <31> Achtung bei LW 400: Gerinne-Bodenteil besteht aus Material PP und kann nicht mit PE-HD-Rohr verschweißt werden. Abb. [10] Abb. [11] 2017/11 13 / 72...
  • Seite 14: 3.9.2 Rohrleitungssystem Für Lw 800 / Lw 1000 Anschließen

    Montage 3.9.2 Rohrleitungssystem für LW 800 / LW 1000 anschließen • Anschlüsse wie folgt herstellen: Zulauf <30>; Ablauf <31 • Das geschlossene Bodenteil (z.B. für das geschlossene Gerinne) ist ohne werks seitige Verstärkung nicht zum Ein bau im Grundwasser geeignet, da sich die Verformungsbeständigkeit sonst lösen kann. Bei Verwendung als Rückstauschacht ist beim Verlegen der Grundleitung die DIN EN 12056 zu beachten! Darüber hinaus ist eine Beruhigungs strecke vor und hinter dem Rückstauverschluss (mind.
  • Seite 15: 3.9.3 Rohrleitungssystem Für Lw 800 / Lw 1000 Anschließen

    Montage 3.9.3 Rohrleitungssystem für LW 800 / LW 1000 anschließen • Anschlüsse wie folgt herstellen: Zulauf <30>; Ablauf <31 • Das geschlossene Bodenteil (z.B. für das geschlossene Gerinne) ist ohne werks seitige Verstärkung nicht zum Ein bau im Grundwasser geeignet, da sich die Verformungsbeständigkeit sonst lösen kann. Bei Verwendung als Rückstauschacht ist beim Verlegen der Grundleitung die DIN EN 12056 zu beachten! Darüber hinaus ist eine Beruhigungs strecke vor und hinter dem Rückstauverschluss (mind.
  • Seite 16: Einbau Der Steighilfen

    Montage 3.10 Einbau der Steighilfen Abb. [16] Die Steighilfen <11> übereinander anordnen, von oben in die vorgesehene Führungsschiene stecken und mit Sicherheitskeilen fixieren (siehe Abb. [8]). Die Steighilfen sind nur bei Komfortschachtsystem LW 800 und LW 1000 verwendbar. 3.11 Schachtsystem montieren Beachten Sie zwei verschiedene Dichtungsdurchmesser.
  • Seite 17 • Verbinden der Schachtteile nach Abbildung 17. • Zwischenstück oder Konus auf das Bodenelement aufsetzen. Dabei sicherstellen, dass dieses nach der Kodierung  ausgerichtet sind <33> und <34> Abb. [18] LW 400 LW 800 LW 1000 Abb. [19] 2017/11 17 / 72...
  • Seite 18: Montage (Optional Kürzen) Des Aufsatzstücks

    Montage (optional kürzen) des Aufsatzstücks: • Dichtung <22> oder <4> in Konus <34> einsetzen und fetten. • Aufsatzstück <20> oder <2> einsetzen, grob auf gewünschte Einbauhöhe bringen, mit Klemmringe fixieren • Feinjustierung auf Endhöhe mit Stellschrauben vornehmen. LW 400 LW 800/1000 Abb. [22] Abb. [21]...
  • Seite 19: Abdeckungsvarianten

    Montage • Rundherum so anzeichnen, dass das Aufsatzstück <20> oder <2> mindestens 4 cm in den Konus  <34> hineinragt. • Mit Stichsäge (15°) <2> absägen. Kanten entgraten. LW 400 LW 800/1000 min. 40 min. 40 Abb. [23] Abb. [24] 3.13 Abdeckungsvarianten LW 400...
  • Seite 20: Grube Verfüllen

    Montage 3.14 Grube verfüllen • Grube mit geeignetem Füllmaterial (0/16 Körnung, 50 cm umlaufend) auffüllen, dabei alle 30 cm das Füllmaterial fachgerecht verdichten (z.B. Rüttelplatte) (<2> = Magerbetonkeil). Der erforderliche Baugrubenböschungswinkel β ist umlaufend einzuhalten.Die Zuordnung zwischen innerem Reibungswinkel ɸ des Verfüllmaterials und zulässigem Baugrubenböschungswinkel β ist wie folgt: Baugrubenböschungswinkel ɸ...
  • Seite 21: Komfortschacht Lw 400

    Montage 3.14.1 Komfortschacht LW 400 30cm 30cm 30cm 50cm 30cm ß 30cm 50cm 30cm Abb. [26] • Bei Einbau in befahrbaren Flächen (Klasse D) ist das teleskopische Aufsatzstück mit einer ca. 15 cm starken armierten Trageplatte aus Beton <35> Klasse B 35 mind. 0,8 x 0,8 m bauseits zu unterfüttern (Abb. [27]).
  • Seite 22: 3.14.2 Komfortschacht Lw 800 / Lw 1000

    30cm Abb. [28] • Beim Einbau in befahrbaren Flächen (Klasse D) sind die KESSEL-Schachtsysteme gemäß Standardstraßen- aufbau (RSto + ZTVE-StB, DIN 18196) einzubauen. Wird das KESSEL-Schachtsystem mit Aufsatzstück und handelsüblicher BEGU-Abdeckung aufgebaut, kann auf eine ca. 15 cm armierte Trageplatte verzichtet werden, ansonsten ist diese 2,3 x 2,3 m um das Aufsatzstück zu betonieren.
  • Seite 23: Technische Daten

    Technische Daten Technische Daten Maximale Schachttiefe max. 5 m Grundwasserdichtheit 0,5 m Abmessungen Siehe Abb. [1] Gewicht Siehe Abb. [1] Abstand der Steighilfen und deren Tragfähigkeit Nach EN 13598-2 / BGV C5 & BGR 177 Material (Art) Kunststoff PE (Schacht) und PPO/PA (Steighilfen) Dichtungen Elastomer 55 Shore A Material (Beschaffenheit)
  • Seite 24: Führend In Entwässerung

    Führend in Entwässerung Privater Wohnungsbau ohne Kanalanbindung 1 2 3 4 1 2 3 4 Öffentlicher Bau z.B. Krankenhaus Öffentlicher Bau z.B. Freizeitanlagen 1 2 3 4 Gewerblicher Bau z.B. Hotel Gewerblicher Bau z.B. Industriebau 2 3 5 Gewerblicher Bau z.B.
  • Seite 25: Installation Instructions

    INSTALLATION INSTRUCTIONS KESSEL Comfort chamber system LW 400 / LW 800 / LW 1000 - for underground installation Product advantages Modular system Approval Z-42.1-256 LW 1000 Approval Z-42.1-224 LW 400; LW 800 Resistant to groundwater up to 0.5 m Vertically adjustable...
  • Seite 26 Setting the base element in place ........................36 Inlets at the side .................................36 Connecting the pipework system ........................37 3.9.1 Connecting the pipework system for LW 400 ....................37 3.9.2 Connecting the pipework system for LW 800 / LW 1000 ................38 3.9.3 Connecting the pipework system for LW 800 / LW 1000 ................39 3.10...
  • Seite 27: Introduction

    Water impermeability requirements can be fulfilled by installing a sealing sheet. The KESSEL comfort chambers are modular systems which can be flexibly adapted to different installation situations and installation depths.
  • Seite 28: Assemblies

    Introduction Assemblies LW 1000 LW 800 LW 400 Fig. [1] Designation Art. no. Cover plate made of cast iron, resistant to surface water; Cl. A, lockable 860132 Cover plate made of cast iron, resistant to surface water; Cl. Class B, lockable 860133 Cover plate made of cast iron, resistant to surface water;...
  • Seite 29 860103 Cone Ø 1200 860102 Connection wedges (set) for LW 1000 860111 Connection wedges (set) for LW 800 840111 Connection wedges (set) for LW 400 850111 Profile lip seal Ø 1070 860112 Adapter 860101 Profile lip seal Ø 1200 860113...
  • Seite 30: Safety

    Later extensions to the Kessel chamber systems must be carried out by Kessel Factory Customer Services. Staff selection and qualification Persons who install the chamber systems must –...
  • Seite 31: Risks Caused By The Product

    Safety Risks caused by the product 2.3.1 Risk of crushing when fitting the chamber elements together Some of the chamber elements are heavy and difficult to handle. There is a risk of crushing injuries to fingers and hands when assembling the sections. Wear personal protective equipment (gloves). Risk of crushing and hazard due to heavy weight.
  • Seite 32: Installation

    Installation Installation General information The chamber elements are put together in accordance with Fig. [1]. Please heed the following: – The excavation pit must have been prepared. – Check chamber depth. Make sure that the assembled chamber elements correspond to the depth of the excavation pit.
  • Seite 33: Description Of Operation/Installation Situation

    Installation Description of operation/installation situation LW 400 Fig. [2] LW 800 Fig. [3] LW 1000 Fig. [4] 2017/11 33 / 72 010-657...
  • Seite 34: Installation Depths Lw 400

    Installation Installation depths LW 400 Fig. [5] DN 150 DN 200 DN 250 Base closed 700-1050 mm 745-1095 mm 795-1135 mm 749-1099 mm 1050-1400 mm 1095-1445 mm 1135-1485 mm 1099-1449 mm 1400-1750 mm 1445-1795 mm 1485-1835 mm 1449-1799 mm 1750-2100 mm...
  • Seite 35: Installation Depths Lw 1000

    Installation Installation depths LW 1000 Fig. [7] Installation of closed base 1150-1650 mm 1650-2150 mm 2150-2650 mm 2650-3150 mm Preparing the excavation pit The substrate and filling material around the chamber must have the following properties: • Substrate:Level, layer of compressed crushed stone/gravel approx. 30 cm deep*. •...
  • Seite 36: Setting The Base Element In Place

    Installation Setting the base element in place • Align the base element horizontally in the excavation pit. Slight deviations are noticed significantly right to the top of deep chambers. The space required for the footprint of the base element (bottom of the excavation pit) must be in contact with the base element across the whole of its surface.
  • Seite 37: Connecting The Pipework System

    Connecting the pipework system for LW 400 Establish connections as follows: – Inflow <30> – Outflow <31> Note for LW 400: The channel-base is made of PP material and cannot be welded to PE-HD pipe. Fig. [10] Fig. [11] 2017/11 37 / 72...
  • Seite 38: Connecting The Pipework System For Lw 800 / Lw 1000

    Installation 3.9.2 Connecting the pipework system for LW 800 / LW 1000 • Establish connections as follows: Inflow <30> Outflow <31> • The closed base (e.g. for the closed channel) is not suitable for installation in the groundwater without having been reinforced in the factory first since the deformation resistance can become loose otherwise. When the chamber is used as a backwater chamber, DIN EN 12056 must always be heeded when routing the base pipe.
  • Seite 39: Connecting The Pipework System For Lw 800 / Lw 1000

    Installation 3.9.3 Connecting the pipework system for LW 800 / LW 1000 • Establish connections as follows: Inflow <30> Outflow <31> • The closed base (e.g. for the closed channel) is not suitable for installation in the groundwater without having been reinforced in the factory first since the deformation resistance can become loose otherwise. When the chamber is used as a backwater chamber, DIN EN 12056 must always be heeded when routing the base pipe.
  • Seite 40: Installation Of The Access Steps

    Installation 3.10 Installation of the access steps Fig. [16] Arrange the access steps <11> above one another, insert into the guide rail provided from above and fix in place using safety wedges (see Fig. [8]). The access steps can only be used with the Comfort chamber system LW 800 and LW 1000. 3.11 Assembling and installing the chamber system Note the two different sealing gasket diameters.
  • Seite 41 Connect the chamber parts as shown in Figure 17. • Set an extension section or cone onto the base element. Make sure this is aligned in accordance with  the coding <33> and <34>. Fig. [18] LW 400 LW 800 LW 1000 Fig. [19] 2017/11 41 / 72...
  • Seite 42: Assembly (Optional Shortening) Of The Upper Section

    Insert the upper cover section <20> or <2>, move it roughly to the required installation height, fix in place using clamping rings. • Use the adjustment screws to carry out fine adjustment to the final height. LW 400 LW 800/1000 Fig. [22] Fig. [21]...
  • Seite 43: Cover Versions

    Mark the upper section <20> or <2> all the way round in such a way that it projects at least 4 cm into the cone <34>. • Use a jigsaw <2> angled at 15° to saw the excess off. Deburr the edges. LW 400 LW 800/1000 min. 40 min. 40 Fig.
  • Seite 44: Filing The Pit

    Installation 3.14 Filing the pit • Fill the pit with suitable filling material (0/16 gravel size, 50 cm all the way round), compressing the filling material professionally every 30 cm (e.g. vibratory plate) (<2> = lean concrete wedge). The required excavation pit slope angle β must be maintained all the way round.The assignment between inner friction angle φ...
  • Seite 45: Comfort Inspection Chamber Lw 400

    Installation 3.14.1 Comfort inspection chamber LW 400 30cm 30cm 30cm 50cm 30cm ß 30cm 50cm 30cm Fig. [26] • Where the chamber is installed in areas that can be driven over (Class D), the telescopic upper cover section must be lined using a reinforced base plate made of concrete B35 at least 0.8 x 0.8 m thick (see Fig.
  • Seite 46: 3.14.2 Comfort Chamber Lw 800 / Lw 1000

    Fig. [28] • Where the chamber is installed in an area that can be driven over (Class D), the KESSEL chamber systems must be installed in line with standard road-building regulations (RSto + ZTVE-StB, DIN 18196). If the KESSEL chamber system is built with upper section and standard BEGU cover, there is no need for a 15 cm reinforced bearing plate, otherwise this must be set in concreate 2.3 x 2.3 m around the upper section.
  • Seite 47: Technical Data

    Technical data Technical data Maximum chamber depth max. 5 m Groundwater resistance 0.5 m Dimensions See Fig. [1] Weight See Fig. [1] Distance between the access steps and their load- According to EN 13598-2 / BGV C5 & BGR bearing capacity Material (type) Polymer PE (chamber) and PPO/PA (access steps)
  • Seite 48: Leading In Drainage

    Leading in Drainage Private homes without public sewage connection 1 2 3 4 1 2 3 4 Public buildings (e.g. hospital) Public buildings (e.g. leisure facility) 1 2 3 4 Commercial buildings (e.g. hotel) Commercial buildings (e.g. industrial / manu- facturing facilities) 2 3 5 Commercial buildings...
  • Seite 49 INSTRUCTIONS DE POSE Système de regard Komfort KESSEL LW 400 / LW 800 / LW 1000 - pour la pose à enterrer Avantages du produit Système modulaire Agrément Z-42.1-256 LW 1000 Agrément Z-42.1-224 LW 400; LW 800 Étanchéité aux eaux souterraines jusqu‘à...
  • Seite 50 Sommaire Introduction Description générale du produit .........................51 Informations d‘ordre général concernant ces instructions d‘utilisation et de maintenance ..51 Composants .................................52 Sécurité Utilisation conforme à l‘usage prévu ........................54 Sélection et qualification du personnel ......................54 Risques liés au produit .............................55 2.3.1 Risque d‘écrasement lié au jointoiement des segments du regard ............55 2.3.2 Risque lié...
  • Seite 51: Introduction

    Chère cliente, Cher client, Nous vous félicitons de votre achat d‘un produit KESSEL. Ce produit sera certainement en mesure de répondre à toutes vos attentes. Nous vous souhaitons une mise en place sans faille et réussie. Nous tentons de maintenir un niveau de qualité aussi élevé que possible de nos produits et avons évidemment besoin de votre collaboration.
  • Seite 52: Composants

    Introduction Composants LW 1000 LW 800 LW 400 Fig. [1] Pos. Désignation Réf. n° Plaque de protection en fonte grise (GG), étanche aux eaux superficielles ; Cl. 860132 A, verrouillée Plaque de protection en fonte grise (GG), étanche aux eaux superficielles ; Cl.
  • Seite 53 Cône Ø 1070 860103 Cône Ø 1200 860102 Clavettes d‘assemblage (kit) pour LW 1000 860111 Clavettes d‘assemblage (kit) pour LW 800 840111 Clavettes d‘assemblage (kit) pour LW 400 850111 Joint à lèvres Ø 1070 860112 Pièce de rallonge 860101 Joint à lèvres Ø 1200 860113 Échelons d‘accès 860110 Segment inférieur...
  • Seite 54: Sécurité

    à tout recours à la garantie du fabricant. Les extensions ultérieures des systèmes de regard Kessel relèvent du domaine de compétence du service clientèle de Kessel.
  • Seite 55: Risques Liés Au Produit

    Sécurité Risques liés au produit 2.3.1 Risque d‘écrasement lié au jointoiement des segments du regard Les segments du regard sont partiellement très lourds et encombrants. Attention au risque d‘écrasement des doigts et des mains pendant le jointoiement. Porter un équipement de protection personnelle (gants). Risques d‘écrasement et danger dû...
  • Seite 56: Montage

    Montage Montage Généralités L‘assemblage des segments du regard doit se faire suivant la Fig. [1]. Observer ce qui suit : – L‘excavation doit être préparée pour recevoir le regard. – Contrôle de la profondeur du regard. S‘assurer que les segments du regard en l‘état monté correspondent à la profondeur de l‘excavation.
  • Seite 57: Schéma De Fonctionnement/Situation D'implantation

    Montage Schéma de fonctionnement/situation d‘implantation Diamètre intérieur de 400 Fig. [2] Diamètre intérieur de 800 Fig. [3] Diamètre intérieur de 1000 Fig. [4] 2017/11 57 / 72 010-657...
  • Seite 58: Profondeurs D'implantation Lw 400

    Montage Profondeurs d‘implantation LW 400 Fig. [5] DN 150 DN 200 DN 250 Segment inférieur fermé 700-1050 mm 745-1095 mm 795-1135 mm 749-1099 mm 1050-1400 mm 1095-1445 mm 1135-1485 mm 1099-1449 mm 1400-1750 mm 1445-1795 mm 1485-1835 mm 1449-1799 mm 1750-2100 mm 1795-2145 mm 1835-2185 mm 1799-2149 mm 2100-2450 mm 2145-2495 mm 2185-2535 mm 2149-2499 mm Profondeurs d‘implantation LW 800 Fig. [6] Pose du segment inférieur fermé...
  • Seite 59: Profondeurs D'implantation Lw 1000

    Montage Profondeurs d‘implantation LW 1000 Fig. [7] Pose du segment inférieur fermé 1150-1650 mm 1650-2150 mm 2150-2650 mm 2650-3150 mm Préparation de l‘excavation La nature du sol et les matériaux pour le remblayage latéral de l‘excavation doivent répondre aux conditions suivantes : • Sol servant de support :plan, hauteur d‘env. 30 cm avec une couche de gravier/gravillons compactée*. •...
  • Seite 60: Pose Du Segment Inférieur

    Montage Pose du segment inférieur • Disposer le segment inférieur horizontalement dans l‘excavation. Même de faibles écarts risquent de provoquer de fortes divergences jusqu‘au niveau supérieur des regards profonds. La surface destinée à recevoir le segment inférieur (fond de l‘excavation) doit entrer en contact plan avec le segment inférieur. •...
  • Seite 61: Raccordement Du Système De Conduites

    Montage Raccordement du système de conduites 3.9.1 Raccordement du système de conduites du modèle LW 400 Établir les raccordements comme suit : – Entrée <30> – Sortie <31> À savoir si LW 400 : le canal du segment inférieur est composé de polypropylène (PP) et il donc impossible de le souder sur le tuyau en PE-HD.
  • Seite 62: Raccordement Du Système De Conduites Du Modèle Lw 800 / Lw 1000

    Montage 3.9.2 Raccordement du système de conduites du modèle LW 800 / LW 1000 • Établir les raccordements comme suit : Entrée <30> ; Sortie <31> • Le segment inférieur fermé (p. ex. pour le canal fermé) doit être équipé d‘un renforcement par défaut à l‘usine du fait de sa résistance à...
  • Seite 63: Raccordement Du Système De Conduites Du Modèle Lw 800 / Lw 1000

    Montage 3.9.3 Raccordement du système de conduites du modèle LW 800 / LW 1000 • Établir les raccordements comme suit : Entrée <30> ; Sortie <31> • Le segment inférieur fermé (p. ex. pour le canal fermé) doit être équipé d‘un renforcement par défaut à l‘usine du fait de sa résistance à...
  • Seite 64: Montage Des Échelons D'accès

    Montage 3.10 Montage des échelons d‘accès Fig. [16] Disposer les échelons d‘accès <11> les uns au-dessus des autres par le haut dans les rails de guidage prévus à cet effet et les immobiliser avec des chevilles de sécurité (voir Fig. [8]). Les échelons d‘accès sont destinés aux systèmes de regard Komfort LW 800 et LW 1000.
  • Seite 65 Poser la rehausse intercalaire ou le cône sur le segment inférieur. S‘assurer que les segments ont été disposés dans l‘ordre de codage correct  <33> et <34>. Fig. [18] LW 400 LW 800 LW 1000 Fig. [19] 2017/11 65 / 72...
  • Seite 66: Montage De La Rehausse (Raccourcissement En Option)

    Insérer le rehausse <20> ou <2>, l‘amener approximativement à la hauteur de montage souhaitée, fixer avec des anneaux serrants. • Procéder à l‘ajustage de précision à la hauteur définitive avec des vis d‘arrêt. LW 400 LW 800/1000 Fig. [22] Fig. [21]...
  • Seite 67: Variantes De Tampon

    Marquer le pourtour suivant le dessin de sorte que la rehausse <20> ou <2> s‘insère d‘au moins 4 cm dans le cône <34>. • Scier avec une scie sauteuse (15°) <2>. Ébavurer les bords. LW 400 LW 800/1000 min. 40 min. 40 Fig. [23] Fig.
  • Seite 68: Remblayage De L'excavation

    Montage 3.14 Remblayage de l‘excavation • Remblayer l‘excavation avec des matériaux de remblayage appropriés (grains d‘une grosseur de 0/16, hauteur de 50 cm autour du regard) en veillant à compacter les matériaux de remblayage tous les 30 cm (p. ex. avec un plaque vibrante) (<2> = calage de béton maigre). Respecter l‘angle d‘inclinaison de l‘excavation requis β...
  • Seite 69: Regard Komfort Lw 400

    Montage 3.14.1 Regard Komfort LW 400 30cm 30cm 30cm 50cm 30cm ß 30cm 50cm 30cm Fig. [26] • En cas de pose dans des surfaces carrossables (Classe D), prévoir une dalle support armée d‘une épaisseur d‘env. 15 cm en béton <35> de classe B 35 d‘au moins 0,8 x 0,8 m pour la rehausse télescopique (Fig. [27]). La réalisation concrète de la dalle en béton est toujours fonction de la statique sur site.
  • Seite 70: 3.14.2 Regard Komfort Lw 800 / Lw 1000

    Fig. [28] • La pose des systèmes de regard KESSEL dans des surfaces carrossables (Classe  D) doit se faire suivant la superstructure standard (Directive pour la normalisation de la superstructure des voies de circulation [RSto] + Conditions contractuelles techniques supplémentaires et directives pour excavations de construction routière [ZTVE-StB], DIN 18196).
  • Seite 71: Caractéristiques Techniques

    Caractéristiques techniques Caractéristiques techniques Profondeur maximale du regard maximum 5 m Étanchéité aux eaux souterraines 0,5 m Dimensions Voir Fig. [1] Poids Voir Fig. [1] Écart entre les échelons d‘accès et capacité portante Suivant EN 13598-2 / Règlement des associations professionnelles allemandes (BGV) C5 &...
  • Seite 72 Leader en solution d’assainissement Construction de logements privés sans raccordement au réseau d’assainissement public 1 2 3 4 1 2 3 4 Construction de logements Construction publique, par privés sans raccordement au exemple aménagement de loisirs réseau d’assainissement public 1 2 3 4 Construction industrielle 2 3 5...

Diese Anleitung auch für:

Lw 800Lw 1000

Inhaltsverzeichnis