Herunterladen Inhalt Inhalt Diese Seite drucken

Werbung

Verfügbare Sprachen

Verfügbare Sprachen

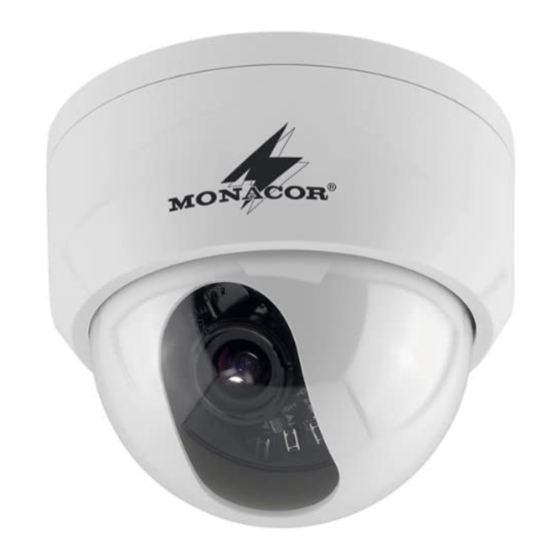
DOME-FARBKAMERA
COLOUR DOME CAMERA
TVCCD-375COL
Best.-Nr. 18.2450
BEDIENUNGSANLEITUNG
INSTRUCTION MANUAL
MODE D'EMPLOI
ISTRUZIONI PER L'USO

Werbung

Inhaltsverzeichnis
loading

Inhaltszusammenfassung für Monacor TVCCD-375COL

  • Seite 1 DOME-FARBKAMERA COLOUR DOME CAMERA TVCCD-375COL Best.-Nr. 18.2450 BEDIENUNGSANLEITUNG INSTRUCTION MANUAL MODE D’EMPLOI ISTRUZIONI PER L’USO...
  • Seite 2: Übersicht Der Bedienelemente Und Anschlüsse

    Auf der ausklappbaren Seite 3 finden Sie alle beschriebenen Bedien elemente und Anschlüsse. 1 Übersicht der Bedienelemente und Anschlüsse Gehäusesockel Gehäusering Kuppel mit Sichtblende 4 – 6 Kamerahalterung, um drei Achsen verstellbar: – zum Neigen der Kamera nach oben oder unten (4) –...
  • Seite 3: Einsatzmöglichkeiten

    Sach- oder Personenschäden und keine Garantie für die Kamera über nommen werden. Soll die Kamera endgültig aus dem Betrieb genommen wer- den, übergeben Sie sie zur umweltgerechten Entsorgung einem örtlichen Recyclingbetrieb. 3 Einsatzmöglichkeiten Diese Farbkamera im Kuppelgehäuse ist speziell für den Einsatz in Video-Überwachungs anlagen (CCTV) konzipiert und für die Decken- oder Wandmontage geeignet.
  • Seite 4: Kamera Anschließen Und Ausrichten

    5 Kamera anschließen und ausrichten 1) Die gelbe BNC-Kupplung (9) über ein abgeschirmtes Anschluss - kabel mit dem Videoeingang eines Monitors verbinden. Bei einer Kabellänge von über 100 m sollte zum Ausgleich von Pegelverlus- ten durch das Kabel ein Videoverstärker zwischen Kamera und Kabel geschaltet werden.
  • Seite 5 Mit der Taste UP oder DOWN (13) den Menüpunkt wählen; der gewählte Menüpunkt ist blau markiert. Mit der Taste LEFT oder (11) eine Einstellung ändern. Steht das Symbol ↵ hinter RIGHT einem Menüpunkt oder einer Einstelloption, kann für weitere Einstel- lungen mit der Taste SET in ein Untermenü...
  • Seite 6: White Bal. - Weißabgleich

    6.3 WHITE BAL. – Weißabgleich Der Weißabgleich dient der Anpassung der Kamera an die Farbtem- peratur verschiedener Lichtquellen. Farbtemperaturen von verschiedenen Lichtquellen: Glühlampe 2 800 – 3 200 K Leuchtstofflampe 4 000 – 5 000 K Sonnenlicht > 5 000 K Tageslicht bei klarem blauen Himmel >...
  • Seite 7 Felder sind heller dargestellt. Sie markieren den aufzuhellenden Bereich. 2) Mit den Tasten LEFT , RIGHT , UP und DOWN lassen sich die einzelnen Felder anwählen. Ein angewähltes Feld zeigt durch seine Farbe, ob es zurzeit deaktiviert (orange) oder aktiviert (gelb) ist.
  • Seite 8: Function - Weitere Funktionen

    ADJUST CONTRAST IIIIII SHARPNESS IIIIIIIIII CB _ GAIN IIIIIIIIIIIIIII CR _ GAIN IIIIIIIIIIIIIII RETURN 6.7 FUNCTION – Weitere Funktionen FUNCTION RETURN CAMERA ID ON↵ DAY NIGHT COLOR MIRROR MOTION PRIVACY GAMMA O.45 LANGUAGE ENGLISH RESET ↵ 6.7.1 CAMERA ID – Kameranamen einblenden keine Einblendung des Kameranamens ON↵...
  • Seite 9 2) CAMERA ID ist angewählt. Die Taste SET drücken. 3) Mit der Taste UP oder DOWN das Zeichen für das erste Ein- gabefeld wählen. Mit der Taste RIGHT zum nächsten Eingabefeld wechseln usw. (max. 15 Zeichen). 4) Zum Bestätigen der Namenseingabe den Cursor mit der Taste unter das Symbol ↵...
  • Seite 10 B/W↵ immer Schwarzweiß-Modus im Untermenü kann gewählt werden, ob das Farbsynchron - signal (Burst) im Videosignal enthalten sein soll (ON) oder nicht (OFF). Ein S/W-Videosignal ohne Burst verhindert stö- rendes farbiges Rauschen im S/W-Bild. Einige (LCD-)Mo- nitore benötigen jedoch das Farb synchron signal generell zur Bild synchronisation.
  • Seite 11 6.7.5 PRIVACY – Maskierung von Bildbereichen keine Maskierung ON↵ Maskierung eingeschaltet Zum Verdecken von nicht zu überwachenden Bildbereichen stehen vier unabhängig einstellbare, rechteckige Bereiche (AREAO bis AREA3) zur Verfügung: Im Untermenü PRIVACY in der Zeile AREA SEL den einzustellenden Bereich wählen. Die Einstellung AREA STATE bestimmt, ob er sichtbar (ON) oder unsichtbar (OFF) ist.
  • Seite 12: Technische Daten

    Abmessungen: ..∅ 125 mm × 105 mm Gewicht: ....380 g Änderungen vorbehalten. Diese Bedienungsanleitung ist urheberrechtlich für MONACOR INTERNATIONAL ®...
  • Seite 13: Operating Elements And Connections

    All operating elements and connections can be found on the fold- out page 3. 1 Operating Elements and Connections Housing base Housing ring Dome with cover 4 – 6 Camera bracket, adjustable in three axes: – for tilting the camera upwards or downwards (4) –...
  • Seite 14 is used for other purposes than originally intended, if it is not correctly installed, or not repaired in an expert way. If the camera is to be put out of operation definitively, take it to a local recycling plant for a disposal which is not harmful to the environment.
  • Seite 15 5 Connecting and Aligning the Camera 1) Connect the yellow BNC inline jack (9) via a screened cable to the video input of a monitor. With a cable length of more than 100 m a video amplifier should be inserted between camera and cable to compensate the level loss by the cable.
  • Seite 16 (11). If the symbol ↵ is behind the menu the button LEFT or RIGHT item or an adjusting option, use the button SET to change into a sub- menu for further adjustments. To exit a submenu, select the line RETURN and confirm with the but- (submenus with the line ↵...
  • Seite 17: Blc - Backlight Compensation

    Colour temperature of different light sources: Incandescent lamp 2 800 – 3 200 K Fluorescent lamp 4 000 – 5 000 K Sunlight > 5 000 K Daylight with a clear blue sky > 10 000 K automatic adaptation with changing illumination in the colour temperature range 1800 –...
  • Seite 18 the button SET shortly to activate the selected field (field changes to yellow) or to deactivate it (field changes to orange). 3) If the button SET is pressed for a longer time (approx. 2 seconds), the following submenu is shown: BLC AREA ALL CLEAR ALL SET...
  • Seite 19 6.7 FUNCTION – further functions FUNCTION RETURN CAMERA ID ON↵ DAY NIGHT COLOR MIRROR MOTION PRIVACY GAMMA O.45 LANGUAGE ENGLISH RESET ↵ 6.7.1 CAMERA ID – inserting a camera name no camera name inserted ON↵ camera name inserted Input of a camera name: 1) With adjustment ON↵...
  • Seite 20 5) To define the position of the name in the picture, select the line POSITION↵ and confirm with the button SET . The name now flashes on the screen. 6) Move the name to the desired position with the buttons LEFT RIGHT , UP and DOWN and confirm the position with the but-...
  • Seite 21 6.7.3 MIRROR – function of mirror-inverted picture no mirror function mirror-inverted picture at vertical axis 6.7.4 MOTION – motion detection no motion detection ON↵ motion detection activated In the submenu MOTION the area for the motion detection (AREA↵ , see chapter 6.4 Area definition in the BLC menu) and the threshold value for the detection (MOTION TH.) can be defined.
  • Seite 22 invisible (OFF). Then define the size of the area by moving the edges (LEFT = left edge, RIGHT = right edge, TOP = upper edge, BOTTOM = lower edge). In the line COLOR, the desired colour can be selected for all four areas together.
  • Seite 23: Specifications

    Dimensions: ... ∅ 125 mm × 105 mm Weight: ....380 g Subject to technical modification. All rights reserved by MONACOR INTERNATIONAL GmbH & Co. KG. No part of this ®...
  • Seite 24: Eléments Et Branchements

    Vous trouverez sur la page 3, dépliable, les éléments et branche- ments. 1 Eléments et branchements Socle du boîtier Anneau du boîtier Dôme avec couvercle 4 – 6 Etrier de la caméra, réglable sur trois axes : – pour incliner la caméra vers le haut ou le bas (4) –...
  • Seite 25: Possibilités Dʼutilisation

    tallée ou nʼest pas réparée par une personne habilitée, de même, la garantie deviendrait caduque. Lorsque la caméra est définitivement retirée du service, vous devez la déposer dans une usine de recyclage de proximité pour contribuer à son élimination non polluante. 3 Possibilités dʼutilisation Cette caméra couleur avec un boîtier en forme de dôme est spéciale- ment conçue pour une utilisation dans des installations de surveillance...
  • Seite 26 5 Branchement et orientation de la caméra 1) Reliez la fiche BNC jaune (9) via un cordon blindé à lʼentrée vidéo dʼun moniteur. Pour une longueur de câble supérieure à 100 m, il convient dʼinsérer entre la caméra et le câble un amplificateur vidéo pour compenser les pertes en ligne générées par le câble.
  • Seite 27 point du menu ou une option de réglage, on peut sélectionner pour dʼautres réglages un sous-menu avec la touche SET . Pour quitter un sous-menu, sélectionnez la ligne RETURN et confir- (les sous-menus avec la ligne ↵ RETURN mez avec la touche SET sont directement quittés en appuyant sur la touche SET ).
  • Seite 28 6.3 WHITE BAL. – compensation du blanc La compensation du blanc permet dʼadapter la caméra à la tempéra- ture de couleur de différentes sources de lumière. Températures de couleur de différentes sources de lumière: lampe à incandescence 2 800 – 3 200 K lampe fluorescente 4 000 –...
  • Seite 29 1) BLC AREA↵ est sélectionné : appuyez sur la touche SET . Une grille de 8 × 8 champs est superposée à lʼimage de la caméra. Les champs activés sont représentés en plus clair. Ils repèrent la zone à éclaircir. 2) Avec les touches LEFT , RIGHT , UP et DOWN , on peut sé-...
  • Seite 30 ADJUST CONTRAST IIIIII SHARPNESS IIIIIIIIII CB _ GAIN IIIIIIIIIIIIIII CR _ GAIN IIIIIIIIIIIIIII RETURN 6.7 FUNCTION – autres fonctions FUNCTION RETURN CAMERA ID ON↵ DAY NIGHT COLOR MIRROR MOTION PRIVACY GAMMA O.45 LANGUAGE ENGLISH RESET ↵ 6.7.1 CAMERA ID – affichage du nom de la caméra pas dʼaffichage du nom de la caméra ON↵...
  • Seite 31 2) CAMERA ID est sélectionnée : appuyez sur la touche SET . 3) Avec la touche UP ou DOWN , sélectionnez le symbole pour le premier champ de saisie. Avec la touche RIGHT , passez au champ suivant et ainsi de suite (15 signes maximum). 4) Pour confirmer la saisie du nom, déplacez le curseur avec la touche sous le symbole ↵...
  • Seite 32 B/W↵ mode noir et blanc toujours activé Dans le sous-menu, on peut sélectionner si le signal syn- chrone couleur (Burst) doit être contenu dans le signal vidéo (ON) ou pas (OFF). Un signal vidéo noir et blanc sans Burst empêche un bruit perturbateur de couleur dans lʼimage noir et blanc.
  • Seite 33 6.7.5 PRIVACY – masquage des zones privées pas de masquage ON↵ masquage activé Pour cacher des zones dʼimages à ne pas surveiller, 4 zones rectangu- laires réglables indépendantes (AREAO à AREA3) sont disponibles : Dans le sous-menu PRIVACY, dans la ligne AREA SEL, sélectionnez la zone à...
  • Seite 34: Caractéristiques Techniques

    Dimensions : ... ∅ 125 mm × 105 mm Poids : ....380 g Tout droit de modification réservé. Notice dʼutilisation protégée par le copyright de MONACOR INTERNATIONAL ®...
  • Seite 35: Elementi Di Comando E Collegamenti

    A pagina 3, se aperta completamente, vedrete sempre gli elementi di comando e i collegamenti descritti. 1 Elementi di comando e collegamenti Zoccolo del contenitore Anello del contenitore Cupola con mascherina 4 – 6 Supporto della telecamera, regolabile intorno a 3 assi: –...
  • Seite 36: Possibilità Dʼimpiego

    sponsabilità per eventuali danni consequenziali a persone o a cose e non si assume nessuna garanzia per la telecamera. Se si desidera eliminare la telecamera definitivamente, con- segnarla per lo smaltimento ad unʼistituzione locale per il rici- claggio. 3 Possibilità dʼimpiego Questa telecamera a colori in un contenitore a cupola è...
  • Seite 37 5 Collegare e orientare la telecamera 1) Collegare la presa BNC gialla (9) con lʼingresso video di un monitor servendosi di un cavo schermato di collegamento. Con lunghezze del cavo superiori a 100 m conviene inserire un amplificatore video fra te- lecamera e cavo per compensare le perdite di livello per via del cavo.
  • Seite 38 Con il tasto UP o DOWN (13) selezionare la voce del menù che sarà evidenziata di blu. Con il tasto LEFT o RIGHT (11) modificare unʼimpostazione. Se dietro una voce del menù o una opzione dʼimpo- stazione si vede il simbolo ↵ , significa che con il tasto SET si può...
  • Seite 39 6.3 WHITE BAL. – bilanciamento del bianco Il bilanciamento del bianco serve per adattare la telecamera alla tem- peratura cromatica delle varie fonti di luce. Temperature cromatiche di varie fonti di luce: Lampada ad incandescenza 2 800 – 3 200 K Lampada fluorescente 4 000 –...
  • Seite 40 1) BLC AREA↵ è scelto. Premere il tasto SET . Sopra lʼimmagine della telecamera si vede ora un raster di 8 × 8 campi. I campi attivati sono rappresentati più chiari. Segnalano la zona da schiarire. 2) Con i tasti LEFT , RIGHT , UP e DOWN...
  • Seite 41 ADJUST CONTRAST IIIIII SHARPNESS IIIIIIIIII CB _ GAIN IIIIIIIIIIIIIII CR _ GAIN IIIIIIIIIIIIIII RETURN 6.7 FUNCTION – ulteriori funzioni FUNCTION RETURN CAMERA ID ON↵ DAY NIGHT COLOR MIRROR MOTION PRIVACY GAMMA O.45 LANGUAGE ENGLISH RESET ↵ 6.7.1 CAMERA ID – visualizzare il nome della telecamera nessuna visualizzazione del nome della telecamera ON↵...
  • Seite 42 2) CAMERA ID è scelto. Premere il tasto SET . 3) Con il tasto UP o DOWN scegliere il primo carattere per il primo campo dʼinput. Con il tasto RIGHT passare al successivo campo dʼinput ecc. (max. 15 caratteri). 4) Per confermare lʼinput del nome, muovere il cursor con il tasto sotto il simbolo ↵...
  • Seite 43 zione del colore (Burst) deve essere contenuto (ON) nel segnale video o non (OFF). Un segnale video b/n senza burst impedisce un rumore cromatico fastidioso nellʼimma- gine b / n. Tuttavia, alcuni monitor (LCD) richiedono gene- ralmente il segnale di sincronizzazione del colore per la sin- cronizzazione dellʼimmagine.
  • Seite 44 Nel sottomenù PRIVACY, nella riga AREA SEL si sceglie il campo da regolare. Lʻimpostazione AREA STATE determina se il campo è visibile (ON) o invisibile (OFF). Quindi definire le dimensioni del campo spo- stando i margini (LEFT = margine sinistro, RIGHT = margine destro, TOP = margine superiore, BOTTOM = margine inferiore).
  • Seite 45: Dati Tecnici

    Dimensioni: ... . ∅ 125 mm × 105 mm Peso: ....380 g Con riserva di modifiche tecniche. La MONACOR INTERNATIONAL GmbH & Co. KG si riserva ogni diritto di elabora- ®...
  • Seite 46 ® Copyright by MONACOR INTERNATIONAL GmbH & Co. KG, Bremen, Germany. © All rights reserved. A-1025.99.01.09.2009...

Diese Anleitung auch für:

Security tvccd-375col

Inhaltsverzeichnis