Herunterladen Diese Seite drucken
Vorschau ausblenden Andere Handbücher für Turny Evo:

Werbung

Verfügbare Sprachen
  • DE

Verfügbare Sprachen

  • DEUTSCH, seite 41
Turny Evo
Autoadapt
Application tool and universal bracket
Front section
Middle section
SV
5 Installationsmanual
EN
23 Installation manual
DE
41 Installationanleitung
FR
59 Manuel d'installation
ES
77 Manual de instalación
IT
95 Manuale di installazione

Werbung

loading

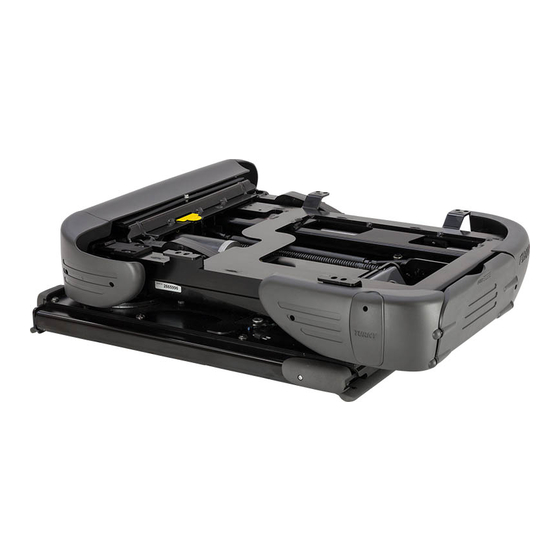
Inhaltszusammenfassung für Autoadapt Turny Evo

  • Seite 1 Turny Evo Autoadapt Application tool and universal bracket Front section Middle section 5 Installationsmanual 23 Installation manual 41 Installationanleitung 59 Manuel d’installation 77 Manual de instalación 95 Manuale di installazione...
  • Seite 5 Har du några frågor kring din kunds anpassning är du varmt välkommen att kontakta Autoadapt. Dina synpunkter är viktiga. De hjälper oss i arbetet med att kontinuerligt förbättra produkten och dess installation. Mer information om oss och vårt utbud av bilanpassningslösningar hittar du på...
  • Seite 6 Turny Evo Ta plats i bilsätet Montera mallningsverktyg Höger modell Placera ramen med de gängade hålen underst.
  • Seite 7 6. Visar Turny Evos förhållande till B-stolpen. Ju större avstånd till B-stolpen desto tidigare kan Turny Evo programmeras att vrida ut. 7. Visar hur mycket plats som behövs för att kunna köra Turny Evo bakåt för att komma åt infästningspunkter framtill vid montering på konsolsida. Notera att Turny Evo går att köra ytterligare 10 cm bakåt.
  • Seite 8 Turny Evo Ta plats i bilsätet Vänster modell Placera ramen med de gängade hålen underst.
  • Seite 9 6. Visar Turny Evos förhållande till B-stolpen. Ju större avstånd till B-stolpen desto tidigare kan Turny Evo programmeras att vrida ut. 7. Visar hur mycket plats som behövs för att kunna köra Turny Evo bakåt för att komma åt infästningspunkter framtill vid montering på konsolsida. Notera att Turny Evo går att köra ytterligare 10 cm bakåt.
  • Seite 10 Turny Evo Ta plats i bilsätet Anpassa konsol för bilens främre sektion Paketets innehåll x 20 Skruv M8x20 x 8 Bricka 8.4x16x1.6 x 4 Tvåhålsmutter x 4 Trehålsmutter x 4 Konsolben x 2 Konsolsida...
  • Seite 11 Ta plats i bilsätet Turny Evo Positionera mallningsverktyget i bilen Samtliga illustrationer i detta kapitel visar en installation av en höger vridande Turny Evo. Tillvägagångssättet för en vänster vridande enhet är detsamma. Börja med att montera konsolsidorna på mallningsverktyget. Fäst skruvarna löst för att lättare...
  • Seite 12 15 mm säkerställer samtidigt att huvudet på skruven inte kommer att ta i rundningen på det bockade benet vid montering. Säkerställ med hjälp av mallningsverktyget att det finns till- räckligt med plats för Turny Evo rörelsebanor . Vid behov kan konsolsidan närmast dörren spegelvändas för att uppnå en optimal position. Konsolsidan närmast kardantunneln får inte vändas eftersom den då...
  • Seite 13 Ta plats i bilsätet Turny Evo Anpassa konsolsidorna Konsolsidorna ska kapas till rätt installationshöjd och anpassas för att inte luta. Om höger och vänster sida skiljer sig åt måste konsolsidorna anpassas var för sig. Bestäm även i detta steg hur benen ska anpassas, se nästa sida. Börja anpassningen av konsolsidorna med att ta ut följande mått.
  • Seite 14 Turny Evo Ta plats i bilsätet Anpassa konsolbenen Bocka, vrid och placera konsolbenen utifrån de förutsättningar som råder i bilen. Den korta delen av benet ska dock alltid monteras mot konsolsidans in- eller utsida. Låt förutsättningarna i bilen i kombination med det estetiska avgöra vad som blir bäst.
  • Seite 15 Ta plats i bilsätet Turny Evo Montera konsolen i bilen Montera samtliga konsolben i OEM-sätesinfästning i golvet. Använd en distans som kompenserar för mattans tjocklek. Fäst konsolsidorna på mallningsverktyget igen och ställ tillbaka på tänkt position i bilen. Markera var hålen för respektive konsolben ska borras i konsolsidorna. Lossa därefter konsolsidorna från mallningsverktyget och borra.
  • Seite 16 Turny Evo Ta plats i bilsätet Montera konsolsidorna på konsolbenen. Alternativ 1 eller 2 gäller för alla typer av bockade och vridna ben. Alternativ 3 gäller endast för plant ben. Alt. 1 Alt. 2 Montera skruvarna från utsidan Montera skruvarna från insidan och in.
  • Seite 17 Ta plats i bilsätet Turny Evo Anpassa konsol för bilens mittersta sektion Paketets innehåll x 28 Skruv M8x20 x 24 Bricka 8.4x16x1.6 x 8 Låsmutter M8 x 4 Tvåhålsmutter x 4 Trehålsmutter x 4 Konsolben x 2 Konsolsida x 2 U-balk...
  • Seite 18 Turny Evo Ta plats i bilsätet Montera konsolsidorna på mallningsverktyget Samtliga illustrationer i detta kapitel visar en installation av en höger vridande Turny Evo. Tillvägagångssättet för en vänster vridande enhet är detsamma. Börja med att montera konsolsidorna på mallningsverktyget. Fäst skruvarna löst för att lättare...
  • Seite 19 Ta plats i bilsätet Turny Evo Montera U-balkarna och anpassa konstruktionen Placera U-balkarna över OEM-sätesinfästning så att Turny Evo kan monteras på önskat avstånd från dörren. Ta hjälp av mallninsverkyget med de fastmonterade konsolsidorna för att ta reda på vilket alternativ nedan som är aktuellt.
  • Seite 20 Vajerlåset ska i sin tur vara anpassat för OEM-sätesinfästning. Anpassat Vajerlås med M12 och M10 gänga finns att köpa som tillbehör. Kontakta Autoadapt Support för vidare hjälp. OEM skena Tillverka en bricka som går att skjuta in i aktuell Alt.
  • Seite 21 Montera tillbaka konsolsidan på mallningsverktyget om den har anpassats. Placera mallningsverktyget ovanpå U-balkarna och säkerställ med hjälp av verktyget att det finns tillräckligt med plats för Turny Evo rörelsebanor. Justera vid behov konsolsi- dorna i sidled. Markera var hålen för respektive konsolben ska borras i konsolsidor- na och balkarna.
  • Seite 22 Turny Evo Ta plats i bilsätet Montera konsolsidorna på U-balkarna. Montera skruvarna från utsidan och in. Viktigt att brickan placeras med skruven.
  • Seite 23 Please read through the manual carefully before starting your work. If you have any questions about your customer’s adaptation, please feel free to contact Autoadapt. Your feedback is important to us. It helps us in our work of continuously improving our product and its installation. You can find more information about us and our range of car adaptation solutions by visiting www.autoadapt.com.
  • Seite 24 Turny Evo Getting seated Assemble the application tool Right model Place the frame with the threaded holes on the bottom.
  • Seite 25 5. Should be flush with B pillar and threshold when fitting the L-profile bracket. 6. Shows Turny Evo's position to the B pillar. The bigger the distance to the B pillar the earlier Turny Evo can be programmed to turn out.
  • Seite 26 Turny Evo Getting seated Left model Place the frame with the threaded holes on the bottom.
  • Seite 27 5. Should be flush with B pillar and threshold when fitting the L-profile bracket. 6. Shows Turny Evo's position to the B pillar. The bigger the distance to the B pillar the earlier Turny Evo can be programmed to turn out.
  • Seite 28 Turny Evo Getting seated Adapt bracket for the car's front section Box content x 20 Screw M8x20 x 8 Washer 8.4x16x1.6 x 4 Two-hole nut x 4 Three-hole nut x 4 Mounting leg x 2 L-profile bracket...
  • Seite 29 Getting seated Turny Evo Position the application tool in the car All instructions in this chapter show an installation of a right turning Turny Evo. The approach for a left swivelling unit is the same. Begin by installing the L-profile brack- et to the application tool.
  • Seite 30 By using the application tool ensure that there is sufficient space for Turny Evo movement paths. When required the L-profile bracket closest to the door can be laterally inverse to achieve an optimal position.
  • Seite 31 Getting seated Turny Evo Adapt the L-profile brackets The L-profile brackets must be cut to the correct installation height and adapted so it does not lean. If the right and left sides differ the L-profile brackets must be adapted separately. Also decide in this step how the leg will be adapted, see next page. Start the adaptation of the L-profile brackets by taking out the following measurements.
  • Seite 32 Turny Evo Getting seated Adapt the mounting legs Bend, turn and place the mounting leg based on the conditions that prevail in the car. The short part of the leg must however always be installed on the inside and outside of the L-profile bracket. Allow the conditions in the car combined with the aesthetics determine what is best.
  • Seite 33 Use a spacer that com- pensates for the mat's thickness. Mark where the hole will be drilled into the L-profile brack- Spacers between 5-45 mm height are available et for all legs. to buy as options. Contact Autoadapt Support for further help.
  • Seite 34 Important that the washer out. Important that the washer is is placed with the screw. placed with the screw. Option 3 Use the screws and the three-hole nut which is intended for installing Turny Evo's base plate on the L-profile bracket.
  • Seite 35 Getting seated Turny Evo Adapt bracket for the car's middle section Box content x 28 Screw M8x20 x 24 Washer 8.4x16x1.6 x 8 Hex lock nut M8 x 4 Two-hole nut x 4 Three-hole nut x 4 Mid bracket x 2 L-profile bracket...
  • Seite 36 Getting seated Install the L-profile brackets of the application tool All instructions in this chapter show an installation of a right turning Turny Evo. The approach for a left swivelling unit is the same. Begin by installing the L-profile brack- ets to the application tool.
  • Seite 37 Getting seated Turny Evo Install the cross beams and adapt the construction Place the cross beams above OEM seat attachment so that Turny Evo can be installed at the desired distance from the door. Use the application tool with the fixed L-profile brackets to find out which option below is relevant.
  • Seite 38 OEM seat attachment. Adapted Wire lock with M12 and M10 thread is available to buy as an option. Contact Autoadapt Support for further help. OEM rail Make a washer that can be slid into the relevant Option 1 = 11 mm rail.
  • Seite 39 Turny Evo paths. Adjust the L-profile brackets laterally where required. Mark each hole for each mounting leg to be drilled in the L-profile brackets and beams.
  • Seite 40 Turny Evo Getting seated Install the L-profile brackets to the cross beams. Fit the screws from the outside and in. Important that the washer is inserted with the screw.
  • Seite 41 Handbuch sorgfältig durch, bevor Sie mit der Montage beginnen. Sollten Sie Fragen zur Fahrzeugumrüstung für Ihren Kunden haben, dann setzen Sie sich bitte mit Autoadapt in Verbindung. Ihre Meinung ist für uns sehr wichtig. Sie hilft uns dabei, das Produkt und seinen Einbau ständig zu verbessern.
  • Seite 42 Turny Evo Um- und Hinsetzen Montieren Sie das Musterwerkzeug Rechtes Modell Platzieren Sie den Rahmen mit den Löchern mit Gewinde zuunterst.
  • Seite 43 Abstand zur B-Säule ist. 7. Zeigt, wie viel Platz erforderlich ist, um den Turny Evo nach hinten zu bewegen, um bei der Montage an der Konsolenseite an die Befestigungspunkte zu kommen. Beachten Sie, dass der Turny Evo weitere 10 cm nach hinten bewegt werden kann.
  • Seite 44 Turny Evo Um- und Hinsetzen Linkes Modell Platzieren Sie den Rahmen mit den Löchern mit Gewinde zuunterst.
  • Seite 45 Abstand zur B-Säule ist. 7. Zeigt, wie viel Platz erforderlich ist, um den Turny Evo nach hinten zu bewegen, um bei der Montage an der Konsolenseite an die Befestigungspunkte zu kommen. Beachten Sie, dass der Turny Evo weitere 10 cm nach hinten bewegt werden kann.
  • Seite 46 Turny Evo Um- und Hinsetzen Passen Sie die Konsole für den vorderen Abschnitt des Autos an Inhalt des Pakets x 20 Schraube M8x20 x 8 Unterlegscheibe 8.4x16x1.6 x 4 Zweilochmutter x 4 Dreilochmutter x 4 Konsolenfüße x 4 Konsolenseiten...
  • Seite 47 Platzieren Sie das Musterwerkzeug im Auto Sämtliche Abbildungen in diesem Kapitel zeigen die Installation eines nach rechts drehenden Turny Evo. Die Vorgehensweise für eine nach links drehende Einheit ist identisch. Montieren Sie zunächst die Konsolenseiten auf dem Musterwerkzeug. Ziehen Sie die Schrauben zunächst nur locker an, damit Sie die Position der Konso-...
  • Seite 48 Turny Evo Um- und Hinsetzen Platzieren Sie das Musterwerkzeug im Auto und zentrieren Sie es über der OEM-Sitzbefes- tigung im Boden. Justieren Sie anschließend die Konsolenseiten seitlich. Damit die Installation stabil ist, muss der Abstand zwischen den Konsolenseiten und der Mitte der OEM-Sitz- befestigungen zwischen 15 und 45 mm betragen.
  • Seite 49 Um- und Hinsetzen Turny Evo Passen Sie die Konsolenseiten an Die Konsolen müssen auf die korrekte Montagehöhe gekappt und angepasst werden, damit sie keine Nei- gung aufweisen. Wenn die rechte und die linke Seite unterschiedlich sind, müssen die Konsolenseiten jeweils für sich angepasst werden.
  • Seite 50 Turny Evo Um- und Hinsetzen Passen Sie den Konsolenfuß an Biegen, drehen und platzieren Sie die Konsolenfüße entsprechend den im Auto herrschen- den Bedingungen. Der kurze Teil des Fußes muss jedoch immer zur Innen- oder Außenseite der Konsole hin montiert werden. Entscheiden Sie anhand der Voraussetzungen im Auto sowie ästhetischer Gründe, was am besten ist.
  • Seite 51 Um- und Hinsetzen Turny Evo Montieren Sie die Konsole im Auto Montieren Sie sämtliche Konsolenfüße in den OEM-Sitzbefestigungen im Boden. Benutzen Sie einen Abstand, der die Dicke des Teppichs ausgleicht. Befestigen Sie die Konsolenseiten wieder am Musterwerkzeug und stellen Sie sie wieder an die vorgesehene Position im Auto zurück.
  • Seite 52 Turny Evo Um- und Hinsetzen Montieren Sie die Konsolenseiten auf den Konsolenfüßen. Die Alternativen 1 und 2 gelten für alle Typen gebogener und gedrehter Füße. Die Alternative 3 gilt nur für ebene Füße. Alternativ 1 Alternativ 2 Montieren Sie die Schrauben von Montieren Sie die Schrauben von außen nach innen.
  • Seite 53: Inhalt Des Pakets

    Um- und Hinsetzen Turny Evo Passen Sie die Konsole für den mittleren Abschnitt des Autos an Inhalt des Pakets x 28 Schraube M8x20 Unterlegscheibe 24.4x16x1.6 x 8 Kontermutter M8 x 4 Zweilochmutter x 4 Dreilochmutter x 4 Konsolenfüße x 4 Konsolenseiten...
  • Seite 54 Montieren Sie die Konsolenseiten auf dem Musterwerkzeug Sämtliche Abbildungen in diesem Kapitel zeigen die Installation eines nach rechts drehenden Turny Evo. Die Vorgehensweise für eine nach links drehende Einheit ist identisch. Montieren Sie zunächst die Konsolenseiten auf dem Musterwerkzeug. Ziehen Sie die Schrauben zunächst nur locker an, damit Sie die Position der Konso-...
  • Seite 55 Um- und Hinsetzen Turny Evo Montieren Sie die U-Träger und passen Sie die Konstruktion an Platzieren Sie die U-Täger über der OEM-Sitzbefestigung, sodass der Turny Evo im gewünschten Abstand zur Tür montiert werden kann. Ziehen Sie das Muster- werkzeug mit den befestigten Konsolenseiten zu Hilfe, um festzustellen, welche der unten stehenden Alternativen infrage kommt.
  • Seite 56 Turny Evo Um- und Hinsetzen Montieren Sie die U-Träger entsprechend den unten aufgeführten Anweisungen. Passen Sie danach die Konsolenseite oder die U-Träger gemäß den Alternativen auf der vorherigen Seite an. Lösen Sie die Konsolenseite vom Musterwerkzeug, wenn diese angepasst werden muss.
  • Seite 57 Platzieren Sie das Musterwerkzeug auf den U-Trägern und stellen Sie mithilfe des Werkzeugs sicher, dass es für die Turny Evo Bewegungsbahnen genügend Platz gibt. Justieren Sie die Konsolenseiten bei Bedarf seitlich. Markieren sie, wo die Löcher für die jeweiligen Konsolenfüße in den Konsolenseiten und Trägern gebohrt werden müssen.
  • Seite 58 Turny Evo Um- und Hinsetzen Montieren Sie die Konsolenseiten auf den U-Trägern. Montieren Sie die Schrauben von außen nach innen. Es ist wichtig, dass die Unterlegscheibe mit der Schraube platziert wird.
  • Seite 59 Lisez donc attentivement ce manuel avant de commencer votre travail. Si vous avez des questions concernant l’adaptation de votre client, n’hésitez pas à contacter Autoadapt. Vos opinions sont très importantes pour nous. Elles nous aident dans notre travail pour continuer à améliorer le produit et son installation.
  • Seite 60 Turny Evo Assise dans le véhicule Monter le gabarit Modèle « à droite » Mettez en place le cadre, trous filetés en bas...
  • Seite 61 2. Trous préparés pour Turny Low Vehicle Ils ne sont pas utilisés pour cette installation. 3. Trous pour câblages partant du Turny Evo. 4. Trois points de fixation dans chaque coin pour le montage du Turny Evo sur le côté de console.
  • Seite 62 Turny Evo Assise dans le véhicule Modèle « à gauche » Mettez en place le cadre, trous filetés en bas...
  • Seite 63 2. Trous préparés pour Turny Low Vehicle Ils ne sont pas utilisés pour cette installation. 3. Trous pour câblages partant du Turny Evo. 4. Trois points de fixation dans chaque coin pour le montage du Turny Evo sur le côté de console.
  • Seite 64: Contenu Du Paquet

    Turny Evo Assise dans le véhicule Adapter la console à la section avant de la voiture Contenu du paquet x 20 Vis M8x20 x 8 Rondelle 8.4x16x1.6 x 4 Écrou à deux trous x 4 Écrou à trois trous x 4 Jambe de console...
  • Seite 65 Assise dans le véhicule Turny Evo Positionner le gabarit dans la voiture Toutes les illustrations de ce chapitre se rapportent à un Turny Evo pivotant à droite. Pour une unité pivotant à gauche, la manière de procéder est analogue. Commencez par monter les côtés de la console sur le gabarit. Posez les vis sans serrer pour pouvoir ajuster plus facilement la position de chaque côté...
  • Seite 66 Vérifiez, à l'aide du gaba- rit, qu'il y a suffisamment d'espace pour les trajectoires du Turny Evo. Au besoin, le côté de console près de la porte peut être inversé droite-gauche pour avoir une position optimale.
  • Seite 67 Assise dans le véhicule Turny Evo Ajuster les côtés de la console Les côtés de console doivent être sectionnés à la bonne hauteur d'installation et adaptés pour ne pas être inclinés. Le côtés droit et gauche diffèrent, les côtés de console doivent être adaptés sépa- rément.
  • Seite 68 Turny Evo Assise dans le véhicule Adapter les jambes de console Courbez, tordez et placez les jambes de console en fonction des particularités dans la voiture La partie courte de la jambe doit toujours être montée contre la face in- térieure ou extérieure du côté...
  • Seite 69 Assise dans le véhicule Turny Evo Monter la console dans la voiture Montez toutes les jambes de console de la fixation de siège OEM dans le plancher. Utilisez une entretoise qui compense l'épaisseur du tapis. Fixez de nouveau les côtés de console sur le gabarit et remettez en place à la position prévue dans la voiture.
  • Seite 70 Alt. 3 Utilisez les vis et l'écrou à trois trous qui sont prévus pour monter le soubassement du Turny Evo sur le côté de console.
  • Seite 71 Assise dans le véhicule Turny Evo Adapter la console à la section médiane de la voiture Contenu du paquet x 28 Vis M8x20 x 24 Rondelle 8.4x16x1.6 x 8 Écrou de blocage M8 x 4 Écrou à deux trous x 4 Écrou à trois trous x 4 Jambe de console x 2 Côté...
  • Seite 72 Assise dans le véhicule Montez les côtés de console sur le gabarit. Toutes les illustrations de ce chapitre se rapportent à un Turny Evo pivotant à droite. Pour une unité pivotant à gauche, la manière de procéder est analogue. Commencez par monter les côtés de la console sur le gabarit. Posez les vis sans serrer pour pouvoir ajuster plus facilement la position de chaque côté...
  • Seite 73 Placez les longerons en U au-dessus de la fixation de siège OEM de telle sorte que le Turny Evo puisse être monté à la distance souhaitée de la porte. Aidez-vous du gabarit avec les côtés de console fixés pour déterminer laquelle des alternatives ci-dessous est applicable.
  • Seite 74 Turny Evo Assise dans le véhicule Montez les longerons en U d'après les instructions applicables ci-dessous. Ensuite, adaptez le côté de console ou les longerons en fonction de l'alternative applicable de la page précédente. Détachez le côté de console du gabarit s'il doit être adapté.
  • Seite 75 U et vérifiez à l'aide du gabarit qu'il y a suffisamment d'espace pour les trajectoires du Turny Evo. Au besoin, ajustez les côtés de console latéralement. Repérez les endroits où les trous des jambes de console doivent être percés dans les côtés de console et les longerons.
  • Seite 76 Turny Evo Assise dans le véhicule Montez les côtés de console sur les longerons en U. Montez les vis en allant de l'exté- rieur vers l'intérieur. Il est impor- tant que la rondelle soit placée avec la vis.
  • Seite 77 Si tiene alguna pregunta sobre su adaptación le pedimos que se ponga en contacto con Autoadapt. Sus comentarios nos interesan. Saber lo que usted opina nos ayuda a seguir perfeccionando el producto y su instalación. Encontrará...
  • Seite 78 Turny Evo Asientos y accesorios para asientos Montar herramienta de moldeo Modelo derecho Coloque el marco con los orificios enroscados abajo.
  • Seite 79 5. Debe tocar tanto el pilar B como el umbral al alinear el lado del soporte. 6. Indica la posición de Turny Evo en relación al pilar B. A mayor distancia al pilar B, con mayor antelación Turny Evo podrá girar hacia fuera.
  • Seite 80 Turny Evo Asientos y accesorios para asientos Modelo izquierdo Coloque el marco con los orificios enroscados abajo.
  • Seite 81 5. Debe tocar tanto el pilar B como el umbral al alinear el lado del soporte. 6. Indica la posición de Turny Evo en relación al pilar B. A mayor distancia al pilar B, con mayor antelación Turny Evo podrá girar hacia fuera.
  • Seite 82: Contenido Del Paquete

    Turny Evo Asientos y accesorios para asientos Adaptar el soporte a la parte delantera del automóvil Contenido del paquete x 20 Perno M8x20 x 8 Arandela 8,4x16x1,6 x 4 Tuerca de dos orificios x 4 Tuerca de tres orificios x 4 Pie de soporte...
  • Seite 83 Turny Evo Posicionar la herramienta de moldeo en el automóvil Todas las imágenes en este capítulo muestran la instalación de un Turny Evo que gira hacia la derecha. El mismo procedimiento aplica para una unidad que gira hacia la izquierda. Comience montando los lados del soporte sobre la herramienta de moldeo.
  • Seite 84 Utilice la herramienta de moldeo para asegurar suficiente espacio para las trayectorias de movimiento de Turny Evo. Si es ne- cesario puede invertir el lado del soporte hacia la puerta para optimizar la posición. El lado del soporte hacia el túnel de la transmisión no puede ser invertido debido a que acabaría en...
  • Seite 85 Asientos y accesorios para asientos Turny Evo Ajustar los lados del soporte Puede recortar los lados del soporte a la altura de instalación adecuada y ajustarlos para evitar inclinaciones. Si el lado derecho es distinto al izquierdo, debe adecuar cada lado del soporte por separado.
  • Seite 86 Turny Evo Asientos y accesorios para asientos Ajustar los pies del soporte Doble, tuerza y coloque los pies del soporte considerando las condiciones del au- tomóvil. La parte más corta del pie siempre debe ir hacia el interior o exterior del lado del soporte.
  • Seite 87 Utilice una broca de 9 mm. Nivel Utilice un distanciador para compensar por el grosor de la alfombra. Marque donde perforará en el lado del soporte para todos Puede adquirir distanciadores de 5-45 mm como los pies. accesorios. Contacte a Autoadapt Support para soporte.
  • Seite 88 Turny Evo Asientos y accesorios para asientos Monte los lados del soporte en los pies del soporte. Las alternativas 1 y 2 corres- ponden a todos los tipos de pies doblados y torcidos. La alternativa 3 es sólo para pies planos.
  • Seite 89 Asientos y accesorios para asientos Turny Evo Adaptar la consola a la parte media del automóvil Contenido del paquete x 28 Perno M8x20 x 24 Arandela 8,4x16x1,6 x 8 Tuerca de cierre automático M8 x 4 Tuerca de dos orificios...
  • Seite 90 Asientos y accesorios para asientos Montar los lados del soporte en la herramienta de moldeo Todas las imágenes en este capítulo muestran la instalación de un Turny Evo que gira hacia la derecha. El mismo procedimiento aplica para una unidad que gira hacia la izquierda.
  • Seite 91 Alt. B - La fijación de asiento OEM se ubica dentro de la fijación de Turny Evo. Puede acortar las vigas en U para que el lado del soporte cubra todo el costado. Turny Evo Lado de soporte hacia...
  • Seite 92 OEM. Adaptada Puede adquirir fijaciones de cable con ros- cas M12 y M10 como accesorios. Contacte a Autoadapt Support para soporte. Riel OEM Fabrique una ficha que pueda introducir en el riel Alt. 1 = 11 mm existente.
  • Seite 93 Coloque la herramienta de moldeo sobre las vigas en U y utilice la he- rramienta para asegurar suficiente espacio para las trayectorias de Turny Evo. Si es necesario, ajuste los lados del soporte en sentido lateral. Marque los lugares donde irán los orificios de cada pie de soporte en los lados del soporte y en las vigas.
  • Seite 94 Turny Evo Asientos y accesorios para asientos Monte los lados del soporte sobre las vigas en U. Monte los pernos desde fuera ha- cia dentro. Es importante colocar la arandela con el perno.
  • Seite 95 Per qualsiasi domanda sulla soluzione personalizzata per il vostro cliente, rivolgetevi ad Autoadapt. Saremo lieti di ricevere le vostre osservazioni, che ci aiutano a migliorare continuamente il prodotto e la sua installazione. Ulteriori informazioni su di noi e la nostra gamma di soluzioni personalizzate per auto sono disponibili su www.autoadapt.com.
  • Seite 96 Turny Evo Soluzioni per seduta Montaggio dell'attrezzo di sagomatura Modello con rotazione verso destra Sistemare il telaio con i fori filettati in basso.
  • Seite 97 1. La parte dell'attrezzo di sagomatura evidenziata in grigio corrisponde alla piastra base di Turny Evo e il telaio a croce corrisponde al segmento antiurto del gruppo. Il telaio a croce non deve poggiare sulla staffa laterale, ma deve essere posizionato lateralmente affinché...
  • Seite 98 Turny Evo Soluzioni per seduta Modello con rotazione verso sinistra Sistemare il telaio con i fori filettati in basso.
  • Seite 99 1. La parte dell'attrezzo di sagomatura evidenziata in grigio corrisponde alla piastra base di Turny Evo e il telaio a croce corrisponde al segmento antiurto del gruppo. Il telaio a croce non deve poggiare sulla staffa laterale, ma deve essere posizionato lateralmente affinché...
  • Seite 100: Contenuto Del Kit

    Turny Evo Soluzioni per seduta Adattamento della staffa per la sezione anteriore del veicolo Contenuto del kit x 20 Vite M8x20 x 8 Rondella 8,4x16x1,6 x 4 Piatto a due fori x 4 Piatto a tre fori x 4 Angolare...
  • Seite 101 Soluzioni per seduta Turny Evo Posizionamento dell'attrezzo di sagomatura nel veicolo Tutte le figure in questo capitolo mostrano l'installazione di un Turny Evo con rotazione verso destra. La procedura per il modello con rotazione verso sinistra è identica. Iniziare montando le staffe laterali sull'attrezzo di sagomatura. Avvitare le viti senza serrare per regolare più...
  • Seite 102 Con l'attrezzo di sagomatura, controllare che lo spazio per il movimento di Turny Evo sia sufficiente. All'occorrenza, è possibile ruotare a specchio la staffa laterale sul lato della portiera per ottenere una posizione ottimale. La staffa laterale sul lato del tunnel cardanico non può...
  • Seite 103 Soluzioni per seduta Turny Evo Adattamento delle staffe laterali Le staffe laterali devono essere tagliate all'altezza di installazione corretta e adattate in modo da non risultare inclinate. Se i lati destro e sinistro sono diversi, è necessario adattare le staffe laterali separatamente.
  • Seite 104 Turny Evo Soluzioni per seduta Adattamento degli angolari Piegare, ruotare e sistemare gli angolari in base alle condizioni del veicolo. Tuttavia, la parte corta dell'angolare deve sempre essere montata contro la parte interna o esterna della staffa laterale. Determinare il montaggio migliore in base alle condizio- ni del veicolo e ai requisiti estetici.
  • Seite 105 Soluzioni per seduta Turny Evo Montaggio della staffa nel veicolo Montare tutti gli angolari nell'attacco del sedile OEM nel pianale. Utilizzare un distanziale per compensare lo spessore del tappetino. Fissare nuovamente le staffe laterali all'attrezzo di sagomatura e risistemarlo nella posizione desiderata nel veicolo.
  • Seite 106 È importante montare la l'esterno. È importante montare la rondella insieme alla vite. rondella insieme alla vite. Alt. 3 Utilizzare le viti e il piatto a tre fori de- stinati al montaggio della piastra base di Turny Evo sulla staffa laterale.
  • Seite 107 Soluzioni per seduta Turny Evo Adattamento della staffa per la sezione centrale del veicolo Contenuto del kit x 28 Vite M8x20 x 24 Rondella 8,4x16x1,6 x 8 Dado di bloccaggio M8 x 4 Piatto a due fori x 4 Piatto a tre fori...
  • Seite 108 Soluzioni per seduta Montaggio delle staffe laterali sull'attrezzo di sagomatura. Tutte le figure in questo capitolo mostrano l'installazione di un Turny Evo con rotazione verso destra. La procedura per il modello con rotazione verso sinistra è identica. Iniziare montando le staffe laterali sull'attrezzo di sagomatura. Avvitare le viti senza serrare per regolare più...
  • Seite 109 Montaggio delle traverse a U e adattamento della struttura Sistemare le traverse a U sopra l'attacco del sedile OEM in modo da poter monta- re Turny Evo alla distanza desiderata dalla portiera. Utilizzare l'attrezzo di sagoma- tura con le staffe laterali fissate per determinare l'alternativa più adatta.
  • Seite 110 OEM. Adattato Come accessori, sono disponibili fermacavo con filettatura M12 e M10. Per maggiori in- formazioni, contattare Autoadapt Support. Guida OEM Fabbricare una rondella per la guida in questione. La Alt. 1 = 11 mm rondella deve avere uno spessore minimo di 8 mm e Alt.
  • Seite 111 U e utilizzarlo per verificare che lo spazio per i movimenti di Turny Evo sia sufficiente. All'occorrenza, regolare lateral- mente le staffe. Tracciare le posizioni dei fori per gli angolari nelle staffe laterali e nelle traverse.
  • Seite 112 Turny Evo Soluzioni per seduta Montare le staffe laterali sulle traverse a U. Montare le viti dall'esterno verso l'interno. È importante montare la rondella insieme alla vite.
  • Seite 115 Accredited by SWEDAC as testing laboratory in accordance with ISO/IEC 17025:2005 Quality system certified in accordance with ISO 9001:2008 Illustrations, descriptions and specifications in the user manual are based on current product information. Autoadapt reserves the right to make alterations without previous notice. © 2015 Autoadapt AB...
  • Seite 116 AUTOADAPT AB Åkerivägen 7 S-443 61 Stenkullen Sweden Phone: +46 302 254 00 E-mail: info@autoadapt.com...