Herunterladen Inhalt Inhalt Diese Seite drucken
Inhaltsverzeichnis

Werbung

Verfügbare Sprachen
  • DE

Verfügbare Sprachen

  • DEUTSCH, seite 45
MASCHIO GASPARDO S.p.A.
FBR Plus
IT
USO E MANUTENZIONE - PARTI DI RICAMBIO
EN
USE AND MAINTENANCE - SPARE PARTS
DE
GEBRAUCH UND WARTUNG - ERSATZTEILE
FR
EMPLOI ET ENTRETIEN - PIECES DETACHEES
ES
EMPLEO Y MANTENIMIENTO - PIEZAS DE REPUESTO
Cod. G19503010
2010-12
*)
*) Valido per Paesi UE
*) Valid for EU member countries
*) Valable dans les Pays UE
*) Gilt für EU-Mitgliedsländer
*) Válido para Países UE

Werbung

Inhaltsverzeichnis
loading

Inhaltszusammenfassung für Gaspardo FBR Plus

  • Seite 1 MASCHIO GASPARDO S.p.A. FBR Plus USO E MANUTENZIONE - PARTI DI RICAMBIO USE AND MAINTENANCE - SPARE PARTS GEBRAUCH UND WARTUNG - ERSATZTEILE EMPLOI ET ENTRETIEN - PIECES DETACHEES EMPLEO Y MANTENIMIENTO - PIEZAS DE REPUESTO *) Valido per Paesi UE...
  • Seite 2: Inhaltsverzeichnis

    ITALIANO ENGLISH DEUTSCH INDICE INDEX INHALT Vo r w o r t ..........45 Premessa ........... 5 Foreword .......... 25 Garantie ..........45 Garanzia ..........5 Warranty ..........25 1.1.1 Scadenza della garanzia ...... 5 1.1.1 Verfall des garantieanspruchs ..45 1.1.1 When the warranty becomes void ..
  • Seite 3 FRANÇAIS ESPAÑOL TABLES DE MATIERES INDICE Introduction ........65 Premisa ..........85 Garantie ..........65 Garantía ..........85 1.1.1 Expiration de la garantie ..... 65 1.1.1 Vencimiento de la garantía ....85 Identification ........65 Identificación ........85 Description de la faucheuse ....66 Escripción de la segadora ....
  • Seite 4 cod. G19503010...
  • Seite 5: Premessa

    ITALIANO 1.0 PREMESSA 1.2 IDENTIFICAZIONE Ogni singola attrezzatura, è dotata di una targhetta di identifica- zione (Fig. 1), i cui dati riportano: Questo manuale descrive le norme d’uso e di manutenzione per la falciatrice. Il presente manuale è parte integrante del prodotto, 1) Marchio ed indirizzo del Costruttore;...
  • Seite 6: Descrizione Della Falciatrice

    La Ditta Costruttrice, è comunque a completa disposizione per assicurare un’immediata e accurata assistenza tecnica e tutto ciò che può essere necessario per il miglior funzionamento e la massima resa dell’attrezzatura. Fig. 4 1.4 DATI TECNICI U.M. FBR Plus Lunghezza barra 1,75 2,05 2,35 Peso [kg] Presa di forza [g.p.m.]...
  • Seite 7: Movimentazione

    ITALIANO USO E MANUTENZIONE 1.5 MOVIMENTAZIONE Fig. 5 Durante le operazioni di movimentazione, utilizzare gli idonei dispositivi di protezione individuale: Tuta Guanti Calzature Occhiali Cuffie In caso di movimentazione della macchina, è necessario solle- vare la stessa agganciandola agli attacchi appositi con paranco o gru idonei e di sufficiente portata (Fig.
  • Seite 8: Segnali Di Sicurezza E Indicazione

    ITALIANO USO E MANUTENZIONE 1.7 SEGNALI DI SICUREZZA E INDICAZIONE I segnali descritti sono riportati sulla macchina (Fig. 7). Tenerli 8) Possibilità di infortunio agli arti con la barra falciante. puliti e sostituirli se staccati o illeggibili. Leggere attentamente quanto descritto e memorizzare il loro significato. Allontanarsi dal raggio d'azione della macchina.
  • Seite 9: Norme Di Sicurezza E Prevenzione Infortuni

    ITALIANO USO E MANUTENZIONE 2.0 NORME DI SICUREZZA E PREVENZIONE Norme generali 1) Fare attenzione ai simboli di pericolo riportati in questo opu- INFORTUNI scolo e sulla falciatrice. 2) Evitare assolutamente di toccare in qualsiasi modo le parti Fare attenzione al segnale di pericolo riportato nei vari capitoli in movimento.
  • Seite 10 ITALIANO USO E MANUTENZIONE 27) È assolutamente vietato l'uso dell'attrezzatura sprovvista delle protezioni. 1 2 3 4 5 6 7 8 9 0 1 2 3 1 2 3 4 5 6 7 8 9 0 1 2 3 28) Prima di abbandonare il trattore, abbassare l'attrezzatura 1 2 3 4 5 6 7 8 9 0 1 2 3 1 2 3 4 5 6 7 8 9 0 1 2 3 agganciata al gruppo sollevatore, arrestare il motore, inseri-...
  • Seite 11 ITALIANO USO E MANUTENZIONE 48) Prima di mettere in funzione la falciatrice controllare che i puntelli di sostegno (C e D, Fig. 11) siano stati tolti da sotto la falciatrice; controllare che la falciatrice sia stata correttamente montata e regolata; controllare che la macchina sia perfetta- mente in ordine, e che tutti gli organi soggetti ad usura e deterioramento siano efficienti.
  • Seite 12: Norme D'uso

    ITALIANO USO E MANUTENZIONE 3.0 NORME D’USO Per ottenere le migliori prestazioni dell’attrezzatura, seguire attentamente quanto di seguito riportato. ATTENZIONE Tutte le operazioni di manutenzione, regolazione e di approntamento alla lavorazione, devono essere eseguite tassativamente con presa di forza del trattore disinserita, falciatrice giù e trattore spento e ben fermo, chiave disinserita. Tutte le operazioni di assemblaggio devono essere eseguite a banco.
  • Seite 13: Predisposizione Falciatrice

    ITALIANO USO E MANUTENZIONE 3.0.2 PREDISPOSIZIONE FALCIATRICE Per esigenze dovute al trasporto, le falciatrici vengono spedite con il gruppo di taglio smontato del telaio. Dopo il montaggio delle due parti, si raccomanda di controllare accuratamente il serraggio di tutte le viti (Fig. 12) dopo le prime 4÷6 ore di lavoro. Ricontrollare dopo 25÷30 ore.
  • Seite 14: Adattamento Albero Cardanico

    ITALIANO USO E MANUTENZIONE 3.0.4 ADATTAMENTO ALBERO CARDANICO 3.0.5 STABILITÀ IN TRASPORTO FALCIATRICE-TRATTORE L’albero cardanico, fornito con la macchina, è di lunghezza Quando una falciatrice viene accoppiata al trattore, divenendo ai standard. Si può quindi rendere necessario l'adattamento del- fini della circolazione stradale parte integrante dello stesso, la l'albero cardanico.
  • Seite 15: Adattamento Barra Falciante

    ITALIANO USO E MANUTENZIONE Fig. 19 Fig. 20 Fig. 21 3.0.6 ADATTAMENTO BARRA FALCIANTE La barra falciante, per un'ottimale utilizzo, deve sporgere total- mente dalla sagoma del trattore (Fig. 19); nella Figura 20 sono rappresentati tre casi: - applicazione su trattore normalmente usato per lavorazioni di falciatura (K1, Fig.
  • Seite 16 ITALIANO USO E MANUTENZIONE - Regolare la catena (N, Fig. 24) in modo che, durante la falcia- Fig. 24 tura, il braccio di sollevamento (O, Fig. 24) possa oscillare per consentire alla barra falciante di seguire eventuali asperità del terreno. Per un buon funzionamento della falciatrice, si consiglia di fissare la catena (N, Fig.
  • Seite 17 ITALIANO USO E MANUTENZIONE FALCIATURA - Rimuovere i puntelli di sostegno (C e D, Fig. 28) e rimontarli capovolti nelle proprie sedi . - Sfilare il gancio di sicurezza (A, Fig. 29). - La falciatrice è dotata di un dispositivo di sicurezza contro gli ostacoli.
  • Seite 18: Manutenzione

    ITALIANO USO E MANUTENZIONE 4.0 MANUTENZIONE Sono di seguito elencate le varie operazioni di manutenzione da eseguirsi con periodicità. Il minor costo di esercizio ed una lunga durata della macchina dipende, tra l'altro, dalla metodica e costante osservanza di tali norme. Durante le operazioni di lavoro e manutenzione, utilizzare gli idonei dispositivi di protezione individuale: CAUTELA...
  • Seite 19: Messa A Riposo

    ITALIANO USO E MANUTENZIONE PULIZIA ED OLEATURA DELLE LAME TAGLIENTI PERICOLO La pulizia e l'oleatura della barra falciante è una operazione molto pericolosa. Effettuare l'intera operazione seguendo le istruzioni: - Sollevare l'attrezzatura mediante le barre di sollevamento in un luogo pianeggiante e non scivoloso; - Frenare il trattore ed assicurarsi che sia ben bloccato;...
  • Seite 20: Manutenzione Straordinaria

    ITALIANO USO E MANUTENZIONE Fig. 40 Fig. 39 4.2 MANUTENZIONE STRAORDINARIA SOSTITUZIONE ASTA PORTA SEZIONI (K, Fig. 41) - Con l’attrezzatura appoggiata al suolo, aprire la barra falciante. - Togliere il perno ad espansione (H, Fig. 39) e sfilare l'asta porta sezioni (Fig.
  • Seite 21: Sostituzione Cinghie

    ITALIANO USO E MANUTENZIONE SOSTITUZIONE CINGHIE - Svitare le viti (M, Fig. 44) e togliere il carter di protezione. - Allentare completamente il tendicinghia (N, Fig. 44). - Sostituire le cinghie usurate con delle nuove. - Riportare le stesse alla tensione ottimale per mezzo del tendicinghia.
  • Seite 22: Trasporto Stradale

    ITALIANO USO E MANUTENZIONE 5.0 TRASPORTO STRADALE Per la fase di trasporto, regolare e fissare le catene dei bracci laterali di sollevamento del trattore; alzare la barra falciante (Fig. 46); assicurarla con il gancio di sicurezza (Q, Fig. 47); infilare il gancio di sicurezza (R, Fig.
  • Seite 23 Notes cod. G19503010...
  • Seite 24 cod. G19503010...
  • Seite 25: Foreword

    ENGLISH 1.0 FOREWORD 1.2 IDENTIFICATION Each individual machine has an identification plate (Fig. 1) indicating the following details: This handbook contains the use and maintenance instructions for the mower. This booklet is an integrating part of the product, 1) Mark and address of the Manufacturer; and must be kept in a safe place for consultation during the 2) Type and model of machine;...
  • Seite 26: Description Of The Mower

    Fig. 4 1.4 TECHNICAL DATA U.M. FBR Plus Cutting arm lenght 1,75 2,05 2,35 Weight [kg] Power take-off revs [r.p.m.]...
  • Seite 27: Handling

    ENGLISH USE AND MAINTENANCE 1.5 HANDLING Fig. 5 During handling operations, use suitable personal protection gear: Overalls Gloves Shoes Goggles Ear defenders If the machine is handled, it must be lifted by hooking (Fig. 5) onto the appropriate holes with a suitable winch or crane of sufficient capacity.
  • Seite 28: Danger And Indicator Signals

    ENGLISH USE AND MAINTENANCE 1.7 DANGER AND INDICATOR SIGNALS The signs described are reproduced on the machine (Fig. 7). Keep them clean and replace them if they should come off or become illegible. Carefully read each description and learn their 8) Danger of injury to the legs or the arms.
  • Seite 29: Safety Regulations And Accident Prevention

    ENGLISH USE AND MAINTENANCE 2.0 SAFETY REGULATIONS AND ACCIDENT General norms Comply with the instructions given by the danger symbols in PREVENTION this handbook and affixed to the mower. Never ever touch any moving part. Pay attention to danger signs, where shown, in this booklet. 3) Operations and adjustments to the implement must always be carried out when the engine is off and the tractor braked.
  • Seite 30 ENGLISH USE AND MAINTENANCE 27) It is absolutely forbidden to use the implement without guards. 1 2 3 4 5 6 7 8 9 0 1 2 3 1 2 3 4 5 6 7 8 9 0 1 2 3 28) Before leaving the tractor, lower the implement coupled to 1 2 3 4 5 6 7 8 9 0 1 2 3 1 2 3 4 5 6 7 8 9 0 1 2 3...
  • Seite 31 ENGLISH USE AND MAINTENANCE 48) Before operating the mowing machine, check that the support struts (C and D, Fig.11) have been removed from underneath the implement. Make sure that the mower has been correctly mounted and adjusted. Check that the machine is in perfect order and that all components subjet to wear and deterioration are efficent.
  • Seite 32: Use Instructions

    ENGLISH USE AND MAINTENANCE 3.0 USE INSTRUCTIONS Strictly comply with the following instructions to achieve the best performances. ATTENTION It is absolutely essential to disengage the tractor pto, lower the mowing machine, switch off the tractor, ensure that this is at a complete standstill and remove the key before servicing, adjusting or preparating the implement for work.
  • Seite 33: Setting-Up The Mowing Machine

    ENGLISH USE AND MAINTENANCE 3.0.2 SETTING-UP THE MOWING MACHINE For transport requirements, the mowers are sent with the cutting unit removed from the frame. After the two parts have been put back together, it is important to check carefully that all the screws are tightened correctly (Fig. 12) after the first 4 to 6 hours of work.
  • Seite 34: Cardan Shaft Adaption

    ENGLISH USE AND MAINTENANCE 3.0.4 CARDAN SHAFT ADAPTION 3.0.5 STABILITY OF MOWER AND TRACTOR DURING The Cardan shaft, supplied with the machine, is of standard TRANSPORT length. Therefore it might be necessary to adapt the Cardan shaft. When a mower is coupled to a tractor, so becoming an integral In that case, before doing anything, consult the Manufacturer for part of it for the purposes of road travel, the stability of the mower- the eventual adaptation.
  • Seite 35: Adapting The Mowing Bar

    ENGLISH USE AND MAINTENANCE Fig. 19 Fig. 20 3.0.6 ADAPTING THE MOWING BAR Fig. 21 To ensure optium use, the mowing bar must completely project from the tractor (Fig. 19); threee situations are shown in the Figures (20): - hitching to a tractor normally used for mowing jobs (K1, Fig. 20);...
  • Seite 36 ENGLISH USE AND MAINTENANCE - Adjusting the hoisting chain (N, Fig. 24) so that during mowing Fig. 24 the hoisting arm (O, Fig. 24) is free to move up and down; in this way, the cutting arm can follow any unevenness of the ground.
  • Seite 37 ENGLISH USE AND MAINTENANCE MOWING - Remove support (C and D, Fig. 28) and remount them, upside- down in their seat . - Remove tie rod (A, Fig. 29) from the cutting arm and secure it in its seat. - The mower is fitted with a safety device for protection against obstacles.
  • Seite 38: Maintenance

    ENGLISH USE AND MAINTENANCE 4.0 MAINTENANCE The various servicing operations are listed in the following paragraphs. Lower running costs and longer machine life depend on constant and methodical compliance with these operations. During work and maintenance operations, use suitable perso- nal protection gear: CAUTION - The given frequencies are indicative and refer to normal...
  • Seite 39 ENGLISH USE AND MAINTENANCE CLEANING AND OILING THE CUTTERS DANGER Mowing bar cleaning and oiling are very dangerous poerations. Always comply with the following instructions: - Lift the implement by means of the lift links in a flat place where it cannot slip;...
  • Seite 40: Extra Maintenance

    ENGLISH USE AND MAINTENANCE Fig. 40 Fig. 39 4.2 EXTRA MAINTENANCE REPLACEMENT OF SECTION-HOLDING BAR (K, Fig. 41) - With the implement resting on the ground, open the mowing bar. - Remove the expansion pin (H, Fig. 39) and pull out the section- holding bar (Fig.
  • Seite 41: Replacement Of Belts

    ENGLISH USE AND MAINTENANCE REPLACEMENT OF BELTS - Unscrew the screws (M, Fig. 44) and remove the protective casing. - Loosen the belt tensioner completely (N, Fig. 44). - Replace the worn belts with new ones. - Put these at the optimum tension using the belt tensioner. Belt play should not exceed 2 centimetres.
  • Seite 42: Road Transport

    ENGLISH USE AND MAINTENANCE 5.0 ROAD TRANSPORT For transport, adjust and fix the chains of the side lifting arms of the tractor; lift the mowing bar (Fig. 46); secure it with the hooking tie rod (Q, Fig. 47); slide in the safety hook (R, Fig. 47); cover the cutting blades and the outer mowing bar support with the guards provided (Fig.
  • Seite 43 Notes cod. G19503010...
  • Seite 44 cod. G19503010...
  • Seite 45: Vorwort

    DEUTSCH 1.0 VORWORT 1.2 IDENTIFIZIERUNG Jedes einzelne Gerät ist mit einem Identifizierungsschild (Abb. Dieses Heft beschreibt die Betriebs- und Wartungsanleitungen. 1) ausgestattet, mit folgenden Angaben: Das vorliegende Heft ist integrierender Teil des Produkts und muß während der Gesamtlebensdauer der Maschine zwecks 1) Firmenzeichen und Adresse des Herstellers;...
  • Seite 46: Beschreibung Der Maschine

    Vorschriften verfällt. Der Hersteller steht auf jeden Fall zur Verfügung, um einen prompten und akkuraten Kundendienst zu liefern, wie auch all das, was erforderlich ist, damit das Gerät richtig und wirtschaftlich funktioniert. Fig. 4 1.4 TECHNISCHE DATEN U.M. FBR Plus Länge der Stange 1,75 2,05 2,35 Gewicht [kg]...
  • Seite 47: Fortbewegung

    DEUTSCH GEBRAUCH UND WARTUNG 1.5 FORTBEWEGUNG Fig. 5 Beim Handling sind geeignete individuelle Schutzmittel anzuwenden: Arbeitsanzug Handschuhe Schuhwerk Brille Ohrenschutz Falls die Maschine transportiert werden muss, muss sie an den dazu bestimmten Anschlusspunkten (Abb. 5) durch geeigneten Aufzug oder Kran mit ausreichender Tragkraft gehoben werden. Diese gefährliche Arbeit muss absolut durch geschultes und haftendes Personal ausgeführt werden.
  • Seite 48: Warnsignale Und Anzeigesignale

    DEUTSCH GEBRAUCH UND WARTUNG 1.7 WARNSIGNALE UND ANZEIGESIGNALE Die beschriebenen Signale sind an der Maschine angebracht 8) Es besteht Verletzungsgefahr für die Glied-maßen. (Abb. 7). Sauber halten und wechseln, falls sie abfallen oder Nicht in der Reichweite der Maschine stehenbleiben. unleserlich werden.
  • Seite 49: Sicherheits- Und Unfallverhütungs- Bestimmungen

    DEUTSCH GEBRAUCH UND WARTUNG 2.0 SICHERHEITS- UND UNFALLVERHÜTUNGS- Allgemeine Vorschriften 1) Auf das Gefahrsignal achten, das in diesem Heft und auf der BESTIMMUNGEN Mähmaschine selbst vorhanden ist. 2) Es ist auf jeden Fall zu vermeiden, die sich bewegenden Das Gefahrsignals in diesem Heft besonders beachten. Teile auf irgendeine Weise anzufassen.
  • Seite 50 DEUTSCH GEBRAUCH UND WARTUNG 26) Es ist absolut verboten, sich in der Reichweite des Gerätes aufzuhalten, wo sich bewegliche Teile befinden. 1 2 3 4 5 6 7 8 9 0 1 2 3 1 2 3 4 5 6 7 8 9 0 1 2 3 27) Es ist absolut verboten, das Gerät ohne Schutzvorrichtungen 1 2 3 4 5 6 7 8 9 0 1 2 3 1 2 3 4 5 6 7 8 9 0 1 2 3...
  • Seite 51 DEUTSCH GEBRAUCH UND WARTUNG 48) Bevor die Mähmaschine in Betrieb genommen wird, ist zu prüfen, daß die Standbeine (C und D, Abb. 11) unter der Mähmaschine wegge-nommen worden sind. Sicherstellen, daß die Mähmaschine korrekt montiert und eingestellt ist. Sicherstellen, daß die Maschine vollkommen in Ordnung ist und daß...
  • Seite 52: Betriebsanleitung

    DEUTSCH GEBRAUCH UND WARTUNG 3.0 BETRIEBSANLEITUNG Um die besten Leistungen des Gerätes zu erhalten, immer die folgenden Anleitungen beachten. ACHTUNG Während der Ausfürung von Wartungs- Einstell- und Rüstarbeiten muß die Zapfwelle unbedingt ausgeschaltet sein, die Mähmaschine gesenkt sein und der Schlepper abgestellt sein und stillstehen, mit abgezogenem Zünd-schlüssel. Das Zusammensetzen der Teile muß...
  • Seite 53: Vorbereitung Der Mähmaschine

    DEUTSCH GEBRAUCH UND WARTUNG 3.0.2 VORBEREITUNG DER MÄHMASCHINE Aus Transportgründen werden die Mähmaschinen mit vom Rahmen abgebautem Schneideaggregat geliefert. Nach der Montage der zwei Teile ist nach den ersten 4-6 Betriebsstunden sorgfältig zu überprüfen, dass alle Schrauben (Abb. 12) korrekt festgezogen sind.
  • Seite 54: Anpassung Der Gelenkwelle

    DEUTSCH GEBRAUCH UND WARTUNG 3.0.4 ANPASSUNG DER GELENKWELLE 3.0.5 STABILITÄT VON MÄHMASCHINE-SCHLEPPER Die mit der Maschine gelieferte Gelenkwelle hat Standardlänge, BEIM TRANSPORT aus diesem Grunde kann ihre Anpassung notwendig sein. In Wenn eine Mähmaschine an den Schlepper angekuppelt wird, diesem Fall sich vor dem Eingriff an den Hersteller der und somit gemäß...
  • Seite 55: Anpassen Des Mähbalkens

    DEUTSCH GEBRAUCH UND WARTUNG Fig. 19 Fig. 20 3.0.6 ANPASSEN DES MÄHBALKENS Fig. 21 Für einen optimalen Einsatz muß der Mähbalken seitlich über die Breite des Schleppers (Abb. 19) überstehen. In den Abb. (20) sind drei Fälle dargestellt: - Anbau an normalen Schlepper, der für Mährbeiten verwendet wird (K1, Fig.
  • Seite 56 DEUTSCH GEBRAUCH UND WARTUNG - Die Länge der Kette (N, Abb. 24) soll so eingestellt sein, damit Fig. 24 während des Mähens der Hebearm(O, Abb. 24) genügend Bewegungsfreiheit hat, um zu ermöglichen, daß das Mähbalken sich etwaigen Unebenheiten des Bodens anpassen kann. Für den einwandfreien Betrieb der Mähmaschine ist die Kette (N, Abb.
  • Seite 57 DEUTSCH GEBRAUCH UND WARTUNG MÄHEN - Die zwei Stützen Bild (C und D, Abb. 28) abziehen und in umgekehrte Position in den gleichen löchern wieder einstecken. - Die Sicherheitsstange (A, Abb. 29) aus dem Balken entfernen und im eigenen Sitz einstecken. Die Mähmaschine ist mit einer Sicherheitsvorrichtung gegen Hindernisse ausgerüstet.
  • Seite 58: Wartung

    DEUTSCH GEBRAUCH UND WARTUNG 4.0 WARTUNG ALLE 50 BETRIEBSSTUNDEN - Es muss häufig geprüft werden, ob die Spannhülsen am Hier werden die verschiedenen Wartung-sarbeiten angeführt, Pleuelwerk angezogen sind (Abb. 34). die in regelmäßigen Abständen durchzuführen sind. Die geringe- ren Betriebskosten und die lange Haltbar-keit des Gerätes REGELMÄSSIGF (6 MONATE) hängen unter anderem von der ständigen Durchführung dieser - Schmierstell (A-B, Abb.
  • Seite 59: Reinigen Und Ölen Der Mähmesser

    DEUTSCH GEBRAUCH UND WARTUNG REINIGEN UND ÖLEN DER MÄHMESSER GEFAHR Das Reinigen und Ölen der Mähmesser ist ein sehr gefährlicher Vorgang. Der gesamte Vorgang ist wie im folgenden beschrieben auszuführen: - Das Gerät mit den Hubstangen an einer ebenen und rutschsicheren Stelle ausheben;...
  • Seite 60: Ausserordentliche Wartung

    DEUTSCH GEBRAUCH UND WARTUNG Fig. 40 Fig. 39 4.2 AUSSERORDENTLICHE WARTUNG ERSETZEN DER ABSCHNITTHALTESTANGE (K, Abb. 41) - Bei auf dem Boden aufliegender Ausrüstung den Mähbalken öffnen. - Den Spreizbolzen (H, Abb. 39) entfernen und die Abschnittträgerstange (Abb. Kupplungsspannstange (I, Abb. 40) herausziehen. - Die neue Abschnitthaltestange einsetzen und mit dem Spreizbolzen blockieren.
  • Seite 61: Ersetzen Der Riemen

    DEUTSCH GEBRAUCH UND WARTUNG ERSETZEN DER RIEMEN - Die Schrauben abschrauben (M, Abb. 44) und das Schutzgehäuse entfernen. - Den Riemenspanner komplett lockern (N, Abb. 44). - Die verschlissenen Riemen durch neue Riemen ersetzen. - Die Riemen wieder mit dem Riemenspanner spannen. Das Spiel der Riemen darf nicht 2 Zentimeter überschreiten.
  • Seite 62: Strassentransport

    DEUTSCH GEBRAUCH UND WARTUNG 5.0 STRASSENTRANSPORT Beim Straßentransport sind die Ketten der seitlichen Hubarme des Schleppers einzustellen und zu befestigen; den Mähbalken (Abb. 46) anheben und mit der Feststellspannstange befestigen (Q, Abb. 47); den Sicherheitshaken (R, Abb. 47) einsetzen; die Messer den Aussenschuh speziellen...
  • Seite 63 Notes cod. G19503010...
  • Seite 64 cod. G19503010...
  • Seite 65: Introduction

    FRANÇAIS 1.0 INTRODUCTION 1.2 IDENTIFICATION Chaque herse est identifiée par une plaque (Fig. 1) sur laquelle sont indiqués: Cette brochure décrit les normes d’utilisation, d’entretien pour le faucheuse. Cette brochure, qui fait partie du produit, doit être 1) Marque et adresse du Constructeur; conservé...
  • Seite 66: Description De La Faucheuse

    être nécessaire pour obtenir le meilleur fonctionnement et un rendement optimal de votre appareil. Fig. 4 1.4 DONNES TECHNIQUES U.M. FBR Plus Longueur barre 1,75 2,05 2,35 Poids [kg] Tours prise de force [r.p.m.]...
  • Seite 67: Movimentation

    FRANÇAIS EMPLOI ET ENTRETIEN 1.5 MOVIMENTATION Fig. 5 Utiliser les dispositifs adéquats de protection individuelle au cours des opérations de déplacement: Combinaison Gants Chaussures Lunettes Coiffe En cas de manutention de la machine, soulever celle-ci en la fixant aux crochets spéciaux par un palan ou une grue appropriés ayant une capacité...
  • Seite 68: Signaux De Securite D'indication

    FRANÇAIS EMPLOI ET ENTRETIEN 1.7 SIGNAUX DE SECURITE D’INDICATION Les signaux décrits sont indiqués sur la machine (Fig. 7). Nettoyer et remplacer ces signaux s’ils sont détachés ou illisibles. Lire 8) Risque d'accidents aux mem-bres avec la barre! Ne vous avec attention la description et mémoriser son sens.
  • Seite 69: Normes De Securite Et De Prevention Des Accidents

    FRANÇAIS EMPLOI ET ENTRETIEN 2.0 NORMES DE SECURITE ET DE PREVENTION Normes générales 1) Faites attention aux symboles de danger que vous trouverez DES ACCIDENTS dans cette brochure et sur votre faucheuse. 2) Evitez absolument de toucher les parties en mouvement. Faire attention au signal de danger quand il apparaît dans cette 3) Les interventions ou les réglages sur l’outil ne seront brochure.
  • Seite 70 FRANÇAIS EMPLOI ET ENTRETIEN 27) Il est absolument interdit d'utiliser l'appareil sans les ptotections. 1 2 3 4 5 6 7 8 9 0 1 2 3 1 2 3 4 5 6 7 8 9 0 1 2 3 28) Avant de quitter le tracteur, abaissez la faucheuse attelée au 1 2 3 4 5 6 7 8 9 0 1 2 3 1 2 3 4 5 6 7 8 9 0 1 2 3...
  • Seite 71 FRANÇAIS EMPLOI ET ENTRETIEN 48) Avant de mettre la faucheuse en marche, controlez que les supports (C et D, Fig.11) sous la faucheuse ont étét enlevés; contrôlez que la faucheuse a étét montée et réglée correctement; vérifiez que la machine est en parfait état et que tous les organes sujets à...
  • Seite 72: Normes D'emploi

    FRANÇAIS EMPLOI ET ENTRETIEN 3.0 NORMES D’EMPLOI Pour obtenir les meilleures performances de votre appareil respectez attentivement les instructions ci-après. ATTENTION Toutes les opérations d’entretien, réglage et préparation à l'exécution du travail ne doivent être effectuées que si la prise de force du tracteur est débranchée, la faucheuse en bas et le tracteur arrêtée, la clé...
  • Seite 73: Montage De La Faucheuse

    FRANÇAIS EMPLOI ET ENTRETIEN 3.0.2 MONTAGE DE LA FAUCHEUSE Les faucheuses sont expédiées, pour des exigences de transport, avec le groupe de coupe démonté du châssis. Après le montage des deux parties, il est recommandé de contrôler attentivement le serrage de toutes les vis (Fig. 12) après les 4-6 premières heures de travail.
  • Seite 74: Adaptation De L'arbre À Cardans

    FRANÇAIS EMPLOI ET ENTRETIEN 3.0.4 ADAPTATION DE L'ARBRE À CARDANS 3.0.5 STABILITE PENDANT LE TRANSPORT FAUCHEUSE- TRACTEUR L’arbre à cardans, fourni avec la machine, a une longueur Lorsqu'un faucheuse est attelé à un tracteur, devenant pour la standard. L’adaptation de l’arbre à cardans pourrait donc s’avérer circulation routière partie intégrante de ce dernier, la stabilité...
  • Seite 75: Adaptation De La Barre De Coupe

    FRANÇAIS EMPLOI ET ENTRETIEN Fig. 19 Fig. 20 3.0.6 ADAPTATION DE LA BARRE DE COUPE Fig. 21 Pour une utilisation optimale de la barre de coupe, elle doit être en saillie par rapport au gabarit du tracteur (Fig. 19); sur les Figures 20 sont illustrés trois cas: - application sur tracteur normalment utilisé...
  • Seite 76 FRANÇAIS EMPLOI ET ENTRETIEN - Régler la chaine (N, Fig. 24) de façon que, pendant le fauchage, Fig. 24 les bras de soulèvement (O, Fig. 24) soit assez libre d'osciller pour consntir à la barre de suivre d'eventuelles aspérités du terrain.
  • Seite 77 FRANÇAIS EMPLOI ET ENTRETIEN FAUCHAGE - Déplacer les étançons de soutien (C et D, Fig. 28) et les remonter renversés dans les propres sièges. - Décrocher le tirant (A, Fig. 29) de la barre et l'assurer dans le propre siège. - La faucheuse est équipée d'un dispositif de sûreté...
  • Seite 78: Entretien

    FRANÇAIS EMPLOI ET ENTRETIEN 4.0 ENTRETIEN PERIODIQUEMENT (6 MOIS) - Graisser dans le point (A-B, Fig. 32). Les différentes opérations d’entretien sont reportées ci-dessous. Les faibles coûts de service et la durée de cette machine APRES CHAQUE FAUCHAGE dépendent, entre autre, du respect constant de ces opérations. - Nettoyer et huiller les lames de la barre de coupe en suivant Pendant les opérations de travail et de maintenance, utiliser les instructions du chapitre: "Nettoyage et huillage des...
  • Seite 79 FRANÇAIS EMPLOI ET ENTRETIEN NETTOYAGE ET HUILLAGE DES LAMES DE COUPE DANGER Le nettoyage et huillage de la barre de coupe est une opération très dangereuse. Respectez les instructions suivantes: - Soulevez l'équipement au moyen de barres de levage sur une terrain plat non glissant;...
  • Seite 80: Maintenance Extraordinaire

    FRANÇAIS EMPLOI ET ENTRETIEN Fig. 40 Fig. 39 4.2 MAINTENANCE EXTRAORDINAIRE REMPLACEMENT DE LA TIGE PORTE-SECTIONS (K, Fig. 41) - Avec l'équipement posé sur le sol, ouvrir la barre de coupe. - Enlever le goujon à expansion (H, Fig. 39) et retirer la tige por- te-sections (Fig.
  • Seite 81: Remplacement Des Courroies

    FRANÇAIS EMPLOI ET ENTRETIEN REMPLACEMENT DES COURROIES - Dévisser les vis (M, Fig. 44) et retirer le carter de protection. - Desserrer complètement le tendeur de courroie (N, Fig. 44). - Remplacer les courroies usées par de nouvelles. - Remettre les courroies à la tension optimale moyennant le tendeur de courroie.
  • Seite 82: Transport Routier

    FRANÇAIS EMPLOI ET ENTRETIEN 5.0 TRANSPORT ROUTIER Pour la phase de transport, régler et fixer les chaînes des bras latéraux de relevage du tracteur; lever la barre de coupe (Fig. 48); l'assujettir avec le tirant d'attelage (Q, Fig. 49); enfiler le crochet de sûreté...
  • Seite 83 Notes cod. G19503010...
  • Seite 84 cod. G19503010...
  • Seite 85: Premisa

    ESPAÑOL 1.0 PREMISA 1.2 IDENTIFICACIÓN Cada equipo está provisto de una tarjeta de identificación (Fig.1), en la que se encuentran: Este opúsculo describe las normas de manejo, mantenimiento para la segadora. El presente opúsculo constituye parte inte- Marca y dirección del Fabricante. grante del producto y tiene que guardarse en un lugar seguro Tipo de la máquina.
  • Seite 86: Escripción De La Segadora

    Fig. 4 1.4 DATOS TECNICOS U.M. FBR Plus Longitud barra 1,75 2,05 2,35 Peso...
  • Seite 87: Manipulación

    ESPAÑOL EMPLEO Y MANTENIMIENTO 1.5 MANIPULACIÓN Fig. 5 Durante los trabajos de mantenimiento, utilice los elementos de protección personal adecuados: Mono Guantes Zapatos Gafas Protecciones auditivas En caso de manipulación de la máquina, se precisa elevar la misma enganchándola a los ganchos al efecto (Fig. 5) median- te aparejo o grúa idóneos con suficiente capacidad.
  • Seite 88: Señales De Seguridad Y De Indicacion

    ESPAÑOL EMPLEO Y MANTENIMIENTO 1.7 SEÑALES DE SEGURIDAD Y DE INDICACION Las señales descritas están colocadas en la máquina (Fig. 7). 8) Peligro para los miembros con barre. Mantenerlas limpias y reemplazarlas si se desprenden o se vuelven Permanecer alejados del radio de acción de la máquina. ilegibles.
  • Seite 89: Normas De Seguridad Y Prevención Contra Los Accidentes

    ESPAÑOL EMPLEO Y MANTENIMIENTO 2.0 NORMAS DE SEGURIDAD Y PREVENCIÓN Normas generales 1) Prestar atención a los símbolos de peligro expuestos en CONTRA LOS ACCIDENTES este manual y presentes en la segadora. 2) No tocar jamás las partes en movimiento. Tener cuidado a las señales de peligro que se indican en este 3) Reparaciones y regulaciones sobre la máquina se deben opúsculo.
  • Seite 90 ESPAÑOL EMPLEO Y MANTENIMIENTO 26) Está terminantemente prohibido permanecer en el área de acción de la máquina. 1 2 3 4 5 6 7 8 9 0 1 2 3 1 2 3 4 5 6 7 8 9 0 1 2 3 27) Está...
  • Seite 91 ESPAÑOL EMPLEO Y MANTENIMIENTO 48) Antes de poner en función la segadora controlar que se hayan quitado de abajo de la segadora los pilares de sostén (C y D, fig. 11) controlar que la segadora haya sido montada y regulada correctamente; controlar que la máquina esté perfectamente en orden y que todos los órganos que sufren desgaste y deterioro estén en buen estado.
  • Seite 92: Normas De Uso

    ESPAÑOL EMPLEO Y MANTENIMIENTO 3.0 NORMAS DE USO Para obtener las mejores prestaciones del equipo, seguir las siguientes instrucciones. ATENCION Todas las operaciones operaciones de manutención, regulación y preparación para el trabajo deben realizarse indefectiblemente con la toma de fuerza del tractor desacoplada, la segadora baja, el tractor apagado y completamente parado y sin la llave de contacto. Todas las operaciones de ensamblado se deben realizar en el banco de trabajo.
  • Seite 93: Preparación De La Segadora

    ESPAÑOL EMPLEO Y MANTENIMIENTO 3.0.2 PREPARACIÓN DE LA SEGADORA Por razones de transporte, las segadoras se envían con el grupo de corte desmontado del bastidor. Tras el montaje de las dos partes, se aconseja controlar el apriete de todos los tornillos (Fig.
  • Seite 94: Adaptación Árbol Cardánico

    ESPAÑOL EMPLEO Y MANTENIMIENTO 3.0.4 ADAPTACIÓN ÁRBOL CARDÁNICO 3.0.5 ESTABILIDAD DURANTE EL TRANSPORTE DE LA El árbol cardán, provisto junto con la máquina, tiene una longitud SEGADORA -TRACTOR estándar; por lo tanto, es posible que haya que adaptarlo. En Cuando una segadora se acopla a un tractor, convirtiéndose así este caso antes de intervenir sobre el árbol cardán, consultar el en parte integrante del mismo para la circulación por la vía Fabricante del mismo para la eventual adaptación.
  • Seite 95: Adaptación De La Barre Segadora

    ESPAÑOL EMPLEO Y MANTENIMIENTO Fig. 19 Fig. 20 3.0.6 ADAPTACIÓN DE LA BARRE SEGADORA Fig. 21 Para lograr un empleo optimal de la barra segadora la misma debe sobresalir totalmente del contorno del tractor (Fig. 19); en las Figuras 20 se representan: - aplicación con tractor usado normalmente para la siega (K1, Fig.
  • Seite 96 ESPAÑOL EMPLEO Y MANTENIMIENTO - Regular la cadena (P, Fig. 24) de modo que, durante la siega, el Fig. 24 brazo de levantamiento (O, Fig. 24) sea lo bastante libre para oscilar, a fin de consentir a la barra de seguir eventuales escabrosidades del terreno.
  • Seite 97 ESPAÑOL EMPLEO Y MANTENIMIENTO SIEGA - Quitar los tirantes de soporte (C y D, Fig. 28) y volverlos a montar al revés en sus asientos. - Desenganchar el tirante (A, Fig. 29) de la barra y fijarlo en su asiento. - La segadora está...
  • Seite 98: Mantenimiento

    ESPAÑOL EMPLEO Y MANTENIMIENTO 4.0 MANTENIMIENTO PERIODICAMENTE (6 MESES) - Engrasar en lo punto (A-B, Fig. 32). Se enumeran a continuación las operaciones de mantenimiento que debemos efectuar periódicamente. El menor costo de DESPUES DE CADA SIEGA ejercicio y la durabilidad de la máquina dependen de la metódica - Limpiar y aceitar las cuchillas de la barra segadora, siguiendo y constante observación de dichas normas.
  • Seite 99 ESPAÑOL EMPLEO Y MANTENIMIENTO LIMPIEZA Y ACEITADO DE LAS HOJAS PERICOLO La limpieza y el aceitado de la barra segadora es una operación muy peligrosa. Efectuarla siempre siguiendo las siguientes instrucciones: - Alzar el equipo mediante las barras de elevación en un lugar plano y no resbaladizo;...
  • Seite 100: Mantenimiento Extraordinario

    ESPAÑOL EMPLEO Y MANTENIMIENTO Fig. 40 Fig. 39 4.2 MANTENIMIENTO EXTRAORDINARIO SUSTITUCIÓN DE LA VARILLA PORTASECCIONES (K, Fig. 41) - Con el equipo apoyado sobre el suelo, abra la barra de corte. - Quite el perno de expansión (H, Fig. 39) y extraiga la barra portasecciones (Fig.
  • Seite 101 ESPAÑOL EMPLEO Y MANTENIMIENTO SUSTITUCIÓN DE LAS CORREAS - Desenrosque los tornillos (M, Fig. 44) y quite el cárter de protección. - Afloje completamente el tensor de correa (N, Fig. 44). - Sustituya las correas gastadas con correas nuevas. - Restablezca la tensión justa de las correas por medio del tensor de correas.
  • Seite 102: Transporte Por La Vía Pública

    ESPAÑOL EMPLEO Y MANTENIMIENTO 5.0 TRANSPORTE POR LA VÍA PÚBLICA Para el transporte, regule y fije las cadenas de los brazos laterales de elevación del tractor; levante la barra de corte (Fig. 46); asegúrela con el tirante de enganche (Q, Fig. 47); introduzca el gancho de seguridad (R, Fig.
  • Seite 103 Notes cod. G19503010...
  • Seite 104: Montaggio

    MONTAGGIO - ASSEMBLY - MONTAGE - MONTAGE - MONTAJE 7.0 MONTAGGIO Questo capitolo descrive le fasi di assemblaggio di una falciatrice imballata in cassa. Durante le operazioni di movimentazione, assemblaggio e successivamente di uso e manutenzione, utilizzare gli idonei dispositivi di protezione individuale (A): obbligo di indossare indumenti adeguati e protezioni indicate.
  • Seite 105 520 - 1145 FBR Plus 205 (X2) 234 - 92 70 - 27.5 74 - 29 560 - 1235 FBR Plus 235 (X2) 275 - 108 73 - 28.7 72,5 - 28.5 600 - 1320 FBR Plus 175 (X5) 234 - 92...
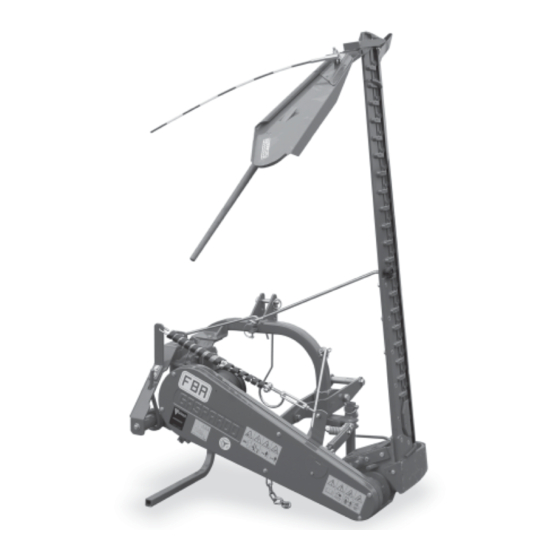
  • Seite 106 MONTAGGIO - ASSEMBLY - MONTAGE - MONTAGE - MONTAJE COMPONENTI DI UNA FALCIATRICE - MOWER COMPONENTS BAUTEILE EINER MÄHMASCHINE - COMPOSANTS D'UNE FAUCHEUSE COMPONENTES DE UNA SEGADORA cod. G19503010...
  • Seite 107 MONTAGGIO - ASSEMBLY - MONTAGE - MONTAGE - MONTAJE Sollevamento meccanico Sollevamento oleodinamico Mechanical lifting Hydraulic lifting Mechanische Aushebung Hydraulische Aushebung Relevage mécanique Relevage hydraulique Elevación mecánica Elevación hidráulica 1) CHÂSSIS TROISIÈME POINT. 1) TELAIO TERZO PUNTO. 2) ÉTRÉSILLON LATÉRAL 2) PUNTELLOLATERALE.
  • Seite 108 MONTAGGIO - ASSEMBLY - MONTAGE - MONTAGE - MONTAJE M8 x 16 cod. G19503010...
  • Seite 109 MONTAGGIO - ASSEMBLY - MONTAGE - MONTAGE - MONTAJE M12 x 35 cod. G19503010...
  • Seite 110 MONTAGGIO - ASSEMBLY - MONTAGE - MONTAGE - MONTAJE M10 x 25 M10 x 25 M12 x 60 (x4) M10 x 60 cod. G19503010...
  • Seite 111 MONTAGGIO - ASSEMBLY - MONTAGE - MONTAGE - MONTAJE Non serrare a fondo il dado di fissaggio (A) dell’andana: permettere il corretto movimento della stessa. Do not tighten securing nut (A) on the moving guide completely: allow for proper movement of the guide. Die Feststellmutter (A) des Schwades nicht bis zum Anschlag festziehen: er Schwad muss sich korrekt bewegen...
  • Seite 112 MONTAGGIO - ASSEMBLY - MONTAGE - MONTAGE - MONTAJE 11.0 M16 x40 NARROW ROADWAY (optional) L. 96 L. 154 M12 x40 M20 x200 M20 x150 cod. G19503010...
  • Seite 113: Parti Di Ricambio

    7.0 PARTI DI RICAMBIO Le ordinazioni delle parti di ricambio vanno fatte presso i nostri concessionari di zona e devono essere sempre corredate dalle seguenti indicazioni: - Tipo, modello e numero di matricola dell'attrezzatura. Tali dati sono stampigliati nell'apposita targhetta di cui è dotata ogni attrezzatura.
  • Seite 114 PARTI DI RICAMBIO - SPARE PARTS - ERSATZTEILE - PIECES DETACHEES - PIEZAS DE REPUESTO cod. G19503010...
  • Seite 115 PARTI DI RICAMBIO - SPARE PARTS - ERSATZTEILE - PIECES DETACHEES - PIEZAS DE REPUESTO cod. G19503010...
  • Seite 116 PARTI DI RICAMBIO - SPARE PARTS - ERSATZTEILE - PIECES DETACHEES - PIEZAS DE REPUESTO cod. G19503010...
  • Seite 117 PARTI DI RICAMBIO - SPARE PARTS - ERSATZTEILE - PIECES DETACHEES - PIEZAS DE REPUESTO cod. G19503010...
  • Seite 118 PARTI DI RICAMBIO - SPARE PARTS - ERSATZTEILE - PIECES DETACHEES - PIEZAS DE REPUESTO cod. G19503010...
  • Seite 119 PARTI DI RICAMBIO - SPARE PARTS - ERSATZTEILE - PIECES DETACHEES - PIEZAS DE REPUESTO cod. G19503010...
  • Seite 120 PARTI DI RICAMBIO - SPARE PARTS - ERSATZTEILE - PIECES DETACHEES - PIEZAS DE REPUESTO cod. G19503010...
  • Seite 121 PARTI DI RICAMBIO - SPARE PARTS - ERSATZTEILE - PIECES DETACHEES - PIEZAS DE REPUESTO cod. G19503010...
  • Seite 122 PARTI DI RICAMBIO - SPARE PARTS - ERSATZTEILE - PIECES DETACHEES - PIEZAS DE REPUESTO cod. G19503010...
  • Seite 123 PARTI DI RICAMBIO - SPARE PARTS - ERSATZTEILE - PIECES DETACHEES - PIEZAS DE REPUESTO cod. G19503010...
  • Seite 124 PARTI DI RICAMBIO - SPARE PARTS - ERSATZTEILE - PIECES DETACHEES - PIEZAS DE REPUESTO cod. G19503010...
  • Seite 125 PARTI DI RICAMBIO - SPARE PARTS - ERSATZTEILE - PIECES DETACHEES - PIEZAS DE REPUESTO cod. G19503010...
  • Seite 126 PARTI DI RICAMBIO - SPARE PARTS - ERSATZTEILE - PIECES DETACHEES - PIEZAS DE REPUESTO cod. G19503010...
  • Seite 127 PARTI DI RICAMBIO - SPARE PARTS - ERSATZTEILE - PIECES DETACHEES - PIEZAS DE REPUESTO cod. G19503010...
  • Seite 128 PARTI DI RICAMBIO - SPARE PARTS - ERSATZTEILE - PIECES DETACHEES - PIEZAS DE REPUESTO cod. G19503010...
  • Seite 129 PARTI DI RICAMBIO - SPARE PARTS - ERSATZTEILE - PIECES DETACHEES - PIEZAS DE REPUESTO cod. G19503010...
  • Seite 130 PARTI DI RICAMBIO - SPARE PARTS - ERSATZTEILE - PIECES DETACHEES - PIEZAS DE REPUESTO cod. G19503010...
  • Seite 131 PARTI DI RICAMBIO - SPARE PARTS - ERSATZTEILE - PIECES DETACHEES - PIEZAS DE REPUESTO cod. G19503010...
  • Seite 132 PARTI DI RICAMBIO - SPARE PARTS - ERSATZTEILE - PIECES DETACHEES - PIEZAS DE REPUESTO cod. G19503010...
  • Seite 133 PARTI DI RICAMBIO - SPARE PARTS - ERSATZTEILE - PIECES DETACHEES - PIEZAS DE REPUESTO cod. G19503010...
  • Seite 134 Û‚‹ÒÌÂÚ - **—Ò¸ÙıðÔ ðÔı ˜ÒÁÛÈÏÔðÔÈÂflÙ·È Ï¸ÌÔ „È· ÍÔðÙÈÍ›Ú ÏÁ˜·Ì›Ú - ***—Ò¸ÙıðÔ ðÔı para a trinchadora - ***Norma utilizada apenas para máquinas combinadas ˜ÒÁÛÈÏÔðÔÈÂflÙ·È Ï¸ÌÔ „È· Ûð·ÒÙÈÍ›Ú ÏÁ˜·Ì›Ú Û Ûı̉ı·Ûϸ Ï ۂ‹ÒÌÂÚ. TYPE MODEL PLACE SERIAL NUMBER DATE Cod. F07040035 (06-2010) – Uff. Tecnico MASCHIO GASPARDO S.p.A. Il Presidente Maschio Egidio...
  • Seite 135: Eesti Keel

    Egidio Maschio – Ühise Peakorteri poolt specyfikacje techniczne ISO 11684:1995. Dokumentacja techniczna zostala sporz dzona przez Egidio Maschio – Zarz d Grupy Maschio Gaspardo. *Standard kehtib ainult kultivaatoritele ja kultivaatorikäppadele - **Standard kehtib ainult *Norma stosowana wy cznie do kultywatorów oraz spulchniarek - **Norma stosowana lõikuritele - ***Standard kehtib ainult kombineeritud masinatele...
  • Seite 136 404126 Волжский 315100 Chisineu-Cris (Arad) - România GASPARDO BIELORUSSIA MASCHIO-GASPARDO CINA Волгоградская область Tel. +40 257 307030 Тел. +7 8443 525065 MASCHIO MIDDLE EAST MASCHIO-GASPARDO KOREA Fax +40 257 307040 факс. +7 8443 525064 e-mail: maschio@maschio.ro Ufficio Tecnico MASCHIO GASPARDO S.p.A.

Inhaltsverzeichnis