Kyosho @12 Racing Ferrari 360 Modena Bedienungsanleitung
1:12 scale radio controlled electric powered touring car
Inhaltsverzeichnis
Quicklinks
Before beginning assembly, please read these instructions thoroughly.
組立/取扱説明書
Instruction Manual
Bedienungsanleitung
Manuel d'instructions
Manual de Instrucciones
POW ER ON
Mode l No.
POW ER
ST.T RIM
ST. D/R
TH.T RIM
PERFEX KT-7
Transmitter
DIG ITA L
PRO POR
TIO NAL
RAD IO CON
TRO L SYS
TEM PER
FEX KT-
1. 安全のための注意事項 / Safety Precautions
Sicherheitshinweise / Pr cautions d'emploi / Consejos de Seguridad
2. セット内容 / Items Included
Inhalt / Contenu de votre valisette / Contenido
3. セットの他に必要な物 / Items Required (not included)
Hinweise zur Bedienung / Conseils d'utilisation. / Consejos pr‡cticos
8, 10. 各部の交換と調整 / Changing Parts
Der Austausch von Teilen am Modell / Changement de pieces / Cambio de piezas
So wird der RundenzŠhler montiert / Comment installer la puce de comptage / Instalaci-n de un cuentavueltas
Problemlšsungen / En cas de probl mes / Guia de Problemas
*Hereby, KYOSHO CORPORATION, declares that this product is in compliance with
the essential requirements and other relevant provisions of Directive 1999/5/EC.
*Hiermit erklŠrt die KYOSHO Corporation, dass dieses Produkt in †bereinstimmung
mit der Richtlinie 1999/5/EC ist und ihr in allen relevanten Punkten entspricht.
※製品改良のため、予告なく仕様を変更する場合があります。
*Specifications are subject to be changed without prior notice!
*Technische nderungen sind jederzeit mšglich!
© 2003 KYOSHO CORPORATION
/禁無断転載複製
※ご使用前にこの説明書を良くお読みになり十分に理解してください。
Anleitung vor Inbetriebnahme aufmerksam lesen!
Veuillez attentivement lire les instructions avant lÕemploi.
Lea este manual de instrucciones antes de utilizar su modelo
1:12 SCALE RADIO CONTROLLED ELECTRIC POWERED TOURING CAR
*Les sp cifications peuvent changer sans pr avis!
*Par la pr sente, KYOSHO CORPORATION d clare que cet
quipement est conforme aux exigences essentielles et aux autres
dispositions de la directive 1999/5/CE qui lui sont applicables.
*Por medio de la presente KYOSHO declara que este producto cumple con los
requisitos esenciales y cualesquiera otras disposiciones aplicables o
exigibles de la Directiva 1999/5/CE.
*El fabricante se reserva el derecho de introducir modificaciones en los kits sin previo aviso!
R
THE FINEST RADIO CONTROL MODELS
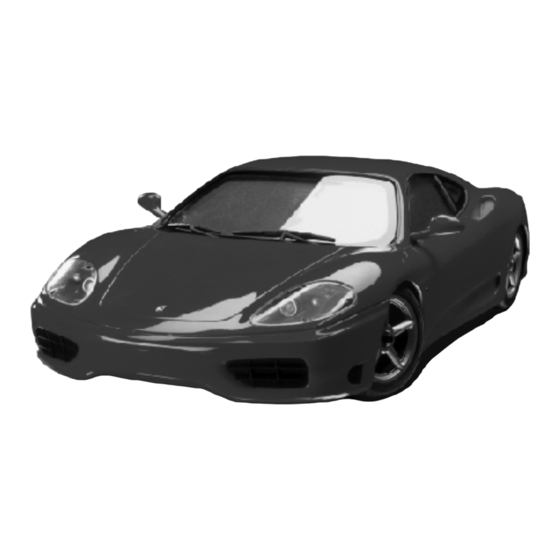
Ferrari 360 Modena
2 ~ 5
6
7
8 ~ 9
10 ~ 13
14 ~ 17
18 ~ 19
20 ~ 31, 33
32
34
35
36
37
38 ~ 39
40
No. 30651
(和英独仏西)
Inhaltsverzeichnis

Verwandte Anleitungen für Kyosho @12 Racing Ferrari 360 Modena


Inhaltszusammenfassung für Kyosho @12 Racing Ferrari 360 Modena
-
Seite 1: Inhaltsverzeichnis
1999/5/CE qui lui sont applicables. *Hiermit erklŠrt die KYOSHO Corporation, dass dieses Produkt in †bereinstimmung *Por medio de la presente KYOSHO declara que este producto cumple con los mit der Richtlinie 1999/5/EC ist und ihr in allen relevanten Punkten entspricht. - Seite 2 Prenez des pr cautions lors de lÕutilisation. Vous seul tes responsable des volutions de votre mod le. La soci t KYOSHO ou son distributeur ne peuvent en aucun cas tre tenus responsables des accidents pouvant survenir lors de lÕutilisation de ce mod le! Tome las precauciones necesarias antes de empezar.
- Seite 3 小さな部品や、とがった部品がありますので、十分注意してください。 また、小さなお子様のいる場所での作業・保管はさけてください。 As the product includes small and sharp parts, assemble and store this product only in places out of the reach of children. Nicht in KinderhŠnde gelangen lassen! L'assemblage de votre @12 doit tre fait ˆ l' cart des jeunes enfants. Garder hors de port des enfants les pi ces de votre @12.
- Seite 4 / SAFETY PRECAUTIONS 安全のための注意事項 Sicherheitshinweise / PRECAUTIONS D'EMPLOIS / PRECAUCIONES DE SEGURIDAD 走行後や走行させない時は必ず電源スイッチをOFFにし、すべての電池を 外してください。誤動作や電池の発熱・液漏れなどの危険があります。 When not using the model, always switch power OFF and remove all batteries. The batteries might otherwise overheat or leak and damage your model. Nach dem Fahrbetrieb die Batterien / Akkus aus Sender und Modell entfernen! Lorsque vous n'utilisez plus votre @12, teindre le r cepteur puis l' metteur.
- Seite 5 Utilice un pa–o suave y limpio. 純正オプションパーツ以外の組み込みや車体の改造はしないでください。 故障の原因となります。 Do NOT install any option parts not made by Kyosho for this model. To avoid causing irreparable damage, do NOT attempt any modifications. Verwenden Sie aus GrŸnden der Produkthaftung ausschlie§lich Original KYOSHO Tuning- und Ersatzteile! Ne jamais utiliser d'autres options que celles fabriqu es par Kyosho.
- Seite 6 / ITEM INCLUDED セット内容 Inhalt / CONTENU DE VOTRE VALISETTE / Contenido *送信機用アンテナ *PERFEX KT-7 送信機 (コントローラー) *アンテナパイプ *PERFEX KT-7 Transmitter (Controller) *Transmitter Antenna *Antenna Pipe *Perfex Fernsteuerung KT-7 *Senderantenne *Antennenrohr *PERFEX KT-7 Radiocommande 2 voies *Antenne radio *Tube dÕantenne *Emisora PERFEX KT-7 *Antena emisora *Tubo Antena...
-
Seite 7: Erforderliches Werkzeug / Outils Necessaires (Non Inclus!) / Herramientas Necesarias
/ REQUIRED ADDITIONAL セットの他に必要な物 Erforderliches Werkzeug / OUTILS NECESSAIRES (NON INCLUS!) / Herramientas necesarias ドライバー (中、小) *ラジオペンチ *Needle Nose Pliers *A Phillips Screwdriver (Precision type or a small sized) *Kreuzschlitzschraubendreher *Flachzange *Pinces plates *Tournevis cruciforme (petit mod le) *Destornillador Phillips *Alicates de punta fina *ニッパー... -
Seite 8: 各部の名称 / Glossary Of Main Parts
/ GLOSSARY OF MAIN PARTS 各部の名称 †bersicht der Hauptteile / GLOSSAIRE / INDICE DE PIEZAS / Transmitter KT-7 送信機 KT-7 Sender KT-7 / Emetteur KT-7 / Emisora KT-7 サーボリバーススイッチ Servo Reversing Switch Servo-Reverse-Schalter Interrupteur d'inversion des servos 電源スイッチ アンテナ Interruptor de inversi—n de los servos Power Switch Antenna Ein-/Ausschalter... - Seite 9 / Chassis / Das Chassis / Chassis / Chasis シャシー モーター Motor Motor パワーユニット Moteur Power Unit Motor Antriebseinheit Unit de propulsion Tren trasero 受信機用クリスタル Crystal for Receiver EmpfŠngerquarz リヤダンパーユニット Quartz de r ception Rear Shock Unit Cristal receptor DŠmpfereinheit, hinten フロントタイヤ...
-
Seite 10: Before Operating
/ BEFORE OPERATING 走行の準備 BEVOR SIE BEGINNEN / AVANT DE COMMENCER. / ANTES DE RODAR 送信機用アンテナ取付け / Installation of Antenna Montage der Antenne / Installation de l'antenne / Instalaci—n de la antena POW ER ON Mod el No. POW ER アンテナ... - Seite 11 / Installation of Mirrors ミラーの取付け Die Montage der Spiegel / Montage des r troviseurs. / Montaje de los retrovisores ミラー (左) ミラー (右) Mirror (Left) Mirror (Right) Oリング Spiegel (links) Spiegel (rechts) O-ring R troviseur (Gauche) R troviseur (Droit) O-Ring Retrovisor (Izquierdo) Retrovisor (Derecho) Joint torique...
-
Seite 12: 走行の準備 / Before Operating
/ BEFORE OPERATING 走行の準備 / AVANT DE COMMENCER. / ANTES DE RODAR BEVOR SIE BEGINNEN / Loading Battery 電池の入れ方 DasLaden der Akkus / Batteries radio バッテリーホルダー Battery Holder / Instalaci—n de las bater’as Akkuhalterung Support de batterie Soporte bater’as 向きに注意。 Note the direction. - Seite 13 / Body Mounting ボディの取付け Die Karosseriehalterung / Support carrosserie / Montaje de la carrocer’a シャシー Chassis Chassis ボディ Chassis Body Chasis Karosserie Carrosserie Carrocer’a 反対側も同様に取付ける。 Attach the Body at both sides. Karosserie aufsetzen, wie dargestellt Fixer la carrosserie des deux c™t s. Fijar bien la carrocer’a en los lugares indicados ボディピン...
-
Seite 14: Let's Drive! Die Inbetriebnahme Des Modells
/ LET'S DRIVE! 走行させましょう DIE INBETRIEBNAHME DES MODELLS / EN PISTE ! / FUNCIONAMIENTO. / Turn the Power Switch ON. 電源の入れ方 Modell einschalten / Mettre l'interrupteur en position "ON". / Interruptores アンテナをのばす。 送信機の電源スイッチを入れる。 車体の電源スイッチを入れる。 Antenna Transmitter (Switch) Chassis (Switch) Antenne Schalter fŸr Fernsteuerung Schalter fŸr Modell Antenne... - Seite 15 / Bringing the Car to a Complete Stop 車体を完全に停止させる Die Neutrallage der Gasfunktion / Mettre la voiture ˆ l'arr t total. / Para que el modelo no avance. スロットルトリガーを中立に保ち、車体が止まるようスロットルトリムを回して調整します。車体から音が出ている時はさらに調整します。 (後進しない場合には、スロットルトリムの調整が正しく行われていません。その場合にはスロットルトリムを微調整してください。) Move the throttle trigger to Neutral position. Then, adjust Throttle Trim until the car comes to a complete stop and makes no sound. If your car does not reverse, the Throttle Trim is not adjusted correctly and requires further adjustment.
-
Seite 16: 走行させましょう / Let's Drive
/ LET'S DRIVE! 走行させましょう DIE INBETRIEBNAHME DES MODELLS / EN PISTE ! / FUNCIONAMIENTO. / Running in a Straight Line まっすぐ走らせるために Die Neutrallage der Lenkung / Rouler tout droit. / Para rodar en l’nea recta. ステアリングホイールを中立に保ち、まっすぐ走るようステアリングトリムを回して調整します。 (路面の凹凸により、完全にまっすぐ走るようにはならない場合もあります。) Bring the steering wheel to Neutral position. Then, adjust the steering trim until the car moves in a straight line. On bumpy surfaces, the car does not always run in a straight line. - Seite 17 / Changing Batteries 乾電池の交換時期 Das Wechseln der Batterien / Changer les batteries. / Cambio de bater’as インジケーターが点滅になったら直ちに電池を交換してください。 送信機 When the LED indicator flashes, replace all transmitter batteries. Transmitter Wenn die rote LED anfŠngt zu blinken, sofort neue Batterien in den Sender einsetzen. Sender Lorsque la LED de la radiocommande clignote, changer les piles imm diatement.
-
Seite 18: 上手な走行テクニック / Operating Tips
/ OPERATING TIPS 上手な走行テクニック HINWEISE ZUR BEDIENUNG / CONSEILS D'UTILISATION. / CONSEJOS PRACTICOS ワキをしめて送信機のアンテナを立てましょう。 Hold your elbows in and keep the transmitter antenna pointing straight up. Lassen Sie die Arme leicht angewinkelt und halten Sie die Senderantenne etwa senkrecht nach oben. Toujours faire attention ˆ... - Seite 19 あまり切れない よく切れる 最初はあまりステアリングが切れない様、 Steering angle will give Steering angle will give ステアリングD/Rアジャスターで調整して you less steering. you more steering. みましょう。 Ausschlag kleiner Ausschlag grš§er At first, set the Steering D/R Adjuster for less L'angle de direction L'angle de direction response, as shown. vous procure moins de vous procure plus de Stellen Sie den Lenkausschlag zunŠchst...
- Seite 20 / CHANGING PARTS / DER AUSTAUSCH VON TEILEN AM MODELL 各部の交換と調整 / CHANGEMENT DE PIECES / CAMBIO DE CRISTALES / Changing Crystal クリスタル交換 Quarzwechsel / Changer sa fr quence / Cambio de cristales オプションパーツのクリスタルセットを使用することで、2台以上の@12を同時に走行させる ことができます。 By using the optional Crystal Set, you can run two or more @12 cars at the same time. Durch den Einsatz unterschiedlicher Quarze, kšnnen mehrere Modelle gleichzeitig betrieben werden.
- Seite 21 / Tires タイヤ Die RŠder / Pneus /Neum‡tico / Neum‡ticos 反対側も同様に交換する。 Replace the other side in the same way. Diese Seite ist identisch aufgebaut wie die gegenŸberliegende Sektion. Remplacer ce c™t aussi. Proceda de igual modo en el otro lado ホイールシャフトとリヤホイ...
- Seite 22 / CHANGING PARTS / DER AUSTAUSCH VON TEILEN AM MODELL 各部の交換と調整 / CHANGEMENT DE PIECES / CAMBIO DE PIEZAS ホイールベース調整 / Adjustment of Wheelbase *ボディの種類に合せて、ホイールベースを変更できます。 Justierung des Radstandes / Empattement ajsutable *Wheelbase can be adjusted to suit different car-body types. / Ajuste de la distancia entre ejes *Die Position des Motors kann je nach Karosserie verŠndert werden *Il est possible de varier la position du moteur.
- Seite 23 車幅の調整 / Adjusting Car Width Die Breite des Modells / Ajuster la voie / Ajuste de la anchura フロントはサスペンションパーツの組み換えにより3段階(L, ML, M) に調整可能です。 Three settings (L, ML, M) are possible by changing front suspension parts. *ボディの種類に合せて、車幅を変更できます。 Es lassen sich vorn drei Breiten justieren (L, ML, M) *Chassis width can be adjusted to suit body type.
- Seite 24 / CHANGING PARTS / DER AUSTAUSCH VON TEILEN AM MODELL 各部の交換と調整 / CHANGEMENT DE PIECES / CAMBIO DE PIEZAS Ferrari 360 modena 3x8mm シャシー幅(L) この穴を使う。 Chassis Width (L) Use this hole. Dieses Loch benutzen. Chassisbreite (L) Utiliser ce trou. Longueur du ch‰ssis (L) Utilice este agujero.
- Seite 25 / Adjusting Lower Arm. *フロントのタイヤを取外して図の様に分解します。 ロアアームの調整 / unteren Querlenker justieren *Remove the front tire and disassemble as shown in the diagram. / R glage des triangles inf rieurs *Vorderräder entfernen und demontieren wie dargestellt. / Ajuste brazo inferior *Retirer les pneus avant et d -assembler comme indiqu ci dessous . *Retire la rueda delantera y desmonte tal y como muestra el dibujo.
- Seite 26 / CHANGING PARTS / DER AUSTAUSCH VON TEILEN AM MODELL 各部の交換と調整 / CHANGEMENT DE PIECES / CAMBIO DE PIEZAS 変更したいサイズに合わせてフロントサスホルダーを取付ける。 Adjust to the desired size and attach front suspension holder. Gewüuenschtes Maß auswaehlen und Querlenkeraufnahme montieren. R gler la taille d sir e et fixer le support de triangle avant. Ajuste a la longitud deseada e instale el soporte suspensi—n delantero Ferrari 360 modena シャシー幅(L)...
- Seite 27 / Changing Tie Rods. タイロッドの交換 / Spurstangen tauschen / Changer les biellettes. / Cambio de tirantes *変更したいサイズに合わせてタイロッドを取付けます。 *Adjust to desired size and attach tie rods. *Gewüuenschte Laenge waehlen und montieren *R gler selon la taille d sir e et fixer la biellette. *Ajustar al tama–o deseado e instalar los tirantes 反対側も同様に取付ける。...
- Seite 28 / CHANGING PARTS / DER AUSTAUSCH VON TEILEN AM MODELL 各部の交換と調整 / CHANGEMENT DE PIECES / CAMBIO DE PIEZAS モーターの交換、 ギヤレシオの調整 接続の前に必ずシャシーから走行用バッテリーを外し、 Changing motor and adjusting gear ratio 電源スイッチを“OFF”にする。 Tausch des Motors und der Uebersetzung Turn the switch "OFF" and remove the batteries before connecting the cord. Modell ausschalten und Batterien entfernen, bevor der Anschlu§...
- Seite 29 3x8mm(TP F/H) 3x8mm(TP F/H) 3 x 8mm TPサラビス TP F/H Screw SK Treibschraube Vis TP F/H 3x8mm Tornillo 3x8mm TP F/H 3 x 8mm TPビス TP Screw LK Treibschr Vis TP 3x8mm Tornillo 3x8mm TP パワーユニット Power Unit Antriebseinheit Unit de propulsion. Unidad propulsora 3x8mm 3 x 3mm...
- Seite 30 / CHANGING PARTS / DER AUSTAUSCH VON TEILEN AM MODELL 各部の交換と調整 / CHANGEMENT DE PIECES / CAMBIO DE PIEZAS モーターにピニオンギヤを取り付けて、モーターを搭載する。 3 x 3mm セットビス Attach pinion gear to motor and install motor. Set Screw Ritzel auf die Motorwelle schrauben und Motor montieren Gewindestift Fixer le pignon moteur au moteur et installer le moteur.
- Seite 31 ボディ高さの変更 / Body Height Adjustment ボディの搭載高さを調整できます。(車種によっては選択できない Die Hšhe der Karosserie 高さがあります。) Adjust Body Height (there is a limitation, depending on body type) / R glage de la hauteur de carrosserie Stellen Sie die gewŸnschte Hšhe der Karosserie ein. / Ajuste de la altura de la carrocer’a R gler la hauteur de la carrosserie (Varie selon la carrosserie) Ajuste la altura de la carrocer’a (segœn el tipo) 3 x 10mm...
-
Seite 32: ラップカウンターの搭載 / How To Install A Lap Counter
/ How to install a Lap Counter ラップカウンターの搭載 So wird der RundenzŠhler montiert / Comment installer la puce de comptage. / Instalaci—n Cuentavueltas 3x8mm 計測用ラップカウンターを搭載する際は、取付ステーを使用します。 If you use a Lap Counter System, install the Lap Counter Stay. Falls gewŸnscht, den Transponderhalter montieren. Pour lÕutilisation dÕun syst me de comptage, installer le support de puce. - Seite 33 / CHANGING PARTS / DER AUSTAUSCH VON TEILEN AM MODELL 各部の交換と調整 / CHANGEMENT DE PIECES / CAMBIO DE PIEZAS 各コードの接続 / Wiring cord Die Verdrahtung 接続の前に必ずシャシーから走行用バッテリーを外し、 電源スイッチを“OFF”にする。 2.6 x 6mm ビス Turn the switch "OFF" and remove the batteries before connecting the cord. Screw Modell ausschalten und Batterien entfernen, bevor der Anschlu§...
-
Seite 34: メンテナンス / Maintenance Die Wartung / Maintenance / Mantenimiento
メンテナンス / MAINTENANCE Die Wartung / MAINTENANCE / MANTENIMIENTO *@12 Racingの性能を維持するためには各部のメンテナンスが必要です。下記のメンテナンスを定期的に行ってください。 *Maintenance is required to keep the @12 at peak performance. Perform the following maintenance at regular intervals. *Damit das Modell seine volle Leistung beibehaeält, mueüssen die folgenden Wartungspunkte beachtet werden. *L'entretien de la voiture ˆ... -
Seite 35: ワンポイントアドバイス / One Point Advice Zusatzhinweis / Notes / Consejos
ワンポイントアドバイス / ONE POINT ADVICE Zusatzhinweis / NOTES / CONSEJOS ダンパーシャフトに別売のシリコンオイルを シリコンオイル ♯100000 No. SIL 100000 塗ることでダンパー効果がでます。 Silicone Oil #100000 Applying optional silicone oil to shock shafts produces Silikonoeöl Best.-Nr. SIL-100000 greater damping effect. Huile silicone (r f.HM-H30000) Geben Sie ein paar Tropfen Silikonoeöl auf die Kolbenstange, Aceite de silicona No.100000 um die Wirkung der Daempfer zu verbessern. -
Seite 36: 故障かな? / Trouble Shooting
TROUBLE SHOOTING 故障かな・・!? / Problem / Cause / Correction 症状 原因 対処 動かない 説明書14ページに従って正しくスイッチを入れる。 車体や送信機のスイッチが入っていない。 Model doesn't move Transmitter or chassis power switch is not ON. Switch power on as per Instruction Manual P.14. 説明書10,12ページに従って種類と向きを確認する。 電池の向きや種類を間違えている。 Polarity or battery type is wrong. Check polarity and type as per Instruction Manual P.10,P.12. - Seite 37 Problemlšsungen / EN CAS DE PROBLEMES... / GUIA DE PROBLEMAS Problem Ursache Fehlerbehebung Probl me Cause Solution Problema Causa Solucion Sender oder EmpfŠnger sind nicht eingeschaltet Sender und Modell einschalten, siehe Seite 14. Das Modell bewegt L'inter de la radio ou du ch‰ssis n'est pas sur "ON". Se rŽfŽrer ˆ...
-
Seite 38: 分解図 / Exploded View Explosionszeichnung / Vue Clat E / Despiece
2.6mm 3x8mmTP AZ110 AZ110 AZTH001F 3x15mm AZC001-3 AZ116 3x8mmTP 3x10mmTP AZ110 ※ スペアパーツはオプションのベアリングセットNo.AZW101を使用してください。 AZ105 Use optional upgrade No. AZW101 Ball Bearing Set as a replacement. 3x8mmTP 2.6mm 3x15mmTP 3x10mmTP 1889 3x8mmTP @12 Racing 3x10mmTP © 2003 KYOSHO CORPORATION / 禁無断転載複製... -
Seite 39: スペアパーツ Spare Parts
1131 4x35・4x40・4x45 2 each 1164 5x30・5x40 3 each 1196 2.6x18 4 pcs ここに明記された以外のビス、ナット等は 1165 3x20・3x25 3 each 『ユーザー相談室』にお問い合わせください。 1166 4x8(平先) 10 pcs 京商ホームページ http://www.kyosho.co.jp/ 京商株式会社 〒243-0034 神奈川県厚木市船子153 ●ユ−ザ−相談室直通電話 046-229-4115 お問い合わせは:月曜∼金曜(祝祭日を除く) 10:00∼18:00 THE FINEST RADIO CONTROL MODELS PRINTED IN JAPAN 61920310-1...