Seite 1
SB-E-2-VPR ISS.03 Operation Manual Viper – Automatic Spray Gun P 2 - 9 P 10 - 17 P 18 - 28...
Seite 2
Operation Manual Viper- Automatic Spraygun Important Read and follow all instructions and Safety Precautions before using this equipment CHARACTERISTICS Automatic Spray gun for enamel application designed to give you the optimal production performance. This spray gun is answering the needs of the sanitary application, table ware and decorative application, pavement, tiles, electric domestic appliances and all others ceramic activities.
SAFETY WARNINGS Fire and explosion Solvents and coating materials can be highly flammable or combustible when sprayed. ALWAYS refer to the coating material supplier’s instructions and COSHH sheets before using this equipment. Users must comply with all local and national codes of practice and insurance company requirements governing ventilation, fire precautions, operation and house-keeping of working areas.
LIST OF SPARE PARTS For the arrangement of the parts, refer the exploded view Description SPA-36 Retaining ring Gasket Polyurethane kit of 5 SPA-17-K5 “Conventional” air cap for tips Ø 1.8 & 2.0 SPA-100-E63 SPA-100-E70 “Conventional” air cap for tips Ø 2.2 & 2.8 SPA-100-E31 “Transtech”...
POSSIBLE COMBINATIONS Air Cap Fluid Tip Needle Point Stainless Point Hardened Point Hardenerd Carbide Stainless Ø Carbide Steel Steel Steel Steel SPA-250-XX SPA-254-XX SPA-250H-XX SPA-350-XX SPA-351-XX SPA-352 SPA-351-XX SPA-100-XXX MODEL PART NUMBER VPR - E70 - 28 C C = Tip/Needle in carbide, H= Tip/Needle Stainless Steel Tip Ø...
STARTING-UP 1. Turn the needle adjusting knob clockwise until it. 2. Turn the “Fan” and “Atom air valves counter-clockwise to be full open. 3. Set the air pressure at the air regulator to achieve recommended pressures above. 4. Turn the adjusting knob counter clockwise to obtain the desired fluid flow. 5.
Seite 8
FIG 1 FIG 2 PACKING Unscrew the 4 screws to disassemble the gun head. Remove the packing bellows seal. Clean or replace if the packing is damaged. FAN & ATOM AIR VALVE (13) Before assembling, check the air valve is in fully open position by unscrewing it counter-clockwise.
Seite 9
We, ITW Finishing UK, Ringwood Rd, Bournemouth, Dorset, BH11 9LH, UK, as the manufacturer of the Spray gun model VIPER , declare, under our sole responsibility that the equipment to which this document relates is in conformity with the following standards or other normative documents: BS EN 292-1 PARTS 1 &...
Notice d’emploi Pistolet Automatique Céramique CARACTERISTIQUES Pistolet automatique céramique conçu pour des performances de production optimales. Ce pistolet répond aux exigences des fabrications de sanitaires, arts de la table et de la décoration, de carrelages, de tuiles, électroménager et activités céramique associées. Le système breveté...
CONSIGNES DE SECURITE Incendie et explosion Les solvants et produits de revêtement peuvent être extrêmement inflammables ou combustibles lorsqu'ils sont pulvérisés. TOUJOURS se reporter aux instructions des fournisseurs des produits et aux fiches COSHH avant d’utiliser le pistolet. Les utilisateurs doivent se conformer aux codes de pratique locaux et nationaux et aux exigences des compagnies d'assurance régissant la ventilation, les précautions à...
LISTE DES PIECES DETACHEES Se référer à la vue éclatée à la fin du manuel pour la disposition des pièces. Référence Désignation SPA-36 Bague de retenue SPA-17-K5 Joint Polyuréthane kit de 5 SPA-100-E63 Chapeau d'air Conventionnel pour Ø 1.8 / 2.0 SPA-100-E70 Chapeau d’air Conventionnel pour Ø...
MISE EN ROUTE Tourner le bouton de réglage de l'aiguille (25) dans le sens horaire jusqu’en bout de course pour interdire tout mouvement. Tourner la valve de réglage du jet Atom) dans le sens anti-horaire pour l'ouvrir complètement. Régler la pression d'entrée d'air au détendeur de manière à obtenir une qualité de pulvérisation suffisante.
Seite 16
Fig 1 Fig 2 PRESSE- ETOUPE Retirer les 4 vis de maintien de la tête. Déposer la tête et retirer l’étoupe. VALVES DE REGLAGE DE JET (13) Avant montage, toujours s'assurer que les valves sont en position d'ouverture maximum, en les dévissant dans le sens anti-horaire. Piston (15b) joints torique (15a), (16) &...
Seite 17
OPTIONS Pistolet sans réglage d’aiguille Référence du kit : SPA-7-K Ce kit comprend un flasque et une butée en remplacement des pièces repèrése 19, 20, 21, 24, 25, sur la vue éclatée. Pistolet avec Air ‘Atom’ ‘Fan’ piloté Référence : SPA-22-K2 Cette référence comprend 2 raccords à...
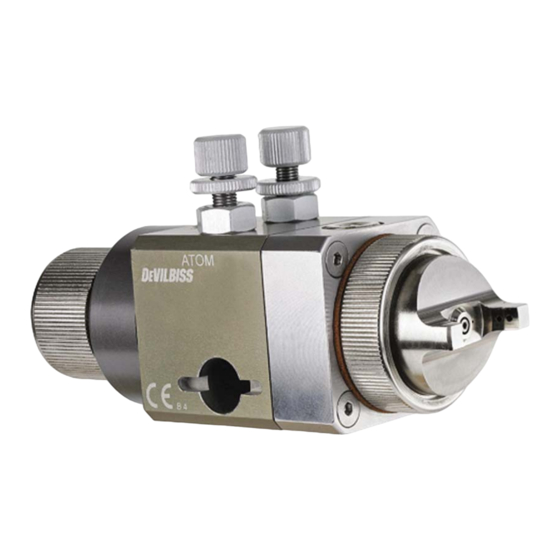
Bedienungsanleitung Viper- Keramik AutomatiK pistole MERKMALE Automatische Keramikspritzpistole für optimale Produktionsleistungen. Diese Spritzpistole entspricht den Herstellungsanforderungen von Sanitäreinrichtungen, Geschirr und Dekorationsgegenständen, Fliesen, Ziegeln, Elektrohaushaltsgeräten und den damit verbundenen Keramikarbeiten. Das patentierte “Quick’Up”-System erleichtert das Abnehmen der Abdeckung und den Ausbau der Spritzdüse.
SICHERHEITSWARNUNGEN Feuer und Explosionen Lösemittel und Beschichtungsstoffe können leicht entflammbar oder brennbar sein, wenn sie verspritzt oder versprüht werden. Schlagen Sie IMMER die Anweisungen des Herstellers für den Beschichtungsstoff und die COSHH-Blätter nach, bevor Sie diese Geräte benutzen. Anwender müssen sämtliche örtlichen nationalen...
LISTE DER EINZELTEILE Die Anordnung der Teile geht aus der Einzelteildarstellung am Ende dieses Handbuches hervor. Referenz Bezeichnung Stck. SPA-36 Haltering SPA-17-K5 Polyurethan-Dichtung, Satz mit 5 Stück SPA-100-E63 Herkömmliche Luftkappe für Ø 1.8 / 2.0 SPA-100-E70 Herkömmliche Luftkappe für Ø 2.2 / 2.8 SPA-100-E31 Transtech Luftkappe für Ø...
INBETRIEBSETZUNG Den Einstellknopf der Nadel (25) im Uhrzeigersinn bis zum Anschlag drehen, um jede Bewegung zu unterbinden. Das Ventil für die Einstellung des Strahls (13 Atom) gegen den Uhrzeigersinn drehen, um es vollständig zu öffnen. Den Luftzufuhrdruck am Druckminderventil so einstellen, dass eine ausreichende Zerstäubungsqualität erreicht wird.
Die Spritzdüse und das dazugehörige Befestigungssystem sind fest miteinander verbunden. Sie dürfen nicht auseinandergebaut werden, da eines der Teile in jedem Fall beschädigt würde. ABB. 1 ABB. 2 Stopfbuchse Die 4 Halteschrauben des Kopfes entfernen. Den Kopf und anschließend die Stopfbuchse entfernen.
Seite 25
EG-Konformitätserklärung ITW Finishing UK, Ringwood Rd, Bournemouth, Dorset, BH11 9LH, UK erklären eigenverantwortlich als Hersteller des Spritzpistolenmodells Viper dass das Gerät, auf das sich dieses Dokument bezieht, die folgenden Richtlinien oder Normendokumente einhält: BS EN 292-1 TEILE 1 & 2: 1991, BS EN 1953: 1999. Daher halten diese Geräte die Schutzanforderungen der folgenden Vorschriften ein: Richtlinie des EU-Rates 98/37/EEC zur Gerätesicherheitsrichtlinie und EN 13463-1:2001, Richtlinie des EU-Rates 94/9/EG zu...
Seite 26
OPTIONEN Spritzpistole ohne Nadeleinstellung Bausatzreferenz : SPA-7-K Dieser Bausatz umfasst eine Blende und einen Anschlag als Ersatz für die Teile 19, 20, 21, 24 und 25 der Einzelteildarstellung. Spritzpistole mit Air ‘Atom’ ‘Fan’-Steuerung Referenz : SPA-22-K2 Unter dieser Referenz sind 2 Anschlüsse als Ersatz für die beiden Ventile 13 der Einzelteildarstellung erhältlich.