Herunterladen Inhalt Inhalt Diese Seite drucken

Werbung

Verfügbare Sprachen
  • DE

Verfügbare Sprachen

DVM8861
INFRARED THERMOMETER WITH DUAL LASER
TARGETING
INFRAROODTHERMOMETER MET DUBBELE
LASERPOINTER
THERMOMÈTRE INFRAROUGE À DOUBLE VISÉE LASER
TERMÓMETRO INFRARROJO CON DOBLE PUNTERO
LÁSER
INFRAROTTHERMOMETER MIT DOPPELTEM
LASERPOINTER
USER MANUAL
GEBRUIKERSHANDLEIDING
MODE D'EMPLOI
MANUAL DEL USUARIO
BEDIENUNGSANLEITUNG
3
10
17
24
31

Werbung

Inhaltsverzeichnis
loading

Inhaltszusammenfassung für Velleman DVM8861

  • Seite 1 DVM8861 INFRARED THERMOMETER WITH DUAL LASER TARGETING INFRAROODTHERMOMETER MET DUBBELE LASERPOINTER THERMOMÈTRE INFRAROUGE À DOUBLE VISÉE LASER TERMÓMETRO INFRARROJO CON DOBLE PUNTERO LÁSER INFRAROTTHERMOMETER MIT DOPPELTEM LASERPOINTER USER MANUAL GEBRUIKERSHANDLEIDING MODE D’EMPLOI MANUAL DEL USUARIO BEDIENUNGSANLEITUNG...
  • Seite 1 DVM8861 INFRARED THERMOMETER WITH DUAL LASER TARGETING INFRAROODTHERMOMETER MET DUBBELE LASERPOINTER THERMOMÈTRE INFRAROUGE À DOUBLE VISÉE LASER TERMÓMETRO INFRARROJO CON DOBLE PUNTERO LÁSER INFRAROTTHERMOMETER MIT DOPPELTEM LASERPOINTER USER MANUAL GEBRUIKERSHANDLEIDING MODE D’EMPLOI MANUAL DEL USUARIO BEDIENUNGSANLEITUNG...
  • Seite 2 DVM8861 V. 04 – 08/07/2014 ©Velleman nv...
  • Seite 2 DVM8861 V. 04 – 08/07/2014 ©Velleman nv...
  • Seite 3: Safety Instructions

    Respect the local environmental rules. If in doubt, contact your local waste disposal authorities. Thank you for choosing Velleman! Please read the manual thoroughly before bringing this device into service. If the device was damaged in transit, do not install or use it and contact your dealer.
  • Seite 4: General Guidelines

    DVM8861 General Guidelines  This device is battery-operated, using one 9V battery (incl.).  Protect this device from shocks and abuse. Avoid brute force when operating the device.  Protected the device against extreme heat (see “Technical Specifications”), dust and moisture.
  • Seite 5 DVM8861 1. IR sensor + laser beam 2. LCD Display 3. up button 4. down button 5. mode button 6. measurement trigger 7. battery cover 8. handle grip  Configure the thermometer by pulling the measurement trigger (6) once. The display lights up.
  • Seite 5 DVM8861 1. IR sensor + laser beam 2. LCD Display 3. up button 4. down button 5. mode button 6. measurement trigger 7. battery cover 8. handle grip  Configure the thermometer by pulling the measurement trigger (6) once. The display lights up.
  • Seite 6: Background Information

    DVM8861 Set value upper limit -50~+550°C (-58~+1022°F) Enable alarm lower limit on / off Set value lower limit -50~+550°C (-58~+1022°F)  To switch between measurements in °C and °F, open the battery cover (7). Just below the measurement trigger (6), a small switch is located. Move this switch gently to the left (for °F reading) or right (for °C reading) without touching any...
  • Seite 7 DVM8861 Surface temperature When going from low temperature to high temperature measurements or vice versa, the IR sensor of the thermometer needs a few minutes to adjust. Distance and spot size As the distance (D) from the object increases, the spot size (S) of the area measured by the unit becomes larger.
  • Seite 7 DVM8861 Surface temperature When going from low temperature to high temperature measurements or vice versa, the IR sensor of the thermometer needs a few minutes to adjust. Distance and spot size As the distance (D) from the object increases, the spot size (S) of the area measured by the unit becomes larger.
  • Seite 8: Troubleshooting

    DVM8861 Troubleshooting LCD display does not light up Possibly a battery problem. Check and replace when the measurements the battery. trigger is pulled. The measured temperature Check the emissivity value. When set too low, changes very quickly and the inaccurate readings will result.
  • Seite 9: Technical Specifications

    The information in this manual is subject to change without prior notice. © COPYRIGHT NOTICE The copyright to this manual is owned by Velleman nv. All worldwide rights reserved. No part of this manual may be copied, reproduced, translated or reduced to any electronic medium or otherwise without the prior written consent of the copyright holder.
  • Seite 10: Gebruikershandleiding

    DVM8861 GEBRUIKERSHANDLEIDING 1. Inleiding Aan alle ingezetenen van de Europese Unie Belangrijke milieu-informatie betreffende dit product Dit symbool op het toestel of de verpakking geeft aan dat, als het na zijn levenscyclus wordt weggeworpen, dit toestel schade kan toebrengen aan het milieu.
  • Seite 11: Algemene Richtlijnen

    DVM8861 Algemene richtlijnen  Dit toestel wordt gevoed door 1 x 9 V-batterij (meegeleverd).  Bescherm dit toestel tegen schokken. Vermijd brute kracht tijdens de bediening van dit toestel.  Bescherm dit toestel tegen extreme temperaturen (zie ‘Technische specificaties’), stof en vochtigheid.
  • Seite 12 DVM8861 Gebruik 1. IR-sensor + laserstraal 2. lcd-scherm 3. ‘omhoog’-knop 4. ‘omlaag’-knop 5. ‘MODE’-knop 6. meetknop 7. batterijvak 8. handvat  Configureer de thermometer door de meetknop (6) eenmaal in te drukken. De display licht op. bevriesfunctie laser ‘aan’ vergrendeling high-/lowalarm aanduiding °C/°F...
  • Seite 13: Algemene Informatie

    DVM8861  Deze thermometer geeft de waarde weer in °C of °F. Om de eenheid in te stellen, open eerst het batterijvak (7). Er bevindt zich een kleine schakelaar onder de meetknop (6). Verplaats deze schakelaar voorzichtig naar links (weergave in °F) of naar rechts (weergave in °C).
  • Seite 14 DVM8861 Verhouding afstand/meetpunt Hoe groter de afstand (D) tot het te meten oppervlak, hoe groter het meetpunt (S). Het focale punt bedraagt 914 mm (36”). D:S= 12:1 12.5mm @ 150mm 25mm @ 300mm 6in. 0.5in @ 1in @ 12in. Emissiviteit Onder emissiviteit verstaan wij de stralingsvermogen van een stof.
  • Seite 15: Problemen En Oplossingen

    DVM8861 Problemen en oplossingen De display licht niet op Batterijprobleem. Controleer de batterij en wanneer u de meetknop vervang indien nodig. indrukt. De gemeten temperatuur is Controleer de emissiviteitwaarde. Een te laag onstabiel en lijkt ingestelde waarde levert onnauwkeurige onwaarschijnlijk.
  • Seite 16: Technische Specificaties

    146 x 104 x 43 mm gewicht 163 g (met batterij) Gebruik dit toestel enkel met originele accessoires. Velleman nv is niet aansprakelijk voor schade of kwetsuren bij (verkeerd) gebruik van dit toestel. Voor meer informatie over dit product en de laatste versie van deze handleiding, zie www.velleman.eu.
  • Seite 17: Instructions De Sécurité

    DVM8861 MODE D’EMPLOI 1. Introduction Aux résidents de l'Union européenne Des informations environnementales importantes concernant ce produit Ce symbole sur l'appareil ou l'emballage indique que l’élimination d’un appareil en fin de vie peut polluer l'environnement. Ne pas jeter un appareil électrique ou électronique (et des piles éventuelles) parmi les déchets municipaux non sujets au tri sélectif ;...
  • Seite 18: Caractéristiques

    DVM8861 General Guidelines  Ce thermomètre est alimenté par une pile de 9 V (incl.).  Protéger le thermomètre contre les chocs et le traiter avec circonspection pendant l’installation et l’opération.  Tenir le thermomètre à l’écart de la poussière, l’humidité et des températures extrêmes (voir «...
  • Seite 19 DVM8861 Emploi 1. capteur IR + faisceau laser 2. afficheur LCD 3. bouton UP 4. bouton DOWN 5. bouton MODE 6. bouton de mesure 7. compartiment de la pile 8. poignée  Configurer ce thermomètre en enfonçant le bouton de mesure (6). L’afficheur s’illumine.
  • Seite 20: Information Générale

    DVM8861  Ce thermomètre affiche la température en °C ou en °F. pour sélectionner l’unité, ouvrir le compartiment de la pile (7). Au bas du bouton de mesure (6) se trouve un sélecteur. Déplacer ce sélecteur vers la gauche (affichage en °F) ou vers la droite (affichage en °C) en veillant à...
  • Seite 21 DVM8861 D:S= 12:1 12.5mm @ 150mm 25mm @ 300mm 0.5in @ 6in. 1in @ 12in. Émissivité L’émissivité décrit la quantité d’énergie rayonnant d’un objet. La plupart des matières organiques ou oxydés ont une valeur de ± 0,95 (valeur par défaut). Pour mesurer la température d’une surface lustrée, appliquer du ruban adhésif non...
  • Seite 22: Problèmes Et Solutions

    DVM8861 Problèmes et solutions L’afficheur LCD n’est pas Problème de pile. Contrôler la pile et remplacer si éclairé lorsque le bouton de nécessaire. mesure est enfoncé. Valeur affichée instable et non Contrôler la valeur d’émissivité. Une valeur trop réaliste. basse influencera l’affichage de manière négative.
  • Seite 23: Spécifications Techniques

    163 g (pile incl.) N’employer cet appareil qu’avec des accessoires d’origine. La SA Velleman ne peut, dans la mesure conforme au droit applicable être tenue responsable des dommages ou lésions (directs ou indirects) pouvant résulter de l’utilisation de cet appareil. Pour plus d’information concernant cet article et la dernière version de cette...
  • Seite 24: Manual Del Usuario

    Respete las leyes locales en relación con el medio ambiente. Si tiene dudas, contacte con las autoridades locales para residuos. ¡Gracias por haber comprado el DVM8861! Lea atentamente las instrucciones del manual antes de usarlo. Si el aparato ha sufrido algún daño en el transporte no lo instale y póngase en contacto con su distribuidor.
  • Seite 25: Normas Generales

    DVM8861 Normas generales  El termómetro funciona con una pila de 9V (incl.).  No agite el aparato. Evite usar excesiva fuerza durante la instalación y la reparación.  No exponga el aparato a polvo, humedad ni temperaturas extremas (véase «...
  • Seite 26 DVM8861 1. sensor IR + rayo láser 2. pantalla LCD 3. botón UP 4. botón DOWN 5. botón MODE 6. botón de medición 7. compartimento de pilas 8. mango  Ajuste este termómetro al pulsar el botón de medición (6). La pantalla se ilumina.
  • Seite 27: Información General

    DVM8861 componente interno. Vuelva a cerrar el compartimento (7). La unidad se visualiza en la pantalla (F).  Mantenga el termómetro por el mango (8) y apunte el sensor IR (1) a la superficie que quiere medir.  Mantenga pulsado el botón de medición (6). La pantalla (2) se ilumina y visualiza no sólo la temperatura actual (I) sino también la temperatura máx.
  • Seite 28 DVM8861 Relación distancia/ punto de medición Cuanto más grande sea la distancia (D) entre el sensor y el objeto que quiere medir, más grande será el punto de contacto (S). El punto de foco es de 914mm (36”). D:S= 12:1 12.5mm @...
  • Seite 29: Solución De Problemas

    DVM8861 Solución de problemas La pantalla LCD no está Problema con la pila. Controle la pila y iluminada si se pulsa el botón reemplácela si fuera necesario. de medición. Controle el valor de emisividad. Un valor El valor visualizado es demasiado bajo influenciará...
  • Seite 30: Especificaciones

    © DERECHOS DE AUTOR Velleman NV dispone de los derechos de autor para este manual del usuario. Todos los derechos mundiales reservados. Está estrictamente prohibido reproducir, traducir, copiar, editar y guardar este manual del usuario o partes de ello sin previo permiso escrito del derecho habiente.
  • Seite 31: Sicherheitshinweise

    Falls Zweifel bestehen, wenden Sie sich für Entsorgungsrichtlinien an Ihre örtliche Behörde. Wir bedanken uns für den Kauf des DVM8861! Lesen Sie diese Bedienungsanleitung vor Inbetriebnahme sorgfältig durch. Überprüfen Sie, ob Transportschäden vorliegen. Sollte dies der Fall sein, verwenden Sie das Gerät nicht und wenden Sie sich an Ihren Händler.
  • Seite 32: Allgemeine Richtlinien
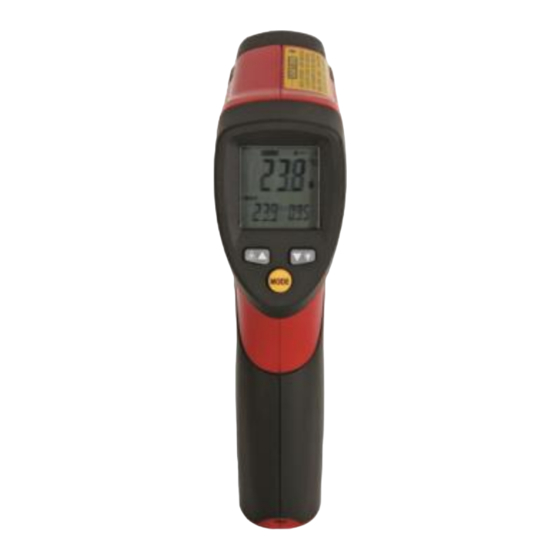
    DVM8861  Halten Sie Kinder und Unbefugte vom Gerät fern. Allgemeine Richtlinien  Dieses Gerät funktioniert mit 1 x 9 V-Batterie (mitgeliefert).  Vermeiden Sie Erschütterungen. Vermeiden Sie rohe Gewalt während der Installation und Bedienung des Gerätes.  Schützen Sie das Gerät vor Staub, Feuchtigkeit und extremen Temperaturen (siehe “Technische Daten”).
  • Seite 33 DVM8861 Anwendung 1. IR-Sensor + Laserstrahl 2. LCD-Display 3. ‘UP’-Taste 4. ‘DOWN’-Taste 5. ‘MODE’-Taste 6. Messtaste 7. Batteriefach 8. Griff  Konfigurieren Sie das Thermometer, indem Sie die Messtaste (6) ein Mal drücken. Das Display leuchtet. Data-Hold-Funktion Laser ‘EIN’ Verriegelung High-/Low-Alarm Anzeige °C/°F...
  • Seite 34: Allgemeine Information

    DVM8861 Wert der Untergrenze -50°C~+550°C (-58°F~+1022°F) einschalten  Dieses Thermometer zeigt den Wert in °C oder °F an. Um die Einheit einzustellen, öffnen Sie zuerst das Batteriefach (7). Es befindet sich einen kleinen Schalter unter der Messtaste (6). Verschieben Sie diesen Schalter vorsichtig nach links (Anzeige in °F) oder nach rechts (Anzeige in °C).
  • Seite 35 DVM8861 Der Sensor braucht einige Minuten um sich einzustellen, wenn Sie von einer Messung der hohen Temperatur auf eine Messung der niedrigen Temperatur und umgekehrt, umschalten. Abstand-zu-Punktgröße Je größer der Abstand (D) bis zur Oberfläche, die Sie messen möchten, ist, umso größer ist der Messpunkt (S).
  • Seite 36: Problemlösung

    DVM8861 Problemlösung Das Display leuchtet nicht, Batterieproblem. Überprüfen Sie die Batterie und wenn Sie die Messtaste führen Sie einen Batteriewechsel durch wenn drücken. nötig. Die gemessene Temperatur Überprüfen Sie den Emissionswert. Ein Wert, der ist instabil und erscheint zu niedrig eingestellt ist, verursacht ungenaue unwahrscheinlich.
  • Seite 37: Technische Daten

    Gewicht 163 g (mit Batterie) Verwenden Sie dieses Gerät nur mit originellen Zubehörteilen. Velleman NV übernimmt keine Haftung für Schaden oder Verletzungen bei (falscher) Anwendung dieses Gerätes. Für mehr Informationen zu diesem Produkt und die neueste Version dieser Bedienungsanleitung, siehe www.velleman.eu. Alle Änderungen ohne vorherige Ankündigung vorbehalten.
  • Seite 38 (zie from the original date of purchase. waarborgvoorwaarden). • Velleman® can decide to replace an article with an equivalent article, or to refund the retail value totally or Algemene waarborgvoorwaarden partially when the complaint is valid and a free repair or...
  • Seite 39 • Elke commerciële garantie laat deze rechten personne sans l’autorisation explicite de SA Velleman® ; - onverminderd. frais de transport de et vers Velleman® si l’appareil n’est plus couvert sous la garantie. Bovenstaande opsomming kan eventueel aangepast • toute réparation sera fournie par l’endroit de l’achat.
  • Seite 40 - Schäden verursacht durch absichtliche, nachlässige oder explícita de Velleman®; unsachgemäße Anwendung, schlechte Wartung, - se calcula gastos de transporte de y a Velleman® si el zweckentfremdete Anwendung oder Nichtbeachtung von aparato ya no está cubierto por la garantía. Benutzerhinweisen in der Bedienungsanleitung.

Inhaltsverzeichnis