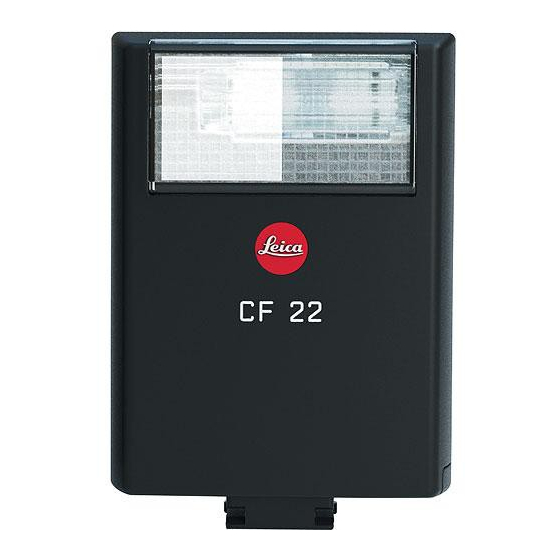
Leica CF 22 Anleitung
System-blitzgerät

Verwandte Anleitungen für Leica CF 22


Inhaltszusammenfassung für Leica CF 22
- Seite 1 Leica CF 22 Anleitung, Instructions Notice d’utilisation, Gebruiksaanwijzing Istruzioni, Instrucciones,...
- Seite 2 Vorwo Sehr ge Leica m des Sys und Sie schen. beste W Wir wü mit Ihre Damit S LEICA C zunäch Verwe Das LEI LEICA D gen auf selbst s LEICA V wendet andere sofern gleicha Die Ver andere...
-
Seite 3: Vorwort
Beschreibungen in dieser Anleitung auf die Verwendbare Kameras Verwendung mit der LEICA D-LUX 4 bezie- Das LEICA CF 22 wurde insbesondere für die hen. Informationen zur Funktion bei der Ver- LEICA D-LUX 4 entwickelt, die Blitzbelichtun- wendung mit anderen Kameras entnehmen gen auf der Grundlage der Leitzahlrechnung Sie bitte den entsprechenden Anleitungen. -
Seite 4: Inhaltsverzeichnis
Ein- und Ausschalten des Blitzgerätes ..8 Automatische Geräteabschaltung AUTO-OFF 9 Einstellungen an der LEICA D-LUX 4 für den Betrieb mit dem LEICA CF 22 ..9 Ausleuchtung und Reflektor-Vorsatzscheibe 10 Weitwinkel-Vorsatzscheibe Diese Anleitung wurde auf 100 % chlorfrei- aufsetzen/abnehmen . -
Seite 5: Bezeichnung Der Teile
Bezeichnung der Teile Entsorgung elektrischer und elektronischer Geräte 1. Reflektor (Gilt für die EU, sowie andere europäische 2. Display mit Anzeigen für Länder mit getrennten Sammelsystemen) a. Betriebsart Dieses Gerät enthält elektri- b. Reichweite sche und/oder elektronische c. Belichtungs-Kontrolle Bauteile und darf daher nicht d. -
Seite 6: Sicherheitshinweise
Sicherheitshinweise wie intensiver Sonneneinstrahlung, Feuer oder dergleichen aussetzen! • Das Blitzgerät ist ausschließlich zur Verwen- • Verbrauchte Batterien sofort aus dem Gerät dung im fotografischen Bereich vorgesehen entnehmen! Aus verbrauchten Batterien kön- und zugelassen. nen Chemikalien austreten (sogenanntes • Nicht aus kurzer Entfernung direkt in die „Auslaufen“) und zur Beschädigung des Augen blitzen! Direktes Blitzen in die Augen Gerätes führen! -
Seite 7: Vorbereiten
Energieausstoßes zu Verbrennungen oder Vorbereiten Fleckenbildungen des Materials bzw. der Stromversorgung Reflektorscheibe kommen. Das Blitzgerät kann wahlweise betrieben wer- • Blitzgerät nicht zerlegen! HOCHSPANNUNG! den mit: Reparaturen sollten ausschließlich von einem autorisierten Service ausgeführt werden. • 2 Alkali-Mangan-Trockenbatterien 1,5 V, Typ IEC LR03 (AAA / Micro), wartungsfreie •... -
Seite 8: Einlegen Und Auswechseln Der Batterien / Akkus
Einlegen und Auswechseln der • Wird das Blitzgerät längere Zeit nicht einge- Batterien / Akkus setzt, sollten die Batterien ebenfalls entnom- men werden. 1. Schalten Sie das Blitzgerät mit dem Haupt- schalter (4) aus. 4. Batteriefachdeckel (9) schließen und gegen den Blitzfuss (8) schieben. -
Seite 9: Meter / Feet-Umschaltung
Meter / Feet-Umschaltung (m – ft) Aufsetzen / Abnehmen des Blitzgerätes Zum Wechsel der Anzeige m / ft verfahren Sie Schalten Sie Blitzgerät und Kamera vor dem wie folgt: Aufsetzen /Abnehmen aus (s. dazu den näch- sten Abschnitt). 1. Blitzgerät mit dem Hauptschalter (4) ausschalten. 2. -
Seite 10: Automatische Geräteabschaltung Auto-Off
„sofort auf Wunsch der Kamera“ z.B. bei Bildwiedergabe oder Kamera-standby oder Es stehen auch bei der Verwendung des ca. 3 Minuten, LEICA CF 22 an der LEICA D-LUX 4 alle - nach dem Einschalten, Blitz–Betriebsarten der Kamera zur Verfügung. - nach einem Einstellvorgang, Wird das Blitzgerät eingeschaltet, erscheint im... -
Seite 11: Ausleuchtung Und Reflektor-Vorsatzscheibe
Kleinbild-Brenn- oder länger oder länger weiten (24x36) Ansonsten entspricht der Betrieb der LEICA D–LUX 4 mit aufgesetztem LEICA CF 22 Hinweise: genau den Beschreibungen in der Kamera- • Die Brennweitenbereiche richten sich nach Anleitung bezüglich der Anwendung des einge- dem Ausgangsformat der verwendeten bauten Blitzgeräts, d.h. -
Seite 12: Weitwinkel-Vorsatzscheibe Aufsetzen/Abnehmen
Für eine korrekte Reichweiten-/u. Belichtungs- Hinweis: anzeige im LC–Display des Blitzgerätes ist es erforderlich, den Reflektorstatus am Blitzgerät Andere Kameras als die LEICA D-LUX 4 über- einzustellen. Dabei wird berücksichtigt, ob das tragen ggf. keine digitalen Daten an das Blitzgerät mit oder ohne Reflektor-Vorsatz- Blitzgerät. -
Seite 13: Ttl -Blitzbetrieb Mit Mess-Vorblitz
Sie brauchen sich nicht um die Blitzeinstellung -Blitzbetrieb mit Mess-Vorblitz kümmern, die Kameraelektronik sorgt automa- -Blitzbetrieb erreichen Sie auf einfache tisch für die richtige Blitzlichtdosierung. Art sehr gute Blitzlichtaufnahmen. In dieser Für die Reichweite des Blitzlichtes beachten Blitzbetriebsart wird die Belichtungsmessung Sie die Anzeige im LC–Display (2) des Blitz- von einem Sensor in der Kamera vorgenom- gerätes (s. -
Seite 14: Manueller Blitzbetrieb M Und M Lo
Blitz mit voller Lichtleistung P 1/1 bei für die Blitz-Betriebsart im Display der LEICA oder der Teillichtleistung P 1/8 bei Lo abge- D–LUX 4 zeigt mit aufgesetztem LEICA CF 22 geben. dagegen lediglich an, ob das Blitzgerät ein- Die Anpassung an die Aufnahmesituation er- oder ausgeschaltet ist. -
Seite 15: Belichtungskontrollanzeige
Belichtungskontrollanzeige schalteter Kamera den Kameraauslöser leicht antippen. o.k. Die Belichtungskontrollanzeige (2c) wird für ca. 3 s im LC-Display des Blitzgerätes ange- Hinweis: zeigt, wenn die Aufnahme im TTL- Blitzbetrieb Für eine korrekte Anzeige ist es erforderlich, richtig belichtet wurde. Wird die Belichtungs- am Blitzgerät den Reflektorstatus (Betrieb mit o.k. -
Seite 16: Reichweitenanzeige Im Manuellen Blitzbetrieb M Und M Lo
Beachten Sie bei der Aufnahme die Reichwei- Überschreitung des Bereichs der Reich- ten-Anzeige im LC-Display des Blitzgerätes. weitenanzeige Das Motiv sollte sich im Bereich von etwa 40 % Im LC-Display des Blitzgerätes können Reich- bis 70 % des angezeigten Wertes befinden. weiten bis maximal 199 m bzw. -
Seite 17: Fehler Und Abhilfe, Kundendienst
Fehler und Abhilfe, Kundendienst Problem: Die Blitzlichtaufnahmen werden überbelichtet. Vor Inanspruchnahme des Kundendienstes soll- ten Sie zunächst folgende Hinweise beachten: • Überprüfen Sie die korrekte Montage des Blitz- gerätes im Zubehörschuh der Kamera! Problem: • Stellen Sie am Blitzgerät die Betriebsart Das Blitzgerät löst nicht aus. - Seite 18 • Wählen Sie an der Kamera eine höhere Erfolglose Fehlersuche ISO–Empfindlichkeit und/oder einen kleine- • Blitzgerät mit dem Hauptschalter (4) aus- ren Blendenwert! schalten, kurze Zeit warten und wieder ein- • Haben Sie an der Kamera einen Belichtungs- schalten. korrekturwert für Blitzlichtaufnahmen einge- •...
-
Seite 19: Tipps Zur Pflege Des Leica Cf 22
Tipps zur Pflege des LEICA CF 22 • Das LEICA CF 22 sollte nicht nass werden. Kostspielige Reparaturen oder sogar Total- • Alkohol und andere chemische Lösungen schaden könnten die Folgen sein. dürfen nicht zur Reinigung des Geräte-Ge- • Bei Nichtgebrauch sollten die Batterien ent- häuses benutzt werden. -
Seite 20: Technische Daten
55°), ab 35 mm ohne Vorsatzscheibe, hori- Blitzbetriebsarten Leica zontal ca. 56°, vertikal ca. 40°) LEICA D–LUX 4, Manuell Maße (B x H x T) 58 x 85 x 32,5 mm Manuelle Lichtleistungen P 1/1, P 1/8 Gewicht ca. 100 g (ohne Batterien) Empfindlichkeit ISO 6 ... - Seite 21 Beobachtung bis zur Leica Camera AG Wiedergabe bieten wir als besonderen Service Leica Akademie seit vielen Jahren in der Leica Akademie Oskar-Barnack Str. 11 praxisgerechte Seminare und Schulungen an, D- 35606 Solms in denen das Wissen um die Welt der Tel.:...
- Seite 22 Für die Wartung Ihrer Leica Ausrüstung sowie gramm beantwortet Ihnen, schriftlich, telefo- in Schadensfällen steht Ihnen der Customer nisch, oder per e-mail der Leica Service der Leica Camera AG oder der Repara- Informations-Service: tur-Service einer Leica Landesvertretung zur Verfügung (Adressenliste siehe Garantiekarte).
- Seite 143 Markenzeichen der Leica Camera Gruppe ® = Registriertes Warenzeichen Trademark of the Leica Camera Group ® = Registered Trademark Marchio depositato del gruppo Leica Camera ® = Marque déposée Handelsmerk van de Leica Camera Groep ® = Gedeponeerd hendelsmerk Marque déposée du groupe Leica Camera ®...
- Seite 144 o.k. WIDE WIDE...
- Seite 145 Leica Camera AG / Oskar-Barnack-Straße 11 / D-35606 Solms www.leica-camera.com / info@leica-camera.com Telephon +49(0)6442-208-0 / Fax +49(0)6442-208-333...