Herunterladen Inhalt Inhalt Diese Seite drucken
Inhaltsverzeichnis

Werbung

Verfügbare Sprachen
  • DE

Verfügbare Sprachen

  • DEUTSCH, seite 1
LEICA SF 64
Anleitung | Instructions | Mode d'emploi
Gebruiksaanwijzing | Istruzioni | Instrucciones

Werbung

Inhaltsverzeichnis
loading

Inhaltszusammenfassung für Leica SF 64

  • Seite 1 LEICA SF 64 Anleitung | Instructions | Mode d’emploi Gebruiksaanwijzing | Istruzioni | Instrucciones...
  • Seite 2: Inhaltsverzeichnis

    INHALTSVERZEICHNIS Das Auswahlmenü ..................10 Der INFO-Bildschirm ..................11 Automatische Geräteabschaltung STANDBY ..........12 LED-Anzeigen ....................13 Vorwort ......................4 Blitzbereitschaftsanzeige ................13 Sicherheitshinweise ..................4 Belichtungskontrollanzeige ................13 Anzeigen im Display ...................13 Entsorgung elektrischer und elektronischer Geräte ....... 5 Displaybeleuchtung ..................13 Anzeige der Blitz-Betriebsart................ 14 Bezeichnung der Teile ..................
  • Seite 3 Reichweitenanzeigen in m oder ft m/ft ............32 Blitzbelichtungsreihen FLASH BRACKETING ..........33 Ersatzteile ....................44 Akustisches Signal BEEP ................34 Verriegelung / Entriegeln ................35 Leica Service-Adressen ................46 Externe Stromquelle POWERPACK ............... 35 Anhang .....................278 Favoritenprogramme .................36 Blitztechniken .....................36 Indirektes Blitzen ..................36 Indirektes Blitzen mit Reflektorkarte ............
  • Seite 4: Vorwort

    Achtung, bestimmungsgemäßer Gebrauch: Sehr geehrte Kundin, Sehr geehrter Kunde Leica möchte sich bei Ihnen für den Erwerb des System-Blitzgeräts Leica SF 64 • Dieses Blitzgerät ist ausschließlich für die Belichtung von Motiven im bedanken und Sie zu Ihrer Entscheidung beglückwünschen. Sie haben mit fotografischen Bereich bestimmt und zugelassen.
  • Seite 5: Entsorgung Elektrischer Und Elektronischer Geräte

    ENTSORGUNG ELEKTRISCHER UND • Aus dem gleichen Grund dürfen Sie das Gerät weder Feuchtigkeit wie Tropf- oder Spritzwasser aussetzen, noch mit feuchten Händen berühren, ELEKTRONISCHER GERÄTE oder es versuchen zu zerlegen, zu reparieren oder umzubauen! Im Gerätein- neren befinden sich keine Bauteile, die von einem Laien repariert werden (Gilt für die EU sowie andere europäische Länder mit getrennten können.
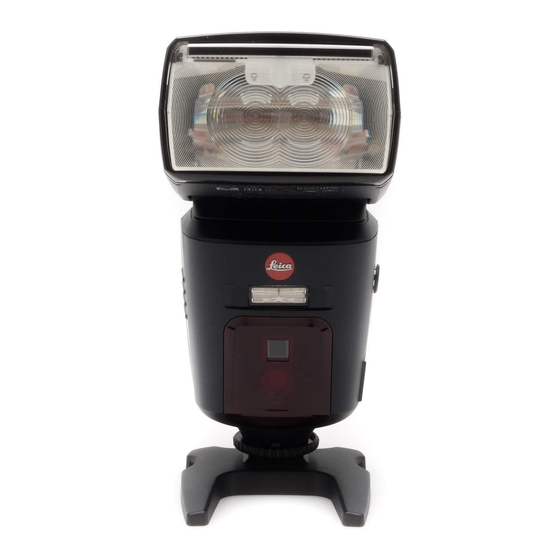
  • Seite 6: Bezeichnung Der Teile

    BEZEICHNUNG DER TEILE KAMERATYP-ABHÄNGIGE BLITZFUNKTIONEN Ansicht von vorne Die unten aufgeführten Blitzfunktionen stehen je nach verwendetem Kamera- AF-Hilfslicht systemen zur Verfügung. Fotosensor • Blitzbereitschaftsanzeige im Kamerasucher/Kameramonitor Haupt-Reflektor • Automatische Blitzsynchronzeitsteuerung Zweitreflektor • Automatische Aufhellblitzsteuerung Fuß mit • TTL-Blitzbetrieb Rändelmutter • Blitzbelichtungskorrektur bei Sicherungsstift •...
  • Seite 7 Hinweise: • Die Beschreibungen in dieser Anleitung beschränken sich im Wesentlichen auf die Verwendung des Leica SF 64 an und mit Leica Kameras der gegenwär- tig erhältlichen Baureihen. • Im Rahmen dieser Anleitung werden ausschließlich die Funktionen beschrie- ben, die am Blitzgerät selber eingestellt werden. Dies gilt, mit wenigen Ausnahmen auch für die Anzeigen am Blitzgerät.
  • Seite 8: Vorbereitungen

    VORBEREITUNGEN STROMVERSORGUNG Akku-- bzw. Batterieauswahl Das Blitzgerät kann wahlweise betrieben werden mit hochwertigen: BLITZGERÄT AUFSETZEN / ABNEHMEN • 4 Nickel-Metall-Hydrid Akkus 1,2 V, Typ IEC HR6 (AA / Mignon), deutlich Kamera und Blitzgerät ausschalten höhere Kapazität als NC–Akku und weniger umweltschädlich, da cadmiumfrei. 1.
  • Seite 9: Akkus/Batterien Wechseln

    Akkus/Batterien wechseln Achtung: Die Akkus/Batterien sind leer bzw. verbraucht, wenn Achten Sie beim Einsetzen der Akkus bzw. Batterien die Blitzfolgezeit (Zeit vom Auslösen eines Blitzes mit auf die richtige Polarität gemäß den Symbolen im voller Lichtleistung, z.B. bei M, bis zum erneuten Batteriefach.
  • Seite 10: Ein- Und Ausschalten Des Blitzgerätes

    EIN- UND AUSSCHALTEN DES Nach Drücken der -Taste können die Blitz- parameter eingestellt werden. BLITZGERÄTES s. S. 19 – (Teillichtleistung), Blitzgerät mit der Taste einschalten – (Belichtungskorrektur ), s. S. 18 • Der Startbildschirm erscheint. Bei Blitz-Bereitschaft – (Refl ektorstellung), s. S. 22 ZOOM leuchtet die -Taste grün...
  • Seite 11: Der Info-Bildschirm

    DER INFO-BILDSCHIRM Nach Drücken der -Taste können die folgenden- MENU Funktionen eingestellt werden. Die aktuellen Einstellungen des Blitzgerätes können , s. S. 28 RAPID während des Betriebs angezeigt werden. , s. S. 28 SUB-REFL. Auf dem Touch-Display die -Taste drücken. , s.
  • Seite 12: Automatische Geräteabschaltung Standby

    AUTOMATISCHE GERÄTEABSCHALTUNG • In allen Betriebsarten wird nach ca. 10s der Bildschirm auf die Hälfte der Helligkeit eingestellt Werksseitig ist das Blitzgerät so eingestellt, dass es um Energie zu sparen. Mit jedem Tastendruck oder ca. 10 Minuten - durch Tippen auf den Bildschirm wird wieder auf –...
  • Seite 13: Led-Anzeigen

    LED-ANZEIGEN ANZEIGEN IM DISPLAY Die meisten Kameras übertragen die Werte für ISO, Objektivbrennweite (mm) und Blende an das BLITZBEREITSCHAFTSANZEIGE Blitzgerät. Dieses passt seine erforderlichen • Bei aufgeladenem Blitzkondensator leuchtet am Einstellungen automatisch an. Es errechnet aus den Blitzgerät die -Taste grün auf und zeigt damit Werten und seiner Leitzahl die maximale Reichweite die Blitzbereitschaft an.
  • Seite 14: Anzeige Der Blitz-Betriebsart

    ANZEIGE DER BLITZ-BETRIEBSART Reichweitenanzeige im TTL-/ TTL-HSS-Blitzbetrieb Im Display wird die eingestellte Blitzbetriebsart In den Blitz-Betriebsarten (s. S. 16) TTL-HSS angezeigt. Dabei sind je nach Kameratyp verschie- wird im Display der Wert für die minimale und dene Anzeigen für die jeweils unterstützte Blitz-Be- maximale Reichweite des Blitzlichtes angezeigt.
  • Seite 15: Reichweitenanzeige Im Manuellen Blitzbetrieb

    Reichweitenanzeige im manuellen ANZEIGEN IM KAMERASUCHER Blitzbetrieb Beispiele für Anzeigen im Kamerasucher: Im manuellen Blitzbetrieb (s. S. 19) wird im Display • Blitzsymbol blinkt der Entfernungswert angezeigt, der für eine korrekte Aufforderung zur Verwendung, bzw. zum Einschal- Blitzbelichtung des Motivs einzuhalten ist. Die ten des Blitzgerätes.
  • Seite 16: Blitz-Betriebsarten

    BLITZ-BETRIEBSARTEN -BLITZBETRIEB In dieser Blitz-Betriebsart erreichen Sie auf einfache Je nach Kameratyp stehen folgende Blitz-Betriebs- Art sehr gute Blitzlichtaufnahmen. Hier wird die arten zur Verfügung: Blitz-Belichtungsmessung von einem Sensor in der – , (s. S. 16) Kamera vorgenommen. Dieser misst das vom Motiv –...
  • Seite 17: Automatische Kurzzeitsynchronisation

    AUTOMATISCHE KURZZEITSYNCHRONISATION AUTOMATIK-BLITZBETRIEB TTL-HSS Im Automatik-Blitzbetrieb misst der Fotosensor des Verschiedene Kameras unterstützen die Automatische Blitzgerätes das vom Motiv reflektierte Licht. Der Kurzzeitsynchronisation (siehe Kamera-Anleitung). Fotosensor hat einen Messwinkel von ca. 25° und Mit dieser Blitz-Betriebsart ist es möglich, auch bei misst nur während der eigenen Lichtabgabe.
  • Seite 18: Blitz-Belichtungskorrekturen

    Hinweise: BLITZ-BELICHTUNGSKORREKTUREN • Eine Blitz-Belichtungskorrektur in den -Blitz-Be- Die Blitzbelichtungsautomatik der meisten Kameras triebsarten kann nur dann erfolgen, wenn die ist auf einen Reflexionsgrad von 25% (durchschnitt- Kamera die Einstellung eines Korrekturwertes am licher Reflexionsgrad von Blitzmotiven) abgestimmt. Blitzgerät unterstützt (siehe Kamera-Anleitung)! Ein dunkles Motiv, das viel Licht absorbiert oder ein Wenn nicht, bleibt der eingestellte Korrekturwert helles oder stark reflektierendes Motiv, oder ein...
  • Seite 19: Manueller Blitzbetrieb M

    MANUELLER BLITZBETRIEB Hinweis: Verschiedene Kameras unterstützen den manuellen Im manuellen Blitzbetrieb wird vom Blitzgerät Blitzbetrieb nur in der Kamerabetriebsart (Manuell). ungeregelt die volle Energie abgestrahlt, sofern keine In anderen Kamerabetriebsarten erfolgt eine Teillichtleistung eingestellt ist. Die Anpassung an die Fehlermeldung im Display und die Auslösung wird Aufnahmesituation kann z.B.
  • Seite 20: Stroboskop-Blitzbetrieb Strobo

    STROBOSKOP-BLITZBETRIEB Für eine Stroboskop-Aufnahme muss die Blitzfrequenz (Blitze pro Sekunde) und die Anzahl der Blitze pro Der Stroboskop-Betrieb ist eine manuelle Blitz-Be- Auslösung eingestellt werden. triebsart. Dabei können mehrere Blitzbelichtungen auf einem Bild gemacht werden. Das ist besonders Stroboskop-Blitzanzahl interessant bei Bewegungsstudien und Effektaufnah- Die Blitzanzahl lässt sich von einstellen, men.
  • Seite 21 Stroboskop-Blitzfrequenz Die Blitzfrequenz gibt die Anzahl der Blitze pro Sekunde an. Die Blitzfrequenz lässt sich von einstellen. Die maximal mögliche Blitzanzahl wird dabei automatisch angepasst. Sie können zur Erzielung von kurzen Blitzleuchtzeiten die Teillichtleistung manuell bis auf den Minimalwert einstellen. 1/256 Blitzfrequenz ( )einstellen...
  • Seite 22: Sonderfunktionen

    SONDERFUNKTIONEN Automatische Zoomsteuerung Wenn das Blitzgerät mit einer Kamera betrieben wird, Je nach Kameratyp stehen verschiedene Sonderfunk- die Daten der Objektivbrennweite überträgt, passt tionen zur Verfügung. sich die Zoom-Position des Reflektors automatisch Zum Aufrufen und Einstellen der Sonderfunktionen der Objektivbrennweite an. muss vorher ein Datenaustausch zwischen Blitzgerät •...
  • Seite 23 Einstellvorgang Rückstellen auf Auto-Zoom -Taste so oft drücken, bis das Auswahlme- 1. Kamera-Auslöser antippen, damit ein Datenaus- nü erscheint tausch zwischen Blitzgerät und Kamera 2. Auf Touch-Display Sensortaste drücken stattfindet 3. Mit in das rot umrandete, mittlere -Taste so oft drücken, bis das Auswahlmenü ▲...
  • Seite 24: Weitwinkelstreuscheibe

    WEITWINKELSTREUSCHEIBE M-SLAVE-BETRIEB Mit der integrierten Weitwinkel-Streuscheibe In dieser Betriebsart kann das Blitzgerät Kamera-fern können Brennweiten ab 12mm ausgeleuchtet werden. und kabellos als Zweit-Lichtquelle verwendet werden. Dazu wird es durch den Hauptblitz des (Führungs-) Vorgehensweise: Blitzgeräts auf der Kamera ausgelöst. Weitwinkel-Streuscheibe aus dem Reflektor nach -Betrieb ist generell nur der manuelle M-SLAVE vorne bis zum Anschlag herausziehen und loslassen...
  • Seite 25 Teillichtleistung einstellen: 1. Auf Touch-Display so oft Sensortaste für Teillichtleistung drücken, bis die entspre- P1/1 chende Auswahlliste erscheint 2. Mit gewünschte Teillichtleistung ▲ ▼ , ... in das rot umrandete, mittlere Feld 1/256 bringen 3. Ausgewählte Teillichtleistung drücken Die ausgewählte Einstellung wird sofort übernommen.
  • Seite 26: Synchronisation/Lernfunktion Einstellen

    Synchronisation/Lernfunktion einstellen Lernfunktion 1. An der Kamera die Betriebsart M-SLAVE Die „Lernfunktion“ ermöglicht die individuelle einstellen automatische Anpassung des Zweit-Blitzgerätes an 2. Auf Touch-Display so oft Sensortaste SYNC ??? die Blitztechnik des Führungs-Blitzgerätes. Sie drücken, bis die entsprechende Auswahlliste berücksichtigt, ob dieses ein oder mehrere Vorblitze erscheint einsetzt, z.B.
  • Seite 27 -Blitzbetrieb ausschalten M-SLAVE 1. Auf Touch-Display so oft Sensortaste für die angezeigte Betriebsart drücken, bis die entspre- chende Auswahlliste erscheint 2. Mit die gewünschte Bettriebsart in das rot ▲ ▼ umrandete, mittlere Feld bringen 3. Gewünschte Betriebsart drücken Die ausgewählte Betriebsart wird sofort übernommen.
  • Seite 28: Menufunktionen

    MENUFUNKTIONEN ZWEITREFLEKTOR SUB-REFL. MENU Der Zweitrefl ektor dient zur Frontalaufhellung beim -BETRIEB RAPID indirekten Blitzen, wenn der Hauprefl ektor seitlich In den Blitz-Betriebsarten hängen die oder nach oben abgeschwenkt ist. Wenn die Blitzfolgezeiten davon ab, wieviel Licht für die Lichtmenge des Zweitrefl ektors zu groß ist, kann Aufnahme benötigt wird.
  • Seite 29: Einstelllicht Testlight

    EINSTELLLICHT TESTLIGHT Beim Einstelllicht handelt es sich um ein Strobo- skop-Blitzlicht mit hoher Frequenz. Bei einer Dauer von ca. 3s entsteht der Eindruck eines Quasi-Dauer- lichtes. Mit dem Einstelllicht kann die Lichtverteilung und Schattenbildung bereits vor einer Aufnahme beurteilt werden. Das Einstelllicht wird mit der -Taste ausgelöst.
  • Seite 30: Zoom Betrieb Zoom Mode

    ZOOM BETRIEB Einstellvorgang ZOOM MODE -Taste so oft drücken, bis das Auswahlmenü , bzw. Zoom-Betrieb STANDARD SOFT SPOT erscheint Beim -Zoom-Betrieb wird die Zoom-Position Standard 2. Auf Touch-Display Sensortaste drücken MEN U des Reflektors an die Objektivbrennweite der Kamera 3. Mit in das rot umrandete, ▲...
  • Seite 31: Aufnahmeformat-Anpassung Zoom Size

    Aufnahmeformat-Anpassung ZOOM SIZE Bei einigen Typen von Digitalkameras kann die Anzeige für die Position des Reflektors dem Aufnahmeformat (Sensor-Abmessungen, z.B. 24x36mm, oder APS-C) mit der -Funktion ZOOM-SIZE angepasst werden. Einstellvorgang -Taste so oft drücken, bis das Auswahlmenü erscheint 2. Auf Touch-Display Sensortaste drücken MEN U 3.
  • Seite 32: Af-Hilfslicht Af Beam

    AF-HILFSLICHT Einstellvorgang AF BEAM -Taste so oft drücken, bis das Auswahlmenü Wenn das Autofokus-Meßsystem einer Kamera wegen erscheint mangelnder Umgebungshelligkeit nicht scharf stellen 2. Auf Touch-Display Sensortaste drücken MEN U kann, so wird von der Kamera das im Blitzgerät 3. Mit in das rot umrandete, mittlere ▲...
  • Seite 33: Blitzbelichtungsreihen Flash Bracketing

    BLITZ-BELICHTUNGSREIHEN Die erste Aufnahme wird ohne Korrekturwert FLASH BRACKETING ausgeführt, die zweite mit Minus- Korrektur, die dritte In den Blitz-Betriebsarten kann eine mit mit Plus-Korrektur. Blitz-Belichtungsreihe durchgeführt werden. Sie • Im Display wird bei der ersten Aufnahme besteht aus drei aufeinander folgenden Aufnahmen angezeigt, bei der zweiten und der Minus-Kor- FBII...
  • Seite 34: Akustisches Signal Beep

    AKUSTISCHES SIGNAL Akustische Meldung nach dem Einschalten des BEEP Blitzgerätes: Mit der -Funktion kann sich der Benutzer einige BEEP Ein kurzer (ca. 2s) ununterbrochenes Ton nach dem Gerätefunktionen des Blitzgerätes akustisch mitteilen Einschalten zeigt die Blitzbereitschaft des Blitzgerätes lassen. Dadurch kann sie/er sich voll auf Motiv und Aufnahme konzentrieren und muss nicht auf zusätzliche optische Statusanzeigen achten! Akustische Meldungen bei den Einstellungen im...
  • Seite 35: Verriegelung / Entriegeln

    VERRIEGELUNG / ENTRIEGELN EXTERNE STROMQUELLE ANSCHLIESSEN Die Einstellungen am Blitzgerät können gegen Im Foto-Fachhandel ist für dieses Blitzgerät ein unbeabsichtigtes Verstellen verriegelt werden. externer Akku-/Batteriepack von Metz erhältlich. Es bietet eine erheblich höhere Blitz-Anzahl und eine Einstellvorgang schnellerer Blitz-Folgezeit als mit den Stromquellen im Blitzgerät selbst.
  • Seite 36: Favoritenprogramme

    FAVORITENPROGRAMME BLITZTECHNIKEN In der Blitzlicht-Fotographie gibt es immer wiederkeh- INDIREKTES BLITZEN rende Standardsituationen (z. B. Geburtstagsfeiern im Durch indirektes Blitzen wird das Motiv weicher eigenen Wohnzimmer o.ä.). Dieses Blitzgerät bietet ausgeleuchtet und eine ausgeprägte Schattenbildung die Möglichkeit, Ihre Einstellungen für solche verringert.
  • Seite 37: Indirektes Blitzen Mit Reflektorkarte

    INDIREKTES BLITZEN MIT REFLEKTORKARTE NAH- / MAKROAUFNAHMEN Durch indirektes Blitzen mit der integrierten Im Nahbereich und bei Makroaufnahmen kann es Refl ektorkarte können bei Personen Spitzlichter in durch den Parallaxefehler zwischen Blitzgerät und den Augen erzeugt werden. Objektiv am unteren Bildrand zu Abschattungen kommen.
  • Seite 38: Blitzsynchronisation

    BLITZSYNCHRONISATION NORMALSYNCHRONISATION Bei der Normalsynchronisation wird das Blitzgerät AUTOMATISCHE BLITZSYNCHRONZEIT- zum Beginn der Verschlusszeit ausgelöst. Die STEUERUNG Normalsynchronisation ist der Standardbetrieb und Je nach Kameratyp und Kamera-Betriebsart wird bei wird von allen Kameras ausgeführt. Sie ist für die Erreichen der Blitzbereitschaft die Verschlusszeit auf meisten Blitzaufnahmen geeignet.
  • Seite 39: Synchronisation Auf Das Ende Der Belichtungszeit

    SYNCHRONISATION AUF DAS ENDE DER DIE SYNCHRONBUCHSE BELICHTUNGSZEIT REAR Das Blitzgerät kann im Automatik-Blitzbetrieb , im Einige Kameras bieten die Möglichkeit zur Synchroni- manuellen Blitzbetrieb und im Stroboskop-Betrieb sation auf das Ende der Belichtungszeit. Dies ist vor über die Synchronbuchse ausgelöst werden. allem bei Belichtungen mit langen Verschluss- Hinweise: zeiten (>...
  • Seite 40: Bildschirm-Einstellungen Helligkeit Brightness

    BILDSCHIRM-EINSTELLUNGEN DREHEN ROTATION Beim Schwenken des Blitzgerätes in die Horizontale HELLIGKEIT BRIGHTNESS kann die Bildschirmanzeige ebenfalls geschwenkt Die Bildschirm-Helligkeit kann in fünf Stufen verändert werden. werden. Einstellvorgang Einstellvorgang -Taste so oft drücken, bis das Auswahlmenü -Taste so oft drücken, bis das Auswahlmenü erscheint erscheint 2.
  • Seite 41: Wartung Und Pflege

    Rahmen an die Funktionen zukünftiger auszuschalten Kameras angepasst werden. Die ausgewählte Einstellung wird sofort Nähere Informationen finden Sie im Internet auf der übernommen und das Blitzgerät wird in den Leica-Homepage: www.leica-camera.com Auslieferungszustand zurückgesetzt. Firm- ware-Updates des Blitzgerätes sind davon nicht betroffen!
  • Seite 42: Hilfe Bei Störungen

    HILFE BEI STÖRUNGEN Das AF-Hilfslicht des Blitzgerätes wird nicht aktiviert Sollte es einmal vorkommen dass z.B. im Display des – Das Blitzgerät ist nicht blitzbereit. Blitzgerätes unsinnige Anzeigen erscheinen oder dass – Die Kamera arbeitet nicht in der Betriebsart es nicht so funktioniert wie es soll, so schalten Sie es (S-AF).
  • Seite 43 Die Zoom-Position des Reflektors wird nicht Es findet keine automatische Umschaltung auf automatisch der aktuellen Zoom-Position des die Blitzsynchronzeit statt Objektivs angepasst – Die Kamera/das Objektiv hat einen Zentralver- schluss (die meisten Kompaktkameras). – Die Kamera überträgt keine Daten an das Die Umschaltung auf Synchronzeit ist daher nicht Blitzgerät.
  • Seite 44: Technische Daten

    TECHNISCHE DATEN Ausleuchtung des Motorzoom-Reflektors Ab 24mm, ab 12mm mit integrierter Weitwinkel-Streuscheibe Maximale Leitzahl (bei ISO 100, Zoomposition 200mm) Schwenkbereiche und Raststellungen des Reflektorkopfes Im Meter-System: 64 / Im Feet-System: 210 Vertikal: -9° 45° 60° 75° 90° Blitz-Betriebsarten Horizontal gegen den Uhrzeigersinn: 60° 90° 120° 150° 180° TTL-, TTL HSS, Manuell, M HSS, Automatik, Stroboskop, M-Slave Horizontal im Uhrzeigersinn: 60°...
  • Seite 45 Batterie-/Akku-Entsorgung – Batterien/Akkus gehören nicht in den Hausmüll! Bitte bedienen Sie sich bei der Rückgabe verbrauchter Batterien/Akkus eines vorhandenen Rücknahme- systems. – Bitte geben Sie nur entladene Batterien/Akkus ab. Batterien/Akkus sind in der Regel dann entladen, wenn das damit betriebene Gerät nach längerem Gebrauch der Batterien/Akkus nicht mehr einwandfrei funktioniert.
  • Seite 46: Leica Product Support

    LEICA PRODUCT SUPPORT LEICA CUSTOMER CARE Anwendungstechnische Fragen zu den Leica Produkten einschließlich der ggf. Für die Wartung Ihrer Leica Ausrüstung sowie in Schadensfällen stehen Ihnen mitgelieferten Software beantwortet Ihnen schriftlich, telefonisch oder per die Customer Care-Abteilung der Leica Camera AG E-Mail die Product Support-Abteilung der Leica Camera AG.
  • Seite 48 TABLE OF CONTENTS The selection menu ..................56 The INFO screen ..................57 Automatic switch-off to STANDBY ............58 LED displays ....................59 Foreword .....................50 Flash ready indicator ................... 59 Safety notes ....................50 Correct exposure display ................59 Indicators on the display ................59 Disposal of electrical and electronic equipment ........51 Display lighting....................
  • Seite 49 Range indicators in m or ft m/ft ..............78 Flash bracketing FLASH BRACKETING ............79 Spare parts ....................90 Acoustic signal BEEP ................... 80 Locking/unlocking ..................81 Leica service addresses ................92 External power source POWERPACK ............81 Appendix ....................282 Favorite programs ..................82 Flash techniques ..................82 Indirect flash ....................
  • Seite 50: Foreword

    It must not be used for any other purpose. made the best choice for your Leica camera. We wish you a great deal of fun • It may be operated only with the accessories described in this manual or with and success with your new flash unit.
  • Seite 51: Disposal Of Electrical And Electronic Equipment

    DISPOSAL OF ELECTRICAL AND • For the same reason, you must never expose the device to moisture, such as drops or splashes of water, nor touch it with wet hands, or try to dismantle, ELECTRONIC EQUIPMENT repair or rebuild it! There are no components inside that can be repaired by an amateur.
  • Seite 52: Designation Of Parts

    DESIGNATION OF PARTS CAMERA TYPE-SPECIFIC FLASH FUNCTIONS View from the front The flash functions listed below are available with the camera systems stated in AF Auxiliary Light each case. Photo Sensor • Flash readiness display in the camera viewfinder/camera monitor Main Reflector •...
  • Seite 53 Notes: • The descriptions in this manual are largely limited to use of the Leica SF 64 on and with Leica cameras of currently available series. • In this manual, only those functions are described that the user sets himself/ herself on the flash unit.
  • Seite 54: Preparations

    PREPARATIONS POWER SUPPLY Changing batteries The flash unit can be operated with high-quality: ATTACHING/REMOVING THE FLASH UNIT • 4 nickel-metal hybrid rechargeable batteries 1.2 V, type IEC HR6 (AA/ Turn off the camera and flash unit mignon), much higher capacity than NC rechargeable batteries and less 1.
  • Seite 55 Changing the batteries Caution: The batteries are drained or spent when the flash When inserting the batteries make sure that the recycle time (time from triggering the flash at full light polarity is correct in line with the symbols in the capacity, e.g.
  • Seite 56: Switching The Flash Unit On/Off

    TURNING THE FLASH UNIT ON AND OFF After the button has been pressed, you can set the fl ash parameters. Switch on the fl ash unit with the button see p. 65 – (partial light output), • The start screen appears. When the fl ash is ready, –...
  • Seite 57: The Info Screen

    THE INFO SCREEN After the button has been pressed, you can set MENU the following functions. The current flash unit settings can be displayed during , see p. 74 RAPID operation. , see p. 74 SUB-REFL. Press the button on the touch display. , see p.
  • Seite 58: Automatic Switch-Off To Standby

    AUTOMATIC DEVICE SHUTDOWN • In all modes, the screen is set to half-brightness after approx. 10s to save energy. Pressing any At the factory, the fl ash unit has been set so that it button or tipping on the screen will restore normal switches to standby mode approx.
  • Seite 59: Display Lighting

    LED DISPLAYS DISPLAYS ON YOUR FLASH UNIT Most cameras transmit the ratings for ISO lens focal length (mm) and f-stop to the fl ash unit. This FLASH READINESS DISPLAY automatically adjusts the necessary settings. It • When the fl ash capacitor is charged, the button calculates the maximum range of the fl ash light from on the fl ash unit lights up in green and displays the ratings and its guide number.
  • Seite 60: Range Display

    DISPLAYING THE FLASH MODE Range indicator in TTL/TTL-HSS flash mode In the flash modes (see p. 62) the TTL-HSS The set flash mode is shown in the display. Depend- value for the minimum and maximum range of the ing on camera type, various displays for the flash flash light is displayed.
  • Seite 61: Displays In Camera Viewfinder

    Range indicator in manual flash mode DISPLAYS IN THE CAMERA VIEWFINDER In manual flash mode (see p. 65) the distance value Examples of displays in the camera viewfinder: that must be adhered to to ensure correct flash • Flash symbol flashing exposure of the subject is shown in the display.
  • Seite 62: Flash Modes

    FLASH MODES FLASH MODE In this flash mode, you will achieve very good flash Depending on camera type, the following flash modes shots very simply. Here, the flash exposure measure- are available: ment is carried out by a sensor in the camera. This –...
  • Seite 63: Automatic High-Speed Synchronization

    AUTOMATIC HIGH-SPEED SYNCHRONIZATION AUTOMATIC FLASH MODE TTL-HSS In automatic flash mode the photo sensor of the Various cameras support automatic high-speed flash unit measures the light reflected from the synchronization (see camera manual). With this subject. The photo sensor has a measuring angle of flash mode it is possible to use a flash unit even with approx.
  • Seite 64: Flash Exposure Compensation

    FLASH EXPOSURE COMPENSATION Notes: • Flash exposure compensation in the flash The automatic flash exposure of most cameras is modes can only work if the camera supports harmonized to a reflection factor of 25% (average setting a compensation value on the flash unit (see reflection factor of flash shots).
  • Seite 65: Manual Flash Mode M

    MANUAL FLASH MODE Note: Various cameras support manual flash mode only in In manual flash mode the full energy is radiated the camera mode (Manual). from the flash unit without control unless partial light In other camera modes, there is an error message in output has been set.
  • Seite 66: Stroboscope Flash Mode Strobo

    STROBOSCOPE FLASH MODE For a stroboscope shot, the flash frequency (flashes per second) and the number of flashes per shutter Stroboscope mode is a manual flash mode. Several release must be set. flash exposures can be made on a single picture. This is of particular interest in motion studies and effect Number of stroboscope flashes photos.
  • Seite 67 Stroboscope flash frequency The flash frequency indicates the number of flashes per second. The flash frequency can be set from . The maximum possible number of flashes is adjusted automatically. To achieve short flash intervals you can manually set the partial light output right down to the minimum value of 1/256 Set flash frequency (...
  • Seite 68: Special Functions

    SPECIAL FUNCTIONS Automatic zoom control If the flash unit is being operated with a camera that Depending on camera type, the following special transmits data of the lens focal length, the zoom functions are available. position of the reflector automatically adjusts to the There must have been a data exchange between the lens focal length.
  • Seite 69 Setting procedure Resetting to auto zoom 1. Press the button repeatedly until the 1. Touch the camera shutter release so that data is selection menu appears exchanged between the flash unit and camera 2. Press the sensor button on the touch display 2.
  • Seite 70: Wide Angle Diffusion Head

    WIDE-ANGLE DIFFUSER HEAD M-SLAVE MODE With the integrated wide-angle diffuser head focal In this mode, the flash unit can be used as a second lengths from 12mm can be illuminated. source of light remotely from the camera without any cables. For this, it is triggered by the main flash of the Procedure: (lead) flash unit on the camera.
  • Seite 71 Setting partial light output: 1. Press the sensor button for partial light output on the touch display repeatedly until the P1/1 relevant selection list appears 2. Use to move the desired partial light output ▲ ▼ , ... to the central field 1/256 outlined in red 3.
  • Seite 72 Setting synchronization/learning function Learning function 1. Set the mode on the camera M-SLAVE The "learning function" enables the automatic 2. Press the sensor button on the touch SYNC ??? adjustment of the second flash unit to the flash display repeatedly until the relevant selection list technique of the lead flash unit.
  • Seite 73: Switch Off

    Switch off flash mode M-SLAVE 1. Press the sensor button for the displayed mode repeatedly until the relevant selection list appears 2. Use to move the desired mode to the ▲ ▼ central field outlined in red 3. Press desired mode The selected mode is accepted immediately.
  • Seite 74: Menu Functions

    MENU FUNCTIONS SUB REFLECTOR SUB-REFL. MENU The sub refl ector is used for front lighting with MODE RAPID indirect fl ash if the main refl ector has been pivoted to In the fl ash modes, the fl ash intervals the side or up. If the amount of light from the sub depend on how much light is needed for the shot.
  • Seite 75: Test Light Testlight

    TEST LIGHT TESTLIGHT The test light is a high-frequency stroboscope fl ash light. With a duration of approx. 3s, it gives the impression of a quasi permanent light. The test light can be used to assess the light distribution and shadow formation even before a shot is taken.
  • Seite 76: Zoom Mode Zoom Mode

    ZOOM MODE Setting procedure ZOOM MODE 1. Press the button repeatedly until the , or zoom mode STANDARD SOFT SPOT selection menu appears zoom mode the zoom position of the Standard 2. Press the sensor button on the touch MENU reflector is adjusted to the camera's lens focal length.
  • Seite 77: Photo Format Adjustment Zoom Size

    Photo format adjustment ZOOM SIZE In some types of digital camera the display of the position of the reflector can be adjusted to the photo format (sensor dimensions, e.g. 24x36mm, or APS-C) with function. ZOOM-SIZE Setting procedure 1. Press the button repeatedly until the selection menu appears...
  • Seite 78: Af Auxiliary Light Af Beam

    AF AUXILIARY LIGHT Setting procedure AF BEAM 1. Press the button repeatedly until the If the autofocus measuring system of a camera selection menu appears cannot focus because of insufficient ambient 2. Press on the touch menu MENU brightness, the AF auxiliary light integrated in the 3.
  • Seite 79: Flash Bracketing Flash Bracketing

    FLASH BRACKETING The first shot is taken without exposure compensa- FLASH BRACKETING tion, the second with negative compensation and the Flash bracketing can be used in the flash third with positive compensation. modes. It comprises three successive shots with • In the display, is shown for the first shot, FBII different flash exposure compensations.
  • Seite 80: Acoustic Signal Beep

    ACOUSTIC SIGNAL Acoustic message after the flash unit has been BEEP switched on: The user can send an acoustic notification of some A short (approx. 2s) uninterrupted sound after flash unit functions with the function. As a BEEP switching on, indicates that the flash unit is ready. result, he/she can fully concentrate on the subject and the shot and does not have to pay attentions to Acoustic messages for the settings in automatic flash...
  • Seite 81: Locking/Unlocking

    LOCKING/RELEASING CONNECTING AN EXTERNAL POWER SOURCE The settings on the flash unit can be locked against An external battery pack from Metz is available for accidental adjustments being made. this flash unit from specialist photographic shops. It offers a much higher number of flashes and a quicker Setting procedure flash recycle time than with the power sources in the flash unit itself.
  • Seite 82: Favorite Programs

    FAVORITE PROGRAMS FLASH TECHNIQUES In flash photography there are recurrent standard INDIRECT FLASH situations (e.g. birthday parties in your own living With indirect flash, the subject is lit up more softly, room etc.). This flash unit gives you the opportunity to reducing marked shadow formation.
  • Seite 83: Indirect Flash With Reflector Card

    INDIRECT FLASH WITH REFLECTOR CARD CLOSE-UPS/MACRO SHOTS Indirect fl ash with the integrated refl ector card For close-ups and macro shots, there may be generate highlights in people's eyes. shadows on the lower edge of the picture due to parallax errors between the fl ash unit and the lens. To Using refl ector card harmonize this, the main refl ector can be pivoted Pulling out...
  • Seite 84: Flash Synchronization

    FLASH SYNCHRONIZATION NORMAL SYNCHRONIZATION In normal synchronization, the flash unit is fired at the AUTOMATIC FLASH SYNCHRONIZATION TIME start of the exposure time. Normal synchronization is CONTROL standard operation and is carried out by all cameras. Depending on the camera type and camera mode, the It is suitable for most flash photographs.
  • Seite 85: Synchronization At The End Of The Exposure Time

    SYNCHRONIZATION AT THE END OF THE THE SYNCHRONIZATION SOCKET EXPOSURE TIME REAR The flash unit can be fired via the synchronization Some cameras have the option of synchronization at socket in automatic flash mode , manual flash mode the end of the exposure time. This is mainly beneficial and stroboscope mode.
  • Seite 86: Screen Settings

    SCREEN SETTINGS ROTATION ROTATION When the flash unit is being povited to the horizontal, BRIGHTNESS BRIGHTNESS the screen display can also be pivoted. The screen brightness can be changed in five stages. Setting procedure Setting procedure 1. Press the button repeatedly until the 1.
  • Seite 87: Maintenance And Care

    2. Press on the touch menu MENU You will find more information on the Leica website: 3. Press RESET www.leica-camera.com 4. Press to switch the function on or off The selected setting is accepted immediately and the flash unit is returned to the factory settings.
  • Seite 88: Troubleshooting

    TROUBLESHOOTING The flash unit AF auxiliary light is not activated – The flash unit is not ready to flash. If nonsensical displays appear on the flash unit or if it – The camera does not work in the (S-AF) Single-AF does not work as it should, switch it off for approx.
  • Seite 89 The reflector's zoom position is not automati- The system does not switch automatically to cally adapted to the lens's current zoom the flash synchronization time position – The camera/lens has central locking (most compact cameras). – The camera is not transferring any data to the flash There is therefore no need to switch to synchroni- unit.
  • Seite 90: Technical Data

    TECHNICAL DATA Lighting up the motor zoom reflector From 24mm, from 12mm with integrated wide-angle diffuser head Maximum guide number Pivot areas and engaging points of the reflector head (at ISO 100, zoom position 200mm) Vertical: -9° 45° 60° 75° 90° In the metric system: 64 /in the imperial system: 210 Horizontal anti-clockwise: 60°...
  • Seite 91: Disposing Of Batteries

    Disposing of batteries – Batteries do not belong in domestic garbage! Please use an existing return system to return used batteries. – Please return only discharged batteries. Batteries are usually discharged when the device that they operate no longer works perfectly after the batteries have been used for a prolonged period.
  • Seite 92: Leica Product Support

    AG Customer Care department or the repair service provided by authorized in writing, on the phone or by email. Leica agents in your country are available (see the Warranty Card for a list of They are also the contact point for purchasing advice and to order instruction addresses).
  • Seite 94 TABLE DES MATIÈRES Le menu sélection ..................102 L'écran INFO .....................103 Arrêt automatique de l'appareil STANDBY ..........104 Affichages à LED ..................105 Avant-propos ....................96 Affichage de la disponibilité du flash ............105 Consignes de sécurité ................96 Affichage du contrôle de l'exposition ............105 Affichages sur l'écran ................105 Élimination des appareils électriques ou électroniques .......97 Éclairage de l'écran ...................
  • Seite 95 Séquences d'exposition au flash FLASH BRACKETING ....... 125 Pièces de rechange .................136 Signal sonore BEEP ................... 126 Verrouillage / déverrouillage ..............127 Adresses des partenaires SAV Leica .............138 Source d'alimentation électrique externe POWERPACK ......127 Annex ......................282 Programmes favoris ................128 Techniques de flash .................128...
  • Seite 96: Avant-Propos

    • Ce flash est destiné et agréé uniquement pour l'éclairage de sujets dans le Leica SF 64. Avec ce flash, vous avez fait le meilleur choix pour votre appareil domaine photographique. Il ne doit pas être employé à un autre usage.
  • Seite 97: Élimination Des Appareils Électriques Ou Électroniques

    ÉLIMINATION DES APPAREILS ÉLECTRIQUES • Pour la même raison, ne pas exposer l'appareil à l'humidité, par ex. des gouttes ou des éclaboussures d'eau, ne pas le toucher avec les mains OU ÉLECTRONIQUES humides, ni essayer de le démonter, de le réparer ou de le modifier. A l'intérieur de l'appareil, il n'y a aucun élément susceptible d'être réparé...
  • Seite 98: Désignation Des Pièces

    DÉSIGNATION DES PIÈCES FONCTIONS DU FLASH LIÉES AU TYPE DE L'APPA- REIL PHOTO Vue de face Lumière auxiliaire AF Les fonctions du flash indiquées ci-dessous sont disponibles avec les systèmes Capteur de lumière d'appareil concernés mentionnés. Réflecteur principal • Affichage de la disponibilité du flash dans le viseur ou le moniteur de Réflecteur secondaire l'appareil photo Pied avec...
  • Seite 99 Remarques • Les descriptions figurant dans le présent mode d'emploi se limitent essentiellement à l'utilisation du Leica SF 64 et des appareils photo des séries actuellement disponibles. • Le présent mode d'emploi présente uniquement les fonctions qui se règlent sur le flash lui-même. Ceci est également valable, à quelques exceptions près, pour les affichages sur le flash.
  • Seite 100: Mise En Place/Retrait Du Flash

    PRÉPARATIONS ALIMENTATION ÉLECTRIQUE Choix des batteries ou des piles Le flash peut fonctionner au choix avec : MISE EN PLACE / RETRAIT DU FLASH • 4 batteries hybrides nickel-métal 1,2 V, type IEC HR6 (AA / R6), d'une Éteindre l'appareil photo et le flash capacité...
  • Seite 101: Remplacement Des Batterie Et Des Piles

    Remplacement des batteries et des piles Attention Les batteries ou les piles sont vides ou usagées si le Lors de la mise en place des batteries ou des piles, temps de recyclage (durée entre le déclenchement du veillez à respecter la polarité conformément aux flash à...
  • Seite 102: Mise En Marche/Arrêt Du Flash

    MISE EN MARCHE/ARRÊT DU FLASH Après avoir appuyé sur la touche , il est possible de régler les paramètres du fl ash. Connecter le fl ash avec la touche voir p. 111 – (Puissance lumineuse partielle), • L'écran de démarrage s'affi che. Quand le fl ash est –...
  • Seite 103: L'écran Info

    L'ÉCRAN INFO Après avoir appuyé sur la touche , il est MENU possible de régler les fonctions ci-dessous. Il est possible d'afficher les réglages en vigueur du , voir p. 120 RAPID flash durant le fonctionnement. , voir p. 120 SUB-REFL.
  • Seite 104: Arrêt Automatique De L'appareil Standby

    ARRÊT AUTOMATIQUE DE L'APPAREIL • Dans tous les modes de fonctionnement, la luminosité de l'écran diminue de moitié au bout Par défaut, le fl ash est paramétré de telle manière d'env. 10 s afi n d'économiser l'énergie. Appuyer qu'au bout de 10 minutes sur une touche ou eff leurer l'écran permet de –...
  • Seite 105: Affichages À Led

    AFFICHAGES À LED AFFICHAGES SUR L'ÉCRAN La plupart des appareils photo transmettent au fl ash les valeurs des paramètres ISO, distance focale de AFFICHAGE DE LA DISPONIBILITÉ DU FLASH l'objectif (mm) et diaphragme. Le fl ash adapte • Lorsque le condensateur du fl ash est chargé, la automatiquement les réglages nécessaires.
  • Seite 106: Affichage Du Mode De Fonctionnement Du Flash

    AFFICHAGE DU MODE DE FONCTIONNEMENT DU Affichage de la portée en mode FLASH TTL/TTL-HSS du flash En mode de fonctionnement TTL-HSS Le mode de fonctionnement du flash paramétré flash (voir p. 108) s'affichent sur l'écran la portée s'affiche sur l'écran. En fonction du type de l'appareil minimale et la portée maximale de l'éclair.
  • Seite 107: Affichages Dans Le Viseur De L'appareil

    Affichage de la portée en mode AFFICHAGES DANS LE VISEUR DE flash manuel L'APPAREIL En mode flash manuel (voir p. 111) s'affiche sur Exemples d'affichages dans le viseur de l'appareil : l'écran l'éloignement à respecter pour une exposition • Le symbole du flash clignote correcte du sujet.
  • Seite 108: Modes De Fonctionnement Du Flash

    MODES DE FONCTIONNEMENT DU FLASH Mode flash Dans ce mode de fonctionnement du flash, vous obte- En fonction du type d'appareil photo, différents nez très facilement d'excellents clichés au flash. La modes de fonctionnement du flash existent : mesure de l'exposition au flash s'effectue ici grâce à –...
  • Seite 109: Synchronisation Rapide Automatique

    SYNCHRONISATION RAPIDE AUTOMATIQUE MODE FLASH AUTOMATIQUE TTL-HSS En mode flash automatique , le capteur de lumière Certains appareils photo sont compatibles avec la du flash mesure la lumière réfléchie par le sujet. Le synchronisation rapide automatique (voir mode capteur de lumière présente un angle de mesure d'emploi de l'appareil photo).
  • Seite 110: Corrections D'exposition Au Flash

    CORRECTIONS D'EXPOSITION AU FLASH Remarques • Il est possible d'effectuer une correction de Le système automatique du flash de la plupart des l'exposition au flash en mode uniquement si appareils photo est réglé sur une réflectance de 25 % l'appareil photo accepte le paramétrage d'une (réflectance moyenne des sujets flashés).
  • Seite 111: Mode Flash Manuel M

    MODE FLASH MANUEL Remarque Certains appareils photo intègrent le mode flash En mode flash manuel , la totalité de l'énergie du manuel uniquement dans le mode (Manuel) de flash est émise sans régulation dans la mesure où il l'appareil photo. n'existe pas de paramétrage d'une puissance Dans d'autres modes de fonctionnement de l'appareil lumineuse partielle.
  • Seite 112: Mode Flash Stroboscopique Strobo

    MODE FLASH STROBOSCOPIQUE Pour une prise de vue stroboscopique, la fréquence des éclairs (nombre d'éclairs par seconde) et le Le mode stroboscopique est un mode de fonctionne- nombre d'éclairs pour chaque déclenchement doivent ment manuel du flash. Il permet de faire plusieurs être paramétrés.
  • Seite 113 Fréquence des éclairs du stroboscope La fréquence des éclairs indique le nombre d'éclairs par seconde. La fréquence des éclairs est réglable de à . Le nombre maximal d'éclairs possible s'adapte automatiquement. Pour obtenir des durées d'éclair faibles, vous pouvez paramétrer manuellement la puissance lumineuse partielle jusqu'à...
  • Seite 114: Fonctions Spéciales

    FONCTIONS SPÉCIALES Commande de zoom automatique Si le flash fonctionne avec un appareil photo qui En fonction du type d'appareil photo, il existe transmet les données concernant la distance focale, différentes fonctions spéciales. la position zoom du réflecteur s'adapte automatique- Pour accéder aux fonctions spéciales et pour les ment à...
  • Seite 115 Procédure de réglage Retour à l'auto-zoom 1. Appuyez sur la touche de manière à faire 1. Appuyer sur le déclencheur de l'appareil photo apparaître le menu sélection afin d'établir un échange de données entre 2. Appuyer sur la touche sensitive de l'écran l'appareil photo et le flash tactile...
  • Seite 116: Diffuseur Grand Angle

    DIFFUSEUR GRAND ANGLE MODE M-SLAVE Le diffuseur grand angle intégré permet d'éclairer Dans ce mode, le flash peut s'utiliser comme source des distances focales à partir de 12 mm. de lumière secondaire à distance de l'appareil photo et sans fil. Pour cela, il est déclenché sur l'appareil Procédure photo par l'éclair principal du flash (maître).
  • Seite 117 Paramétrage d'une puissance lumineuse partielle 1. Sur l'écran tactile, appuyer sur la touche sensitive de la puissance lumineuse partielle jusqu'à P1/1 ce qu'apparaisse la liste de sélection correspon- dante 2. A l'aide des flèches ▲ ▼ , amener la puissance lumineuse partielle souhaitée , ...
  • Seite 118 Paramétrage de la synchronisation/de la Fonction apprentissage fonction apprentissage La « fonction apprentissage » permet l'adaptation 1. Paramétrer le mode sur l'appareil M-SLAVE personnalisée automatique du flash secondaire à la photo partie technique du flash maître. Elle prend en 2. Sur l'écran tactile, appuyer sur la touche sensitive compte si celui-ci utilise un ou plusieurs pré-éclairs, jusqu'à...
  • Seite 119 Désactivation du mode pour le flash M-SLAVE 1. Sur l'écran tactile, appuyer sur la touche sensitive pour le mode de fonctionnement affiché jusqu'à ce qu'apparaisse la liste de sélection correspon- dante 2. A l'aide des flèches ▲ ▼ , amener le mode de fonctionnement souhaité...
  • Seite 120: Fonctions Menu

    FONCTIONS MENU RÉFLECTEUR SECONDAIRE SUB-REFL. MENU Le réfl ecteur secondaire sert d'illuminateur frontal MODE RAPID en cas d'éclair indirect si le réfl ecteur principal est En mode de fonctionnement du fl ash , le orienté de côté ou vers le haut. Si la quantité de temps de recyclage dépend de la lumière nécessaire lumière du réfl ecteur secondaire est trop importante, à...
  • Seite 121: Lumière Test Testlight

    LUMIÈRE TEST TESTLIGHT La lumière test est une lumière du fl ash strobosco- pique à fréquence élevée. Pendant une durée d'environ 3 s, on a l'impression d'une lumière quasi continue. La lumière test permet d'évaluer la répartition de la lumière et les ombres avant même de prendre un cliché.
  • Seite 122: Mode Zoom Zoom Mode

    MODE ZOOM Procédure de réglage ZOOM MODE 1. Appuyez sur la touche de manière à faire Mode zoom STANDARD SOFT SPOT apparaître le menu sélection En mode zoom , la position du réflecteur Standard 2. Appuyer sur la touche sensitive de l'écran MEN U s'adapte à...
  • Seite 123: Adaptation Du Format De Prise De Vue Zoom Size

    Adaptation du format de prise de vue ZOOM SIZE Sur certains types d'appareils numériques, il est possible d'adapter l'affichage de la position du réflecteur au format de prise de vue (dimensions du capteur, par ex. 24 x 36 mm, ou APS-C) grâce à la fonction ZOOM-SIZE Procédure de réglage...
  • Seite 124: Lumière Auxiliaire Af Af Beam

    LUMIÈRE AUXILIAIRE AF Procédure de réglage AF BEAM 1. Appuyez sur la touche de manière à faire Si le système de mesure autofocus d'un appareil apparaître le menu sélection photo ne peut pas faire une mise au point nette par 2.
  • Seite 125: Séquences D'exposition Au Flash Flash Bracketing

    SÉQUENCES D'EXPOSITION AU FLASH La première prise de vue est réalisée sans valeur corrigée, la deuxième avec une correction négative et FLASH BRACKETING la troisième avec une correction positive. En mode de fonctionnement du flash , il est • Sur l'écran s'affiche pour la première prise de vue possible de réaliser une séquence d'exposition au , pour la deuxième et la valeur corrective...
  • Seite 126: Signal Sonore Beep

    SIGNAL SONORE Signal sonore après la mise en marche du flash : BEEP Un son bref (env. 2 s) continu retentit après la mise Grâce à la fonction , l'utilisateur peut se faire BEEP en marche et indique la disponibilité du flash. communiquer de manière acoustique l'état de certaines fonctions du flash.
  • Seite 127: Verrouillage / Déverrouillage

    VERROUILLAGE / DÉVERROUILLAGE RACCORDEMENT D'UNE SOURCE D'ALIMENTA- TION ÉLECTRIQUE EXTERNE Il est possible de bloquer les réglages du flash pour empêcher tout déréglage involontaire. Dans les magasins spécialisés dans le matériel photographique, il existe pour ce flash un pack Procédure de verrouillage/déverrouillage batterie/piles externe Metz.
  • Seite 128: Programmes Favoris

    PROGRAMMES FAVORIS TECHNIQUES DE FLASH Dans la photo au flash, des situations courantes FLASH INDIRECT reviennent sans cesse (par ex. fêtes d'anniversaire Grâce au flash indirect, le sujet est éclairé de manière dans le séjour familial, etc.). Ce flash offre la tamisée, ce qui réduit aussi le contraste des ombres.
  • Seite 129: Flash Indirect Avec Carte De Réflecteur

    FLASH INDIRECT AVEC CARTE DE RÉFLECTEUR PRISES DE VUE DE PRÈS ET MACROPHOTOS Avec un fl ash indirect à carte de réfl ecteur Dans la zone de près et pour les macrophotos, le intégrée, la lumière d'eff et peut atteindre les yeux des défaut de parallaxe entre le fl ash et l'objectif peut personnages.
  • Seite 130: Synchronisation Du Flash

    SYNCHRONISATION DU FLASH SYNCHRONISATION NORMALE En synchronisation normale, le flash se déclenche au COMMANDE AUTOMATIQUE DE LA VITESSE DE début de la durée d'exposition. La synchronisation SYNCHRO-FLASH normale est le mode standard et elle est possible sur En fonction du type d'appareil photo et de son mode tous les appareils photo.
  • Seite 131: Synchronisation Sur La Fin Du Temps De Pose

    SYNCHRONISATION SUR LA FIN DU TEMPS DE LA PRISE SYNCHRONE POSE REAR Le flash peut être déclenché à partir de la prise Certains appareils photo offrent la possibilité de synchrone en mode flash automatique , en mode synchronisation sur la fin du temps de pose. Ceci est flash manuel ou en mode flash stroboscopique.
  • Seite 132: Paramétrages De L'écran

    PARAMÉTRAGES DE L'ÉCRAN ROTATION ROTATION Orienter le flash à l'horizontale permet d'orienter LUMINOSITÉ BRIGHTNESS aussi l'écran. La luminosité de l'écran peut se régler sur cinq niveaux différents. Procédure de réglage 1. Appuyer sur la touche de manière à faire Procédure de réglage apparaître le menu sélection 1.
  • Seite 133: Maintenance Et Entretien

    Vous trouverez plus de détails sur Internet à la page Le paramétrage choisi est immédiatement d'accueil Leica : www.leica-camera.com opérationnel et le flash est réinitialisé dans sa configuration par défaut. Les mises à jour du microprogramme du flash ne sont pas concer-...
  • Seite 134: Que Faire En Cas De Dysfonctionnement

    QUE FAIRE EN CAS DE DYSFONCTIONNE- La lumière auxiliaire AF du flash n'est pas activée MENT ? – Le flash n'est pas prêt à flasher. S'il arrivait par ex. que des indications absurdes – L'appareil photo ne fonctionne pas en mode apparaissent sur l'écran du flash ou que ce dernier ne (S-AF).
  • Seite 135 La position zoom du réflecteur ne s'adapte pas Le passage automatique en vitesse de synchro- automatiquement à la position zoom instanta- flash n'a pas lieu née de l'objectif – L'appareil ou l'objectif possède un verrouillage centralisé (la plupart des appareils compacts). –...
  • Seite 136: Caractéristiques Techniques

    CARACTÉRISTIQUES TECHNIQUES Éclairage du réflecteur du zoom motorisé A partir de 24 mm ou de 12 mm avec diffuseur grand angle intégré Nombre-guide maximal (ISO 100, position du zoom 200 mm) Plages d'orientation et positions de calage de la tête du réflecteur En système métrique : 64 / En système anglo-saxon : 210 Verticalement : -9°...
  • Seite 137 Élimination des piles et des batteries – Ne pas jeter les batteries ni les piles dans les ordures ménagères. Lors du retour des piles ou batteries usagées, utilisez l'un des circuits spécialisés existant. – Rendez uniquement les piles et batteries déchargées. Les piles et batteries sont généralement considérées comme déchargées si l'appareil fonctionnant avec elles ne marche plus correctement après un usage prolongé...
  • Seite 138: Leica Product Support

    Pour l'entretien de votre équipement Leica ou en cas de problème, le service e-mail à toutes les questions d'ordre technique se rapportant aux produits Leica, Customer Care (SAV) de Leica Camera AG ou le service de réparation d'une des ainsi qu'aux logiciels qui les accompagnent.
  • Seite 140 INHOUDSOPGAVE Het keuzemenu ..................148 Het INFO-scherm ..................149 Automatische apparaat-uitschakeling STANDBY .........150 LED-weergaven ..................151 Voorwoord ....................142 Weergave paraatheid flits ................151 Veiligheidsvoorschriften .................142 Weergave belichtingscontrole ..............151 Weergaven op het display ...............151 Milieuvriendelijk afvoeren van elektrische Displayverlichting ..................151 en elektronische apparatuur ..............143 De flitsmodus weergeven ................
  • Seite 141 Actieradius-weergaven in m of ft m/ft ............170 Flitsbelichtingsreeksen FLASH BRACKETING ..........171 Reserveonderdelen .................182 Geluidssignaal BEEP .................. 172 Vergrendeling / ontgrendelen ..............173 Leica service-adressen ................184 Externe stroombron POWERPACK ............. 173 Appendix ....................282 Favorietenprogramma´s .................174 Flitstechnieken ..................174 Indirect flitsen ................... 174 Indirect flitsen met reflectorkaart ..............
  • Seite 142: Voorwoord

    Gebruik dit apparaat waarvoor het is bedoeld: Geachte klant Leica dankt u voor de aanschaf van het systeemflitsapparaat Leica SF 64 en • Dit flitsapparaat is uitsluitend bestemd en toegelaten voor de belichting van feliciteert u met deze beslissing. U hebt met dit flitsapparaat de beste keuze onderwerpen in het fotografische bereik.
  • Seite 143: Milieuvriendelijk Afvoeren Van Elektrische En Elektronische Apparatuur

    MILIEUVRIENDELIJK AFVOEREN ELEKTRI- • Om dezelfde reden mag u het apparaat niet blootstellen aan druppen of spatwater, noch het met vochtige handen aanraken, of het proberen uit SCHE EN ELEKTRONISCHE APPARATUUR elkaar te nemen, te repareren of om te bouwen! In het apparaat bevinden zich geen onderdelen die door een leek kunnen worden gerepareerd.
  • Seite 144: Benaming Van De Onderdelen

    BENAMING VAN DE ONDERDELEN CAMERATYPE-AFHANKELIJKE FLITSFUNCTIES Vooraanzicht De hieronder vermelde flitsfuncties zijn beschikbaar bij de betreffende AF-hulplicht aangegeven camerasystemen. Fotosensor • Flitsparaatheids-weergave in de camerazoeker / cameramonitor Hoofdreflector • Automatische flitssynchroontijd-regeling Tweede reflector • Regeling automatisch ophelderings-flitsen Voet met • TTL-flitsmodus Kartelmoer •...
  • Seite 145 Opmerking: • De beschrijvingen in deze handleiding beperken zich in wezen tot het gebruik van de Leica SF 64 aan en met Leica camera´s van de momenteel leverbare reeksen. • In het kader van deze handleiding worden uitsluitend de functies beschreven die op het flitsapparaat zelf worden ingesteld.
  • Seite 146: Voorbereidingen

    VOORBEREIDINGEN VOEDINGSSPANNING Batterij verwisselen Het flitsapparaat kan naar wens worden gebruikt met hoogwaardige batterijen: FLITSAPPARAAT AANBRENGEN / AFNEMEN • Vier nikkel-metaal-hydride batterijen 1,2 V, type IEC HR6 (AA / Mignon), Camera en flitsapparaat uitschakelen duidelijk grotere capaciteit dan NC–batterij en milieuvriendelijker, want 1.
  • Seite 147: Batterijen Verwisselen

    Batterijen verwisselen Let op: De batterijen zijn leeg respectievelijk verbruikt als de Let bij het plaatsen van de batterijen op de juiste flits-volgtijd (tijd van het flitsen met volledige polariteit conform de symbolen in het batterijvak. lichtcapaciteit (bijvoorbeeld bij M) tot aan het Verwisselde polen kunnen tot vernieling van het opnieuw oplichten van de weergave paraatheid flits) apparaat leiden! Explosiegevaar bij ondeskundig...
  • Seite 148: Het Flitsapparaat In- En Uitschakelen

    HET FLITSAPPARAAT IN- EN UITSCHAKE- Na het indrukken van de toets kunnen de fl itsparameters worden ingesteld. zie pagina 157 – (Deellichtvermogen), Flitsapparaat met de toets inschakelen – (Belichtingscorrectie), zie pagina 156 • Het startscherm verschijnt. Bij parate fl its brandt –...
  • Seite 149: Het Info-Scherm

    HET INFOSCHERM Na het indrukken van de toets kunnen de MENU volgende functies worden ingesteld. De actuele instellingen van het flitsapparaat kunnen , zie pagina 166 RAPID tijdens het gebruik worden weergegeven. , zie pagina 166 SUB-REFL. Op het touch-display de toets indrukken.
  • Seite 150: Het Apparaat Automatisch Uitschakelen

    HET APPARAAT AUTOMATISCH UITSCHAKELEN • In alle modi wordt na circa 10 s het beeldscherm ingesteld op de helft van de helderheid, om energie In de fabriek is het fl itsapparaat zodanig ingesteld dat te besparen. Met iedere toetsdruk of tik op het het circa 10 minuten beeldscherm wordt de gangbare helderheid weer –...
  • Seite 151: Led-Weergaven

    LED-WEERGAVEN WEERGAVEN OP HET DISPLAY De meeste camera's brengen de waarden voor ISO, objectief-brandpuntsafstand (mm) en diafragma over FLITSPARAATHEIDS-WEERGAVE aan het fl itsapparaat. Deze past zijn vereiste • Bij geladen fl itscondensator brandt op het instellingen automatisch aan. Hij berekent uit de fl itsapparaat de toets groen en geeft daarmee waarden en zijn richtwaarde de maximale actieradius...
  • Seite 152: De Flitsmodus Weergeven

    DE FLITSMODUS WEERGEVEN Actieradius-weergave in de TTL-/ TTL-HSS-flitsmodus Op het display wordt de ingestelde flitsmodus In de flitsmodi (zie pagina 154) TTL-HSS weergegeven. Daarbij zijn afhankelijk van het wordt op het display de waarde voor de minimale en cameratype verschillende weergaven voor de maximale actieradius van het flitslicht aangegeven.
  • Seite 153: Weergaven In De Camerazoeker

    Actieradius-weergave in de handmatige WEERGAVEN IN DE CAMERAZOEKER flitsmodus Voorbeelden voor weergaven in de camerazoeker: In de handmatige flitsmodus (zie pagina 157) wordt • Flitssymbool knippert op het display de afstandswaarde weergegeven die Oproep tot gebruik, respectievelijk tot het moet worden nageleefd voor een correcte flitsverlich- inschakelen van het flitsapparaat.
  • Seite 154: Flitsmodi

    FLITSMODI -FLITSMODUS In deze flitsmodus realiseert u op eenvoudige wijze Afhankelijk van het cameratype kunt u kiezen uit de zeer goede flitslicht-opnamen. Hier wordt de volgende flitsmodi: flits-belichtingsmeting verzorgd door een sensor in de – , (zie pagina 154) camera. Deze meet het door het onderwerp –...
  • Seite 155: Automatische Kortstondige Synchronisatie

    AUTOMATISCHE KORTSTONDIGE SYNCHRONISA- AUTOMATISCHE FLITSMODUS TTL-HSS In de automatische flitsmodus meet de fotosensor Verschillende camera´s ondersteunen de automati- van het flitsapparaat het door het onderwerp sche kortstondige synchronisatie (zie camera- gereflecteerde licht. De fotosensor heeft een handleiding). Met deze flitsmodus is het mogelijk ook meethoek van circa 25°...
  • Seite 156: Flitsbelichtingscorrecties

    FLITSBELICHTINGSCORRECTIES Opmerking: • Een flitsbelichtingscorrectie in de -flitsmodi kan De belichtingsautomaat van de meeste camera´s is uitsluitend dan plaatsvinden als de camera de afgestemd op een reflectiegraad van 25% (gemiddelde instelling van een correctiewaarde op het reflectiegraad van flitsvoorwerpen). flitsapparaat ondersteunt (zie camera-handleiding)! Een donker onderwerp dat veel licht absorbeert of Indien niet, wordt de ingestelde correctiewaarde een licht of sterk reflecterend onderwerp, of een...
  • Seite 157: Handmatige Flitsmodus M

    HANDMATIGE FLITSMODUS Opmerking: Verschillende camera's ondersteunen de handmatige In de handmatige flitsmodus wordt door het flitsmodus uitsluitend in de cameramodus (Manuell flitsapparaat ongeregeld de volledige energie = handmatig). afgestraald, in zoverre geen deellichtvermogen is In andere cameramodi volgt een foutmelding op het ingesteld.
  • Seite 158: Stroboscoop-Flitsmodus Strobo

    STROBOSCOOP-FLITSMODUS Voor een stroboscoop-opname moet de flitsfrequen- tie (flitsen per seconde) en het aantal flitsen per De stroboscoop-modus is een handmatige flitsmodus. ontspanning worden ingesteld. Daarbij kunnen meerdere flitsbelichtingen op één afbeelding worden gemaakt. Dat is bijzonder Aantal stroboscoopflitsen interessant bij bewegingsstudies en effect-opnamen. U kunt het aantal flitsen instellen tussen Bij de stroboscoop-modus worden meerdere flitsen afhankelijk van het ingestelde deellichtvermogen (zie...
  • Seite 159 Stroboscoop-flitsfrequentie De flitsfrequentie geeft het aantal flitsen per seconde aan. U kunt de flitsfrequentie instellen tussen . Het maximaal mogelijke aantal flitsen wordt daarbij automatisch aangepast. Voor kortere flitslichttijden kunt u het deellichtvermo- gen handmatig instellen tot op een minimale waarde 1/256 Flitsfrequentie ( )instellen...
  • Seite 160: Speciale Functies

    SPECIALE FUNCTIES Automatische zoomregeling Als het flitsapparaat met een camera wordt gebruikt Afhankelijk van het cameratype kunt u kiezen uit die gegevens van de objectief-brandpuntsafstand verschillende speciale functies. overdraagt, past de zoompositie van de reflector zich Voor het oproepen en instellen van de speciale automatisch aan aan de objectief-brandpuntsafstand.
  • Seite 161 Instelprocedure Terugstellen op auto-zoom -Toets zo vaak indrukken, tot het keuzeme- 1. Ontspanknop camera aantikken, opdat een nu verschijnt gegevensuitwisseling tussen camera en 2. Op touch-display op sensortoets drukken flitsapparaat plaatsvindt 3. Met naar het rood omrande, centrale -Toets zo vaak indrukken, tot het keuzemenu ▲...
  • Seite 162: Groothoeklens

    GROOTHOEKLENS M-SLAVE-MODUS Met de geïntegreerde groothoeklens kunnen In deze modus kan het flitsapparaat draadloos en van brandpuntsafstanden vanaf 12 mm worden verlicht. de camera verwijderd als tweede lichtbron worden gebruikt. Daartoe wordt hij door de hoofdflits van het Procedure: (hoofd-)flitsapparaat op de camera geactiveerd. Groothoeklens uit de reflector naar voren tot aan de In de modus is in het algemeen slechts de...
  • Seite 163 Deellichtvermogen instellen: 1. Op touch-display zo vaak op de sensortoets voor deellichtvermogen drukken tot de betreffen- P1/1 de keuzelijst verschijnt 2. Met gewenste deellichtvermogen ▲ ▼ , ... naar het rood omrande, centrale 1/256 veld brengen 3. Op geselecteerde deellichtvermogen drukken De geselecteerde instelling wordt onmiddellijk overgenomen.
  • Seite 164 Synchronisatie / aanleerfunctie instellen Aanleerfunctie 1. Op de camera de modus instellen M-SLAVE De 'aanleerfunctie' maakt de individuele automati- 2. Op het touch-display drukt u zo vaak op de sche aanpassing van het tweede flitsapparaat aan de sensortoets tot de betreffende SYNC ??? flitstechniek van het hoofd-flitsapparaat mogelijk.
  • Seite 165 -flitsmodus uitschakelen M-SLAVE 1. Op het touch-display drukt u zo vaak op de sensortoets voor de weergegeven modus tot de betreffende keuzelijst verschijnt 2. Met de gewenste modus naar het rood ▲ ▼ omrande, centrale veld brengen 3. Op de gewenste modus drukken De geselecteerde modus wordt onmiddellijk overgenomen.
  • Seite 166: Menufuncties

    MENUFUNCTIES TWEEDE REFLECTOR SUB-REFL. MENU De tweede refl ector dient voor het frontaal -MODUS RAPID verlichten bij indirect fl itsen, als de hoofd-refl ector In de fl itsmodi hangt de fl its-volgtijd van het zijwaarts of naar boven is weggezwenkt. Als de feit hoeveel licht voor de opname nodig is.
  • Seite 167: Instellicht Testlight

    INSTELLICHT TESTLIGHT Bij het instellicht gaat het om een stroboscoop-fl its- licht met hoge frequentie. Bij een duur van circa 3 s ontstaat de indruk van een quasi-permanent licht. Met het instellicht kan de lichtverdeling en schaduw- vorming reeds vóór een opname worden beoordeeld. Het instellicht wordt geactiveerd met de toets Instelprocedure -Toets...
  • Seite 168: Zoommodus Zoom Mode

    ZOOMMODUS Instelprocedure ZOOM MODE -Toets zo vaak indrukken, tot het keuzeme- , respectievelijk zoommodus STANDARD SOFT SPOT nu verschijnt Bij de zoommodus wordt de zoompositie Standard 2. Op touch-display op sensortoets drukken MENU van de reflector aangepast aan de objectief-brand- 3.
  • Seite 169: Opnameformaat-Aanpassing Zoom Size

    Opnameformaat-aanpassing ZOOM SIZE Bij enkele typen digitale camera's kan de weergave voor de positie van de reflector met behulp van de functie worden aangepast aan het ZOOM-SIZE opnameformaat (sensorafmetingen, bijvoorbeeld 24x36 mm, of APS-C). Instelprocedure -Toets zo vaak indrukken, tot het keuzeme- nu verschijnt 2.
  • Seite 170: Af-Hulplicht Af Beam

    AF-HULPLICHT Instelprocedure AF BEAM -Toets zo vaak indrukken, tot het keuzeme- Als het autofocus-meetsysteem van een camera nu verschijnt vanwege gebrekkig omgevingslicht niet kan 2. Op touch-display op sensortoets drukken MENU scherpstellen, activeert de camera het in het 3. Met naar het rood omrande, ▲...
  • Seite 171: Flitsbelichtingsreeksen Flash Bracketing

    FLITS-BELICHTINGSREEKSEN De eerste opname wordt zonder correctie gemaakt, FLASH BRACKETING de tweede met minus-correctie, de derde met In de flitsmodi kan een flits-belichtingsreeks plus-correctie. worden gerealiseerd. Deze bestaat uit drie op elkaar • Op het display wordt bij de eerste opname volgende opnamen met verschillende flitsbelichtings- weergegeven, bij de tweede en de minus-cor-...
  • Seite 172: Geluidssignaal Beep

    GELUIDSSIGNAAL Akoestische melding na het inschakelen van het BEEP flitsapparaat: Met de functie kan de gebruiker enkele functies BEEP Een korte (circa 2 s) ononderbroken toon na het van het flitsapparaat akoestisch laten melden. inschakelen geeft de flitsparaatheid van het Daardoor kan hij zich volledig op het onderwerp en flitsapparaat aan.
  • Seite 173: Vergrendeling / Ontgrendelen

    VERGRENDELING / ONTGRENDELEN EXTERNE STROOMBRON AANSLUITEN De instellingen op het flitsapparaat kunnen worden In de foto-vakhandel is voor dit flitsapparaat een vergrendeld tegen abusievelijk instellen. extern batterijpakket van Metz verkrijgbaar. Dat biedt een aanzienlijk hoger aantal flitsen en een hogere Instelprocedure flitsfrequentie dan met stroombronnen in het flitsapparaat zelf.
  • Seite 174: Favorietenprogramma´s

    FAVORIETENPROGRAMMA´S FLITSTECHNIEKEN In de flitslicht-fotografie zijn er steeds terugkerende INDIRECT FLITSEN standaard situaties (bijvoorbeeld verjaardagsfeestjes Door indirect flitsen wordt het onderwerp minder in eigen woonkamer en dergelijke). Dit flitsapparaat verlicht en een sterke schaduwvorming verminderd. biedt de mogelijkheid, uw instellingen voor dergelijke Bovendien wordt natuurlijke lichtafname van standaard situaties op te slaan als favorietenprogram- voorgrond naar achtergrond verminderd.
  • Seite 175: Indirect Flitsen Met Reflectorkaart

    INDIRECT FLITSEN MET REFLECTORKAART DICHTBIJ-/MACROOPNAMEN Door indirect fl itsen met de geïntegreerde refl ector- In het dichtbij-bereik en bij macroopnamen kunnen er kaart kunnen bij mensen spotlichtjes in de ogen door de parallaxfouten tussen fl itsapparaat en worden gecreëerd. objectief aan de onderste beeldrand verduisteringen optreden.
  • Seite 176: Flitssynchronisatie

    FLITSSYNCHRONISATIE GANGBARE SYNCHRONISATIE Bij de gangbare synchronisatie wordt het flitsapparaat AUTOMATISCHE FLITSSYNCHROONTIJD-REGE- aan het begin van de sluitertijd geactiveerd. De LING gangbare synchronisatie is de standaard modus en Afhankelijk van het cameratype en cameramodus wordt door alle camera's gerealiseerd. Zij is geschikt wordt bij het bereiken van de flitsparaatheid de voor de meeste flits-opnamen.
  • Seite 177: Synchronisatie Aan Het Einde Van De Belichtingstijd

    DE SYNCHROONBUS SYNCHRONISATIE AAN HET EINDE VAN DE Het flitsapparaat kan in de automatische flitsmodus BELICHTINGSTIJD REAR , in de handmatige flitsmodus en in de strobo- Enkele camera´s bieden de mogelijkheid voor scoopmodus via de synchroonbus worden geacti- synchronisatie aan het einde van de belichtingstijd. veerd.
  • Seite 178: Beeldscherm-Instellingen

    BEELDSCHERM-INSTELLINGEN DRAAIEN ROTATION Bij het zwenken van het flitsapparaat in het horizon- HELDERHEID BRIGHTNESS tale vlak kan de beeldschermweergave eveneens De beeldscherm-helderheid kan in vijf stappen worden gezwenkt. worden veranderd. Instelprocedure Instelprocedure -Toets zo vaak indrukken, tot het keuzeme- -Toets zo vaak indrukken, tot het keuzeme- nu verschijnt nu verschijnt...
  • Seite 179: Onderhoud En Service

    De geselecteerde instelling wordt onmiddellijk Nadere informatie vindt u op de startpagina van overgenomen en het flitsapparaat wordt Leica: www.leica-camera.com teruggesteld op de fabrieksinstelling. Dat geldt niet voor firmwareupdates van het flitsapparaat!
  • Seite 180: Hulp Bij Storingen

    HULP BIJ STORINGEN Het AF-hulplicht van het flitsapparaat wordt niet geactiveerd Mocht het ooit gebeuren dat bijvoorbeeld op het – Het flitsapparaat is niet klaar om te flitsen. display van het flitsapparaat betekenisloze weergaven – De camera werkt niet in de modus Single-AF verschijnen of dat het niet naar behoren functioneert, (S-AF).
  • Seite 181: Het Diafragma F Kan In Het Flitsapparaat Niet Worden Versteld

    De zoompositie van de reflector wordt niet Er vindt geen automatische omschakeling naar automatisch aangepast aan de actuele zoompo- de flitssynchroontijd plaats sitie van het objectief – De camera / het objectief heeft een centrale sluiter (de meeste compacte camera´s). –...
  • Seite 182: Technische Gegevens

    TECHNISCHE GEGEVENS Belichting van de motorzoom-reflector Vanaf 24 mm, vanaf 12 mm met geïntegreerde groothoeklens Maximale richtwaarde (bij ISO 100, zoompositie 200 mm) Zwenkbereiken en vastzetstanden van de reflectorkop In het metersysteem: 64 / In het feetsysteem: 210 Verticaal: -9° 45° 60° 75° 90° Flitsmodi Horizontaal tegen de klok in: 60°...
  • Seite 183: Batterijen Afvoeren

    Batterijen afvoeren – Batterijen horen niet bij het huisvuil! Maak bij de teruggave van gebruikte batterijen gebruik van een aanwezig terugnamesysteem. – Geef uitsluitend ontladen batterijen af. Batterijen zijn in de regel ontladen als het erdoor gevoede apparaat na langer gebruik van de batterijen niet meer perfect functioneert.
  • Seite 184: Leica Product Support

    Leica-vertegenwoordiging in uw land (voor adressenlijst zie Ook voor koopadvies en het bestellen van handleidingen is dit uw contactadres. garantiebewijs). U kunt uw vragen eveneens via het contactformulier op de website van Leica Ca- Leica Camera AG mera AG aan ons richten.
  • Seite 186 INDICE Menu di selezione ..................194 Schermata INFO ..................195 Spegnimento automatico (STANDBY) ............196 Indicatori LED ...................197 Prefazione ....................188 Indicatore di flash pronto ................197 Avvertenze sulla sicurezza ..............188 Indicatore di controllo dell'esposizione ............197 Indicatori sul display ................197 Smaltimento dei dispositivi elettrici ed elettronici ......189 Illuminazione del display ................
  • Seite 187 Serie di esposizioni con flash FLASH BRACKETING ........217 Ricambi .....................228 Segnale acustico BEEP ................218 Bloccaggio / sbloccaggio ................219 Indirizzi dell'assistenza Leica ..............230 Sorgente di alimentazione esterna POWERPACK ........219 Appendice ....................282 Programmi preferiti .................220 Tecniche di flash ..................220 Lampo riflesso ..................
  • Seite 188: Prefazione

    Attenzione, uso conforme: Gentile cliente, Leica La ringrazia per l'acquisto del flash di sistema Leica SF 64 e si congratula • Questo flash è destinato e omologato esclusivamente per l'esposizione di con Lei per la scelta. Optando per questo flash, ha compiuto la scelta migliore soggetti in campo fotografico.
  • Seite 189: Smaltimento Dei Dispositivi Elettrici Ed Elettronici

    (Si applica all'UE e agli altri Paesi europei con sistemi di raccolta • Utilizzare solo batterie normali/ricaricabili specificate in questo manuale e differenziata.) omologate da Leica! Il presente apparecchio contiene componenti elettrici e/o elettronici e non può • Non mettere le batterie normali/ricaricabili in cortocircuito e non esporle a pertanto essere smaltito insieme ai normali rifiuti domestici.
  • Seite 190: Denominazione Dei Componenti

    DENOMINAZIONE DEI COMPONENTI FUNZIONI FLASH DIPENDENTI DAL TIPO DI FOTO- CAMERA Vista anteriore Luce ausiliaria AF Le funzioni flash elencate di seguito sono disponibili con i sistemi di fotocamera Fotosensore specificati. Parabola principale • Indicatore di flash pronto nel mirino/monitor della fotocamera Parabola ausiliaria •...
  • Seite 191 Avvertenze: • Le descrizioni contenute nel presente manuale si limitano essenzialmente all’utilizzo di Leica SF 64 con fotocamere Leica delle serie attualmente in commercio. • All'interno di questo manuale vengono descritte esclusivamente le funzioni impostate sul flash stesso. Ciò vale, con alcune eccezioni, anche per gli indicatori sul flash.
  • Seite 192: Preparativi

    PREPARATIVI ALIMENTAZIONE Scelta delle batterie normali o ricaricabili Il flash può essere alimentato indifferentemente dai seguenti tipi di batterie ad MONTAGGIO/RIMOZIONE DEL FLASH alte prestazioni: Spegnimento della fotocamera e del flash • 4 batterie ricaricabili al nichel-metallo idruro da 1,2 V, tipo IEC HR6 (AA / 1.
  • Seite 193: Cambio Delle Batterie Normali/Ricaricabili

    Cambio delle batterie normali/ricaricabili Attenzione: Le batterie normali/ricaricabili sono scariche quando Durante l'inserimento delle batterie normali/ il tempo di ricarica del flash (il tempo che intercorre ricaricabili, fare attenzione alla polarità facendo tra l'attivazione di un lampo alla massima potenza, ad riferimento ai simboli stampigliati sul vano batterie.
  • Seite 194: Accensione E Spegnimento Del Flash

    ACCENSIONE E SPEGNIMENTO DEL Dopo aver premuto il tasto , è possibile impostare i parametri del fl ash. FLASH cfr. pag. 203 – (potenza ridotta), Accendere il fl ash con il tasto – (correzione dell'esposizione), cfr. pag. 202 • Viene visualizzata la schermata iniziale. Quando il –...
  • Seite 195: Schermata Info

    SCHERMATA INFO Dopo aver premuto il tasto , è possibile MENU impostare le seguenti funzioni. Le impostazioni correnti del flash possono essere , cfr. pag. 212 RAPID visualizzate durante il funzionamento. , cfr. pag. 212 SUB-REFL. Sul display tattile premere il tasto . , cfr.
  • Seite 196: Impostazione Dello Spegnimento Automa- Tico

    SPEGNIMENTO AUTOMATICO • Il fl ash si spegne completamente circa 1 ora dopo l'ultimo utilizzo. Per impostazione di fabbrica, il fl ash entra in modalità • In tutte le modalità, la luminosità dello schermo vie- standby circa 10 minuti ne ridotta a metà dopo circa 10s per risparmiare –...
  • Seite 197: Indicatori Led

    INDICATORI LED INDICATORI SUL DISPLAY La maggior parte delle fotocamere trasmette al fl ash i valori relativi a ISO, lunghezza focale dell'obiettivo INDICATORE DI FLASH PRONTO (mm) e apertura di diaframma. A sua volta, il fl ash • Quando il condensatore del fl ash è carico, il tasto regola automaticamente le proprie impostazioni nella sul fl ash si accende con una luce verde misura necessaria.
  • Seite 198: Indicatore Della Modalità Flash

    INDICATORE DELLA MODALITÀ FLASH Indicatore della portata in modalità flash TTL/TTL-HSS Sul display viene visualizzata la modalità flash Nelle modalità flash (cfr. pag. 200) TTL-HSS selezionata. A seconda del tipo di fotocamera, appare sul display il valore della portata minima e possono apparire indicatori diversi per la modalità...
  • Seite 199: Indicatori Nel Mirino Della Fotocamera

    Indicatore della portata in modalità INDICATORI NEL MIRINO DELLA flash manuale FOTOCAMERA In modalità flash manuale (cfr. pag. 203) viene Esempi di indicatori nel mirino della fotocamera: visualizzato sul display il valore della distanza da • L'icona del flash lampeggia mantenere per una corretta esposizione flash del invito a utilizzare o accendere il flash.
  • Seite 200: Modalità Flash

    MODALITÀ FLASH MODALITÀ FLASH Questa modalità flash permette di ottenere facilmente A seconda del tipo di fotocamera sono disponibili le ottime riprese con il flash. La misurazione dell'esposi- seguenti modalità flash: zione flash viene effettuata da un sensore all'interno – , (cfr.
  • Seite 201: Sincronizzazione Automatica Ad Alta Velocità

    SINCRONIZZAZIONE AUTOMATICA AD ALTA MODALITÀ FLASH AUTOMATICA VELOCITÀ TTL-HSS In modalità flash automatica il fotosensore del flash Diverse fotocamere supportano la sincronizzazione misura la luce riflessa dal soggetto. Il fotosensore automatica ad alta velocità (cfr. manuale della ha un angolo di misurazione di circa 25° e misura fotocamera).
  • Seite 202: Correzioni Dell'esposizione Flash

    CORREZIONI DELL'ESPOSIZIONE CON FLASH Avvertenze: • La correzione dell'esposizione flash nelle modalità Il controllo automatico dell'esposizione del flash è flash è possibile solo quando la fotocamera impostato nella maggior parte delle fotocamere su un supporta l'impostazione di un valore di correzione grado di riflessione del 25% (il grado di riflessione sul flash (cfr.
  • Seite 203: Modalità Flash Manuale M

    MODALITÀ FLASH MANUALE Avvertenza: Diverse fotocamere supportano la modalità flash In modalità flash manuale il flash emette la manuale solo nella modalità (manuale) della massima energia senza alcuna limitazione, a meno fotocamera stessa. Nelle altre modalità della che non sia impostata una potenza ridotta. Per fotocamera appare un messaggio di errore sul display adattare la luce alla situazione di ripresa, è...
  • Seite 204: Modalità Flash Strobo

    FLASH IN MODALITÀ STROBO Per una ripresa con flash strobo è necessario impostare la frequenza di lampeggio (lampi al La modalità strobo è una modalità flash manuale. Con secondo) e il numero di lampi per ogni scatto. questa modalità è possibile effettuare diverse esposizioni flash in una stessa immagine.
  • Seite 205 Frequenza di lampeggio in modalità strobo La frequenza di lampeggio indica il numero di lampi al secondo. La frequenza di lampeggio può essere impostata su un valore tra . Il numero massimo possibile di lampi viene regolato automaticamente. Per ottenere tempi di lampeggio brevi, è possibile impostare manualmente la potenza ridotta fino a un valore minimo di 1/256...
  • Seite 206: Funzioni Speciali

    FUNZIONI SPECIALI Controllo automatico dello zoom Se il flash viene utilizzato su una fotocamera che A seconda del tipo di fotocamera sono disponibili trasmette i dati relativi alla lunghezza focale varie funzioni speciali. dell'obiettivo, la posizione zoom della parabola viene Per accedere e impostare le funzioni speciali, è...
  • Seite 207 Procedura di impostazione Reset sullo zoom automatico 1. Mantenere premuto il tasto fino a quando 1. Premere il pulsante di scatto della fotocamera appare il menu di selezione per consentire uno scambio dei dati tra il flash e 2. Sul display tattile premere il tasto a sfioramento la fotocamera 2.
  • Seite 208: Diffusore Grandangolare

    DIFFUSORE GRANDANGOLARE MODALITÀ M-SLAVE Con il diffusore grandangolare è possibile In questa modalità il flash può essere controllato in illuminare lunghezze focali a partire da 12mm. remoto e senza cavo come seconda sorgente di luce. In questa configurazione viene attivato dal lampo Procedura: principale del flash primario della fotocamera.
  • Seite 209 Impostazione della potenza ridotta: 1. Sul display tattile premere ripetutamente il tasto a sfioramento della potenza ridotta fino a P1/1 quando appare l'elenco di selezione corrispon- dente 2. Con ▲ ▼ portare la potenza ridotta desiderata nel campo centrale 1/256 circondato da un riquadro rosso 3.
  • Seite 210 Impostazione della sincronizzazione/funzione di Funzione apprendimento apprendimento La "funzione apprendimento" permette di regolare 1. Impostare la modalità sulla fotocamera M-SLAVE separatamente e automaticamente il flash secondario 2. Sul display tattile premere ripetutamente il tasto in base alla modalità flash utilizzata dal flash a sfioramento fino a quando appare SYNC ???
  • Seite 211 Disattivazione della modalità flash M-SLAVE 1. Sul display tattile premere ripetutamente il tasto a sfioramento della modalità visualizzata fino a quando appare l'elenco di selezione corrispon- dente 2. Con ▲ ▼ portare la modalità desiderata nel campo centrale circondato da un riquadro rosso 3.
  • Seite 212: Funzioni Del Menu

    FUNZIONI DEL MENU PARABOLA AUSILIARIA SUB-REFL. MENU La parabola ausiliaria serve all'illuminazione frontale MODALITÀ RAPID con lampi rifl essi quando la parabola principale è Nelle modalità fl ash i tempi di ricarica del rivolta di lato o verso l'alto. Se la quantità di luce della fl ash dipendono dalla quantità...
  • Seite 213: Luce Pilota Testlight

    LUCE PILOTA TESTLIGHT La luce pilota è un lampeggio stroboscopico ad alta frequenza. Con una durata di circa 3s, si genera l'impressione di una luce quasi permanente. Con la luce pilota è possibile valutare la distribuzione della luce e la formazione delle ombre già prima di scattare una ripresa.
  • Seite 214: Modalità Zoom Zoom Mode

    MODALITÀ ZOOM Procedura di impostazione ZOOM MODE 1. Mantenere premuto il tasto fino a quando Modalità zoom STANDARD SOFT SPOT appare il menu di selezione Nella modalità zoom la posizione zoom Standard 2. Sul display tattile premere il tasto a sfioramento della parabola viene adattata alla lunghezza focale MENU della fotocamera.
  • Seite 215: Adattamento Del Formato Della Ripresa Zoom Size

    Adattamento del formato della ripresa ZOOM SIZE In alcuni tipi di fotocamere digitali l'indicazione della posizione della parabola può essere adattata al formato della ripresa (dimensioni del sensore, ad es. 24x36mm o APS-C) con la funzione ZOOM-SIZE Procedura di impostazione 1.
  • Seite 216: Luce Ausiliaria Af Af Beam

    LUCE AUSILIARIA AF Procedura di impostazione AF BEAM 1. Mantenere premuto il tasto fino a quando Quando il sistema di misurazione dell'autofocus di 1. pare il menu di selezione una fotocamera non è in grado di mettere a fuoco a 2.
  • Seite 217: Serie Di Esposizioni Con Flash Flash Bracketing

    SERIE DI ESPOSIZIONI CON FLASH La prima ripresa viene scattata senza un valore di correzione, la seconda con una correzione negativa, FLASH BRACKETING la terzo con una correzione positiva. Nelle modalità flash è possibile eseguire una • Sul display viene visualizzato alla prima ripresa serie di esposizioni con flash.
  • Seite 218: Segnale Acustico Beep

    SEGNALE ACUSTICO Segnale acustico dopo l'accensione del flash: BEEP Un breve segnale continuo (di circa 2s) dopo La funzione permette di accompagnare alcune BEEP l'accensione indica che il flash è pronto per l'uso. funzioni del flash con un segnale acustico. In questo modo, il fotografo può...
  • Seite 219: Bloccaggio / Sbloccaggio

    BLOCCAGGIO / SBLOCCAGGIO COLLEGAMENTO DI UNA SORGENTE DI ALIMENTAZIONE ESTERNA Le impostazioni sul flash possono essere bloccate per prevenire modifiche accidentali. In commercio è disponibile per questo flash un pacco batterie normali/ricaricabili prodotto da Metz. Questo Procedura di impostazione pacco batterie garantisce un numero di lampi significativamente più...
  • Seite 220: Programmi Preferiti

    PROGRAMMI PREFERITI TECNICHE DI FLASH Nell fotografia con flash esistono sempre situazioni LAMPO RIFLESSO ricorrenti (ad es. una festa di compleanno nel salotto Con il lampo riflesso il soggetto viene illuminato con di casa e simili). Questo flash offre la possibilità di una luce più...
  • Seite 221: Lampo Riflesso Con Pannello Riflettente

    LAMPO RIFLESSO CON PANNELLO RIFLETTENTE PRIMI PIANI/MACROFOTOGRAFIE Utilizzando il lampo rifl esso con il pannello rifl ettente Nei primi piani e nelle macrofotografi e possono integrato , possono crearsi picchi di luce negli crearsi ombre a causa dell'errore di parallasse tra occhi delle persone.
  • Seite 222: Sincronizzazione Del Lampo

    SINCRONIZZAZIONE DEL LAMPO SINCRONIZZAZIONE NORMALE Nella sincronizzazione normale il flash viene attivato SINCRONIZZAZIONE AUTOMATICA DEL LAMPO all'inizio del tempo di posa. La sincronizzazione A seconda del tipo di fotocamera e della modalità normale rappresenta la modalità standard ed è utilizzata, quando viene raggiunto lo stato di pronto supportata da tutte le fotocamere.
  • Seite 223: Sincronizzazione A Fine Esposizione

    SINCRONIZZAZIONE A FINE ESPOSIZIONE PRESA DI SINCRONIZZAZIONE REAR Alcune fotocamere offrono un'opzione per eseguire la Il flash può essere attivato in modalità flash automati- sincronizzazione alla fine dell'esposizione. Ciò risulta , in modalità flash manuale e in modalità flash utile, in particolare, nelle esposizioni con tempi di strobo tramite la presa di sincronizzazione.
  • Seite 224: Impostazioni Dello Schermo Luminosità Brightness

    IMPOSTAZIONI DELLO SCHERMO ROTAZIONE ROTATION Quando si ruota il flash in posizione orizzontale, è LUMINOSITÀ BRIGHTNESS possibile ruotare anche il display. La luminosità dello schermo può essere impostata su cinque livelli diversi. Procedura di impostazione 1. Mantenere premuto il tasto fino a quando Procedura di impostazione appare il menu di selezione...
  • Seite 225: Cura E Manutenzione

    SERVICE Per ulteriori informazioni, consultare il sito Internet di 3. Premere RESET Leica alla pagina: www.leica-camera.com 4. Premere rispettivamente per attivare o disattivare la funzione L'impostazione selezionata viene resa immediata- mente effettiva e il flash viene reimpostato sullo stato originale al momento della consegna.
  • Seite 226: Risoluzione Dei Problemi

    RISOLUZIONE DEI PROBLEMI La luce ausiliaria AF del flash non si attiva – Il flash non è pronto per lo scatto. Qualora appaiano, ad esempio, indicazioni o messaggi – La fotocamera non funziona in modalità Single-AF anomali sul display del flash o il dispositivo non (S-AF).
  • Seite 227 La posizione zoom della parabola non viene Il passaggio automatico al tempo di sincronizza- regolata automaticamente sulla posizione zoom zione del flash non avviene corrente dell'obiettivo – La fotocamera/l'obiettivo è dotato di un otturatore centrale (è il caso della maggior parte delle –...
  • Seite 228: Dati Tecnici

    DATI TECNICI Illuminazione della parabola con zoom motorizzato Da 24mm, da 12mm con diffusore grandangolare integrato Numero guida massimo (con ISO 100, posizione zoom 200mm) Campi di orientamento e posizioni di scatto della testa della parabola Con sistema metrico: 64 / Con sistema imperiale: 210 Verticale: -9°...
  • Seite 229 Smaltimento delle batterie normali/ricaricabili – Non disperdere le batterie normali/ricaricabili tra i rifiuti domestici! Per la restituzione di batterie normali/ricaricabili usate utilizzare un sistema di raccolta locale esistente. – Le batterie normali/ricaricabili devono essere smaltite solo completamente scariche. Di norma, le batterie normali/ricaricabili sono completamente scariche quando il dispositivo da esse alimentato non funziona più...
  • Seite 230: Indirizzi Dell'assistenza Leica

    LEICA PRODUCT SUPPORT LEICA CUSTOMER CARE Il Product Support di Leica Camera AG sarà lieto di rispondere per iscritto, per Per la manutenzione dell'attrezzatura Leica e in caso di guasti rivolgersi al telefono o per e-mail alle vostre domande tecniche sui prodotti Leica o sul reparto Customer Care di Leica Camera AG o al Servizio Riparazioni di un software eventualmente incluso.
  • Seite 232 ÍNDICE El menú de selección ................240 La pantalla INFO ..................241 Apagado automático STANDBY ..............242 Indicadores LED ..................243 Prólogo ......................234 Indicación de disponibilidad del flash ............243 Indicaciones de seguridad ..............234 Indicación de exposición correcta ............. 243 Indicaciones en la pantalla ..............243 Eliminación de aparatos eléctricos y electrónicos como residuos ..235 Iluminación de la pantalla ................
  • Seite 233 Horquillado del flash FLASH BRACKETING ..........263 Piezas de recambio .................274 Señal acústica BEEP.................. 264 Bloqueo / desbloqueo ................265 Direcciones del servicio técnico Leica ..........276 Fuentes de energía externas POWERPACK ..........265 Apéndice ....................282 Programas favoritos ................266 Técnicas de flash ..................266 Flash indirecto ..................
  • Seite 234: Estas Instrucciones

    Atención, uso adecuado: Estimada clienta, estimado cliente, Leica le da las gracias por la adquisición del flash Leica SF 64 y le felicita por su • Este flash está previsto y autorizado exclusivamente para proporcionar acertada decisión. Este flash es la mejor opción para su cámara Leica. Le iluminación suplementaria a motivos en el campo fotográfico.
  • Seite 235: Eliminación De Aparatos Eléctricos Yelectrónicos Como Residuos

    ELIMINACIÓN DE APARATOS ELÉCTRICOS Y • ¡Por la misma razón, no exponga la unidad a la humedad, tal como goteo o salpicaduras, ni la toque con las manos mojadas, ni intente desmontar, ELECTRÓNICOS COMO RESIDUOS reparar o reequipar! El interior de la unidad contiene piezas que solo puedan ser reparadas por expertos.
  • Seite 236: Denominación De Los Componentes

    DENOMINACIÓN DE LOS COMPONENTES FUNCIONES DEL FLASH SEGÚN EL TIPO DE CÁMARA Vista desde el frente Las funciones del flash que se enumeran a continuación están disponibles con Luz auxiliar AF los sistemas de cámaras indicados. Fotosensor • Indicación de disponibilidad del flash en el visor/pantalla de la cámara Reflector principal •...
  • Seite 237 • Las descripciones de este manual se limitan esencialmente a la utilización del Leica SF 64 y con las cámaras Leica de las series actualmente disponibles. • En este manual sólo se describirán las funciones que se ajustan en el mismo flash.
  • Seite 238: Preparativos

    PREPARATIVOS ALIMENTACIÓN DE ENERGÍA Selección de pilas o baterías El flash funciona con cualquiera de las siguientes opciones de alta calidad: COLOCACIÓN/EXTRACCIÓN DEL FLASH • 4 pilas de hidruro metálico de níquel de 1,2 V, tipo IEC HR6 (AA/Mignon), Apagado de la cámara y del flash con capacidad significativamente mayor que las pilas de níquel-cadmio y 1.
  • Seite 239: Cambio De Pilas/Baterías

    Cambio de las pilas/batería Atención: Se considera que las pilas o baterías están usadas o Al colocar las pilas o baterías, observar la polaridad vacías, cuando el tiempo de recarga del flash (tiempo correcta indicada por los símbolos del compartimento desde el disparo del flash a plena potencia, por de las pilas.
  • Seite 240: Encendido Y Apagado Del Flash

    ENCENDIDO Y APAGADO DEL FLASH Pulsar la tecla para ajustar los parámetros del fl ash. Encender el fl ash con la tecla v. pág. 249 – (Potencia parcial del destello), • Aparece la pantalla de inicio. Cuando el fl ash está –...
  • Seite 241: La Pantalla Info

    LA PANTALLA INFO Pulsar la tecla para configurar las siguientes MENU funciones. La configuración actual del flash se puede visualizar , v. pág. 258 RAPID durante la operación. v. pág. 258 SUB-REFL. Pulsar la tecla en la pantalla táctil. , v. pág. 261 ZOOM SIZE •...
  • Seite 242: Configuración Del Apagado Automático

    APAGADO AUTOMÁTICO • El fl ash se apaga por completo aproximadamente 1 hora después de la última utilización. Este fl ash está ajustado de fábrica de modo que • En todos los modos, la pantalla se ajusta a la mitad aprox.
  • Seite 243: Indicadores Led

    INDICADORES LED INDICACIONES EN LA PANTALLA La mayoría de las cámaras transmiten los valores de ISO, la distancia focal del objetivo (mm) y la apertura INDICACIÓN DE DISPONIBILIDAD DEL FLASH de diafragma al fl ash. El fl ash entonces ajusta •...
  • Seite 244: Indicación Del Modo De Flash

    INDICACIÓN DEL MODO DE FLASH Indicación del alcance en el modo TTL/TTL-HSS En los modos de flash (v. pág. 246) TTL-HSS La pantalla muestra el modo de flash seleccionado. aparece en la pantalla el valor del alcance mínimo y En función del tipo de cámara, existen diferentes máximo del flash.
  • Seite 245: Indicaciones En El Visor De La Cámara

    Indicación del alcance en el modo manual del INDICACIONES EN EL VISOR DE LA flash CÁMARA En el modo manual del flash (v. pág. 249) aparece en Ejemplos de indicaciones en el visor de la cámara: la pantalla el valor de la distancia que debe mantener- •...
  • Seite 246: Modos De Funcionamiento Del Flash

    MODOS DE FUNCIONAMIENTO DEL FLASH Modo Con el modo TTL se consigue de forma sencilla una Dependiendo del tipo de cámara, los siguientes iluminación muy buena de las tomas con luz de flash. modos de flash están disponibles: En este modo de funcionamiento, la exposición se –...
  • Seite 247: Sincronización Rápida Automática

    SINCRONIZACIÓN RÁPIDA AUTOMÁTICA EN MODO AUTOMÁTICO TTL-HSS En el modo de flash automático un fotosensor del Son varias las cámaras compatible con la sincroniza- flash mide la luz reflejada en el sujeto a fotografiar. ción rápida automática en (consulte el manual de El fotosensor tiene un ángulo de medición de aprox.
  • Seite 248: Compensaciones De La Exposición Del Flash

    COMPENSACIONES DE LA EXPOSICIÓN DEL FLASH Nota: • Una compensación de la exposición del flash en En la mayoría de las cámaras el destello automático los modos sólo es posible cuando la cámara de exposición está adaptado a una reflectividad del permite ajustar un valor de corrección en el flash 25% (el factor de reflectividad promedio de los (consulte el manual de la cámara)
  • Seite 249: Modo Manual M

    MODO MANUAL Nota: Algunas cámaras son compatibles con el modo de En el modo manual del flash , el flash libera un flash manual únicamente cuando la cámara también destello a plena potencia mientras no se haya se encuentra en modo (Manual).
  • Seite 250: Modo Estroboscópico Strobo

    MODO ESTROBOSCÓPICO Para una toma estroboscópica se debe ajustar la frecuencia de disparo del flash (destellos por El modo estroboscópico es un modo de funciona- segundo) y la cantidad de destellos por disparo. miento del flash manual. Con este modo se disparan varios destellos durante una toma.
  • Seite 251 Frecuencia de destellos estroboscópicos La frecuencia de destellos determina la cantidad de destellos por segundo. Se puede ajustar de . La máxima cantidad de destellos posible se ajusta de forma automática. Para alcanzar tiempos de destello cortos, se puede ajustar la potencia parcial del destello manualmente al valor mínimo de 1/256 Configuración de la frecuencia de destellos...
  • Seite 252: Funciones Especiales

    FUNCIONES ESPECIALES Control automático del zoom Si el flash funciona con una cámara que transmite Según el modelo de cámara están disponibles datos sobre la distancia focal del objetivo, la posición distintas funciones especiales. del zoom del reflector se ajusta automáticamente a la Para acceder y configurar las funciones especiales distancia focal del objetivo.
  • Seite 253 Configuración Restablecimiento del modo de Auto-Zoom 1. Pulsar repetidamente la tecla hasta que 1. Pulsar el disparador de la cámara para que se aparezca el menú de selección produzca el intercambio de datos entre el flash y 2. En la pantalla táctil, pulsar la tecla táctil la cámara 3.
  • Seite 254: Difusor De Gran Angular

    DIFUSOR DE GRAN ANGULAR MODO M-SLAVE Con el difusor de gran angular se pueden iluminar En este modo, el flash puede utilizarse de forma distancias focales a partir de 12 mm. remota e inalámbrica de la cámara como una segunda fuente de luz. Para este propósito, el flash es Procedimiento: disparado por el destello principal del flash (guía) de Extraer y soltar el difusor de gran angular del reflector...
  • Seite 255 Configuración de la potencia parcial del destello: 1. En la pantalla táctil, pulsar repetidamente la tecla de potencia parcial del destello hasta que P1/1 aparezca la lista de selección correspondiente 2. Con las teclas desplazar la potencia parcial ▲ ▼ del destello deseada , ...
  • Seite 256 Configuración de la sincronización/función de Función de aprendizaje aprendizaje La "Función de aprendizaje" permite el ajuste 1. Configurar la cámara en el modo M-SLAVE individual del flash secundario automáticamente a la 2. En la pantalla táctil, pulsar repetidamente la tecla técnica de destello del flash guía.
  • Seite 257 Desactivar el modo de flash M-SLAVE 1. En la pantalla táctil, pulsar repetidamente la tecla del modo de funcionamiento indicado hasta que aparezca la lista de selección correspondiente 2. Con las teclas desplazar el modo de ▲ ▼ funcionamiento deseado hasta el campo central encuadrado de rojo 3.
  • Seite 258: Funciones Del Menú

    FUNCIONES DEL MENÚ SEGUNDO REFLECTOR SUB-REFL. MENU El segundo refl ector sirve para la iluminación Modo RAPID frontal, mediante iluminación indirecta, cuando el En los modos de fl ash , el tiempo de recarga refl ector principal está inclinado lateralmente o hacia del fl ash depende de la cantidad de luz necesaria arriba.
  • Seite 259: Luz De Modelado Testlight

    LUZ DE MODELADO TESTLIGHT Se trata de una secuencia de destellos estroboscópi- cos a alta frecuencia con una duración de aprox. 3 segundos, que produce la impresión de una iluminación casi continua. Con la luz de modelado se puede evaluar la distribución de la luz y la formación de som- bras incluso antes de la toma.
  • Seite 260: Modo Del Zoom Zoom Mode

    MODOS DEL ZOOM Configuración ZOOM MODE 1. Pulsar repetidamente la tecla hasta que STANDARD SOFT SPOT aparezca el menú de selección En el modo de zoom la posición del zoom Standard 2. En la pantalla táctil, pulsar la tecla táctil MENU del reflector se ajusta a la distancia focal del objetivo.
  • Seite 261: Ajuste Al Formato De La Toma Zoom Size

    Ajuste al formato de la toma ZOOM SIZE En algunas cámaras digitales, es posible ajustar la indicación de la posición del reflector al formato de la toma (dimensiones del sensor, p.ej. 24X36 mm o APS-C) por medio de la función ZOOM-SIZE Configuración 1.
  • Seite 262: Luz Auxiliar Af Beam

    LUZ AUXILIAR AF Configuración AF BEAM 1. Pulsar repetidamente la tecla hasta que Cuando el sistema de medición autofoco de una aparezca el menú de selección cámara digital no puede enfocar con nitidez debido a 2. En la pantalla táctil, pulsar la tecla táctil MENU una luminosidad ambiente insuficiente, la cámara 3.
  • Seite 263: Horquillado Del Flash Flash Bracketing

    HORQUILLADO DE FLASH La primera toma se realiza sin valor de corrección, la FLASH BRACKETING segunda toma se realiza con la corrección negativa y En los modos de flash se puede realizar un la tercera toma se realiza con la corrección positiva. horquillado de flash.
  • Seite 264: Señal Acústica Beep

    SEÑAL ACÚSTICA Mensaje acústico después de encender el flash: BEEP Un tono continuo corto (unos 2 s) después del Con la función el usuario puede recibir BEEP encendido indica la disponibilidad del destello del información acústica sobre algunas funciones del flash.
  • Seite 265: Bloqueo / Desbloqueo

    BLOQUEO / DESBLOQUEO CONECTAR FUENTES DE ENERGÍA EXTERNAS La configuración del flash se puede bloquear para En los comercios especializados en fotográfica se evitar un ajuste no intencionado. puede adquirir un paquete de pilas/baterías externas (Power Pack) de Metz para este flash. Este paquete Configuración proporciona un número de destellos significativamen- te mayor y un tiempo de recarga del flash más rápido...
  • Seite 266: Programas Favoritos

    PROGRAMAS FAVORITOS TÉCNICAS DE FLASH En las fotografías con flash siempre hay situaciones FLASH INDIRECTO estándar recurrentes (p. ej. fiestas de cumpleaños en Mediante el flash indirecto, el motivo recibe una ilumi- su sala de estar, etc.). Este flash ofrece la posibilidad nación más suave y se atenúa la formación de de guardar la configuración de tales situaciones sombras.
  • Seite 267: Flash Indirecto Con Tarjeta Reflectante

    FLASH INDIRECTO CON TARJETA REFLECTANTE PRIMEROS PLANOS Y MACROFOTOGRAFÍAS Mediante el fl ash indirecto y la tarjeta refl ectante Con fotografía de primeros planos y macrofotografía integrada se pueden conseguir refl ejos especulares puede aparecer un sombreado en el margen inferior en los ojos de las personas.
  • Seite 268: Sincronización Del Flash

    SINCRONIZACIÓN DEL FLASH SINCRONIZACIÓN NORMAL En la sincronización normal, el flash se dispara al CONTROL AUTOMÁTICO DE LA SINCRONIZACIÓN principio del tiempo de obturación. Este es el DEL FLASH funcionamiento estándar que siguen todas las Según el tipo de cámara y el modo de funcionamiento cámaras.
  • Seite 269: Sincronización Con La Segunda Cortinilla

    SINCRONIZACIÓN CON LA SEGUNDA CORTINI- TOMA PARA LA SINCRONIZACIÓN REAR El flash se puede disparar en los modos de funciona- Algunas cámaras ofrecen la posibilidad de la miento automático , manual y estroboscópico a sincronización con la segunda cortinilla, se trata de través de la toma para la sincronización.
  • Seite 270: Ajustes De Pantalla Brillo Brightness

    AJUSTES DE PANTALLA ROTACIÓN ROTATION Al inclinar el flash a la posición horizontal, la pantalla BRILLO BRIGHTNESS también se puede girar. El brillo de la pantalla se puede cambiar en cinco niveles. Configuración 1. Pulsar repetidamente la tecla hasta que Configuración aparezca el menú...
  • Seite 271: Mantenimiento Y Cuidados

    Encontrará más información al respecto en el sitio función web de Leica: www.leica-camera.com El ajuste seleccionado se aplica de forma inmediata y el flash se restablece a su configura- ción de fábrica. Las actualizaciones del firmware...
  • Seite 272: Ayuda En Caso De Problemas

    AYUDA EN CASO DE PROBLEMAS La luz auxiliar AF del flash no se activa – El flash no está disponible Si alguna vez aparecen en la pantalla, por ejemplo, – La cámara no está ajustada en el modo de indicaciones sin sentido o el flash no funciona como funcionamiento (S-AF).
  • Seite 273 La posición del zoom del reflector no se ajusta No tiene lugar una conmutación automática a la automáticamente a la posición real del zoom del velocidad de sincronización del flash objetivo – La cámara/el objetivo tiene un obturador central (como la mayoría de las cámaras compactas). –...
  • Seite 274: Especificaciones Técnicas

    ESPECIFICACIONES TÉCNICAS Iluminación del reflector con zoom motorizado A partir de 24 mm, a partir de 12 mm con difusor de gran angular integrado Máximo número guía (con ISO 100, posición de zoom 200 mm) Gama de inclinación y posiciones de enclavamiento del reflector En metros: 64 / En pies: 210 Vertical: -9°...
  • Seite 275: Eliminación De Las Pilas/Baterías

    Eliminación de las pilas/baterías – Las pilas y baterías usadas no deben tirarse al cubo de la basura doméstica. Para la devolución de sus pilas/baterías gastadas, sírvase utilizar uno de los sistemas de reciclaje existente eventualmente en su país. – Sírvase devolver únicamente pilas/baterías descargadas. Por regla general, las baterías están descargadas cuando el aparato alimentado por ellas no funciona bien después de un largo período de uso de las pilas/baterías.
  • Seite 276: Direcciones Del Servicio Técnico Leica

    LEICA CUSTOMER CARE Si tiene preguntas sobre la aplicación técnica de los productos Leica, incluido el Para el mantenimiento y la reparación de su equipo Leica, están a su disposi- software suministrado, serán respondidas por escrito, por teléfono o por correo ción el departamento Customer Care de Leica Camera AG o el Servicio de...
  • Seite 282: Appendix

    Tabelle 1: Zoom Leitzahlen bei maximaler Lichtleistung (P 1/1) Table 1: 6/9° 8/10° Guide numbers at maximum light output (P 1/1) 10/11° Tableau 1: 12/12° Nombres-guides pour la puissance maximale (P 1/1) 16/13° Tabel 1: 20/14° 25/15° Richtgetallen bij vol vermogen (P 1/1) 32/16°...
  • Seite 283 Tabelle 2: Teillichtleistung Blitzleuchtzeit (s) Blitzleuchtzeit (s) Blitzleuchtzeiten in den Teillichtleistungsstufen Niveaux de puissance Durée d’éclair (s) Durée d’éclair (s) Table 2: Deelvermogensstappen Flitsdur (s) Flitsdur (s) Partial light output Flash duration Flash duration Flash durations at the individual partial light output levels Livello di potenza Durata del lampo Durata del lampo...
  • Seite 284 ZOOM Tabelle 3: Maximale Leitzahlen im HSS-Betrieb Table 3: Maximum guide numbers at HSS-Mode Tableau 3: Nombres-guides en mode HSS Tabel 3: Max. Richtgetallen bij de HSS functie Tabella 3: Potenza piena a numeri guida per il modo HSS Tabla 3: Números-guía max.
  • Seite 288 Leica Camera AG Am Leitz-Park 5 35578 WETZLAR DEUTSCHLAND Telefon +49 (0) 6441-2080-0 Telefax +49 (0) 6441-2080-333 www.leica-camera.com...

Inhaltsverzeichnis