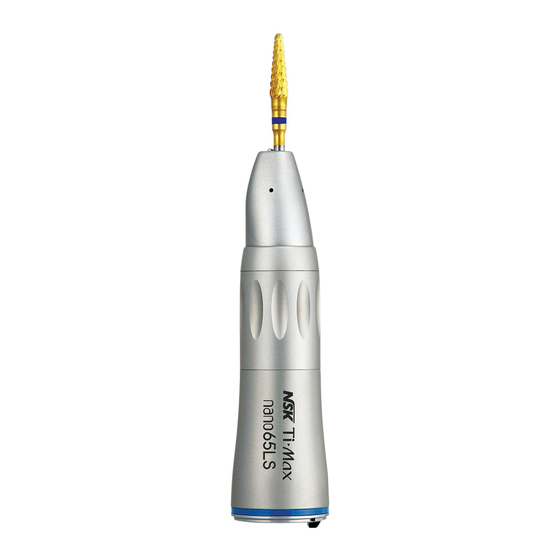
Herunterladen Inhalt Inhalt Diese Seite drucken

Werbung

Verfügbare Sprachen
  • DE

Verfügbare Sprachen

  • DEUTSCH, seite 17

Werbung

Inhaltsverzeichnis
loading

Inhaltszusammenfassung für NSK Ti-Max nano65LS

  • Seite 2: User And Intended Use

    1. User and Intended Use User : Qualified Professionals Intended Use : Dental Treatment / Dental Prosthetics (Cutting, Polishing) CAUTION 23mm This handpiece can ONLY be connected to E type motors in accordance with ISO 3964 with a motor insert length of 23mm or less.
  • Seite 3: Precautions For Handling And Operation

    2. Precautions for handling and operation • Please read these precautions carefully and use only as intended or instructed. • Safety instructions are intended to avoid potential hazards that could result in personal injury or damage to the device. Safety instructions are classified as follows in accordance with the seriousness of the risk.
  • Seite 4 • Users are responsible for the operational control, maintenance and continual inspection of this product. • Do not attempt to disassemble the product nor tamper with the mechanism except as recommend by NSK in this Operation Manual. • Do not allow any impact on to the product. Do not drop the product.
  • Seite 5 3. Connection & Disconnection of the Handpiece and Motor 3-1 Connection 1) Connect the handpiece direct to the motor and twist the handpiece until it locks into position with a clicking sound. 2) Make sure the handpiece is firmly connected to the motor. nano handpiece Motor 3-2 Disconnection...
  • Seite 6 4. Insertion & Removal of the Bur Open 4-1 HP Bur 4-1-1 To Insert the Bur 1) Turn the Bur Lock Ring in the direction of the " " mark until it clicks. (Fig.2) 2) Insert the bur fully into the chuck then turn the Bur Lock Ring in the direction of the mark " " until it clicks.
  • Seite 7 4-2 CA Bur 4-2-1 To Insert the Bur 1) Turn the Bur Lock Ring in the direction of the " " mark until it clicks. 2) Insert the attached Bur Stopper fully into the chuck. (Fig.3) 3) Insert the Bur fully into the chuck until it stops. 4) Turn the Bur Lock Ring in the direction of the "...
  • Seite 8 CAUTION • Make sure to align the " " mark with " " mark. If those marks are not completely aligned, it may cause handpiece overheating or patient burn injuries. • Always insert the bur fully into the chuck. Insufficient insertion of the bur could cause premature failure of the bearing. •...
  • Seite 9: Check Before Treatment

    • Do not use Short Shank CA burs as the bur will not be fully secured and may disengage from the chuck, causing an injury. 5. Check before treatment Check for handpiece vibration, noise and overheating. If any abnormalities are found do not use the handpiece and contact your Authorized NSK Dealer.
  • Seite 10: Maintenance

    6. Maintenance After each patient maintain the product as follows. 6-1 Cleaning (Handpiece) 1) Remove dirt and debris from the product. Do not use a wire brush. 2) Wipe clean with alcohol-immersed cotton swab or cloth. This icon denotes that the product can be washed via Thermo Disinfector. Refer to the Thermo-Disinfector manual.
  • Seite 11 E-Type Spray Nozzle NSK PANA SPRAY Plus Handpiece Apply NSK PANA SPRAY Plus every time after each use and/or before autoclaving. 1) Remove the bur from the handpiece. 2) Insert the Spray Nozzle into the Spray Port nozzle on the can.
  • Seite 12 • Hold the spray can upright. NSK Care3 Plus When using NSK Care3 Plus automatic handpiece cleaning and lubrication system, refer to the Care3 System instructions. 6-4 Sterilization Sterilize the product by autoclave sterilization. Remove the bur after each patient and sterilize as noted below.
  • Seite 13 • Autoclave sterilization is recommended for the product. The validity of other sterilization methods is not confirmed. • Do not touch the product immediately after autoclaving as it will be very hot and must remain in a sterile condition. NOTICE NSK recommends Class B sterilizers as stated in EN13060.
  • Seite 14: Periodical Maintenance Checks

    7. Periodical Maintenance Checks Perform periodical maintenance checks every three months, referring to the check sheet below. If any abnormalities are found, contact your Authorized NSK Dealer. Points to check Details Rotation Rotate the handpiece and check for abnormalities such as abnormal rotation, vibration, noise, and overheating.
  • Seite 15: Warranty

    9. Warranty NSK products are warranted against manufacturing errors and defects in materials. NSK reserves the right to analyze and determine the cause of any problem. Warranty is voided should the product be not used correctly or for the intended purpose or has been tampered with by unqualified personnel or has had non NSK parts installed.
  • Seite 16: Specifications

    12. Specifications Model nano65LS Max. Rotation Speed (Motor) 40,000 min Max. Rotation Speed (Handpiece) 40,000 min Gear Ratio 1:1 Direct Drive ISO 1797-1 Type1 ø2.35mm CA Bur Bur Type ISO 1797-1 Type2 ø2.35mm HP Bur Chucking Length 29.4mm (HP Bur) Max.
  • Seite 17: Benutzer Und Verwendungszweck

    1. Benutzer und Verwendungszweck Benutzer : Qualifiziertes Fachpersonal Verwendungszweck : Zahnmedizinische Behandlung / Zahnprothese (schneiden, polieren) VORSICHT 23mm Dieses Instrument kann AUSSCHLIESSLICH auf Typ E Motoren (gem. ISO 3964) betrieben werden, deren Motoraufnahme eine Länge von 23mm oder weniger aufweist.
  • Seite 18: Sicherheitsanweisungen Für Die Handhabung Und Bedienung

    2. Sicherheitsanweisungen für die Handhabung und Bedienung • Lesen Sie bitte diese Sicherheitsanweisungen aufmerksam durch und benutzen Sie das Gerät ausschließlich gemäß seines bestimmungsgemäßen Gebrauchs und entsprechend der Anweisungen. • Die Sicherheitsanweisungen sind dafür vorgesehen, mögliche Gefahren zu verhindern, die Körperverletzungen oder Beschädigungen am Gerät verursachen können.
  • Seite 19 • Bediener und alle anderen Personen in der Umgebung müssen während der Benutzung dieses Handstücks einen Augenschutz tragen. • Sollte das Produkt nicht einwandfrei funktionieren, stellen Sie den Einsatz sofort ein und nehmen Sie Kontakt mit Ihrem NSK-Fachhändler auf. • Benutzen Sie kein Wasser mit hohem Säuregehalt oder Sterilisationslösungen zum Abwischen, Eintauchen oder Reinigen des Produkts. Legen Sie das Produkt nicht in solche ein.
  • Seite 20: Verbinden & Abtrennen Des Handstücks Und Motors

    3. Verbinden & Abtrennen des Handstücks und Motors 3-1 Montage 1) Das Handstück direkt an den Motor anschließen und drehen, bis es hörbar einrastet. 2) Stellen Sie sicher, dass das Handstück fest mit dem Motor verbunden ist. nano handstück Motor 3-2 Demontage Halten Sie den Motor und das Handstück mit je einer Hand und ziehen Sie sie gerade voneinander ab.
  • Seite 21: Einsetzen & Entfernen Des Fräsers Oder Schleifers

    4. Einsetzen & Entfernen des Fräsers oder Schleifers Öffnen 4-1 HP Fräse 4-1-1 Einsetzen der Fräse/des Schleifers 1) Drehen Sie den Verschlussring in Richtung der Markierung " ", bis es klickt. (Abb.2) 2) Setzen Sie den Bohrer vollständig in die Spannvorrichtung ein und drehen Sie den Verschlussring in Richtung der Markierung "...
  • Seite 22 4-2 CA Fräse 4-2-1 Einsetzen des Fräsers oder Schleifers 1) Drehen Sie den Verschlussring in Richtung der Markierung " ", bis es klickt. 2) Setzen Sie den mitgelieferten Tiefenanschlag in die Spannvorrichtung ein. (Abb.3) 3) Setzen Sie den Bohrer vollständig in die Spannvorrichtung ein, bis er einrastet. 4) Drehen Sie den Verschlussring in Richtung der Markierung "...
  • Seite 23 • Überschreiten Sie nicht die vom Hersteller des Fräsers/Schleifers angegebene Drehzahl. • Überschreiten Sie nicht die von NSK empfohlene maximale Fräser-/Schleiferlänge. • Wenden Sie keinen übermäßigen Druck auf den Fräser/Schleifer an, da dieser brechen oder sich verbiegen kann oder evtl. schwer entfernbar wird.
  • Seite 24: Überprüfung Vor Der Behandlung

    Verletzungen führen kann. 5. Überprüfung vor der Behandlung Überprüfen Sie das Handstück auf Vibrationen, Geräusche und Überhitzung. Wenn Sie irgendwelche Auffälligkeiten feststellen, darf das Handstück nicht benutzt werden. Nehmen Sie in diesem Fall Kontakt mit Ihrem NSK-Fachhändler auf.
  • Seite 25: Wartung

    6. Wartung Führen Sie nach jedem Patienten die folgende Wartung des Produkts durch. 6-1 Reinigung (Handstück) 1) Entfernen Sie Schmutz und Ablagerungen vom Produkt. Benutzen Sie keine Drahtbürste. 2) Wischen Sie es mit einem in Alkohol getränkten Wattestäbchen oder Tuch sauber. Dieses Symbol bedeutet, dass das Produkt mittels Thermodesinfektor gereinigt werden kann.
  • Seite 26 Sprühdüse Typ E NSK PANA SPRAY Plus Handstück Führen Sie nach jeder Benutzung und/oder vor der Autoklavierung eine Ölpflege mit NSK PANA SPRAY Plus durch. 1) Entfernen Sie den Fräser vom Handstück. 2) Führen Sie die Sprühdüse in die Sprühöffnung an der Dose ein.
  • Seite 27 • Halten Sie die Dose aufrecht. NSK Care3 Plus Für die Benutzung des automatischen NSK Care3 Plus Pflegesystems beachten Sie bitte die Care3 System-Anweisungen. 6-4 Sterilisierung Sterilisieren Sie das Produkt im Autoklaven. Entfernen Sie den Fräser / Schleifer nach jedem Patienten und sterilisieren Sie es wie unten beschrieben.
  • Seite 28 • Für das Produkt wird eine Autoklavsterilisation empfohlen. Die Wirksamkeit anderer Sterilisierungsverfahren kann nicht bestätigt werden. • Berühren Sie das Produkt nicht sofort nach dem Autoklavieren, da es sehr heiß ist und steril bleiben soll. HINWEIS NSK empfiehlt Klasse B-Sterilisation nach EN13060.
  • Seite 29: Regelmäßige Wartungsprüfungen

    7. Regelmäßige Wartungsprüfungen Führen Sie alle drei Monate Wartungsprüfungen durch, siehe dazu die im Folgenden aufgeführten Kontrollpunkte. Wenn Sie irgendeine Auffälligkeit feststellen, nehmen Sie Kontakt mit Ihrem NSK-Fachhändler auf. Prüfpunkte Beschreibung Lassen Sie das Handstück laufen und überprüfen Sie es auf Auffälligkeiten z.B. ungewöhnliche Laufeigenschaften, Rotation Vibration, Geräusche und Überhitzung.
  • Seite 30: Garantie

    9. Garantie Für alle NSK-Produkte gilt eine Garantie für Fabrikationsfehler und Mängel an Materialien. NSK behält sich das Recht vor, die Ursache von Problemen zu analysieren und zu ermitteln. Die Garantie erlischt, wenn das Produkt nicht ordnungsgemäß oder nicht sachgemäß verwendet wurde, das Produkt von unqualifiziertem Personal verändert wurde oder Fremdteile (Nicht-NSK-Teile) eingebaut wurden.
  • Seite 31: Technische Daten

    12. Technische Daten Modell nano65LS Max. Drehzahl (Motor) 40.000 min Max. Drehzahl (Handstück) 40.000 min 1:1 Direktantrieb Übersetzungsverhältnis ISO 1797-1 Typ1 ø2,35mm CA Fräse Fräser-/Schleifertyp ISO 1797-1 Typ2 ø2,35mm HP Fräse Schaftlänge 29,4mm (HP Fräse) Max. Fräserlänge 44,5mm (HP Fräse) Max.
  • Seite 32 1. Utilisateur et finalité d'utilisation Utilisateur : Professionnels qualifiés Finalité d'utilisation : Soins dentaires / Prothèses dentaires (couper, polir) ATTENTION 23mm Cet instrument doit être uniquement connecté avec des moteurs de Type E compatible avec la norme ISO 3964. La longueur du moteur connecté...
  • Seite 33: Précautions À Prendre Lors De La Manipulation Et Du Fonctionnement

    2. Précautions à prendre lors de la manipulation et du fonctionnement • Lisez soigneusement ces précautions et n'utilisez l'appareil qu'à des fins indiquées et uniquement selon les instructions données. • Les instructions de sécurité ont pour but d'écarter tout danger potentiel pouvant déboucher sur des blessures corporelles ou endommager l'appareil. Les instructions de sécurité...
  • Seite 34 • Les utilisateurs sont responsables des vérifications opérationnelles, de l'entretien et de l'inspection permanente de cet appareil. • N'essayez pas de démonter le produit ou de modifier son mécanisme, sauf si NSK vous le recommande dans ce mode d'emploi. • Veillez à ce que le produit ne soit soumis à aucun impact. Ne faites pas tomber le produit.
  • Seite 35 3. Connexion & déconnexion de la pièce à main et du moteur 3-1 Connexion 1) Connectez la pièce à main directement au moteur et vissez la pièce à main jusqu'à ce que vous entendiez un clic indiquant qu'elle est bien positionnée. 2) Assurez-vous que la pièce à...
  • Seite 36 4. Insertion & enlèvement de la fraise Ouvrir 4-1 Fraise HP 4-1-1 Pour insérer la fraise 1) Faire pivoter la bague de serrage de la fraise vers le symbole " " jusqu'à ce qu'un clic se fasse entendre. (Fig.2) 2) Insérer totalement la fraise dans la griffe, ensuite faire pivoter la bague de serrage de la fraise vers le symbole "...
  • Seite 37 4-2 Fraise CA 4-2-1 Pour insérer la fraise 1) Faire pivoter la bague de serrage de la fraise vers le symbole " " jusqu'à ce qu'un clic se fasse entendre. 2) Insérer complètement l'arrêt de la fraise dans la griffe. (Fig.3) 3) Insérer totalement la fraise dans la griffe jusqu'à...
  • Seite 38 ATTENTION • Veillez à aligner les symboles " " et " ". Un mauvais alignement de ces symboles entraîne un risque de surchauffe et/ou de brûlure. • Toujours insérer complètement la fraise dans la griffe. Une insertion insuffisante de la fraise pourrait occasionner une défaillance précoce du roulement.
  • Seite 39: Vérification Avant Utilisation

    • Ne pas utiliser des fraises CA à mandrin court puisque la fraise ne sera pas totalement bloquée et qu'elle pourrait se détacher de la griffe, occasionnant une blessure. 5. Vérification avant utilisation Vérifiez également que la pièce à main ne présente pas de vibrations, de bruit ni une surchauffe. En cas d'anomalies, n'utilisez pas la pièce à main et contactez votre revendeur NSK agréé.
  • Seite 40 6. Maintenance Après chaque patient, procédez à l'entretien du produit comme suit. 6-1 Nettoyage (pièce à main) 1) Eliminez les saletés et les débris présents sur le produit. Ne pas utiliser de brosse métallique. 2) Essuyez avec un tissu ou un coton-tige imbibé d'alcool. Cette icône indique que le produit peut être lavé...
  • Seite 41 Embout de spray Type E NSK PANA SPRAY Plus Pièce à main Appliquez NSK PANA SPRAY Plus après chaque utilisation et/ou avant l'autoclave. 1) Enlevez la fraise de l'instrument. 2) Positionnez l'embout de spray sur le PANA SPRAY Plus. 3) Insérez le PANA SPRAY Plus à l'arrière de la pièce à main. Tenez l'instrument et pulvérisez pendant environ 2-3 secondes.
  • Seite 42 • Lors de la lubrification, veillez à tenir fermement l'insturment pour éviter qu'il vous échappe des mains sous la pression de pulvérisation. • Tenez la bombe d'aérosol à la verticale. NSK Care3 Plus Pour l'utilisation du système automatique de nettoyage et de lubrification pour pièce à main NSK Care3 Plus, se référer aux instructions relatives au système Care3 Plus. 6-4 Stérilisation Stérilisez le produit en autoclave.
  • Seite 43 • La stérilisation en autoclave est recommandée pour ce produit. La validité d'autres méthodes de stérilisation n'est pas confirmée. • Ne touchez pas le produit immédiatement après qu'il a été autoclavé, puisqu'il peut être extrêmement chaud et qu'il doit demeurer stérile. REMARQUE NSK recommande des stérilisateurs de classe B, comme spécifié par l'EN13060.
  • Seite 44: Contrôles D'entretien Périodique

    7. Contrôles d'entretien périodique Procédez aux contrôles d'entretien périodique tous les trois mois, en se basant sur la fiche ci-dessous. Si des anomalies sont identifiées, contactez votre revendeur NSK agréé. Points à vérifier Détails Faites pivoter la pièce à main et vérifiez l'absence d'anomalies, notamment rotation, vibration, bruit et surchauffe Rotation atypiques.
  • Seite 45: Liste Des Pièces De Rechange

    9. Garantie Les produits NSK sont garantis contre les défauts de fabrication et de matériel. NSK se réserve le droit d'analyser et de déterminer la cause de tout problème. La garantie est annulée si l'instrument n'a pas été utilisé correctement ou à d'autres fins que celles stipulées ou qu'il a été modifié par du personnel non qualifié...
  • Seite 46: Spécifications

    12. Spécifications Modèle nano65LS Vitesse de rotation max. (moteur) 40.000 min Vitesse de rotation max. (pièce à main) 40.000 min Rapport de vitesse commande directe 1:1 ISO 1797-1 Type1 ø2,35mm Fraise CA Type de fraise ISO 1797-1 Type2 ø2,35mm Fraise HP Longueur de griffe 29,4mm (Fraise HP) Longueur max.
  • Seite 47: Usuario Y Uso Previsto

    1. Usuario y uso previsto Usuario : Profesionales cualificados Uso previsto : Tratamiento Dental / Prótesis dentales (cortar, pulir) PRECAUCIÓN 23mm Esta pieza de mano solo puede conectarse a motores de tipo E compatibles con ISO 3964 con una longitud del conector del motor de 23 mm o menos.
  • Seite 48: Precauciones Para Uso Y Operación

    2. Precauciones para uso y operación • Lea detenidamente estas advertencias y utilice el dispositivo sólo para el fin diseñado y en la forma indicada. • Las instrucciones de seguridad tienen el fin de evitar cualquier posible peligro que pudiera provocar daños personales o en el dispositivo. Las instrucciones de seguridad se clasifican de la siguiente forma, de acuerdo con la gravedad del riesgo.
  • Seite 49 • Los usuarios son responsables del control de operación, mantenimiento e inspección continua de este producto. • No intente desmontar el producto ni modificar el mecanismo excepto cuando así lo recomiende NSK en este manual de operaciones. • Evite que el producto sufra cualquier impacto. No deje caer el producto.
  • Seite 50 3. Conexión y desconexión de la pieza de mano y el motor 3-1 Conexión 1) Conecte la pieza de mano directamente al motor y gire la pieza de mano hasta que encaje en su posición con un chasquido. 2) Asegúrese de que la pieza de mano está firmemente conectada al motor. nano pieza de mano Motor 3-2 Desconexión...
  • Seite 51 4. Inserción y extracción de la fresa Abrir 4-1 Fresa HP 4-1-1 Para insertar la fresa 1) Gire el anillo de bloqueo en la dirección de la marca " " hasta que haga clic. (Fig.2) 2) Inserte la fresa completamente en el dispositivo de sujeción y luego gire el anillo de bloqueo en la dirección de la marca "...
  • Seite 52 4-2 Fresa CA 4-2-1 Para insertar la fresa 1) Gire el anillo de bloqueo en la dirección de la marca " " hasta que haga clic. 2) Inserte el tope de la fresa completamente en la pinza. (Fig.3) 3) Inserte la fresa completamente en la pinza hasta que no vaya más. 4) Gire el anillo de bloqueo en la dirección de la marca "...
  • Seite 53 PRECAUCIÓN • Asegúrese de alinear las marcas " " y " ". Si estas marcas no están completamente alineadas se podría producir sobrecalentamiento o quemaduras. • Siempre inserte la fresa completamente en la pinza. Una inserción insuficiente de la fresa podría causar fallos prematuros en el rodamiento. •...
  • Seite 54 • No use fresas de contra-ángulo con vástago corto, ya que la fresa no estará firmemente sujeta y podría soltarse de la pinza, causando heridas. 5. Verificación antes de tratamiento Compruebe también la vibración, ruido y sobrecalentamiento. Si se produjera alguna anormalidad, deje de utilizar la pieza de mano y póngase en contacto con su distribuidor NSK autorizado.
  • Seite 55: Mantenimiento

    6. Mantenimiento Después de cada paciente, realice el mantenimiento del producto de la siguiente manera. 6-1 Limpieza (Pieza de mano) 1) Retire la suciedad y los deshechos del producto. No utilice un cepillo de alambre. 2) Limpie con un paño o trapo de algodón impregnado en alcohol. Este icono muestra que el producto puede lavarse con un termo-desinfectante.
  • Seite 56 NSK PANA SPRAY Plus Pieza de mano Aplique NSK PANA SPRAY Plus después de cada uso y/o antes de la limpieza con autoclave. 1) Retire la fresa de la pieza de mano. 2) Introduzca la boquilla del pulverizador en el conducto de pulverizador de la botella.
  • Seite 57 • Mantenga la botella del pulverizador hacia arriba. NSK Care3 Plus Para utilizar el sistema de lubricación y limpieza de pieza de mano automático NSK Care3 Plus, consulte las instrucciones del sistema Care3. 6-4 Esterilización Esterilice el producto con autoclave. Retire la fresa después de cada paciente y esterilice tal y como se indica a continuación.
  • Seite 58 • Para el producto se recomienda esterilización con autoclave. No está confirmada la validez de otros métodos de esterilización. • No toque el producto inmediatamente después de la esterilización con autoclave ya que estará muy caliente y debe permanecer estéril. IMPORTANTE NSK recomienda esterilizadores Clase B tal y como se indica en EN13060.
  • Seite 59: Comprobaciones Periódicas De Mantenimiento

    7. Comprobaciones periódicas de mantenimiento Realice comprobaciones de mantenimiento periódicas cada tres meses de acuerdo con la hoja de verificación de abajo. En caso de encontrar alguna anomalía, póngase en contacto con su distribuidor autorizado NSK. Puntos a comprobar Detalles Rotación...
  • Seite 60: Lista De Piezas De Recambio

    La garantía se anula si el producto no se usa correctamente o para los fines previstos, o si ha sido manipulada por personal no calificado o se le han instalado piezas que no son de NSK. Las piezas de repuesto están disponibles durante los siete años posteriores a la interrupción en la venta del modelo.
  • Seite 61: Características Técnicas

    12. Características técnicas Modelo nano65LS Velocidad de rotación máxima (Motor) 40.000 min Velocidad de rotación máxima (Pieza de mano) 40.000 min Relación de cambio 1:1 transmisión directa ISO 1797-1 Tipo1 Fresa ø2,35mm CA Tipo de fresa ISO 1797-1 Tipo2 Fresa ø2,35mm HP Longitud del dispositivo de sujeción 29,4mm (Fresa HP) Longitud máx.
  • Seite 62: Utente E Destinazione D'uso

    1. Utente e destinazione d'uso Utente : Professionisti qualificati Destinazione d'uso : Trattamento odontoiatrico / Protesi dentale (Taglio, Lucidatura) ATTENZIONE 23mm Il manipolo può essere collegato solo a motori di tipo E conformi allo standard ISO 3964. La lunghezza dell’inserto del motore non deve superare i 23 mm.
  • Seite 63: Precauzioni Di Utilizzo E Funzionamento

    2. Precauzioni di utilizzo e funzionamento • Leggere attentamente le avvertenze e usare il dispositivo solo come da istruzioni e per la destinazione d'uso prevista. • Le istruzioni di sicurezza hanno lo scopo di evitare potenziali rischi che potrebbero causare lesioni personali o danni al dispositivo. Le istruzioni di sicurezza sono classificate come segue, a seconda della gravità...
  • Seite 64 • Gli utenti sono responsabili del controllo del corretto funzionamento, della manutenzione e dell’ispezione continua del prodotto. • Non tentare di smontare il prodotto o di manometterne il meccanismo. Seguire sempre le raccomandazioni di NSK contenute nel presente manuale d'uso.
  • Seite 65 3. Collegamento & Scollegamento di manipolo e motore 3-1 Collegamento 1) Collegare il manipolo direttamente al motore e ruotare il manipolo fino a farlo bloccare in posizione con un click. 2) Assicurarsi che il manipolo sia saldamente collegato al motore. nano manipolo Motore 3-2 Rimozione...
  • Seite 66 4. Inserimento e rimozione della fresa Aperto 4-1 Fresa HP 4-1-1 Inserimento della fresa 1) Girare l'anello di bloccaggio della fresa in direzione del segno " " fino a che non si sente un clic. (Fig.2) 2) Inserire completamente la fresa nel mandrino quindi girare l'anello di bloccaggio in direzione del segno "...
  • Seite 67 4-2 Fresa CA 4-2-1 Inserimento della fresa 1) Girare l'anello di bloccaggio della fresa in direzione del segno " " fino a che non si sente un clic. 2) Inserire completamente lo Stopper della fresa (in dotazione) nel mandrino. (Fig.3) 3) Inserire completamente la fresa nel mandrino fino al suo arresto.
  • Seite 68 ATTENZIONE • Assicurarsi che i simboli " " e " " siano allineati. Nel caso in cui questi simboli non siano completamente allineati, l’apparecchio potrebbe surriscaldarsi o si potrebbero riportare ustioni. • Inserire sempre la fresa completamente nel mandrino. In caso contrario il cuscinetto potrebbe rompersi precocemente. •...
  • Seite 69: Controllo Prima Del Trattamento

    • Non utilizzare frese a gambo corto CA perché non sarebbero assicurate completamente e potrebbero sganciarsi dal mandrino causando lesioni. 5. Controllo prima del trattamento Verificare inoltre l'assenza di eventuali vibrazioni, rumorosità e surriscaldamento del manipolo. Se si riscontrano anomalie, non usare il manipolo e contattare il distributore NSK autorizzato.
  • Seite 70: Manutenzione

    6. Manutenzione Al termine del trattamento di ogni paziente, sottoporre il prodotto ai seguenti interventi di manutenzione. 6-1 Pulizia (manipolo) 1) Togliere sporco e impurità dal prodotto. Non utilizzare una spazzola metallica. 2) Pulire con un tampone di cotone o un panno imbevuti di alcool. L'icona indica che il prodotto è...
  • Seite 71 Beccuccio Spray tipo E NSK PANA SPRAY Plus Manipolo Erogare NSK PANA SPRAY Plus dopo ogni utilizzo e/o prima della sterilizzazione in autoclave. 1) Estrarre la fresa dal manipolo. 2) Inserire il beccuccio spray nel beccuccio del condotto spray situato sulla bomboletta.
  • Seite 72 • Tenere la bomboletta spray in posizione verticale. NSK Care3 Plus Quando si usa il sistema di pulizia e di lubrificazione automatico per manipoli NSK Care3 Plus, consultare le istruzioni di Care3 System. 6-4 Sterilizzazione Sterilizzare il prodotto mediante sterilizzazione in autoclave. Rimuovere la fresa al termine del trattamento di ogni paziente e sterilizzare come riportato di seguito.
  • Seite 73 • Per questo prodotto si consiglia la sterilizzazione in autoclave. Non viene confermata l'efficacia di altri metodi di sterilizzazione. • Non toccare il prodotto subito dopo la sterilizzazione in autoclave: esso è molto caldo e deve rimanere in una condizione sterile. AVVISO NSK consiglia sterilizzatori di Classe B specificati nella norma EN13060.
  • Seite 74: Controlli Di Manutenzione Periodici

    7. Controlli di manutenzione periodici Eseguire controlli di manutenzione periodici ogni tre mesi facendo riferimento alla scheda di controllo riportata di seguito. Contattare il distributore NSK autorizzato in caso di anomalie. Elementi da controllare Dettagli Rotazione Azionare il manipolo e verificare l'assenza di anomalie di rotazione, vibrazione, rumore e surriscaldamento.
  • Seite 75: Garanzia

    9. Garanzia I prodotti NSK sono garantiti da errori di fabbricazione e difetti dei materiali. NSK si riserva il diritto di analizzare e di stabilire la causa di qualsiasi problema. La garanzia sarà nulla qualora il prodotto non sia stato usato correttamente o per la destinazione d'uso prevista o qualora sia stato manomesso da personale non qualificato o presenti pezzi non originali NSK.
  • Seite 76: Specifiche Tecniche

    12. Specifiche tecniche Modello nano65LS Velocità di rotazione max. (motore) 40.000 rpm Velocità di rotazione max.(manipolo) 40.000 rpm Rapporto di trasmissione Rapporto Diretto 1:1 ISO 1797-1 Tipo1 ø2,35mm Fresa CA Tipo di fresa ISO 1797-1 Tipo2 ø2,35mm Fresa HP Lunghezza del mandrino 29,4mm (Fresa HP) Lunghezza max.

Inhaltsverzeichnis