HELIX DSP MINI Bedienungsanleitung
Digitaler high-res 6-kanal signalprozessor mit 96 khz / 24 bit signalweg

Verwandte Anleitungen für HELIX DSP MINI


Inhaltszusammenfassung für HELIX DSP MINI
- Seite 1 DSP MINI Digitaler High-Res 6-Kanal Signalprozessor mit 96 kHz / 24 Bit Signalweg Digital High-Res 6-channel signal processor with 96 kHz / 24 Bit signal path...
-
Seite 2: Allgemeine Hinweise
Verarbeitung und eine tigen HELIX-Signalprozessors. überzeugende Anwendung ausgereifter Technolo- gien aus. Audiotec Fischer setzt mit dem HELIX DSP MINI neue Maßstäbe im Bereich der Signalprozessor- Viel Freude an diesem Produkt wünscht Ihnen das technik. Dabei profitieren Sie als Kunde direkt von Team von unserer nahezu 30-jährigen Erfahrung in der For-... -
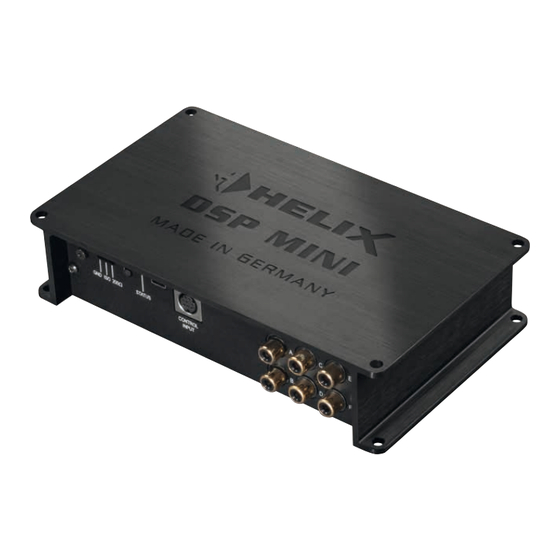
Seite 3: Anschluss- Und Bedienelemente
Definiert die Verbindung der Masse zwischen Multifunktionsanschluss dient Signaleingang und Signalausgang. Anschluss einer Fernbedienung weiterem HELIX Zubehör. Control Taster Dient zum Umschalten der Sound Setups Line Output oder zum Resetten des Gerätes. Vorverstärkerausgänge zum Anschluss des / der Verstärker/s. Zur Einschaltung eines Status LED angeschlossenen Verstärkers muss der... - Seite 4 1 Line Input Achtung: Es ist zwingend notwendig, die Eingangs- 4-Kanal Vorverstärkereingang zum Anschluss von empfindlichkeit des DSP MINI an die Signalquelle Signalquellen, z.B. Radios. Die Eingangsempfind- anzupassen, um Schäden am Signalprozessor zu lichkeit ist für alle Kanäle ab Werk auf 4 Volt ein- vermeiden.
-
Seite 5: Power Input
Fall alle Anschlüsse auf Fehler, wie z.B. 8 Masseschalter Kurzschlüsse oder fehlerhafte Verbindungen. Ist die Beim HELIX DSP MINI ist die Masse der Signalein- Sicherheitsschaltung der Temperaturüberwachung gänge galvanisch von der Masse der Signalaus- aktiv, wird der Remote-Ausgang sowie die Signal- gänge getrennt. -
Seite 6: Line Output
„Power Save Mode“ sowie bei einem Software-Update ab. Die Ausgänge können in der DSP PC-Tool Software den Eingängen beliebig zu- geordnet werden. Einbau und Installation Der HELIX DSP MINI wird wie nachfolgend be- 2. Anschluss der Highlevel-Lautsprecherein- gänge schrieben an das Autoradio angeschlossen. Hochpegel-Lautsprechereingänge kön-... - Seite 7 Batterie verbunden ist. Die Stromaufnahme des Um die Eingangsempfindlichkeit zu verändern, verwenden Sie den Drehregler 4 (Punkt 4, HELIX DSP MINI ist mit ca. 400 mA zwar sehr Seite 4; Input Sensitivity). Werkseitig ist die gering, trotzdem sollten Kabel mit min. 1 mm²...
- Seite 8 Verstärker / der Lautspre- cher führen. Informationen zum Anschluss des 7. Konfiguration des Remote-Eingangs Signalprozessors an einen PC finden Sie auf Die Einschaltung des HELIX DSP MINI erfolgt Seite 9. automatisch bei Ansteuerung über die Hoch- 9. Anschluss des Remote-Ausgangs pegel-Lautsprechereingänge (High level Input)
-
Seite 9: Anschluss An Den Computer
USB-Kabel an den Computer an. sechs DSP Kanäle separat eingestellt werden. Wenn Sie längere Distanzen zu überbrücken Bevor Sie den HELIX DSP MINI das erste Mal an haben, verwenden Sie bitte eine aktive USB- Verlängerung mit integriertem Repeater und einen Computer anschließen, gehen Sie auf unsere... -
Seite 10: Konfigurationshinweise Für Die Dsp-Soundeffekte
Konfigurationshinweise für die DSP-Soundeffekte Der HELIX DSP MINI bietet einzigartige DSP- Hinweis: Das Center Processing wird ausschließ- Sound effekte wie das „Augmented Bass Proces- lich auf den Ausgangskanal E angewendet. sing“, den „StageXpander“, den „RealCenter“ und Hinweise für StageXpander- noch mehr. -
Seite 11: Einbau Einer Helix Extension Card
Einbau einer HELIX Extension Card Der HELIX DSP MINI kann durch die Montage einer 6. Achten Sie auf den richtigen Sitz des HEC Mo- HELIX Extension Card (HEC) um weitere Schnitt- duls und darauf, dass alle Kontaktstifte vollstän- stellen wie beispielsweise einem Bluetooth Audio dig im Sockel stecken. - Seite 12 96 kHz Abtastrate Start-Stopfähigkeit Der HELIX DSP MINI bietet eine Signalverarbeitung Das Netzteil im HELIX DSP MINI stellt die interne Spannungsversorgung auch bei kurzfristigen Ein- mit einer doppelten Abtastrate von 96 kHz. Dadurch brüchen bis hinab zu 6 Volt sicher.
-
Seite 13: Technische Daten
Technische Daten Eingänge ................. 4 x Cinch 4 x Hochpegel-Lautsprechereingang 1 x Optisch SPDIF-Format (12 - 96 kHz) 1 x Remote In Eingangsempfindlichkeit ..........Cinch 2 - 4 Volt Hochpegel 5 - 11 Volt Ausgänge ................6 x Cinch 1 x Remote Out Ausgangsspannung ............4 Volt Frequenzbereich..............10 Hz - 44.000 Hz DSP Auflösung ..............64 Bit...