Klarstein 10033000 Bedienungsanleitung
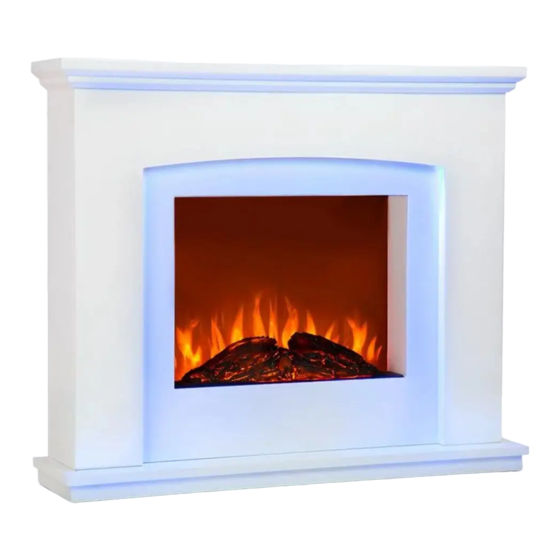
Elektrischer kamin
Inhaltsverzeichnis
Verfügbare Sprachen
Verfügbare Sprachen
Elektrischer Kamin
Electric Fireplace
Chimenea eléctrica
Cheminée électrique
Camino elettrico
10033000
Hinweis: Das Gerät eignet sich nicht zur Nutzung
als primäre Heizquelle.
Note: The device is not suitable for use as a
primary heat source.
Remarque : l'appareil ne convient pas en tant que
source principale de chauffage.
Nota: il dispositivo non è idoneo ad essere
utilizzato come fonte di riscaldamento primaria.
Advertencia: el aparato no es apto para utilizar
como fuente de calefacción primaria.
Kapitel
Inhaltsverzeichnis
Fehlerbehebung

Verwandte Anleitungen für Klarstein 10033000


Inhaltszusammenfassung für Klarstein 10033000
- Seite 1 Remarque : l‘appareil ne convient pas en tant que Cheminée électrique source principale de chauffage. Nota: il dispositivo non è idoneo ad essere Camino elettrico utilizzato come fonte di riscaldamento primaria. Advertencia: el aparato no es apto para utilizar como fuente de calefacción primaria. 10033000...
-
Seite 3: Inhaltsverzeichnis
Installation 7 Bedienung und Tastenfunktionen 9 Timereinstellungen 12 Fehlerbehebung 14 Reinigung und Pflege 15 Hinweise zur Entsorgung 16 TECHNISCHE DATEN Artikelnummer 10033000 Stromversorgung 220-240 V ~ 50/60 Hz Leistung 1000-2000 W KONFORMITÄTSERKLÄRUNG Hersteller: Chal-Tec GmbH, Wallstraße 16, 10179 Berlin, Deutschland. Dieses Produkt entspricht den folgenden Europäischen... -
Seite 4: Produktdatenblatt
PRODUKTDATENBLATT Modellkennung(en) 10033000 Angabe Symbol Wert Einheit Angabe Einheit Wärmeleistung Nur bei elektrischen Speicher-Einzelraumheizgeräten: Art der Regelung der Wärmezufuhr Nennwärmeleistung Manuelle Regelung der Wärmezufuhr mit k.A. integriertem Thermostat Mindestwärmeleistung Manuelle Regelung der Wärmezufuhr k.A. (Richtwert) mit Rückmeldung der Raum- und/oder Außentemperatur... -
Seite 5: Sicherheitshinweise
SICHERHEITSHINWEISE • Prüfen Sie vor der Benutzung die Spannung auf der Geräteplakette und schließen Sie das Gerät nur an Steckdosen an, die der Spannung des Geräts entsprechen. • Falls das Netzkabel beschädigt ist, lassen Sie es von einer ausgebildeten Fachkraft ersetzen. •... -
Seite 6: Gerät Und Zubehör
GERÄT UND ZUBEHÖR Rahmen Luftauslass Hauptnetzschalter Flamme Display Holzscheite Dübel (4x) Fernbedienung (1x) Schrauben (4x) Bedienungsanleitung (1x) Wandhalterungen (2x) -
Seite 7: Installation
INSTALLATION Hinweis: Schließen Sie das Gerät währen der Installation NICHT an das Stromnetz an. Die mitgelieferten Schrauben und Dübel sind nur für solide Wände geeignet. Für andere Wände, z.B. mit Hohlräumen, müssen entsprechende Befestigungen verwendet werden. • Packen Sie das Gerät aus, heben Sie die Einfassung vorsichtig aus dem Karton und stellen Sie es aufrecht hin. - Seite 8 1. Halten Sie das Heizgerät an die Wand, an der es befestigt werden soll, und markieren Sie die Höhe der an beiden Seiten des Heizgerätes angebrachten Halterung. Die Wandhalterung ist ca. 30mm. nach innen zu montieren. 2. Halten Sie die Wandhalterungen an dieser Position und markieren Sie die Positionen der Schraubenlöcher.
-
Seite 9: Bedienung Und Tastenfunktionen
BEDIENUNG UND TASTENFUNKTIONEN On/Off Gerät ein/ausschalten Flame Gedrückt halten, um zwischen Flammen und Umgebungslicht zu wechseln Heat Heizleistung einstellen oder eine Eingabe bestätigen Temp. Raumtemperatur einstellen Timing Timer einstellen Set up Wochentimer einstellen Display Zeigt den aktuellen Status an Hinweise zum Hauptnetzschalter (O/I) •... - Seite 10 Gerät ein/ausschalten [On/Off] Hinweis: Wenn der Netzschalter eingeschaltet ist, befindet sich der Kamin im Standby-Modus und die Power-Anzeige leuchtet im Display. • Drücken Sie einmal die ON/Off-Taste, die Flamme wird auf Stufe 3 (hoch) eingeschaltet und das Flammensymbol leuchtet im Display. •...
- Seite 11 Adaptiver Start [Temp.] Hinweis: Die Raumtemperatur kann ohne Einschalten der Heizung eingestellt werden. Mit der TEMP-Taste lässt sich die Raumtemperatur auf 18°C (65°F), 21°C (70°F), 24°C (75°F), 27°C (80°F) oder 30°C (85°F) einzustellen. • Drücken Sie die TEMP-Taste oder die TIMER-Taste, bis die entsprechende Raumtemperatur ausgewählt wurde.
-
Seite 12: Timereinstellungen
TIMEREINSTELLUNGEN Einen einfachen Timer einstellen [Timing] Drücken Sie einmal auf die TIMING-Taste, um den Timer aufsteigend von 1-24 Stunden einzustellen. Die entsprechende Zeit wird im Display angezeigt. 1. Drücken Sie einmal auf die TIMING-Taste. Im Display wird die Nummer [1] angezeigt und das Timersymbol leuchtet. - Seite 13 Wochentimer einrichten [Set up] Drücken Sie einmal auf die SET UP-Taste, um die Einstellungen des Wochentimer zu öffnen. Im Display erscheint die Anzeige [DATE]. 1. Wählen Sie zuerst das Datum von [d1] bis [ALL] durch Drücken der Tasten TEMP oder TIMING. Drücken Sie zur Bestätigung die HEAT-Taste. d1 = Montag d2 = Dienstag d3 = Mittwoch...
-
Seite 14: Fehlerbehebung
Hinweise zum Wochentimer • Die Raumtemperatur und die Einschalt-/Ausschaltzeit kann für jeden Tag individuell eingestellt werden. • Wiederholen Sie die eben beschriebenen Schritte, um Raumtemperatur, Einschalt- und Ausschaltzeit für weitere Tage einzurichten. • Wenn Sie [ALL] wählen ist die gewählte Einstellung für alle Tage gleich. •... -
Seite 15: Reinigung Und Pflege
REINIGUNG UND PFLEGE • Prüfen Sie regelmäßig, ob alle Schrauben fest angezogen sind. • Stauben Sie das Gerät wöchentlich mit einem weichen, fusselfreien Tuch ab. • Wenn Wasser auf das Gerät getropft ist, entfernen Sie es umgehend mit einem weichen, sauberen Tuch entfernt und lassen Sie das Gerät trocknen. •... -
Seite 16: Hinweise Zur Entsorgung
HINWEISE ZUR ENTSORGUNG Befindet sich die linke Abbildung (durchgestrichene Mülltonne auf Rädern) auf dem Produkt, gilt die Europäische Richtlinie 2012/19/EU. Diese Produkte dürfen nicht mit dem normalen Hausmüll entsorgt werden. Informieren Sie sich über die örtlichen Regelungen zur getrennten Sammlung elektrischer und elektronischer Gerätschaften.