Klarstein Bern Smart Bedienungsanleitung
Elektrischer kamin
Inhaltsverzeichnis
Verfügbare Sprachen
Verfügbare Sprachen
Bern Smart
Lucerne Smart
Aargau Smart
Elektrischer Kamin
Fireplace Heater
Cheminée électrique
Camino elettrico
Chimenea eléctrica
10035202 10035203 10035204
Hinweis: Das Gerät eignet sich nicht zur Nutzung als
primäre Heizquelle.
Note: The device is not suitable for use as a primary
heat source.
Remarque : l'appareil ne convient pas en tant que
source principale de chauffage.
Nota: il dispositivo non è idoneo ad essere utilizzato
come fonte di riscaldamento primaria.
Advertencia: el aparato no es apto para utilizar como
fuente de calefacción primaria.
Kapitel
Inhaltsverzeichnis

Verwandte Anleitungen für Klarstein Bern Smart


Inhaltszusammenfassung für Klarstein Bern Smart
- Seite 1 Bern Smart Lucerne Smart Hinweis: Das Gerät eignet sich nicht zur Nutzung als Aargau Smart primäre Heizquelle. Note: The device is not suitable for use as a primary heat source. Remarque : l‘appareil ne convient pas en tant que Elektrischer Kamin source principale de chauffage.
-
Seite 3: Inhaltsverzeichnis
Sehr geehrter Kunde, wir gratulieren Ihnen zum Erwerb Ihres Gerätes. Lesen Sie die folgenden Hinweise sorgfältig durch und befolgen Sie diese, um möglichen Schäden vorzubeugen. Für Schäden, die durch Missachtung der Hinweise und unsachgemäßen Gebrauch entstehen, übernehmen wir keine Haftung. Scannen Sie den folgenden QR-Code, um Zugriff auf die aktuellste Bedienungsanleitung und weitere Informationen rund um das Produkt zu erhalten. -
Seite 4: Sicherheitshinweise
SICHERHEITSHINWEISE • Prüfen Sie vor der Benutzung die Angabe zur Spannung auf dem Typenschild und schließen Sie das Gerät nur an Steckdosen an, die der Nennspannung des Geräts entsprechen. • Falls das Netzkabel beschädigt ist, lassen Sie es von einer ausgebildeten Fachkraft ersetzen. •... -
Seite 5: Geräteübersicht Und Tasten
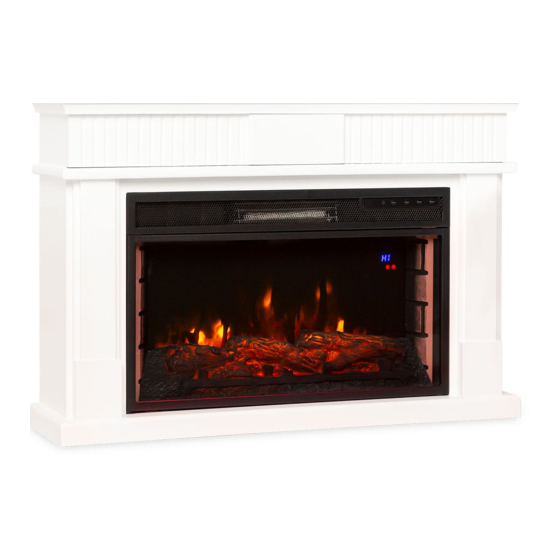
GERÄTEÜBERSICHT UND TASTEN Luftauslass Bedienfeld Luftauslass Bedienfeld Luftauslass Bedienfeld... -
Seite 6: Zusammenbau 10035204
ZUSAMMENBAU 10035204... -
Seite 7: Wandmontage
WANDMONTAGE Der Kamin kann an der Wand befestigt werden. Bevor die den Kamin befestigen, versichern Sie sich, dass der Kamin auf einem ebenen Untergrund steht. Markieren Sie mit einem Stift die Position der Löcher für die mitgelieferte Halterung. Bohren Sie mit einem dünnen Bohrer (2 mm) Löcher in die Rückseite des Kamins. Befestigen Sie die Halterungen mit den 4 weißen Schrauben am Kamin. -
Seite 8: Bedienfeld
BEDIENFELD Timer Flammenregler Wärmeregler Ein/Aus FERNBEDIENUNG Ein-/Aus-Taste • Drücken Sie diese Taste, um das Gerät ein- / auszuschalten Flammentaste • Zur Anpassung der Flammenhelligkeit: Drücken Sie diese Taste einmal und passen Sie die Flammenhelligkeit anschließend mit den Pfeiltasten • Zum Einstellen der Flammenfarbe: Drücken Sie zweimal die Flammen-Taste und verwenden Sie dann die Pfeil-Tasten, um zwischen den Flammenfarben (C1 - C7) zu wechseln. -
Seite 9: Bildschirmanzeigen
Timertaste • Drücken Sie, während das Gerät eingeschaltet ist, diese Taste, um die Zeit bis zum automatischen Ausschalten einzustellen. Sie können in 1-Stunden- Schritte 0 – 9 Stunden einstellen. Sobald die von Ihnen eingestellte Zeit verstrichen ist, geht das Feuer automatisch aus. -
Seite 10: Inbetriebnahme Und Bedienung
INBETRIEBNAHME UND BEDIENUNG Ein/Aus • Drücken Sie die Taste Power, um das Gerät ein-/ auszuschalten. • Halten Sie die Taste Power im Standbymodus für 3 Sekunden gedrückt, um das WLAN zurückzusetzen. • Halten Sie die Taste Power im Standbymodus 5 Sekunden lang gedrückt, um zwischen Celsius und Fahrenheit zu wechseln. -
Seite 11: Reinigung Und Pflege
Timer • Durch mehrfaches Drücken der Taste Timer im Standbymodus kann ein Einschalttimer eingestellt werden. Es kann ein Timer zwischen 0 und 9 Stunden eingestellt werden. Durch jedes Drücken der Taste Timer wird die Zeit in einem 1-Stunden-Intervall angepasst. • Drücken Sie zum Einstellen der LED-Hintergrundbeleuchtung so lange die Taste Timer, bis ein piependes Geräusch ertönt. -
Seite 12: Gerätesteuerung Per Smartphone
GERÄTESTEUERUNG PER SMARTPHONE Wenn Sie Ihr Klarstein-Gerät in Ihr heimisches WLAN einbinden, können Sie es ganz bequem über die dazugehörige Klarstein-App bedienen. Die App ermöglicht es Ihnen, nicht nur das Gerät über Ihr Smartphone fernzusteuern, sondern bietet Ihnen zudem Zugang zu Rezepten und weiterführenden Informationen. - Seite 13 Fehlerbehebung bei Verbindungsproblemen Wenn Ihr Klarstein-Gerät im WLAN nicht gefunden werden kann, überprüfen Sie Folgendes: • Ist das Gerät eingesteckt? • Ist die WLAN-Funktion des Smartphones aktiviert? • Ist die WLAN-Funktion des Klarstein-Gerätes aktiviert? (Befolgen Sie die Anweisungen in der App.) •...
-
Seite 14: Produktdatenblatt
PRODUKTDATENBLATT Modellkennung(en) 10035202, 10035203, 10035204 Angabe Symbol Wert Einheit Angabe Einheit Wärmeleistung Nur bei elektrischen Speicher-Einzelraumheizgeräten: Art der Regelung der Wärmezufuhr Nennwärmeleistung Manuelle Regelung der Wärmezufuhr mit k.A. integriertem Thermostat Mindestwärmeleistung Manuelle Regelung der Wärmezufuhr k.A. (Richtwert) mit Rückmeldung der Raum- und/oder Außentemperatur Maximale kontinuierliche Elektronische Regelung der Wärmezufuhr... -
Seite 15: Hinweise Zur Entsorgung
HINWEISE ZUR ENTSORGUNG Befindet sich die linke Abbildung (durchgestrichene Mülltonne auf Rädern) auf dem Produkt, gilt die Europäische Richtlinie 2012/19/EU. Diese Produkte dürfen nicht mit dem normalen Hausmüll entsorgt werden. Informieren Sie sich über die örtlichen Regelungen zur getrennten Sammlung elektrischer und elektronischer Gerätschaften.