Herunterladen Inhalt Inhalt Diese Seite drucken
Klarstein 10030845 Bedienungsanleitung
Vorschau ausblenden Andere Handbücher für 10030845:

Werbung

Verfügbare Sprachen
  • DE

Verfügbare Sprachen

  • DEUTSCH, seite 1
Elektrischer Kamin
10030845

Werbung

Inhaltsverzeichnis
loading

Inhaltszusammenfassung für Klarstein 10030845

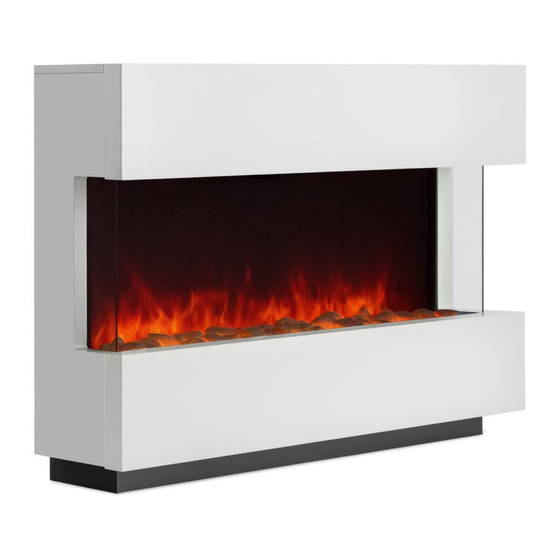
  • Seite 1 Elektrischer Kamin 10030845...
  • Seite 2: Inhaltsverzeichnis

    Installation 4 Inbetriebnahme und Bedienung 6 Reinigung und Pflege 7 Fehlersuche und Fehlerbehebung 8 Entsorgung und Konformitätserklärung 8 Technische Daten Artikelnummer 10030845 Stromversorgung 220-240 V ~ 50 Hz Leistung 2000 W Gewicht 36 kg Abmessungen (H x B x T)
  • Seite 3 • Falls das Netzkabel oder der Stecker beschädigt sind, müssen sie vom Hersteller, einem autorisierten Fach- betrieb oder einer ähnlich qualifizierten Person ersetzt werden. • Stellen Sie das Gerät nicht direkt unter einer Steckdose auf. • Benutzen Sie das Gerät nicht in Bäder, sowie in der Nähe einer Dusche oder eines Schwimmbeckens. •...
  • Seite 4: Installation

    Installation Gerät auspacken Das Gerät ist schwer. Suchen Sie sich während dem Auspacken und während der Installation Hilfe. Bitte lesen Sie sich alle Anweisungen vor der Installation genau durch. Bevor Sie mit der Installation dieses Kamins begin- nen, beachten Sie folgendes: •...
  • Seite 5 Installation Setzen Sie das Gerät an die Wand, an der es be- festigt werden soll. Markieren Sie den Punkt, an dem Sie den Gurt befestigen wollen. Nehmen Sie das Gerät von der Wand und bohren Sie ein Loch mit einem Durchmesser von 5,5 mm und einer Tiefe von 40 mm tief.
  • Seite 6: Inbetriebnahme Und Bedienung

    Inbetriebnahme und Bedienung Bedienfeld und Fernbedienung Bedienfeld Fernbedienung Das Bedienfeld enthält mehrere Tasten, über die 1 Ein/Aus sich das Gerät bedienen lässt. Die Tasten stimmen 2 Niedrige Heizleistung 1000 W in ihrer Funktion mit den Tasten der Fernbedie- 3 Hohe Heizleistung 200 W nung überein.
  • Seite 7: Reinigung Und Pflege

    Batterien der Fernbedienung wechseln Das Gerät wird mit einer Fernbedienung geliefert. Bevor Sie die Fernbedienung benutzen können, müssen sie zunächst den Plastikstreifen entfernen. So wechseln Sie die Batterien aus: 1. Drücken Sie auf die Klammer am Batteriefach und ziehen Sie es heraus. 2.
  • Seite 8: Entsorgung Und Konformitätserklärung

    Problem Mögliche Ursache und Lösung Das Gerät läuft nicht obwohl Setzen Sie alle Schalter auf OFF und ziehen Sie den Stecker aus der es eingeschaltet ist und alle Steckdose. Warten Sie 5 Minuten. Stecken Sie den Stecker nach 5 Minuten Schalter auf ON stehen.
  • Seite 9: Technical Data

    Installation 11 Use and Operation 13 Cleaning and Care 16 Troubleshooting 17 Disposal and Declaration of Conformity 17 Technical Data Item number 10030845 Power supply 220-240 V ~ 50 Hz Power consumtion 2000 W Weight 36 kg Dimensions (H x W x D)
  • Seite 10 • The heater must not be located immediately below a socket-outlet. • DO NOT use this heater in the immediate surroundings of a bath, a shower or a swimming pool. • WARNING: In order to avoid overheating, do not cover the heater. •...
  • Seite 11 Installation Unpacking the Appliance This appliance is heavy. Always seek assistance whilst unpacking and/or during installation. Please read all the instructions before continuing to unpack or install appliance. Before star ting the installation of this fireplace, please read the following: •...
  • Seite 12 Installation Offer the appliance up to the wall in it’ s desired location. Draw a mark where you wish to connect the strap in to the wall. Remove the appliance from the position and drill 1x hole (5.5 mm dia- meter, 40 mm deep).
  • Seite 13: Use And Operation

    Use and Operation Control Panel and remote Control Control Panel Remote Control This panel contains the buttons to properly opera- 1 On/Off te the electric fire ,the Remote Control functions in 2 Heater low (1000W) the same way. The remote control has an effective 3 Heater high (2000W) range of up to 4 m.
  • Seite 14: Cleaning And Care

    Battery Replacement The fire is supplied with an IR multifunction remote. Before the remote will operate the plastic insulating sheet needs to be removed. 1. Locate and remove the battery bracket. 2. The battery has two sides, one with a button feature, and the other is flat. 3.
  • Seite 15: Hints On Disposal

    Problem Possible Cause and Solution Heater doesn‘t work, but Turn all switches / buttons to the „OFF“ position and unplug the unit from Power and Heater switches/ the wall outlet for 5 minutes. After 5 minutes plug the unit back into wall buttons are in the „ON“...
  • Seite 16: Datos Técnicos

    Puesta en marcha y uso 20 Limpieza y cuidado 21 Detección y resolución de problemas 22 Retirada del aparato y declaración de conformidad 22 Datos técnicos Número de artículo 10030845 Suministro eléctrico 220-240 V ~ 50 Hz Potencia 2000 W Peso...
  • Seite 17 • Si el cable de alimentación o el enchufe están dañados, deberán ser sustituidos por el fabricante, un servicio técnico autorizado o una persona igualmente cualificada. • No coloque el aparato justo bajo una toma de corriente. • No utilice el aparato en cuartos de baño ni cerca de duchas ni bañeras. •...
  • Seite 18: Instalación

    Instalación Desembalar aparato El aparato es pesado. Pida ayuda durante el desembalaje e instalación. Lea atentamente todas las indicaciones antes de la instalación. Antes de comenzar con la instalación de esta chimenea, tenga en cuenta lo siguiente: • La instalación debe realizarse por parte de dos adultos para evitar lesiones o daños. Si el aparato es muy pesado para dos personas, pida ayuda adicional.
  • Seite 19 Instalación Coloque el aparato en la pared en donde deci- da fijarlo. Marque el punto en el que va a fijar la correa. Retire el aparato de la pared y perfore un orificio con un diámetro de 5,5 mm y una pro- fundidad de 40 mm.
  • Seite 20: Puesta En Marcha Y Uso

    Puesta en marcha y uso Panel de control y mando a distancia Panel de control Mando a distancia El panel de control contiene varios botones con los 1 On/off que puede controlar el aparato. Los botones coinci- 2 Potencia de calefacción baja 1000 W den con su función con los del mando a distancia.
  • Seite 21: Limpieza Y Cuidado

    Sustituir las pilas del mando a distancia El aparato se entrega con un mando a distancia. Antes de poder utilizarlo, deberá retirar la tira de plástico. Cómo sustituir las pilas: 1. Presione la patilla del compartimento para las pilas y extráigalo. 2.
  • Seite 22: Indicaciones Para La Retirada Del Aparato

    Problema Posible causa y solución El aparato no funciona Coloque todos los interruptores en la posición OFF y desconecte el enchufe aunque está encendido y de la toma de corriente. Espere 5 minutos. Vuelva a conectar el enchufe a la todos los interruptores están toma de corriente y encienda el aparato de nuevo transcurridos 5 minutos.
  • Seite 23: Fiche Technique

    Mise en marche et utilisation 27 Nettoyage et entretien 28 Identification et résolution des problèmes 29 Information sur le recyclage et déclaration de conformité 29 Fiche technique Numéro d’ a rticle 10030845 Alimentation électrique 220-240 V ~ 50 Hz Puissance 2000 W Poids...
  • Seite 24 • Si le cordon et la fiche d‘alimentation sont endommagés, les faire remplacer par le fabricant, une entreprise spécialisée habilitée ou une personne présentant une qualification analogue. • Ne pas placer l’ a ppareil directement sous une prise. • Ne pas utiliser l’ a ppareil dans une baignoire ou à proximité d’une douche ou d’un bassin. •...
  • Seite 25: Installation

    Installation Déballer l’appareil L’ a ppareil est lourd. Demander de l’ a ide pour le déballer et l’installer. Lire attentivement toutes les instructions avant l’installation. Avant de commencer l’installation de la cheminée, respecter les consignes suivantes : • L’installation doit être effectuée par deux adultes pour éviter toute blessure ou endommagement. Si l’...
  • Seite 26 Installation Placer l’ a ppareil contre le mur sur lequel il doit être monté. Marquer le point de fixation de la sangle. Éloigner l’ a ppareil du mur et percer un trou d’un diamètre de 5,5 mm et d’une profon- deur de 40 mm.
  • Seite 27: Mise En Marche Et Utilisation

    Mise en marche et utilisation Panneau de commande et télécommande Panneau de commande Télécommande Le panneau de commande comprend plusieurs 1 Marche / arrêt touches permettant de commander l’ a ppareil. La 2 Puissance basse de chauffe 1 000 W fonction des touches correspond à...
  • Seite 28: Nettoyage Et Entretien

    Remplacer la pile de la télécommande L’ a ppareil est livré avec une télécommande. Avant de pouvoir utiliser la télécommande, il est nécessaire d’ e n retirer le film de protection en plastique. Voici comment remplacer la pile : 1. Appuyer sur l’ a ttache du compartiment de la pile et sortir celui-ci. 2.
  • Seite 29: Information Sur Le Recyclage Et Déclaration De Conformité

    Problème Cause possible et solution L’ a ppareil ne fonctionne pas Mettre tous les interrupteurs sur OFF et débrancher l’ a ppareil. Attendre 5 bien qu’il soit allumé et que minutes. Puis rebrancher la fiche d’ a limentation après 5 minutes et remettre tous les interrupteurs sont l’...
  • Seite 30: Dati Tecnici

    Installazione 32 Messa in funzione e utilizzo 34 Manutenzione e pulizia 35 Ricerca e correzione errori 36 Smaltimento e dichiarazione di conformità 36 Dati tecnici Codice articolo 10030845 Alimentazione 220-240 V ~ 50 Hz Potenza 2000 W Peso 36 kg...
  • Seite 31 • Qualora il cavo o la spina di alimentazione dovessero essere danneggiati, è necessario rivolgersi al produtto- re, a personale tecnico autorizzato o a persone qualificate per la sostituzione. • Non posizionare il dispositivo direttamente sotto ad una presa di corrente. •...
  • Seite 32 Installazione Togliere il dispositivo dall‘imballaggio Il dispositivo è pesante. Farsi aiutare durante il disimballaggio e l’installazione. Si prega di leggere attentamente le avvertenze prima di procedere all’installazione. Prima di procedere all’installazione, fare attenzione a quanto segue: • L’installazione dovrebbe essere eseguita da due adulti, per evitare danneggiamenti e infortuni. Se il disposi- tivo dovesse rivelarsi comunque eccessivamente pesante, chiedere aiuto ad una terza persona.
  • Seite 33 Installazione Porre il dispositivo alla parete su cui si desidera fissarlo. Segnare il punto in cui si vuole fissare la cinghia. Spostare il dispositivo dalla parete e re- alizzare, con un trapano, un foro del diametro di 5,5 mm e una profondità di 40 mm. IMPORTANTE: prima di forare la parete con il trapano, assi- curarsi che non si trovino al suo interno cavi, tubi...
  • Seite 34: Messa In Funzione E Utilizzo

    Messa in funzione e utilizzo Pannello di controllo e telecomando Pannello di controllo Telecomando Il pannello di controllo comprende diversi tasti per 1 On/Off utilizzare il dispositivo. I tasti corrispondono nelle 2 Bassa potenza riscaldante 1000 W loro funzioni ai tasti del telecomando. La copertura 3 Alta potenza riscaldante 200 W del telecomando è...
  • Seite 35: Manutenzione E Pulizia

    Sostituzione pila nel telecomando Il dispositivo viene consegnato con un telecomando in dotazione. Prima di poter utilizzare il telecomando, è necessario rimuovere le strisce di plastica. In questo modo si sostituisce la pila: 1. Premere sulla levetta del vano per la pila ed estrarlo. 2.
  • Seite 36: Smaltimento

    Problema Possibile causa e soluzione Il dispositivo non funziona, Posizionare tutti gli interruttori su OFF e scollegare la spina. Attendere 5 sebbene sia acceso e tutti gli minuti. Inserire nuovamente la spina e accendere nuovamente il dispositivo. interruttori in posizione ON. Il dispositivo emette rumori.

Inhaltsverzeichnis