Inhaltsverzeichnis
Werbung
Verfügbare Sprachen
Verfügbare Sprachen
Quicklinks
WL-HDD2.5
Contents
Getting Started With Your WL-HDD2.5 .......................................... 2
Benefits of the WL-HDD2.5 ....................................................... 2
Before Installing ........................................................................ 2
System Requirements .................................................................... 3
Power Requirements ...................................................................... 3
Package List ................................................................................... 3
Setting up the WL-HDD2.5 ............................................................. 4
Installing a Hard Drive ............................................................... 4
Making the Connections ........................................................... 5
Accessing the Configuration Web Page ................................... 6
Formatting a New Hard Disk Drive ........................................... 7
Status Indicators ....................................................................... 8
Setting up a File and FTP Servers ................................................. 9
Adding Users ............................................................................ 9
Adding Shares and Applying Permissions .............................. 10
Sharing Files ............................................................................11
Enabling Access to the Hard Disk Drive ....................................... 12
Using the Auto-Copy Function ..................................................... 13
Auto-Copy Function ................................................................ 13
Shutting Down the WL-HDD2.5 ................................................... 14
¨
ASUS 802.11g WL-HDD2.5
1
Werbung
Kapitel
Inhaltsverzeichnis

Verwandte Anleitungen für Asus WL-HDD2.5


Inhaltszusammenfassung für Asus WL-HDD2.5
-
Seite 1: Inhaltsverzeichnis
¨ WL-HDD2.5 Contents Getting Started With Your WL-HDD2.5 .......... 2 Benefits of the WL-HDD2.5 ............2 Before Installing ................ 2 System Requirements ..............3 Power Requirements ..............3 Package List ................... 3 Setting up the WL-HDD2.5 ............. 4 Installing a Hard Drive ............... 4 Making the Connections ............ -
Seite 2: Getting Started With Your Wl-Hdd2.5
AP for wireless devices such as PDAs, to gain access to the Internet. Network Storage Whether the ASUS WL-HDD2.5 is set up as an AP or not, it has an additional advantage in that it provides network storage with its hard disk drive, enabling you to share information and storage capacity through a WLAN. -
Seite 3: System Requirements
System Requirements To begin using the ASUS WL-HDD2.5, your system must have the following minimum requirements: • An Ethernet (10BaseT or 10/100BaseT) adapter for wired clients • At least one 802.11g (54Mbps) or one 802.11b (11Mbps) wireless adapter for wireless mobile clients •... -
Seite 4: Setting Up The Wl-Hdd2.5
Setting up the WL-HDD2.5 Installing a Hard Drive Follow these steps to insert the hard disk and assemble the device before using it. 1. Remove the screws from the bottom. 2. Remove the internal circuit board by pulling the front panel cover in the direction of the arrow. -
Seite 5: Making The Connections
Making the Connections In order to use the ASUS WL-HDD2.5 as an AP, it has to be connected to a cable modem, network hub, or some other form of Internet access device. 1. Attach one end of an RJ-45 Ethernet cable to the ASUS WL- HDD2.5. -
Seite 6: Accessing The Configuration Web Page
Accessing the Configuration Web Page To access the Configuration web page of the ASUS WL-HDD2.5 from a wireless client do the following: 1. Connect to the WL-HDD through a wireless client using the default SSID, “WL-HDD”. See your wireless client’s user manual for instructions on how to do this. -
Seite 7: Formatting A New Hard Disk Drive
Formatting a New Hard Disk Drive 1. When the ASUS WL-HDD2.5 is turned on, the pre-scan function detects the unformatted disk and prompts you to start formatting. Click OK. 2. The Disk Tool from the Storage Setting menu opens in your browser. -
Seite 8: Status Indicators
Power adapter is plugged in and the device is powered on Blinking (slow) File system on the hard disk drive is inconsistent 10Mb/s Blinking Data is being transferred with a speed of 10Mbps. 100Mb/s Blinking Data is being transferred with a Speed of 100Mbps. ASUS 802.11g WL-HDD2.5... -
Seite 9: Setting Up A File And Ftp Servers
You can also add users and set their access rights as follows. Adding Users The user list is a list of people who are allowed access to the ASUS WL- HDD2.5. 1. Access the “ASUS WL-HDD2.5 Web Manager” page as described in “Accessing the Configuration Web Page”... -
Seite 10: Adding Shares And Applying Permissions
Adding Shares and Applying Permissions The shared nodes list is a list of all the folders and partitions on the ASUS WL-HDD2.5 showing permissions for each node. 1. Under the “Shared Nodes List” on the “Storage Setting - Shared Nodes” page, select a folder or partition from the “Folders and Partitions”... -
Seite 11: Sharing Files
Sharing Files The ASUS WL-HDD2.5 is primarily designed to help you share data, music, video, or other files over the wireless LAN. 1. Connect to the wireless network through your wireless client and access the ASUS WL-HDD2.5. 2. Type a valid user name and password to access the data. -
Seite 12: Enabling Access To The Hard Disk Drive
1. Open Windows Explorer, click the My Network Places icon then double-click Entire Network. 2. Click Search for computers to start searching for the ASUS WL- HDD2.5. 3. The search window opens. Type the device name or SSID (WL- HDD) in the search field. -
Seite 13: Using The Auto-Copy Function
– is used first. All data is copied as long as there is free space on the first partition. Note: If you remove the flash disk from the ASUS WL-HDD2.5 and insert it again, the data is copied again to the hard disk in a new folder with the folder name incremented by 1. -
Seite 14: Shutting Down The Wl-Hdd2.5
Shutting Down the WL-HDD2.5 Use the Web Manager tool to shut down the ASUS WL-HDD2.5 after using it to prevent damage to the hard disk and loss of data. To shut down the system, do one of the following: • Press the shutdown button for 5 seconds on the unit. Hold it down for 20 seconds to reset it to default settings. - Seite 15 WL-HDD2.5 Table des Matières Bien débuter avec votre WL-HDD2.5 ..........2 Les avantages du WL-HDD2.5 ..........2 Avant l’installation ..............2 Configuration requise ..............3 Alimentation requise ............... 3 Contenu du paquet ................. 3 Configurer le WL-HDD2.5 .............. 4 Installer un disque dur ............... 4 Effectuer les connexions ............
-
Seite 16: Bien Débuter Avec Votre Wl-Hdd2.5
Remarque: Il est de la responsabilité de l’installateur et des utilisateurs de s’assurer que l’antenne du WL-HDD2.5 ASUS est placée à une distance d’au moins 20 cm d’une personne pendant son fonctionnement. ASUS 802.11g WL-HDD2.5... -
Seite 17: Configuration Requise
Configuration requise Pour commencer à utiliser le WL-HDD2.5 ASUS, votre système doit respecter la configuration minimum suivante : • Une carte Ethernet (10BaseT ou 10/100BaseT) pour les clients câblés • Au moins une carte réseau sans-fil 802.11g (54Mbps) ou 802.11b (11Mbps) pour les clients mobiles sans-fil •... -
Seite 18: Configurer Le Wl-Hdd2.5
Configurer le WL-HDD2.5 Installer un disque dur Suivez ces étapes pour insérer le disque dur et assembler l’appareil avant de l’utiliser. 1. Retirez les vis du dessous. 2. Retirez la carte de circuits interne en tirant le couvercle du panneau avant dans la direction de la flèche. -
Seite 19: Effectuer Les Connexions
Effectuer les connexions Pour pouvoir utiliser le WL-HDD2.5 ASUS comme un point d'accès, il doit être connecté à un modem câble, un hub réseau ou un autre type de périphérique d’accès Internet. 1. Fixez une extrémité d’un câble Ethernet RJ-45 au WL-HDD2.5 ASUS. -
Seite 20: Accéder À La Page De Configuration Web
Accéder à la page de configuration web Pour accéder à la page de configuration Web de votre WL-HDD2.5 ASUS depuis un client sans-fil, veuillez : 1. Vous connecter au WL-HDD par l’intermédiaire d’un client sans- fil en utilisant le SSID par défaut, “WL-HDD”. Consultez le manuel de votre client sans-fil pour savoir comment faire. -
Seite 21: Formater Un Nouveau Disque Dur
Formater un nouveau disque dur 1. Lorsque le WL-HDD2.5 est allumé, la fonction pre-scan détectera le disque non formaté et vous proposera de débuter le formatage. Cliquez sur OK. 2. L’Outil Disque du Menu Paramétrage de Stockage s’ouvrira dans votre navigateur. Cet outil formatera le disque dur et créera jusqu’à... -
Seite 22: Témoins D'état
Clignotement (lent) Le système de fichiers sur le disque dur est inconsistant 10Mb/s Clignotant Les données sont transmises à une vitesse de 10 Mbps. 100Mb/s Clignotant Les données sont transmises à une vitesse de 100 Mbps. ASUS 802.11g WL-HDD2.5... -
Seite 23: Configurer Un Serveur De Fichiers Et Un Serveur Ftp
Configurer un serveur de fichier et un serveur FTP Par défaut, les données sur le WL-HDD2.5 ASUS sont partagées, permettant l’accès à tous les clients distants sans identifiant ou mot de passe. Vous pouvez accéder au WL-HDD2.5 ASUS en recherchant le nom d’ordinateur “WL-HDD”. -
Seite 24: Ajouter Des Partages Et Appliquer Des Autorisations
La liste des noeuds partagés est une liste de tous les dossiers et partitions sur le WL-HDD2.5 ASUS, affichant les permissions pour chaque noeud. 1. Sous “Liste des Noeuds partagés” dans “Paramètres de Stockage - Noeuds partagés”, sélectionnez un dossier ou une partition dans la liste déroulante “Dossiers et Partitions”. -
Seite 25: Partager Des Fichiers
Partager des fichiers Le WL-HDD2.5 ASUS est principalement conçu pour vous aider à partager des données, de la musique, de la vidéo ou d’autres fichiers par l’intermédiaire du réseau sans-fil. 1. Connectez-vous au réseau sans-fil grâce à votre client sans-fil et accédez au WL-HDD2.5 ASUS. -
Seite 26: Autoriser Les Accès Au Disque Dur
Tout le Réseau. 2. Cliquez sur Rechercher des ordinateurs pour débuter la recherche du WL-HDD2.5 ASUS. 3. La fenêtre de recherche s’affiche. Saisissez le nom de l’appareil ou son SSID (WL-HDD) dans le champ de recherche. Puis cliquez sur Rechercher Maintenant. -
Seite 27: Utiliser La Fonction Copie-Auto
-part1- est utilisée en premier. Toutes les données sont copiées, du moment qu’il reste de l’espace sur la première partition. Remarque: Si vous retirez le disque flash du WL-HDD2.5 ASUS et si vous l’insérez de nouveau, les données seront recopiées encore une fois sur le disque dur dans un nouveau dossier avec un nom incrémenté... -
Seite 28: Eteindre Le Wl-Hdd2.5
Eteindre le WL-HDD2.5 Utilisez l’outil Gestionnaire Web pour éteindre le WL-HDD2.5 ASUS après l’avoir utilisé pour éviter les dommages au disque dur et la perte de données. Pour éteindre le système, effectuez l’une des manipulations suivantes : • Pressez le bouton arrêt sur l’unité pendant 5 secondes. - Seite 29 ¨ WL-HDD2.5 Inhaltsverzeichnis Ihr WL-HDD2.5 ................2 Vorteil des WL-HDD2.5 ............2 Vor der Installation ..............2 Systemanforderungen ..............3 Stromversorgungsanforderungen ..........3 Verpackungsinhalt ................. 3 Einrichten des WL-HDD2.5 ............4 Installieren einer Festplatte ............4 Verbinden des WL-HDD2.5 ............5 Zugriff auf die Konfigurations-Webseite ........
-
Seite 30: Ihr Wl-Hdd2.5
AP. Drahtlose Geräte wie z.B. PDAs können über das WL-HDD2.5 auf das Internet zugreifen. Netzwerkspeicherung Ein zusätzlicher Vorteil des ASUS WL-HDD2.5 ist, dass egal ob es als AP eingerichtet wurde oder nicht, können Sie die Festplatte zur Netzwerkspeicherung verwenden und dadurch Informationen über ein WLAN mit anderen Leuten teilen. -
Seite 31: Systemanforderungen
Systemanforderungen Um das ASUS WL-HDD2.5 zu verwenden, muss Ihr System die folgenden Mindestanforderungen erfüllen: • Einen Netzwerkadapter (10BaseT oder 10/100BaseT) für die Netzwerknutzung • Mindestens ein 802.11g (54MBps) oder 802.11b (11MBps) WLAN Adapter für drahtlose mobile Clients • TCP/IP und ein Internetbrowser •... -
Seite 32: Einrichten Des Wl-Hdd2.5
Einrichten des WL-HDD2.5 Installieren einer Festplatte Bevor Sie das Gerät benutzen, installieren Sie bitte die Festplatte wie unten beschrieben. 1. Entfernen Sie die beiden Plastikfüße und die darunterliegenden Schrauben auf der Unterseite des Gehäuses (bei der Erstinstallation nicht notwendig, Schrauben liegen der Verpackung bei). -
Seite 33: Verbinden Des Wl-Hdd2.5
Verbinden des ASUS WL-HDD2.5 Um das WL-HDD2.5 als AP zu verwenden, müssen Sie es mit einem Kabelmodem, Netzwerk-Hub oder einem anderen Netzwerkgerät verbinden. 1. Verbinden Sie ein Ende des RJ-45 Netzwerkkabels mit dem ASUS WL-HDD2.5. 2. Verbinden Sie das andere Ende mit dem RJ-45 Anschluss eines Switches, Hubs, Routers oder anderen Netzwerkgerätes. -
Seite 34: Zugriff Auf Die Konfigurations-Webseite
Zugriff auf die Konfigurations-Webseite Folgen Sie bitte den untenstehenden Schritten, um von einem drahtlosen Client auf die Konfigurations-Webseite des ASUS WL-HDD2.5 zuzugreifen: 1. Stellen Sie eine Verbindung über einen drahtlosen Client mit der Standard-SSID “WL-HDD” her. Für genauere Informationen hierzu sehen Sie bitte im Benutzerhandbuch Ihres drahtlosen Clients nach. -
Seite 35: Formatieren Einer Neuen Festplatte
4. Klicken Sie nach dem Formatieren auf Speichern & Neu starten, um das System neu zu starten. Der Browser zeigt den Status an, wenn das ASUS WL-HDD2.5 neu startet. Bevor Sie das System verwenden, warten Sie bitte, bis der Inhalt auf dem Bildschirm aktualisiert wurde. -
Seite 36: Statusanzeigen
Datenpakete drahtlos gesendet oder empfangen STROM Stromadapter eingesteckt und das Gerät eingeschaltet Blinkt (langsam) Dateisystem auf der Festplatte nicht konsistent 10MB/s Blinkt Daten mit einer Geschwindigkeit von 10MBps übertragen. 100MB/s Blinkt Daten mit einer Geschwindigkeit von 100MBps übertragen. ASUS 802.11g WL-HDD2.5... -
Seite 37: Hinzufügen Von Benutzern
Verbindung über FTP herzustellen. Sie können auch Benutzer hinzufügen und Ihre Zugriffsberechtigung wie folgt einstellen. Hinzufügen von Benutzern Die Benutzerliste ist eine Liste von Personen, die auf das ASUS WL-HDD2.5 zugreifen dürfen. 1. Öffnen Sie die “ASUS WL-HDD2.5 Web Manager”-Seite wie in Abschnitt “Zugriff auf die Konfigurations-Webseite”... -
Seite 38: Hinzufügen Von Freigaben Und Übernahme Von Zugangsberechtigungen
Hinzufügen von Freigaben und Übernahme von Zugangsberechtigungen Die Knotenfreigabenliste ist eine Liste aller Ordner und Partitionen auf dem ASUS WL-HDD2.5. Auf der Liste werden die Zugangsberechtigungen von jedem Knoten angezeigt. 1. Wählen Sie einen Ordner oder eine Partition aus dem “Ordner und Partitionen”-Menü... -
Seite 39: Filesharing Mit Den Anderen
Filesharing mit den Anderen Ein Hauptzweck des ASUS WL-HDD2.5 ist, Ihnen zu helfen, Daten, Musik, Videos oder andere Dateien über das drahtlose LAN mit anderen auszutauschen. 1. Stellen Sie eine Verbindung über Ihren drahtlosen Client mit dem drahtlosen Netzwerk her und greifen auf das ASUS WL-HDD2.5 2. -
Seite 40: Zugriff Auf Die Festplatte
Netzwerkumgebungs-Symbol und klicken anschließend doppelt auf ‘Gesamtes Netzwerk’. 2. Klicken Sie auf ‘Nach Computern suchen’, um die Suche nach dem ASUS WL-HDD2.5 zu starten. 3. Das Suchfenster wird geöffnet. Tippen Sie den Gerätenamen oder die SSID (WL-HDD) in das Suchfeld ein. Klicken Sie anschließend auf ‘Jetzt suchen’. -
Seite 41: Verwenden Der Auto-Kopierfunktion
Verwenden der Auto-Kopierfunktion Das ASUS WL-HDD2.5 unterstützt USB-Flashdisks oder externe Flash- Speicherkarten, um Daten über eine USB-Verbindung austauschen zu können. Das Gerät kopiert die Daten automatisch von dem Flash-Speicher auf die Festplatte, wenn der Flash-Speicher in den USB-Anschluss eingesteckt wird. -
Seite 42: Ausschalten Des Wl-Hdd2.5
Ausschalten des WL-HDD2.5 Zum Ausschalten des ASUS WL-HDD2.5 verwenden Sie bitte das Web Manager Tool, um Schäden an der Festplatte und einen Datenverlust zu vermeiden. So schalten Sie das System aus: • Drücken Sie die Ausschalten-Taste am Gerät für 5 Sekunden. - Seite 43 ¨ WL-HDD2.5 Indice Introduzione a WL-HDD2.5 ............2 Vantaggi di WL-HDD2.5 ............2 Prima dell’installazione ............. 2 Requisiti di sistema ................ 3 Requisiti di alimentazione .............. 3 Contenuto della confezione ............3 Impostazione di WL-HDD2.5 ............4 Installazione del disco fisso ............4 Esecuzione dei collegamenti ............
-
Seite 44: Introduzione A Wl-Hdd2.5
LAN. Vantaggi di WL-HDD2.5 Access Point (AP) Se collegato ad una LAN tramite un cavo di rete, WL-HDD2.5 diventa un AP per dispositivi wireless come i PDA, permettendo l’accesso a Internet. Storage di rete Indipendente da come è stato impostato, se come AP o no, ASUS WL- HDD2, possiede comunque il vantaggio di fornire la memorizzazione dei dati dalla rete con il proprio disco fisso, permettendo così... -
Seite 45: Requisiti Di Sistema
Requisiti di sistema Per iniziare ad utilizzare ASUS WL-HDD2.5, il sistema deve avere come minimo i seguenti requisiti: • Un adattatore Ethernet (10BaseT o 10/100BaseT) per client wired • Almeno un adattatore wireless 802.11g (54Mbps) o 802.11b (11Mbps) per client wireless mobili •... -
Seite 46: Impostazione Di Wl-Hdd2.5
Impostazione di WL-HDD2.5 Installazione di un disco fisso Seguire queste operazioni per inserire il disco fisso e assemblare il dispositivo prima di utilizzarlo. 1. Rimuovere le viti in fondo. 2. Rimuovere la scheda del circuito interno tirando il coperchio del pannello anteriore in direzione della freccia. -
Seite 47: Esecuzione Dei Collegamenti
Esecuzione dei collegamenti Per poter utilizzare ASUS WL-HDD2.5 come AP, esso deve essere collegato ad un modem, hub di rete, o a qualche altro tipo di dispositivo per l’accesso a Internet. 1. Collegare un capo del cavo Ethernet RJ-45 a ASUS WL-HDD2.5. -
Seite 48: Accesso Alla Pagina Web Della Configurazione
Accesso alla Pagina Web della Configurazione Per accedere alla pagina web della Configurazione di ASUS WL-HDD2.5 da un client wireless, procedere come segue: 1. Collegarsi a WL-HDD tramite un client wireless utilizzando il SSID, “WL-HDD” predefinito. Consultare il manuale utente sul client wireless per istruzioni al riguardo. -
Seite 49: Formattazione Di Un Nuovo Disco Fisso
Formattazione di un nuovo disco fisso 1. Quando ASUS WL-HDD2.5 è acceso, la funzione di pre-scan riscontra il disco non formattato e richiede di iniziare la formattazione. Fare clic su OK. 2. Strumenti Disco dal menu Impostazioni Storage si apre nel browser., esegue la formattazione del disco fisso e crea max. -
Seite 50: Indicatori Dello Stato
Pacchetti wireless in trasmissione o ricezione ALIM. Acceso Alimentatore inserito e dispositivo acceso Lamp. (lento) Il file system sul disco fisso inconsistente 10Mb/s Lampeggiante Trasferimento dati in corso con velocità 10Mbps. 100Mb/s Lampeggiante Trasferimento dati in corso con velocità 100Mbps. ASUS 802.11g WL-HDD2.5... -
Seite 51: Impostazione Di Un File E Dei Server Ftp
“WL-HDD”. Fare riferimento a “Abilitazione all’accesso del disco fisso” per ulteriori dettagli. Utilizzando anche un client FTP è possibile collegarsi al Server FTP di ASUS WL-HDD2.5; in tal caso, utilizzare un login anonimo senza bisogno di password. Inoltre, per aggiungere utenti ed impostarne l’accesso procedere come segue. -
Seite 52: Aggiunta Condivisioni E Permessi
Aggiunta condivisioni e permessi La lista dei nodi condivisi rappresenta un elenco di tutte le cartelle e partizioni di ASUS WL-HDD2.5 e mostra i permessi per ogni nodo. 1. Nella maschera “Elenco Nodi Condivisi” della pagina “Impostazioni Storage - Nodi Condivisi”, selezionare una cartella o partizione dal menu a cascata “Cartelle e Partizioni”. -
Seite 53: Condivisione Dei File
Condivisione dei file ASUS WL-HDD2.5 è stato progettato principalmente per permettere agli utenti la condivisione di dati, musica, video, e altri file della LAN wireless. 1. Collegarsi alla rete wireless tramite il client wireless ed accedere a ASUS WL-HDD2.5. 2. Inserire nome utente e password validi per accedere ai dati. -
Seite 54: Abilitazione All'accesso Del Disco Fisso
1. Aprire Windows Explorer, fare clic sull’icona Risorse di Rete e poi doppio clic su Tutta la Rete. 2. Fare clic su Cerca computer per avviare la ricerca di ASUS WL- HDD2.5. 3. La finestra per la ricerca si apre. Inserire il nome del dispositivo o SSID (WL-HDD) nel campo di ricerca. -
Seite 55: Utilizzo Della Funzione Copia Automatica
– part1 – sarà anche quella utilizzata per prima. Tutti i dati vengono copiati finché ci sarà spazio su di essa. Nota: Togliendo e rimettendo il disco flash da ASUS WL-HDD2.5, i dati vengono copiati di nuovo sul il disco fisso in una nuova cartella che avrà il nome incrementato di 1. -
Seite 56: Arresto Di Wl-Hdd2.5
Arresto di WL-HDD2.5 Utilizzare Web Manager per eseguire l’arresto di ASUS WL-HDD2.5 dopo averlo utilizzato, per evitare eventuali danni al disco fisso e perdita di dati. Per arrestare il sistema, eseguire una delle seguenti operazioni: • Premere il tasto shutdown posto sull’unità per 5 secondi. Tenerlo premuto per 20 secondi per riportarlo ai valori predefiniti. - Seite 57 ¨ WL-HDD2.5 Contenido Introducción a WL-HDD2.5 ............2 Ventajas de WL-HDD2.5 ............2 Antes de la instalación .............. 2 Requisitos de sistema ..............3 Requisitos de alimentación ............3 Lista de embalaje ................3 Configuración de WL-HDD2.5 ............4 Instalación de un disco duro ............. 4 Conexiones ................
-
Seite 58: Introducción A Wl-Hdd2.5
PDA, puedan conectar a Internet. Almacenamiento de red Tanto si el ASUS WL-HDD2.5 se configura como un PA o no, tiene la ventaja adicional de proporcionar un almacenamiento de red con su unidad de disco duro, permitiéndole compartir información y capacidad de almacenamiento con toda la WLAN. -
Seite 59: Requisitos De Sistema
Requisitos de sistema Para comenzar a utilizar el ASUS WL-HDD2.5, el sistema debe disponer de los siguientes requisitos mínimos: • Un adaptador Ethernet (10BaseT or 10/100BaseT) para clientes por cable • Al menos un adaptador inalámbrico 802.11g (54Mbps) o 802.11b (11Mbps) para clientes móviles inalámbricos... -
Seite 60: Configuración De Wl-Hdd2.5
Configuración de WL-HDD2.5 Instalación de un disco duro Siga estos pasos para insertar un nuevo disco duro y montar el dispositivo antes de utilizarlo. 1. Retire los tornillos de la parte inferior. 2. Retire la placa de circuito interna tirando de la cubierta del panel frontal en la dirección... -
Seite 61: Conexiones
Conexiones Para utilizar el ASUS WL-HDD2.5 como un PA, debe conectarse a un módem cable, concentrador de red o alguna forma de dispositivo de acceso a Internet. 1. Conecte un extremo del cable Ethernet RJ-45 al ASUS WL- HDD2.5. 2. Conecte el otro extremo a un puerto RJ-45 de un conmutador, concentrador, enrutador, panel de conexión o alguna forma de... -
Seite 62: Acceso A La Página Web De Configuración
Acceso a la página web de configuración Para acceder a la página web de configuración del ASUS WL- HDD2.5 desde un cliente inalámbrico, haga lo siguiente: 1. Conecte al WL-HDD mediante un cliente inalámbrico utilizando el SSID predeterminado, “WL-HDD”. Consulte el manual de usuario del cliente inalámbrico para obtener instrucciones acerca... - Seite 63 Formateo de una nueva unidad de disco duro 1. Cuando se enciende el ASUS WL-HDD2.5 se enciende, la función de exploración previa detecta el disco sin formato y le pide que comience el formateo. Haga clic en Aceptar. 2. La Herramienta de disco del menú Configuración de almacenamiento se abrirá...
-
Seite 64: Indicadores De Estado
Parpadenado El sistema de archivos del disco duro no es consistente (lento) 10Mb/s Parpadeando Los datos se están transmitiendo a una velocidad de 10Mbps. 100Mb/s Parpadeando Los datos se están transmitiendo a una velocidad de 100Mbps. ASUS 802.11g WL-HDD2.5... -
Seite 65: Configuración De Servidores De Archivos Y Ftp
Consulte “Habilitar otros usuarios a acceder a la unidad de disco duro” para obtener más detalles. También puede utilizar un cliente FTP para conectar al servidor de FTP de ASUS WL-HDD2.5. Para conectar utilizando FTP, utilice un inicio de sesión anónimo sin contraseña. -
Seite 66: Adición De Servicios Compartidos Y Aplicación De Permisos
Adición de servicios compartidos y aplicación de permisos La lista de nodos compartidos es una lista de todas las carpetas y particiones de ASUS WL-HDD2.5 mostrando los permisos de cada nodo. 1. En la “Lista de nodos compartidos” de la página “Configuración de almacenamiento - Nodos compartidos”, seleccione una... -
Seite 67: Archivos Compartidos
Archivos compartidos El ASUS WL-HDD2.5 está diseñado principalmente para ayudarle a compartir los datos, música, vídeo u otros archivos por la LAN inalámbrica. 1. Conecte a la red inalámbrica por el cliente inalámbrico y acceda a ASUS WL-HDD2.5. 2. Escriba un nombre de usuario y contraseña válidos para acceder a los datos. -
Seite 68: Habilitar El Acceso Al Disco Duro
La unidad de disco duro meustra la carpeta de configuración y las particiones (partición1, partición2, etc.) disponibles. Consulte el manual de usuario para saber cómo acceder al disco duro utilizando otros métodos. ASUS 802.11g WL-HDD2.5... -
Seite 69: Utilización De La Función De Copia Automática
(partición1) se utilizará en primer lugar. Todos los datos se copiarán mientras quede espacio libre en la primera partición. Nota: Si retira el disco flash del ASUS WL-HDD2.5 y lo vuelve a insertar, los datos se copiarán de nuevo al disco duro en una nueva carpeta cuyo nombre habrá... -
Seite 70: Apagado De Wl-Hdd2.5
Apagado de WL-HDD2.5 Utilice la herramienta de administración web para apagar el ASUS WL-HDD2.5 tras utilizarlo para evitar daños al disco duro o pérdida de datos. Para apagar el sistema, realice una de las siguientes operaciones: • Pulse el botón de apagado durante 5 segundos. Manténgalo pulsado durante 20 segundos para reiniciarlo a su configuración... - Seite 71 ¨ WL-HDD2.5 одержание накомство с устройством WL-HDD2.5 ............. 2 реимущества устройства WL-HDD2.5 ............2 одготовка к установке ................2 ребования к системе ..................3 ребования к питанию ..................3 омплектация ....................... 3 астройка WL-HDD2.5 ..................4 Установка накопителя на жестких дисках ..........4 одключение...
-
Seite 72: Накомство С Устройством Wl-Hdd2.5
для , для получения доступа в нтернет. етевое устройство хранения данных не зависимости от того, настроено ли устройство ASUS WL-HDD2.5 в качестве или нет, оно имеет дополнительное преимущество - обеспечивает хранение данных в сети на своем накопителе на жестком диске, что... -
Seite 73: Ребования К Системе
ребования к системе ля использования устройства ASUS WL-HDD2.5 система должна соответствовать следующим минимальным требованиям: • Адаптер Ethernet (10BaseT или 10/100BaseT) для подключаемых по проводам клиентов • е менее одного адаптера беспроводной связи 802.11g (54 бит/с) или 802.11b (11 бит/с) для беспроводных мобильных клиентов... -
Seite 74: Астройка Wl-Hdd2.5
роверьте, что контакты разъема накопителя на жестких дисках и ответной части правильно совмещены. 4. сли требуется, установите на место крышку передней панели и вновь установите печатную плату в корпус. 5. аверните винты. 6. рисоедините внешнюю антенну для улучшения рабочих характеристик. ASUS 802.11g WL-HDD2.5... -
Seite 75: Одключение
одключение ля использования устройства ASUS WL-HDD2.5 в качестве точки доступа ( ) оно должно быть подсоединено к обычному (проводному) модему, сетевому концентратору или другому устройству доступа в нтернет. 1. одсоедините один конец RJ-45 сетевого кабеля Ethernet к устройству ASUS WL-HDD2.5. -
Seite 76: Оступ К Web-Странице Настройки
оступ к Web-странице настройки ля доступа к Web-странице настройки устройства ASUS WL-HDD2.5 с беспроводного клиента выполните следующие операции: беспроводного клиента установите соединение с устройством WL-HDD, используя для SSID значение по умолчанию, “WL-HDD”. оответствующие инструкции см. в руководстве пользователя клиента. 2. нструкции по просмотру содержимого устройства ASUS WL-HDD2.5 см. -
Seite 77: Орматирование Нового Накопителя На Жестком Диске
нажмите кнопку OK. ачнется форматирование жесткого диска, а в окне браузера будет отображаться состояние форматирования. осле завершения форматирования выберите “Save&Restart” ( охранение и перезапуск) для перезапуска системы. о время перезапуска устройства ASUS WL-HDD2.5 в окне браузера отображается состояние устройства. еред использованием системы дождитесь обновления экрана. ASUS 802.11g WL-HDD2.5... -
Seite 78: Ндикаторы Состояния
ыполняется прием или передача пакета данных POWER орит Адаптер питания подсоединен, и питание устройства включено игает (редко) есовместимая файловая система на жестком диске 10Mb/s игает анные передаются со скоростью 10 бит/с 100Mb/s игает анные передаются со скоростью 100 бит/с ASUS 802.11g WL-HDD2.5... -
Seite 79: Астройка Файловых Серверов И Ftp Серверов
предоставлен общий доступ, позволяющий любому пользователю, имеющему удаленного клиента, получать доступ без ввода имени пользователя и пароля. оступ к устройству ASUS WL-HDD2.5 можно получить, выполнив поиск компьютера с именем “WL-HDD”. одробнее см. раздел “ редоставление доступа к накопителю на жестком... -
Seite 80: Обавление Совместно Используемых Ресурсов И Назначение Полномочий
обавление совместно используемых ресурсов и назначение полномочий писок совместно используемых узлов - это список всех папок и разделов устройства ASUS WL-HDD2.5 с отображением полномочий для каждого пользователя. 1. од заголовком “ писок совместно используемых узлов” на странице “ араметры хранения - совместно используемые узлы” выберите папку... -
Seite 81: Овместный Доступ К Файлам
овместный доступ к файлам Устройство ASUS WL-HDD2.5 предназначено прежде всего для совместного доступа пользователей к данным, музыке, видеофильмам и другим файлам по беспроводной 1. Установите соединение с беспроводной сетью с помощью клиента беспроводного доступа и получите доступ к устройству ASUS WL-HDD2.5. -
Seite 82: Редоставление Доступа К Жесткому Диску
компьютерам сети и нахождение жесткого диска с помощью следующей процедуры: 1. Откройте программу роводник Windows, выберите значок “ етевое окружение” и дважды щелкните на значке “ ся сеть”. 2. ыберите “ оиск компьютеров” для запуска поиска устройства ASUS WL-HDD2.5. 3. Открывается окно поиска. -
Seite 83: Спользование Функции Автоматического Копирования
используется первый раздел – part1. се данные копируются в этот раздел, пока на нем имеется свободное место. римечание. ри извлечении накопителя на флэш-памяти из устройства ASUS WL-HDD2.5 и повторной установке данные снова автоматически копируются на жесткий диск в новую папку номер в имени которой больше на 1. - Seite 84 авершение работы WL-HDD2.5 ля выключения устройства ASUS WL-HDD2.5 после использования во избежание повреждения жесткого диска и потери данных используйте средство Web Manager. ля завершения работы системы используйте один из следующих способов: • а 5 секунд нажмите кнопку выключения на устройстве.
- Seite 85 ¤ Wireless WL-HDD (For 802.11g/b Wireless Clients) Quick Start Guide QE2013 / Apr 2005...
-
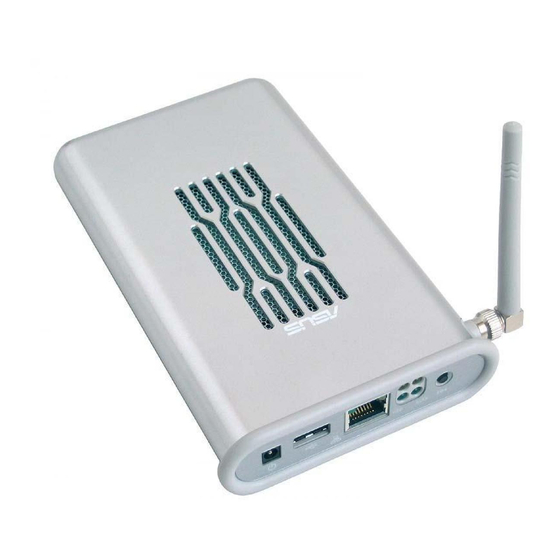
Seite 86: Ports And Buttons
Connect one end of the RJ-45 Ethernet cable here and the other end to the RJ-45 port of a network hub, switch, or router. Reset Button: Press this button for 5 seconds to shut down the ASUS Wireless "WL-HDD". Press this button for 30 seconds to reset the ASUS Wireless "WL-HDD". Status Indicators... -
Seite 87: Connecting Power
Configuring the Wireless Client TCP/IP Settings In order to access the shared hard disk drive of the ASUS Wireless "WL- HDD" or to use the device as an AP, you may need to configure the TCP/IP settings. The TCP/IP settings should be on the IP subnet of the ASUS Wireless "WL-HDD". - Seite 88 If you set your computer’s (wireless client) IP manually, it needs to be on the same segment as the ASUS Wireless "WL-HDD". To set the TCP/IP settings, use the Network and Dialup Connections wizard to create a new LAN connection and configure its TCP/IP settings as follows: 1.
- Seite 89 Refer to the documentation for your wireless client (notebook or PDA) as well as that for the wire- less adapter for specific instructions. When the wireless client is configured correctly, connection to “WL-HDD” should automatic. ASUS Wireless "WL-HDD" Quick Start...
- Seite 90 Using the Hard Disk Drive Now that you have installed the ASUS Wireless "WL-HDD" and connected it as required, you are ready to start using the hard drive as a network storage device as described in the following sections. Accessing the Hard Disk Drive...
- Seite 91 Using the ASUS Utility We recommend that you install the ASUS utility provided on the software CD included in your package. The utility enables you to search for the device and connect to the device to access the hard drive and configure the settings.
-
Seite 92: Formatting The Hard Disk
Hard Drive Pre-scan Function When the ASUS Wireless "WL-HDD" is first turned on, it performs a pre- scan of the hard disk drive to ensure that it is functioning correctly and does not have any corrupt data. If the hard drive is not working, has not been formatted, or has been corrupted, a message is displayed on the screen asking you to format the hard disk. - Seite 93 Editing the Shared Nodes List The shared nodes list is a list of all the folders and partitions on the ASUS Wireless "WL-HDD" showing the sharing and writing permissions for each node. You can specify which folder or partition is shared and which can be written to.
- Seite 94 6. Select a folder or partition from the list, then click Del to delete it from the list. 7. Select a folder or partition from the list and click Edit to modify permissions for the user in user list. ASUS Wireless "WL-HDD" Quick Start...
- Seite 95 Network Neighborhood Mode option to apply the permissions. Scroll to select Apply rules in shared node list from the field and click Finish to save the changes and restart the system. ASUS Wireless "WL-HDD" Quick Start...
- Seite 96 In order to share data from the ASUS Wireless WL-HDD, you must access the hard disk drive using a valid user name. See “Editing the User List” for more details about creating users.
- Seite 97 Notes: If you remove the flash disk from the ASUS Wireless "WL- HDD" and insert it again, the data is copied again to the hard disk in a new folder with the folder name incremented by 1. For instance, if the first time the data was copied under USBpart005, then after removing and inserting the disk, the data is copied again to a new folder named USBpart006.
-
Seite 98: System Setting
This set of menus enables you to make changes to the system parameters of the ASUS Wireless "WL-HDD". You can change the password, upgrade the firmware from a file provided by ASUS, or restore the device to its default factory settings using this set of menus.