Herunterladen Inhalt Inhalt Diese Seite drucken
Inhaltsverzeichnis

Werbung

Verfügbare Sprachen

Verfügbare Sprachen

Schnurlostelefon
Téléphone sans fil
Telefono senza fili
Cordless telephone
Bedienungsanleitung
Operating Instructions
Mode d'emploi
Istruzioni per l'uso
DF 93x
D
F
I
GB

Werbung

Inhaltsverzeichnis
loading

Inhaltszusammenfassung für switel DF 931

  • Seite 1 Schnurlostelefon Téléphone sans fil DF 93x Telefono senza fili Cordless telephone Bedienungsanleitung Mode d’emploi Istruzioni per l’uso Operating Instructions...
  • Seite 3: Inhaltsverzeichnis

    Inhaltsverzeichnis 1 Sicherheitshinweise ....... .2 2 Telefon in Betrieb nehmen ......3 3 Bedienelemente .
  • Seite 4: Sicherheitshinweise

    Sicherheitshinweise 1 Sicherheitshinweise Lesen Sie diese Bedienungsanleitung sorgfältig durch. Bestimmungsgemäße Verwendung Dieses Telefon ist geeignet zum Telefonieren innerhalb eines Telefonnetzes. Jede andere Verwendung gilt als nicht bestimmungsgemäß. Eigenmächtige Ver- änderungen oder Umbauten sind nicht zulässig. Öffnen Sie das Gerät in keinem Fall selbst und führen Sie keine eigenen Repa- raturversuche durch.
  • Seite 5: Entsorgung

    Achtung: Lesen Sie vor der Inbetriebnahme unbedingt die Sicherheits- hinweise in Kapitel 1. Verpackungsinhalt prüfen Zum Lieferumfang gehören: Inhalt DF 93x-Modell Basisstation mit Netzteil Ladestation mit Netzteil Mobilteil Telefonanschlusskabel Akkus Bedienungsanleitung Unter www.switel.com erfahren Sie, ob dieses Telefonset bereits erhältlich ist.
  • Seite 6: Basisstation Anschließen

    Telefon in Betrieb nehmen Basisstation anschließen Achtung: Stellen Sie die Basisstation mit einem Mindestabstand von 1 m zu anderen elektronischen Geräten auf, da es sonst zu gegen seitigen Störungen kommen kann. Schließen Sie die Basisstation wie auf der Skizze abgebildet an. Verwenden Sie aus Sicherheitsgründen nur das mitgelieferte Netzteil sowie das beigefügte Tele- fonanschlusskabel.
  • Seite 7: Displaysprache Einstellen

    Telefon in Betrieb nehmen Akkus aufladen ☞ Stellen Sie das Mobilteil bei der ersten Inbetriebnahme für mindestens 10 Stunden in die Basisstation / Ladestation. Das Mobilteil erwärmt sich beim Laden. Dies ist normal und ungefährlich. Laden Sie das Mobilteil nicht mit fremden Aufladegeräten. Der Akkuladezustand wird im Display angezeigt.
  • Seite 8: Bedienelemente

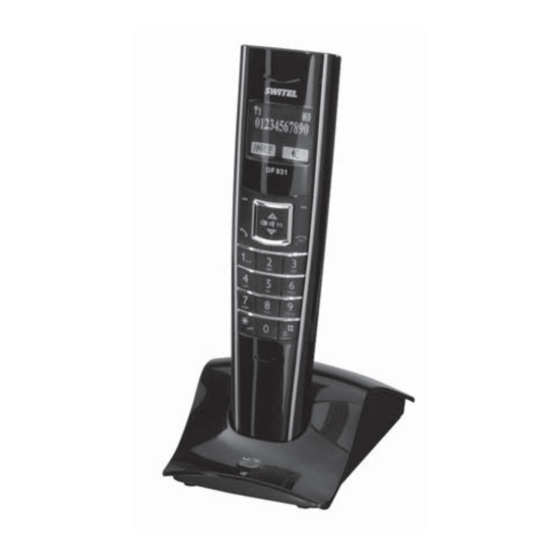
    Bedienelemente 3 Bedienelemente Hörkapsel Funktions-Taste Display Softkey (Telefonbuch/ Softkey Zurück) (Menü / OK) Auflegetaste Abnehmetaste Zifferntasten Mikrofon Ladekontakte Mobilteil suchen (Paging)
  • Seite 9: Einführende Informationen

    Einführende Informationen 4 Einführende Informationen Symbole im Display Symbol Beschreibung Konstant: Verbindung zur Basisstation. Blinkt: keine Verbindung zur Basisstation. Konstant: Anzeige der Batteriekapazität. Blinkt während Mobilteil in der Basis: Die Akkus werden geladen. Konstant: Akkus sollten geladen werden. Blinkend: Laden Sie die Akkus. Konstant: Sie führen ein Gespräch.
  • Seite 10: Sonderfunktionen Einiger Tasten

    Einführende Informationen Im Bereitschaftszustand: Anrufliste öffnen. (oben) In Listen/Menüs: Aufwärts bewegen. Während Verbindung: Lautstärke erhöhen. Im Bereitschaftszustand: Wahlwiederholliste öffnen. (unten) In Listen/Menüs: Abwärts bewegen. Während Verbindung: Lautstärke verringern. Lauthören/Freisprechen ein-/ausschalten. (Zentrum) Sonderfunktionen einiger Tasten Im Bereitschaftszustand: langer Tastendruck schaltet Tasten- sperre ein/aus.
  • Seite 11: Telefonieren

    Telefonieren 5 Telefonieren Anruf annehmen Ihr Telefon klingelt. Befindet sich das Mobilteil nicht in der Basis: Drücken Sie die Abnehmetaste oder die Freisprechtaste. Befindet sich das Mobilteil in der Basis und AUTO. ANNAHME ist nicht eingeschaltet: Nehmen Sie das Mobilteil aus der Basis und drücken Sie die Abnehmetaste oder die Freisprechtaste.
  • Seite 12: Anzeige Der Gesprächsdauer

    Telefonieren Aus der Anrufliste anrufen ☞ Ihr Telefon speichert die letzten 50 Anrufe in der Anrufliste. Ist für die Rufnummer ein Telefonbucheintrag angelegt, wird zusätzlich der Name angezeigt. Die Speicherung kann nur erfolgen, wenn die Funktion „Rufnum- mernübertragung (CLIP)“ an Ihrem Anschluss verfügbar ist und die Rufnum- mer vom Anrufer nicht unterdrückt oder aus anderen Gründen nicht übertra- gen wurde.
  • Seite 13 Telefonieren Intern telefonieren ☞ Interne Gespräche, Vermitteln und Konferenzgespräche sind nur möglich, wenn mehrere Mobilteile angemeldet sind. Internes Gespräch führen Drücken Sie die Taste Int. Drücken Sie ggf. die gewünschte interne Nummer. Sind nur zwei Mobilteile angemeldet, wird das andere sofort gerufen. Externes Gespräch vermitteln Während eines Externgespräches .
  • Seite 14: Weitere Leistungsmerkmale

    Weitere Leistungsmerkmale 6 Weitere Leistungsmerkmale Tastensperre ☞ Die Tastensperre verhindert ein unbeabsichtigtes Betätigen der Tasten. Eintreffende Anrufe können wie gewohnt entgegengenommen werden. Drücken und halten Sie die Stern-Taste bis im Display das Symbol für die Tastensperre erscheint. Zum Entsperren der Tastatur drücken und halten Sie die Stern- Taste erneut bis das Symbol wieder erlischt.
  • Seite 15: Anrufliste / Wahlwiederholung

    Anrufliste / Wahlwiederholung 7 Anrufliste / Wahlwiederholung Anrufliste bearbeiten Öffnen Sie die Anrufliste. Wählen Sie einen Eintrag aus. Drücken Sie ✔. Wählen Sie aus den folgenden Möglichkeiten und bestätigen Sie mit ✔: INS TEL-BUCH Die Rufnummer wird im Telefonbuch gespeichert. Geben Sie einen Namen ein, bestätigen oder bearbeiten Sie die Rufnum- mer und wählen Sie die Art des Tonrufs.
  • Seite 16: Telefonbuch

    Telefonbuch 8 Telefonbuch ☞ Im Telefonbuch können Sie bis zu 130 Rufnummern und zugehörige Namen speichern. Sie können für jeden Eintrag festlegen, ob er mit der „normalen“ Melodie oder mit der VIP-Melodie signalisiert werden soll. Geben Sie die Rufnummern immer mit der Ortsvorwahl ein; das ermöglicht eine korrekte Anzeige des jeweiligen Anrufers, für den ein Eintrag angelegt ist und dessen Übertragung der Rufnummer an Ihrem Anschluss verfügbar ist.
  • Seite 17: Telefon Einstellen

    Telefon einstellen NEUER EINTRAG Sie können einen neuen Eintrag anlegen. EINTR. BEARB. Wählen Sie den zu ändernden Eintrag und bestätigen Sie mit ✔. Löschen Sie Buchstaben und Ziffern mit , geben Sie mit den Zifferntasten neue Buchstaben und Ziffern ein. Einzel- heiten dazu siehe unter „Neuen Eintrag anlegen“.
  • Seite 18 Telefon einstellen Wählen Sie eine VIP-Melodie. VIP ANRUF Hinweistöne einstellen Drücken Sie den Softkey Menü. MENÜ Wählen Sie MT EINSTELL. aus und drücken Sie ✔. Wählen Sie HINWEISTÖNE aus und drücken Sie ✔. Wählen Sie aus den folgenden Möglichkeiten und bestätigen Sie mit ✔: Schalten Sie den Quittungston für eine Tastenbetätigung ein TASTENTON...
  • Seite 19 Telefon einstellen Schnellwahl einstellen Drücken Sie den Softkey Menü. MENÜ Wählen Sie MT EINSTELL. aus und drücken Sie ✔. Wählen Sie SCHNELLWAHL aus und drücken Sie ✔. Drücken Sie eine der Tasten 4, 5, 6, 7, 8, 9 oder 0, auf die Sie eine Rufnummer für die Schnellwahl speichern wollen.
  • Seite 20: Raumüberwachung

    Telefon einstellen Wählen Sie MT EINSTELL. aus und drücken Sie ✔. Wählen Sie BS AUSWÄHLEN aus und drücken Sie ✔. Wählen Sie eine der Basisstationen 1…4 oder AUTOMATISCH und bestätigen Sie mit ✔. ☞ Es können nur Basisstation ausgewählt werden, an denen das Mobilteil bereits eingebucht wurde.
  • Seite 21: Mobilteil In Den Auslieferungszustand Zurücksetzen

    Telefon einstellen Kontrast Drücken Sie den Softkey Menü. MENÜ Wählen Sie MT EINSTELL. aus und drücken Sie ✔. Wählen Sie KONTRAST aus und drücken Sie ✔. Wählen Sie einen Kontrast 1…8 aus und drücken Sie ✔. Mobilteil in den Auslieferungszustand zurücksetzen Drücken Sie den Softkey Menü.
  • Seite 22: Basisstation In Den Auslieferungszustand Zurücksetzen

    Telefon einstellen Geben Sie die neue PIN noch einmal ein und drücken Sie ✔. ☞ Die vierstellige PIN schützt einige Einstellungen vor unbefugtem Zugriff. Wenn Sie die PIN vergessen haben wenden Sie sich bitte an unsere Service- Hotline. Basisstation in den Auslieferungszustand zurücksetzen Drücken Sie den Softkey Menü.
  • Seite 23: Mobilteile An-/Abmelden

    Mobilteile an-/abmelden 10 Mobilteile an-/abmelden An einer Basisstation können bis zu 6 Mobilteile angemeldet werden. Die mit Ihrem Telefon ausgelieferten Mobilteile sind bereits an der Basis angemeldet. Zum Anmelden eines „fremden“ Mobilteils ziehen Sie bitte auch dessen Bedie- nungsanleitung zu Rate. Weiteres Mobilteil des gleichen Typs anmelden Drücken und halten Sie die Paging-Taste an der Basisstation so lange, bis sie beginnt zu blinken (ca.
  • Seite 24: Betrieb An Telefonanlagen/Zusatzdienste

    Betrieb an Telefonanlagen/Zusatzdienste / Anhang 11 Betrieb an Telefonanlagen/Zusatzdienste Betrieb an Telefonanlagen Ist Ihr Telefon an einer Telefonanlage angeschlossen, können Sie mit dem rech- ten Softkey R Funktionen, wie z. B. Anrufe weiterleiten und automatischen Rückruf nutzen. Lesen Sie bitte in der Bedienungsanleitung Ihrer Telefonanlage, welche Flash-Zeit Sie zur Nutzung dieser Funktionen einstellen müssen.
  • Seite 25 Intern: Melodie 1 Extern: Melodie 2 Tonruflautstärke: 5 Hinweistöne Tastenton: Ein Akku leer: Ein Reichweite: Ein Sprache Deutsch Mobilteilname SWITEL Autom. Rufannahme Datum & Zeit Datumsformat: TT-MM-JJ Zeitformat: 24 Stunden Wahlverfahren Tonwahl Flash-Zeit Kurz (100 ms) 0 0 0 0...
  • Seite 26: Technische Daten

    Anhang Technische Daten Standard: DECT / GAP Kanalzahl: 120 Duplexkanäle Frequenzen: 1880 MHz bis 1900 MHz Duplexverfahren: Zeitmultiplex, 10ms Rahmenlänge Kanalraster: 1728 kHz Bitrate: 1152 kBit / s Modulation: GFSK Sprachkodierung: 32 kBit / s Sendeleistung: 10 mW (mittlere Leistung pro Kanal) Reichweite: bis zu 250 Meter im Freien, in Gebäuden bis zu 50 Metern Stromversorgung Basisstation: 230 V / 50 Hz (Steckernetzgerät), 6 V / 300 mA...
  • Seite 27: Konformitätserklärung

    Sollte Ihr Gerät dennoch einen Defekt innerhalb der Garantiezeit aufweisen, wenden Sie sich bitte unter Vorlage Ihrer Kaufquittung ausschließlich an das Geschäft, in dem Sie Ihr SWITEL-Gerät gekauft haben. Alle Gewährleistungsan- sprüche nach diesen Bestimmungen sind ausschließlich gegenüber Ihrem Fach- händler geltend zu machen.
  • Seite 29 Table des matières 1 Consignes de sécurité ....... . .2 2 Mettre votre téléphone en service .
  • Seite 30: Consignes De Sécurité

    Consignes de sécurité 1 Consignes de sécurité Lisez très attentivement ce mode d’emploi. Utilisation conforme aux prescriptions Ce téléphone convient pour téléphoner à l’intérieur d’un réseau téléphonique. Tout autre utilisation est considérée comme non conforme à l’usage. Des modifications ou changements effectués d’un propre gré ne sont pas autori- sés.
  • Seite 31: Mettre Votre Téléphone En Service

    Les éléments suivants font partie de la livraison : Contenu Modèle DF 93x Base avec bloc d’alimentation Chargeur avec bloc d’alimentation Combiné Câble de raccordement téléphonique Piles rechargeables Mode d’emploi À l’adresse www.switel.com, vous apprendrez si ce kit téléphonique est déjà disponible à la vente.
  • Seite 32: Raccorder Le Chargeur

    Mettre votre téléphone en service Raccorder la base Attention: Posez la base à une distance minimum d’1 m par rapport à d’autres appareils électroniques, une distance inférieure pouvant provoquer des interactions. Raccordez la base comme représenté sur le croquis. Pour des raisons de sécurité, n’utilisez que le bloc d’alimentation fourni avec l’appareil ainsi que le câble de raccordement téléphonique ci-joint.
  • Seite 33 Mettre votre téléphone en service Recharger les piles rechargeables ☞ Pour la première mise en service, posez le combiné sur la base / le chargeur pour une durée d’au moins 10 heures. Le combiné chauffe lors du chargement. C’est normal et ce n’est pas dange- reux.
  • Seite 34: Éléments De Manipulation

    Éléments de manipulation 3 Éléments de manipulation Haut-parleur Touche de fonction Écran Touche softkey (Répertoire/ Touche softkey Retour) (Menu / OK) Raccrocher Répondre Pavé numérique Microphone Contacts de chargement Chercher le combiné (Paging)
  • Seite 35: Introduction

    Introduction 4 Introduction Icônes à l’écran du combiné Icône Description Constant : la liaison avec la base est bonne. Clignotant : la liaison avec la base s’interrompt. Constant : affichage de la capacité des piles. Clignotant quand le combiné est sur la base : Les piles rechargeables se rechargent.
  • Seite 36: Mode Veille

    Introduction En état de fonctionnement : ouvrir la liste d’appels. (Haut) Dans les listes/menus : déplacer vers le haut. Pendant la liaison : augmenter le volume sonore. En état de fonctionnement : ouvrir la liste de répétition des (Bas) derniers numéros. Dans les listes/menus : déplacer vers le bas.
  • Seite 37: Téléphoner

    Téléphoner 5 Téléphoner Prendre l’appel Votre téléphone sonne. Si le combiné ne se trouve pas sur la base: Appuyez sur la touche décrocher ou la touche mains-libres. Si le combiné se trouve sur la base et DECROCHE AUTO n’est pas activé: Prenez le combiné...
  • Seite 38 Téléphoner Appeler depuis la liste d’appels ☞ Votre téléphone mémorise les 50 derniers appels dans la liste d’appels. Si le numéro de téléphone est mémorisé dans le répertoire, le nom s’affiche. L’enregistrement ne peut avoir lieu que si la fonction « transfert d’appel (CLIP) »...
  • Seite 39 Téléphoner Téléphoner en interne ☞ Communication internes, transferts et communications en conférence sont possibles uniquement si plusieurs combinés sont déclarés. Téléphoner en interne Appuyez la touche Int. Appuyez, le cas échéant, sur le numéro interne souhaité. Si deux combinés sont déclarés, l’autre com- biné...
  • Seite 40: Fonctions Spéciales

    Fonctions spéciales 6 Fonctions spéciales Verrouillage du clavier ☞ La touche verrouillage empêche une manipulation involontaire des touches. Les appels peuvent être reçus comme d’habitude. Appuyez et maintenez la touche étoile jusqu’à l’apparition du symbole de verrouillage des touches. Pour déverrouiller le clavier, appuyez et maintenez de nouveau la touche étoile jusqu'à...
  • Seite 41: Liste D'appels / Répétition Des Derniers Numéros

    Liste d’appels / Répétition des derniers numéros 7 Liste d’appels / Répétition des derniers numéros Utiliser la liste d’appels Ouvrez la liste d’appels. Sélectionnez une entrée. Appuyez sur ✔. Sélectionnez l’une des options suivantes et confirmez avec ✔: AJOUT.CONTACTS Le numéro est enregistré dans le répertoire. Entrez le nom, confirmez ou modifiez le numéro et fixez une mélodie sonore pour cette entrée.
  • Seite 42: Répertoire

    Répertoire 8 Répertoire ☞ Dans le répertoire, vous pouvez mémoriser 130 numéros et noms corres- pondants. Vous pouvez déterminer pour chaque entrée si elle doit être signalée avec une mélodie "normale" ou avec une mélodie VIP. Entrez toujours les numéros avec le préfixe ; ceci permet un affichage correct de chaque appelant dont il existe une entrée et dont le transfert de numéro à...
  • Seite 43: Réglage Du Téléphone

    Réglage du téléphone AJOUT.ENTREE Vous pouvez effectuer une nouvelle entrée. MODIF.ENTREE Sélectionnez l’entrée à modifier et confirmez avec ✔. Effacez les lettres et chiffres avec , entrez de nouvelles lettres et chiffres avec les touches de chiffres. Pour plus de détails, voir “Saisir une nouvelle entrée“.
  • Seite 44 Réglage du téléphone Régler la tonalités d’information Appuyez sur touche softkey Menu. MENU Sélectionnez REGL. COMBINE et appuyer sur ✔. Sélectionnez REGL.TONALITE et appuyer sur ✔. Sélectionnez parmi les options suivantes et confirmez avec ✔: Activez ou désactivez la tonalité de confirmation pour l’activati- BIP TOUCHE on d’une touche.
  • Seite 45 Réglage du téléphone Régler le numéro abrégé Appuyez sur touche softkey Menu. MENU Sélectionnez REGL. COMBINE et appuyer sur ✔. Sélectionnez NUMERO ABREGE et appuyer sur ✔. Appuyez sur l’une des touches 4, 5, 6, 7, 8, 9 ou 0, sur laquel- le vous souhaitez mémoriser un numéro de téléphone.
  • Seite 46 Réglage du téléphone Sélectionner la base Appuyez sur touche softkey Menu. MENU Sélectionnez REGL. COMBINE et appuyer sur ✔. Sélectionnez CHOISIR BASE et appuyer sur ✔. Sélectionnez une base ou AUTO et appuyez sur ✔. ☞ Seules des bases, sur lesquelles le combiné a déjà été enregistré, peuvent être sélectionnées.
  • Seite 47 Réglage du téléphone La conversation est reçue automatiquement sans sonnerie et vous pouvez entendre les bruits provenant de la pièce que vous souhaitez surveiller. Régler le contraste Appuyez sur touche softkey Menu. MENU Sélectionnez REGL. COMBINE et appuyer sur ✔. Sélectionnez CONTRASTE et appuyer sur ✔.
  • Seite 48 Réglage du téléphone Entrez un nouveau PIN et appuyez sur ✔. Entrez le nouveau PIN une nouvelle fois et appuyez sur ✔. ☞ Le PIN à quatre chiffres protége quelques réglages contre un accès non autorisé. Si vous avez oublié le PIN, merci de vous adresser à notre service hotline.
  • Seite 49: Déclarer/Retirer Un Combiné

    Déclarer/retirer un combiné 10 Déclarer/retirer un combiné Sur une base, vous pouvez déclarer jusqu’à 6 combinés. Les combinés livrés avec votre téléphone sont déjà déclarés sur la base. Pour déclarer un combiné « étranger », consultez aussi la notice d’utilisation de ce combiné. Déclarer un autre combiné...
  • Seite 50: Installations À Postes Supplém. / Services Confort

    Installations à postes supplém. / services confort / Annexe 11 Installations à postes supplém. / services confort Installations à postes supplémentaires Si votre téléphone est raccordé à une installation à postes supplémentaires, vous pouvez au moyen de la touche softkey R tirer profit de certaines fonctions comme par ex.
  • Seite 51 Vol. sonnerie 5 Alertes son. Bips touches: en service Batt. faible: en service Hors portée: en service Langue Allemand Nom combine SWITEL Reponse auto en service Date & Heure Format date: JJ-MM-AA Format heure: 24 heures Mode de numerotation Tonalité...
  • Seite 52: Caractéristiques Techniques

    Annexe Caractéristiques techniques Standard : DECT / GAP Nombre de canaux : 120 canaux duplex Fréquences : 1880 MHz jusqu’à 1900 MHz Processus duplex : multiplexage par répartition dans le temps (MRT), 10ms longueur de marge Trame canaux : 1728 kHz Débit binaire : 1152 kbits / s Modulation :...
  • Seite 53: Déclaration De Conformité

    Si votre appareil devait malgré tout présenter une défectuosité pendant la péri- ode de garantie, veuillez vous adressez, muni de la quittance d’achat, exclusi- vement au magasin où vous avez acheté votre appareil SWITEL. Vous ne pou- vez faire valoir vos droits à la garantie selon ces dispositions qu’auprès de votre revendeur exclusivement.
  • Seite 55 Contenuto 1 Indicazioni di sicurezza ....... .2 2 Mettere in funzione il telefono ......3 3 Elementi di comando .
  • Seite 56: Indicazioni Di Sicurezza

    Indicazioni di sicurezza 1 Indicazioni di sicurezza Leggere attentamente le presenti istruzioni per l’uso. Impiego conforme agli usi previsti Il presente telefono consente di svolgere telefonate all’interno di una rete telefo- nica. Qualsiasi altro impiego è considerato come non conforme agli usi previsti. Non sono consentite modifiche o trasformazioni non autorizzate.
  • Seite 57: Smaltimento

    Stazione base con alimentatore di rete Stazione di carica con alimentatore Unità portatile Cavo di collegamento telefonico 1 Accumulatore ricaricabile Istruzioni per l’uso Per ulteriori informazioni riguardo la disponibilità di questo set telefonico si prega di visitare il sito www.switel.com.
  • Seite 58 Mettere in funzione il telefono Collegare la stazione base Attenzione: Montare la stazione base con una distanza minima di 1 m da altri apparecchi elettronici in modo da evitare interferenze reciproche. Procedere al collegamento della stazione base seguendo quanto raffigurato nella figura.
  • Seite 59: Caricare Le Batterie

    Mettere in funzione il telefono Caricare le batterie ☞ Riporre l’unità portatile in sede di prima messa in funzione per minimo 10 ore nella stazione base / stazione di carica. L’unità portatile si surriscalda durante il processo di carica. Questo è un feno- meno normale e non pericoloso.
  • Seite 60: Elementi Di Comando

    Elementi di comando 3 Elementi di comando Altoparlante Tasto funzione Display Tasto softkey (Rubrica/Ritornare) Tasto softkey (Menu / OK) Tasto di Fine Tasto di chiamata chiamata Tasti numerici Mikrofono Contatti di carica Cercare l’unità portatile (funzione di paging)
  • Seite 61: Informazioni Introduttive

    Informazioni introduttive 4 Informazioni introduttive Simboli sul display dell’unità portatile Simbolo Descrizione Costante: Collegamento con la stazione base Lampeggiante: Il collegamento con la stazione base si inter- rompe. Costante: Indicazione dello stato di carica delle batterie. Segmenti che scorrono quando l’unità portatile è collegata all’unità...
  • Seite 62: Navigazione Nel Menu

    Informazioni introduttive Avviare conversazione interna. (destra) In modalitá stand-by: Aprire l’elenco chiamate . (su) In liste/menú: Muovere in su. Durante il collegamento: Alzare il volume. In modalitá stand-by: Aprire la lista della ripetizione delle (giú) selezioni. In liste/menú: Muovere in giú. Durante il collegamento: Abbassare il volume.
  • Seite 63: Compiere Telefonate

    Compiere telefonate 5 Compiere telefonate Ricevere una chiamata Il telefono suona. L’unità portatile non si trova inserita nell’unità base: Premere il tasto di risposta o il vivavoce. L’unità portatile non si trova inserita nell’unità base e la RISPOSTA AUTO non è inserita: Sollevare l’unità...
  • Seite 64 Compiere telefonate Per chiamare un numero dall’elenco chiamate ☞ Il vostro telefono memorizza le ultime 50 chiamate nell’elenco chiamate. Se il numero è stato inserito nella rubrica del telefono, apparirà il nome memo- rizzato. La memorizzazione può avvenire solo, se sulla vostra connessione è...
  • Seite 65: Compiere Chiamate Interne

    Compiere telefonate Compiere chiamate interne ☞ Le conversazioni interne, trasferimenti di chiamata e teleconferenze sono possibili solo quando sono registrate più unità portatili. Effettuare chiamate interne Premere il tasto Int. Premete sul numero interno desiderato. Se sono registrate due unità portatili, verrà chiamato subito l’altra unità...
  • Seite 66: Funzioni Speciali

    Funzioni speciali 6 Funzioni speciali Blocco tastiera ☞ Il blocco tastiera impedisce la digitazione involontaria dei tasti. Le chiamate in arrivo possono essere ricevute come di consueto. Tenere premuto il tasto asterisco fino a quando appare sul dis- play il simbolo del blocco tastiera. Per sbloccare la tastiera tenere premuto nuovamente il tasto asterisco fino a quando il simbolo non scompare di nuovo.
  • Seite 67: Elenco Chiamate/Ripetizione Di Selezione

    Elenco chiamate/ripetizione di selezione 7 Elenco chiamate/ripetizione di selezione Modificare l’elenco chiamate Accedere all’elenco chiamate. Selezionare una voce. Premere ✔. Selezionare una delle seguenti opzioni e confermare con ✔: AGGIUNG. RUBR? Il numero di chiamata verrà memorizzato nella rubrica. Se è inserito un nome, confermare o modificare il numero di telefo- no ed associare una suoneria per questa voce della rubrica.
  • Seite 68: Rubrica Telefonica

    Rubrica telefonica 8 Rubrica telefonica ☞ Nella rubrica è possibile memorizzare fino a 130 numeri di telefono e relativi nomi. Per ogni voce Voi potete stabilire se deve essere segnalata con la suoneria „normale“ o con la suoneria VIP. Immettere sempre il numero di telefono con il relativo prefisso; questo permet- terà...
  • Seite 69: Impostazioni Telefono

    Impostazioni Telefono MODIFICA VOCE Selezionate la voce da modificare e confermate con ✔. Elimi- nare caratteri e cifre con , inserire con i tasti cifra dei nuovi caratteri e nuove cifre. Per ulteriori dettagli consultare “Immettere nuova voce”. CANCELLA VOCE Selezionate la voce da cancellare e confermate con ✔. La voce della rubrica verrà...
  • Seite 70 Impostazioni Telefono Impostazione toni di avviso Premere il softkey Menu. MENU Selezionare IMPOSTAZ. PORT e confermare con ✔. Selezionare SCEGLI TONI e confermare con ✔. Selezionare una delle seguenti opzioni e confermare con ✔: Attivare o disattivare il tono dei tasti. TONO TASTI BATTERIA BASSA Attivare o disattivare il tono di avviso che segnala quando la batteria deve essere ricaricata.
  • Seite 71 Impostazioni Telefono Impostare la chiamata rapida Premere il softkey Menu. MENU Selezionare IMPOSTAZ. PORT e confermare con ✔. Selezionare CHIAM. RAPIDA e confermare con ✔. Premete uno dei tasti 4, 5, 6, 7, 8, 9 o 0, sui quali volete salva- re un numero di chiamata per la selezione rapida.
  • Seite 72 Impostazioni Telefono Selezionare l’unità base Premere il softkey Menu. MENU Selezionare IMPOSTAZ. PORT e confermare con ✔. Selezionare SELEZIONA BASE e confermare con ✔. Selezionare un’unità base 1…4 o AUTO e premere ✔. ☞ Può essere selezionata solo la base alla quale l’unitá portatile è stata giá connessa.
  • Seite 73 Impostazioni Telefono La conversazione viene automaticamente accettata senza segnale di chiamata e Voi potete sentire i rumori provenienti dalla stanza che volete sorvegliare. Regolare il contrasto Premere il softkey Menu. MENU Selezionare IMPOSTAZ. PORT e confermare con ✔. Selezionare CONTRASTO e confermare con ✔. Selezionare il contrasto desiderato 1…8 e premere ✔.
  • Seite 74 Impostazioni Telefono (nella configurazione predefinita 0 0 0 0) e premere ✔. Inserire un nuovo codice PIN e premere ✔. Inserire un nuovo codice PIN ancora una volta e premere ✔. ☞ Il codice PIN a quattro cifre protegge alcune impostazioni da un accesso non autorizzato.
  • Seite 75: Registrare/Cancellare Un'unità Portatile

    Registrare/cancellare un’unità portatile 10 Registrare/cancellare un’unità portatile Su una stazione base possono essere registrate fino a 6 unità portatili. Le unità portatili fornite con il vostro telefono sono già registrate con l’unità base. Per registrare un’unità mobile „estranea“ si prega di consultare il manuale di istruzio- Registrare un’altra unità...
  • Seite 76: Appendice

    Impianti telefonici interni / Servizi addizionali / Appendice 11 Impianti telefonici interni / Servizi addizionali Impianti telefonici interni Avendo collegato il telefono ad un impianto telefonico interno, il tasto softkey R consente di accedere a tutte le altre funzioni disponibili come per es. trasferi- mento di chiamata e funzione di richiamata automatica.
  • Seite 77: Localizzazione Guasti

    Interno: Melodia 1 Esterno: Melodia 2 Volume: 5 Imposta toni Toni tasti: Attivato Toni batt: Attivato Fuoriportata: Attivato Lingua Tedesco Nome portatile SWITEL Risposta aut. Attivato Data e ora Formato data: GG-MM Formato ora 24 ora Proc selezione Toni Tempo flash...
  • Seite 78: Dati Tecnici

    Appendice Dati Tecnici Standard: DECT / GAP Numero di canali: 120 canali duplex Frequenza: 1880 MHz - 1900 MHz Procedura duplex: a divisione di tempo, 10 ms lunghezza trama Distanza canali: 1728 kHz Bit rate: 1152 kBit / s Modulazione: GFSK Codifica Voce: 32 kBit / s Potenza di trasmissione: 10 mW (potenza media per canale) Copertura: fino a 250 metri all’aperto, fino a 50 metri all’interno di un edificio...
  • Seite 79 Non utilizzare mai detergenti o solventi. Garanzia Gli apparecchi SWITEL sono costruiti e collaudati in osservanza dei processi di produzione più moderni. L’impiego di materiali selezionati e tecnologie altamen- te sviluppate sono garanti di una perfetta funzionalità e lunga durata in vita. La garanzia non viene considerata esecutiva qualora la causa del malfunzionamen- to dell’apparecchio è...
  • Seite 81 Contents 1 Safety Information ....... . .2 2 Preparing the Telephone ......3 3 Operating Elements .
  • Seite 82: Safety Information

    Safety Information 1 Safety Information Please read this operating instruction manual thoroughly. Intended use The telephone is suitable for telephoning within a public telephone network sys- tem. Any other use is considered unintended use. Unauthorised modification or reconstruction is not permitted. Under no circumstances open the device or complete any repair work yourself.
  • Seite 83: Preparing The Telephone

    Checking the package contents The package contains: Content DF 93x model Base station with power adapter plug Charging station with power adapter plug Handset Telephone connection cable Rechargeable batteries Operating instructions Visit www.switel.com to find out whether this telephone is available.
  • Seite 84: Connecting The Charging Station

    Preparing the Telephone Connecting the base station Attention: Position the base station at least 1 m away from other electronic devices, otherwise there is a risk of mutual disturbance. Connect the base station as illustrated in the diagram. For reasons of safety, only use the power adapter plug and telephone connection line supplied.
  • Seite 85: Charging The Batteries

    Preparing the Telephone Charging the batteries ☞ Before the handset is used for the first time, insert it in the base station / charging station for at least 10 hours. The handset warms up during the charging process. This is normal and does not represent a risk.
  • Seite 86: Operating Elements

    Operating Elements 3 Operating Elements Earpiece Function button Display Softkey (Phonebook/ Softkey Back) (Menu / OK) On Hook button Off Hook button Digit keys Microphone Charging contacts Locate handset (Paging)
  • Seite 87: Preliminary Information

    Preliminary Information 4 Preliminary Information Icons in the handset display Icon Description On: The connection to the base station is good. Flashing: The connection to the base station is lost. On: Indicates the battery charge status. Flashing while handset in base: Batteries are being charged.
  • Seite 88: Standby Mode

    Preliminary Information During a call: Press to increase the volume. In idle mode: Press to access the redial list. (down) In lists / menus: Press to scroll downwards. During connection: Press to decrease the volume. Press to activate / deactivate hands-free. (in the middle) Special key functions In idle mode: a long press will activate/deactivate keypad lock.
  • Seite 89: Telephoning

    Telephoning 5 Telephoning Taking a call Your phone is ringing. If the handset is not in the base station: Press the Off Hook button or the Handsfree button. If the handset is in the base station and Auto Answer is not activated: Remove the handset from the base and press the Off Hook button or the Handsfree button.
  • Seite 90: Setting The Earpiece/Loudspeaker Volume

    Telephoning Making a call from the call list ☞ Your handset saves the numbers of the last 50 incoming calls in the call list. If a caller is stored in your phone book, the name and the telephone number will be displayed. Saving can only take place if the function “Phone number transmission (CLIP)”...
  • Seite 91: Internal Calls

    Telephoning Internal calls ☞ Internal calls, transfers and conference calls are only possible if multiple handsets are registered. Making an internal call Press the Int. key and if neccessary enter the internal number of the respective handset. If two handsets are registrated to the base station the other handset will be called immediately.
  • Seite 92: Other Features

    Other features 6 Other features Key lock ☞ The key lock prevents functions assigned to buttons being activated inadvertently. Incoming calls can still be taken in the normal way even when the key lock function is activated. Press and hold down the star-key until the key lock icon appears in the display.
  • Seite 93: Call List / Redial

    Call list / Redial 7 Call list / Redial Editing the call list Open the call list. Select an entry. Press ✔. Select one of the following options and confirm with ✔: The telephone number will be stored in the telephone book. Add To PB ? Enter a name, confirm or edit the telephone number and select a ringtone melody for the entry.
  • Seite 94: Phone Book

    Phone book 8 Phone book ☞ Your phone can store up to 130 private phonebook entries with names and numbers. You can select for every entry whether it should be signalled with the „normal“ or the VIP call melody. Always enter the phone numbers with the area code; this enables a correct display of the respective caller for whom there is an existing entry and whose phone number transmission to your connection is available.
  • Seite 95: Setting The Telephone

    Setting the telephone numbers as required. Please refer to “Creating a new entry”. Select the desired entry and confirm with ✔. The entry will be DEL Record deleted after a confirmation query. All entries will be deleted after a confirmation query. Delete All The current allocation will be displayed (e.g.
  • Seite 96: Setting Auto Answer

    Setting the telephone Setting the alert tones Press the Menu softkey. Menu Select Handset Settings and press ✔. Select Tone Setup and press ✔. Select one of the following options and confirm with ✔: Switch the keytone on or off. Key Tone Switch the alert tone on or off.
  • Seite 97 Setting the telephone Setting speed dial Press the Menu softkey. Menu Select Handset Settings and press ✔. Select Speed Dial and press ✔. Press on of the keys 4, 5, 6, 7, 8, 9 or 0, onto which you want to store a speed dial telephone number.
  • Seite 98: Room Monitoring

    Setting the telephone Select a base station Press the Menu softkey. Menu Select Handset Settings and press ✔. Select Select Base and press ✔. Select one of the base stations 1…4 or Auto and press ✔. ☞ If the handset is subscribed to several bases you can select the active base.
  • Seite 99 Setting the telephone Contrast Press the Menu softkey. Menu Select Handset Settings and press ✔. Select Contrast and press ✔. Select a contrast 1…8 and press ✔. Resetting the handset Press the Menu softkey. Menu Select Handset Settings and press ✔. Select HS Default and press ✔.
  • Seite 100 Setting the telephone ☞ The four digit PIN protects some settings against unauthorized changes. If you have forgotten your PIN please call our service hotline. Resetting the base station Press the Menu softkey. Menu Select Base Settings and press ✔. Select BS Default and press ✔.
  • Seite 101: Registering/De-Registering Handsets

    Registering/de-registering handsets 10 Registering/de-registering handsets Up to 6 handsets can be registered to a base station. The handsets delivered with your telephone are already registered. To register a “foreign” handset please refer to it’s user manual. Registering a handset of the same type Press and hold down the paging key on the base station until it starts flashing (approx.
  • Seite 102: Pbx / Supplementary Services

    PBX / Supplementary Services 11 PBX / Supplementary Services If the telephone is connected to a private branch exchange, functions such as transferring calls and automatic call back can be used via the R softkey. Refer to the operating manual provided with your private branch exchange as to which Flash time must be set in order to use these functions.
  • Seite 103: Default Settings

    External call: Melody 2 Volume: 5 Tone setup Key tone: On Battery tone: On Out of range: On Language German Handset name SWITEL Auto answer Date & Time Date format: DD-MM-YY Time format: 24 hours Dial mode Tone Flash time Short (100 ms)
  • Seite 104: Technical Data

    Appendix Technical data Standard: DECT / GAP Number of channels: 120 duplex channels Frequencies: 1880 MHz to 1900 MHz Duplex mode: Time division multiplex, 10ms frame length Channel spacing: 1728 kHz Bit rate: 1152 kBit / s Modulation: GFSK Voice encoding: 32 kBit / s Transmitter power: 10 mW (average power per channel) Range: up to 250 m outside, up to 50 m inside buildings Electricity supply base station:...
  • Seite 105: Declaration Of Conformity

    If your device shows signs of defect during the period of guarantee, please return it to the sales outlet in which you purchased the SWITEL device together with the purchase receipt. All claims under the terms of guarantee in accor- dance with this agreement can only be asserted at the sales outlet.
  • Seite 108 Quest’apparecchiatura è conforme alla direttiva europea R&TTE. Per la dichiarazione di conformità completa si prega di voler usufruire del servizio gratuito di download dal nostro sito Internet www.switel.com. This equipment complies with the European R&TTE directive. To view the complete Declaration of Conformity, please refer to the free download available at our web site: www.switel.com.

Diese Anleitung auch für:

Df 933Df 932Df 934

Inhaltsverzeichnis