Einstellen Gesamtkilometer Herzlichen Glückwunsch. Umschalten von Rad 1 auf Rad 2 Mit Ihrer Wahl für einen VDO Computer haben Sie sich für ein technisch sehr hochwertiges Gerät entschieden. 2. Bedienung Service-Intervall-Anzeige Um das Potenzial des Computers optimal ausnutzen zu können, empfehlen wir Ihnen, diese Anleitung Der Navigator sorgfältig zu lesen.
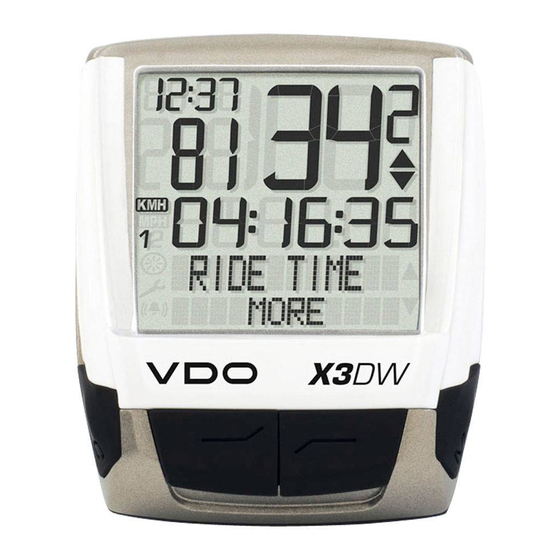
Indikatoren finden Sie auf der Zeile) wird angezeigt, meter oder Meilen angezeigt. Der Indikator zeigt rechten Seite. ob es weitere Informati- die gewählte Messeinheit an. onen gibt „MEHR“ ob es eine weitere Auswahlmöglichkeit gibt „AUSWAHL“ X3DW VDO CYCLECOMPUTING www.vdocyclecomputing.com X3DW...
Gesamtfahrzeit Rad 1 bis max. 999:59 HHH:MM AUSWAHL zeigt, dass es zum Hauptmenu NAVIGATOR Eine Ziffer verringern. Eine Ziffer erhöhen. Gesamtfahrzeit Rad 2 bis max. 999:59 HHH:MM ein Untermenu gibt. Das Untermenu öffnen Sie mit X3DW VDO CYCLECOMPUTING www.vdocyclecomputing.com X3DW...
überschrieben, wenn erneut die Runde 1 ter Kapitel 5.7. gestartet wird oder 30 Runden überschritten sind. 3.2 Timer-Funktionen 3.3 Trittfrequenz-Option Der X3DW hat 7 verschieden, wählbare Timer. Nur Start mit . Stopp mit . Reset mit – 3 Sekunden.
2 Computer nach rechts auf 12-Uhr-Position dre- sicher mit der Lenkerhalterung. hen „twist“ und in das Haltesystem einrasten „click“. Ihr VDO Computer wird mit einer 3V Batterie step 1 Legen Sie die Batterie mit dem +Pol nach (Type 2032) geliefert. Die Batterie ist im Liefer- oben in das Computergehäuse ein.
5.2 Einstellen und Messen der Radgröße Die Geschwindigkeits- und Trittfrequenzsignale ACHTUNG: Die Pairingzeit beträgt 5 Minuten. Damit Ihr VDO Computer korrekt messen kann, (Option: Artikel Nr. 7702) werden digital und codiert Wenn Sie in diesen 5 Minuten nicht losfahren, müssen Sie die Radgröße (Radabrollumfang) Ihres an Ihren Computer übertragen.
RADGRÖSSE/ MANUELL SET. Bestätigen mit RADGRÖSSE/REIFEN AUSW. step 6 Geben Sie den so gemessenen Radumfang Bestätigen mit in Ihren VDO-Computer ein. zu RADGRÖSSE/ RAD 1 …SET UMFANG/WEITER EINSTELLEN. Bestätigen mit ACHTUNG: Wenn Sie KMH–Anzeige gewählt stellen Sie jetzt den REIFEN AUSW./WÄHLEN.
Sie den Alarm AUS oder EIN. Bei KM ZÄHLER/RAD 1 (mit stellen Sie die Minuten ALARM EIN kommen Sie in die Alarm-Zeit-Einstellung. kommen Sie zur Einstellung für ein. Bestätigen Sie die Minuten- Bestätigen mit RAD 2). Bestätigen mit Einstellung mit X3DW VDO CYCLECOMPUTING www.vdocyclecomputing.com X3DW...
5.5 Umschalten von Rad 1 auf Rad 2 >>> P03 Ihr VDO Computer kann an 2 Fahrrädern verwendet Wiederholen Sie die Schritte, bis die letzte, rechte werden. Wenn Sie von Rad 1 auf Rad 2 wechseln, RAD SERVICE/RAD 1. Ziffer blinkt. Bestätigen mit erkennt der Computer den Sender von Rad 2.
NAVIGATOR/SET OK? Bestätigen mit Der Computer wartet jetzt auf Geschwindigkeits- NAVIGATOR/SET FERTIG erscheint zur Bestätigung NAVIGATOR/EINSTELLEN. und Trittfrequenz-Signale (sofern Trittfrequenz und Ihr VDO-Computer kehrt automatisch ins Menü wechseln zu installiert ist). Fahren Sie jetzt einfach los. Der Com- NAVIGATOR/AUSWAHL zurück. NAVIGATOR/RESET.
6. Timer-Funktionen 6.1 Timer auswählen Ihr VDO-Computer verfügt über 7 versch. Timing- 5. COUNTDOWN Gehen Sie mit zu EINSTELL- Hinweis: Beim Bestätigen der AUSWAHL er- Funktionen. Wenn eine der Timing-Funktionen läuft, Sie können eine Zeit programmieren, von dieser Zeit MENU/AUSWAHL. Bestätigen scheint immer die zuletzt gewählte Timing-...
Seite 13
Timer ZEITFAHREN einstellen: Runden-Timer einstellen: RUNDEN-TIMER… EING. STRECKE/ TIMER1 oder TIMER2 oder COUNTDOWN/SET WEITER. Die blinkende Ziffer ist FERTIG erscheint kurz und Ihr VDO-Computer Gehen Sie mit zu EINSTELL- Beim Runden-Timer können Sie wählen zwischen zur Eingabe bereit kehrt automatisch zu EINSTELLMENU/AUSWAHL MENU/AUSWAHL.
6.3 Bedienung der Timer 7. Garantiebedingungen STOPPUHR VDO Cycle Parts gewährt für Ihren VDO-Computer Bitte wenden Sie sich mit allen Reklamationen Start mit . Stopp mit . Reset mit – 3 Sekunden. eine Garantie von 5 Jahren ab Kaufdatum. Die und Garantieansprüchen an Ihren Fachhändler,...
100 mm bis 3999 mm (3,9 bis 157,4 inch) Anzeige wird schwach Batterie leer Batterie prüfen, evtl. ersetzen Anzeige wird schwach Temperaturen unter 5° machen Bei normalen Temperaturen die Anzeige träge arbeitet die Anzeige wieder normal X3DW VDO CYCLECOMPUTING www.vdocyclecomputing.com X3DW...
Seite 16
Setting the CLOCK/ALARM Congratulations Setting the total kilometres With your selection of a VDO computer you have opted for a technically very high quality appliance. 2. Operation Switch from bike 1 to bike 2 In order to fully benefit from the potential of the computer, we recommend that you carefully read this Service interval display manual.
You can find the description shows, measurement unit. of the individual indicators whether there is more on the right hand side. information „MORE“ whether there is another selection option „SELECT“. X3DW VDO CYCLECOMPUTING www.vdocyclecomputing.com X3DW...
Roadbook. the setting modes. Scroll upwards within menu RIDE TIME. You open the submenu with Decrease a digit. the setting modes. In the submenu you will find. Increase a digit. X3DW VDO CYCLECOMPUTING www.vdocyclecomputing.com X3DW...
You can set a starting value here and decide whether again. the counter counts forwards or backwards from 3.2 Timer-Functions 3.3 Cadence option The X3DW has 7 different selectable timers. heard. Start with . Stop with The cadence menu is only available if access to the information.
Step 2 Twist computer to the right to 12 o‘clock posi- securely with the handlebar holder. tion and click into the holder system. Your VDO computer is supplied with a 3V battery step 1 Place the battery in the computer casing Step 1 Place computer into the holder in Step 3 To take the computer out, twist to the left (type 2032).
7702) will be transmitted digitally and encoded to 5 minutes. If you do not start cycling during ference) of your bike so that your VDO computer your computer. This technology is less prone to these 5 minutes, no pairing takes place.
WHEELSIZE/ TYRE SELECT. Step 6 Enter the wheel circumference measured Confirm with Using up/down go to Confirm with in this way into your VDO computer. WHEELSIZE/SET. Confirm with ATTENTION: If you have selected KMH display, BIKE 1 ...SET SIZE/CONTINUE TYRE SELECT/SELECT.
. With ALARM ON you come (use to go to setting for CONTINUE. Set the minutes to the alarm time setting. Confirm with BIKE 2). Confirm with using . Confirm the minutes ODO BIKE 1 ...SET DISTANCE/ setting with CONTINUE. X3DW VDO CYCLECOMPUTING www.vdocyclecomputing.com X3DW...
5.5 Switch from Bike1 to Bike2 >>> P03 Your VDO computer can be used on 2 bikes. Repeat the steps until the last digit on the right If you switch from bike 1 to bike 2, the computer BIKE SERVICE/BIKE 1 is flashing.
ODO TOTAL: Total km, km bike 1, km bike 2 DATA RESET/ODO TOTAL TOTAL RIDE TM: Total ride time, ride time bike 1, DATA RESET/LAP DATA Your VDO computer is equipped with a two-fold In Sleep mode 2 the wireless receiver is also ride time bike 2. DATA RESET/NAVIGATOR sleep mode function.
6. Timer functions 6.1 Selecting timers Your VDO computer has 7 different timing functions. 5. COUNTDOWN Using go to SETTINGS / When confirming the SELECT the timing function When one of the timing functions is running, the You can program a time, and the timer counts back- SELECT.
Seite 27
Return confirmation on the display: automatically started (e.g. 1 km) Set seconds using . Confirm with Return confirmation: TIMER1+2/SET DONE TIME TRIAL/SET DONE. Your VDO computer automatically returns to the Return to SETTINGS/SELECT. LAP TIMER… SET DISTANCE/ SET OK? Confirm with menu SETTINGS/SELECT. CONTINUE...
6.3 Operating the timers 7. Terms of guarantee STOPWATCH Recalling lap data: VDO Cycle Parts grants a guarantee of 5 years Please contact the dealer from whom you Start with . Stop with . Reset with for 3 seconds. from the date of purchase for your VDO computer.
100 mm to 3999 mm (3.9 to 157.4 inches) Display becomes weak Battery dead Check battery, replace if nec. Display becomes weak Temperatures under 5° make At normal temperatures the the display sluggish display will work normally again X3DW VDO CYCLECOMPUTING www.vdocyclecomputing.com X3DW...
Fonctions d’information en mode Mode « Veille » Nous vous souhaitons beaucoup de plaisir lors de toutes vos sorties avec votre compteur Cycle VDO. de fonctionnement Fonction de mise à zéro Cycle Parts GmbH Fonctions de chronométrage...
L’indicateur indique l’unité de mesu- la page de droite. (ligne de menu) indique re sélectionnée. « PLUS » si d’autres informations sont disponibles. « CHOIX » si une autre possibilité de sélection existe. X3DW VDO CYCLECOMPUTING www.vdocyclecomputing.com X3DW...
PLUS indique qu’un sous-menu existe pour le menu Ces possibilités particulières facilitent le suivi des Augmenter un chiffre. principal CHRONO JOUR. Le sous-menu peut être tours au moyen d’un journal des tours ou d’un X3DW VDO CYCLECOMPUTING www.vdocyclecomputing.com X3DW...
3.2 Fonctions de chronométrage 3.3 Option « Fréquence de pédalage » Le X3DW dispose de 7 chronomètres différents. départ de cette valeur, jusqu’à zéro. Un bip retentit Seul le chronomètre sélectionné apparaît à l’écran. à la fin du compte à rebours. Démarrer avec Le menu Cadence est uniquement disponible permettent de sélectionner le menu CADENCE PEDA /...
Etape 4 Tourner le support pour guidon à 90° Etape 3 Veiller à ce que le joint en caoutchouc soit ASTUCE pour le remplacement de la pile : VDO doit être orientée vers les rayons. selon que le compteur doit être monté sur le bien à...
Les signaux de vitesse et de fréquence de pédalage step 2 Tourner la roue avant ou démarrer tout Pour que les mesures de votre compteur VDO (option : n° d’article 7702) sont transmis à votre simplement ; le capteur définit alors les codages soient correctes, vous devez tout d‘abord régler la...
Etape 6 Saisir la circonférence ainsi mesurée dans Confirmer avec Touches pour accéder à Confirmer avec votre compteur VDO. TAILLE ROUE / REGLAGE. VELO 1 … REGLAGE ROUE / Confirmer avec ATTENTION : Si vous avez sélectionné l’affichage CONTINUER. Définir la circon- TYPE PNEU / SELECT.
Il est possible de procéder au L’écran confirme : KM VELO 1 / REGLAGE OK les minutes. Confirmer les réglage de l’alarme lorsque le compteur indique Retour automatique à REGLAGES / CHOIX. minutes réglées avec ALARME MARCHE. Confirmer avec X3DW VDO CYCLECOMPUTING www.vdocyclecomputing.com X3DW...
5.5 Passage de Vélo 1 à Vélo 2 >>> P03 Votre compteur VDO peut être utilisé sur 2 vélos. Lorsque vous passez du vélo 1 au vélo 2, le compteur REVISER VELO / VELO 1 (utiliser Répéter les étapes jusqu’à ce que le dernier détecte l’émetteur du vélo 2.
NAVIGATOR / REGLAGE OK apparaît pour confir- passer à NAVIGATOR / Le compteur attend alors que des signaux de mer et votre compteur VDO revient automatique- MISE A ZERO. vitesse et de cadence soient émis (dans la mesure ment au menu NAVIGATEUR / CHOIX.
6. Fonctions de chronométrage 6.1 Sélection du chronomètre Votre compteur VDO dispose de 7 fonctions de CPTE REBOURS Utiliser les touches pour ac- Attention : La dernière fonction TIMING sélec- Timing différentes. Lorsqu‘une fonction de Timing Vous pouvez programmer une durée qui sera alors céder à...
Seite 41
Pour le chronomètre des tours, vous pouvez choisir Les touches permettent de OK apparaît brièvement et votre compteur VDO accéder à REGLAGES / CHOIX. entre un démarrage manuel ou automatique du déterminer la valeur. revient automatiquement à REGLAGES / CHOIX.
6.3 Utilisation des chronomètres 7. Conditions de garantie CHRONO MANU Consulter les données des tours VDO Cycle Parts offre une garantie de 5 ans à Veuillez vous adresser à votre revendeur pour Démarrer avec . Arrêter avec compter de la date d‘achat pour votre compteur toute réclamation ou exercice du droit à...
2,5 km/h, max. 199,5 km/h Affichage faible La pile est déchargée. Contrôler la pile et, éventuelle- ment, la remplacer. Affichage faible Les températures inférieures L’affichage est à nouveau à 5°C rendent l’affichage lent. normal lorsque les températu- res remontent. X3DW VDO CYCLECOMPUTING www.vdocyclecomputing.com X3DW...
Seite 44
5.2.1 Scelta da una tabella delle gomme Complimenti! 5.2.2 Impostazione manuale della Con l’acquisto di un computer VDO avete scelto un apparecchio di alto livello tecnologico. Per sfruttare 2. Comando misura della ruota al massimo il potenziale del computer vi raccomandiamo di leggere attentamente le presenti istruzioni, Impostazione Orologio/Sveglia nelle quali troverete tutte le istruzioni per l’uso e molti consigli utili.
“DI PIU’” se vi sono L’indicatore mostra l’unità di misura selezionata. ulteriori informazioni. “SELEZIONA” se vi è un’altra possibilità di scelta. X3DW VDO CYCLECOMPUTING www.vdocyclecomputing.com X3DW...
SELEZIONA indica che nel menu principale NAVIGA- Acorrere verso l’alto in modalità Tempo corsa totale bici 2 fino massimo TOR vi è un sottomenu. Per aprire il sottomenu impostazione . 999:59 HHH:MM. premere il tasto Aumentare una cifra.. X3DW VDO CYCLECOMPUTING www.vdocyclecomputing.com X3DW...
1° giro oppure al supera- mento del 30° giro. 3.2 Funzioni timer 3.3 Opzione frequenza di pedalata L’apparecchio X3DW ha 7 diversi timer selezionabili. a zero. Alla fine del countdown viene emesso un beep. Nel display viene visualizzato solo il timer di volta Premere per far partire.
4.5 Inserimento del computer nel supporto per manubrio >>> P06 Il display è vuoto (nessuna visualizzazione). Il sistema twist click VDO garantisce un collegamento step 2 Ruotare ”twist” il computer verso destra tenen- 4.3 Montaggio della batteria nel computer >>> P05 sicuro del computer al supporto per manubrio.
5.2 Impostazione e misurazione della misura della ruota I segnali di velocità e frequenza di pedalata l’apprendimento dei codici digitali. Per consentire al vostro computer VDO di esegui- (opzione: codice art. 7702) vengono trasmessi in di- Quando il computer ha trovato il trasmettitore ed re una corretta misurazione dovete impostare la gitale e codificati al vostro computer.
Seite 50
DIMENS RUOTA/TIPO GOMMA: (circonferenza di rotolamento). DIMENS RUOTA/BICI 1 Confermare con (con per l’impostazione step 6 Inserite nel vostro computer VDO la circon- della bici 2). Confermare con n DIMENS RUOTA/ TIPO GOMMA/SELECT ferenza della ruota così misurata. IMPOSTAZ Confermare con selezionate ora la vostra gomma.
ORA...IMPOST MIN/CONTINUA. inserite la sveglia su OFF o ON. BICI 2). Confermare con impostate i minuti. Con SVEGLIA ON entrate nell’impostazione Confermare l’impostazione dei dell’orario sveglia. Confermare con minuti con X3DW VDO CYCLECOMPUTING www.vdocyclecomputing.com X3DW 101...
5.5 Passaggio da Bici 1 a Bici 2 >>> P03 Ripetere queste operazioni fino a quando l’ultima Il computer VDO può essere utilizzato per 2 bici. cifra a destra lampeggia. Confermare con Quando si passa da bici 1 a bici 2 il computer riconosce MANUT.
CANCEL DATI/TOTAL CORSA pedalata (opzione) CANCEL DATI/TOT DIST 1+2 Il vostro computer VDO è dotato di una doppia Nella modalità sleep 2 viene anche disinserito il TOT DIST 1+2: totale km, km bici 1, km bici 2 CANCEL DATI/LAP DATI funzione modalità...
6. Funzioni timing 6.1 Seleziona timer Il vostro computer VDO ha 7 diverse funzioni timing. 5. CONTO ROV: andare in IMPOSTAZIO- Nota: quando si conferma la SELEZIONE viene Quando è attiva una delle funzioni timing, general- potete programmare un tempo, dal quale poi viene NI/SELEZIONA.
Seite 55
. Confermare con Il vostro computer VDO torna automaticamente Conferma nel display: TEMPO CORSA/IMPOST OK. in automatico il giro successivo (ad es. 1 km). nel menu IMPOSTAZIONI/SELEZIONA.
Per tutti i reclami e i casi di garanzia vi preghia- Premere per avviare. Premere per stoppare. VDO una garanzia di 5 anni dalla data di acquisto. mo di rivolgervi al vostro rivenditore di fiducia Reset con per 3 secondi.
(2) this device must accept any interference received, including interference that may cause undesired operation. NOTICE: Warning: Changes or modifications made to this equipment not expressly approved by VDO Cycle Parts GmbH may void the FCC authorization to operate this equipment.
Seite 58
(rifiuti elettrici ed elettronici) on und anderen europäischen Ländern mit einem they purchased this product, or their local govern- X2DW, X3DW und alle Sender SPD-TX und CAD-TX separaten Sammelsystem). Die Kennzeichnung auf ment office, for details of where and how they can bei bestimmungsgemäßer Verwendung den grund-...