Herunterladen Inhalt Inhalt Diese Seite drucken
Inhaltsverzeichnis

Werbung

Verfügbare Sprachen
  • DE

Verfügbare Sprachen

  • DEUTSCH, seite 29

Werbung

Inhaltsverzeichnis
loading

Inhaltszusammenfassung für Clevo W230SS

  • Seite 3: Inhaltsverzeichnis

    Contents Apps und Kacheln ................38 Charms-Leiste .................38 About this Concise User Guide ............1 Grafikfunktionen ................39 System Startup ..................4 Audiofunktionen ................41 System Map: Front View with LCD Panel Open ......5 Energieoptionen ................42 LED Indicators ..................6 Installation der Treiber ..............43 Keyboard ...................7 3G-Modul ..................44 Control Center ...................9 Fehlerbehebung ................45...
  • Seite 4 Contenidos Schermata Start e Desktop di Windows 8.1 ........109 App & Titoli ..................110 Acerca de esta Guía del Usuario Concisa ........73 Charms Bar ..................110 Guía rápida para empezar ...............76 Funzioni video ................111 Mapa del sistema: Vista frontal con panel LCD abierto ....77 Funzionalità...
  • Seite 5: About This Concise User Guide

    About this Concise User Guide This quick guide is a brief introduction to getting your system started. This is a supplement, and not a substitute for the expanded English language User’s Manual in Adobe Acrobat format on the Device Drivers & Utilities + User’s Manual disc supplied with your computer.
  • Seite 6: Instructions For Care And Operation

    Instructions for Care and Operation Safety Information • Only use an AC/DC adapter approved for use with this computer. The computer is quite rugged, but it can be damaged. To pre- • Use only the power cord and batteries indicated in this manual. vent this, follow these suggestions: Do not dispose of batteries in a fire.
  • Seite 7 Polymer Battery Precautions Note the following information which is specific to polymer batteries only, and where applicable, this overrides the general battery precaution information. • Polymer batteries may experience a slight expansion or swelling, however this is part of the battery’s safety mechanism and is not a cause for concern.
  • Seite 8: System Startup

    System Startup 1. Remove all packing materials. 2. Place the computer on a stable surface. 130 ° 3. Insert the battery and make sure it is locked in position. 4. Securely attach any peripherals you want to use with the computer (e.g. keyboard and mouse) to their ports.
  • Seite 9: System Map: Front View With Lcd Panel Open

    System Map: Front View with LCD Panel Open Figure 2 Front View with LCD Panel Open 1. PC Camera 2. *PC Camera LED *When the PC camera is in use, the LED will be illuminated in red. 3. Built-In Microphone 4.
  • Seite 10: Led Indicators

    LED Indicators The LED indicators on the computer display helpful infor- Icon Color Description mation about the current status of the computer. Icon Color Description Number Lock (Numeric Keypad) Acti- Blue vated Blue Caps Lock Activated The AC/DC Adapter is Plugged Orange The AC/DC adapter is plugged Blue...
  • Seite 11: Keyboard

    Keyboard The keyboard has a numeric keypad for easy numeric data input. Pressing Fn + Num Lk turns on/off the numeric key- pad. It also features function keys to allow you to change operational features instantly. The keyboard illumination level may be adjusted, or turned off/on, by using the Fn + F12 keys.
  • Seite 12: Function Keys & Visual Indicators

    Function Keys & Visual Indicators The function keys (F1 - F12 etc.) will act as hot keys when pressed while the Fn key is held down. In addition to the basic function key combinations, some visual indicators are available (in the Windows Desktop application only and not in the Start Screen) when the hot key driver is installed.
  • Seite 13: Control Center

    Control Center The Control Center in Windows 8.1 works under the Desktop app and not under the Start screen. Press the Fn + Esc key combination, or double-click the icon in the notification area of the taskbar to toggle the Control Center on/off.
  • Seite 14 Power Modes You can set a Power Mode by clicking the appropriate icon at the top of the Control Center. Each power mode will affect the Power Conservation Mode, Airplane Mode, Power Plan and PC camera power etc. You can click a Control Center icon to set an overall power mode and then click individual icons in the Control Cen- ter to power on/off the Touchpad and PC camera.
  • Seite 15 Power Status Sleep Button The Power Status icon will show whether you are cur- Click either the Hibernate or Sleep button to have the rently powered by the battery, or by the AC/DC adapter computer enter the selected power-saving mode. plugged in to a working power outlet.
  • Seite 16: System Map: Front, Left, Right, Rear & Bottom Views

    System Map: Front, Left, Right, Rear & Bottom Views Front Left Right Bottom Rear  Figure 5 Front, Left, Right, Rear & Bottom Views 1. LED Indicators 9. HDMI-Out Port The USB 3.0 ports are colored blue. USB 3.0 will transfer data 2.
  • Seite 17: Windows 8.1 Control Panel

    Windows 8.1 Control Panel Throughout this manual you will see an instruction to open the Control Panel. Right-click the Start button in the Desktop app or Start screen (or use the Windows Logo Key + X key combination) to bring up an advanced context menu of useful features such as Control Panel, Programs and Features, Power Options, Task Manager, Search, File Ex- plorer, Command Prompt, Device Manager and Network Connections etc.
  • Seite 18: Apps & Tiles

    Apps & Tiles The Start screen will contain a number of apps, and many more will be installed as you add more applications etc. Not all of these apps can fit on one screen so you will often need use the slider at Click the arrow at the bottom of the the bottom of the screen in order to view all the necessary Apps.
  • Seite 19: Video Features

    Video Features The system features both an Intel’s Integrated GPU (for To access the Intel® HD Graphics Control Panel: power-saving) and an NVIDIA’s discrete GPU (for per- 1. Click the icon (Intel® HD Graphics Control Panel) on the Apps screen. formance).
  • Seite 20 Display Devices & Options Using the Windows Logo Key Besides the built-in LCD you can also use an external Key Combination to Switch Displays monitor/flat panel display/TV (TV through HDMI-Out You can also use the + P key combination (or Fn + F7 port only), connected to the external monitor port or to the ) to quickly change display configuration and modes (this HDMI-Out port (High-Definition Multimedia Interface)
  • Seite 21: Audio Features

    Audio Features Sound Blaster Cinema EQ Install the Sound Blaster Cinema application to allow You can configure the audio options on your computer you to configure the audio settings to your requirements from the Sound control panel in Windows, from the for the best performance in games, music and movies.
  • Seite 22: Power Options

    Power Options The Power Options (Hardware and Sound menu) control panel icon in Windows allows you to configure power man- agement features for your computer. You can conserve power by means of power plans and configure the options for the power button, sleep button (Fn + F4), computer lid (when closed), display and sleep mode (the default power saving state) from the left menu.
  • Seite 23: Driver Installation

    Driver Installation  The Device Drivers & Utilities + User’s Manual disc contains the drivers and utilities necessary for the proper operation of the computer. This setup will probably have al- Driver Installation General Guidelines ready been done for you. If this is not the case, insert the disc and click Install Drivers (button), or Option Drivers (button) to access the Optional driver menu.
  • Seite 24: 3G Module

    3G Module If you have included an optional 3G module in your purchase option, follow the instructions below to install the USIM card (which will be provided by your service provider), and then run the appropriate application supplied with your module.
  • Seite 25: Troubleshooting

    Troubleshooting Problem Possible Cause - Solution Wireless LAN/Bluetooth The modules are off as the computer is in Airplane Mode. Check the LED indicator and/or function key indicator to see if it is in Airplane Mode (see Table 1 on page 6).
  • Seite 26: Specifications

    Specifications Processor Options Memory Intel® Core™ i7 Processor Two 204 Pin SO-DIMM Sockets Supporting DDR3L 1600MHz Memory i7-4900MQ (2.80GHz)  Memory Expandable up to 16GB 8MB L3 Cache, 22nm, DDR3L-1600MHz, Latest Specification Information TDP 47W (The real memory operating frequency i7-4800MQ (2.70GHz), i7-4700MQ The specifications listed in this here depends on the FSB of the processor.)
  • Seite 27 Pointing Device Mini Card Slots Environmental Spec Built-in Touchpad Slot 1 for WLAN Module or WLAN and Temperature Bluetooth Combo Module ° ° Operating: 5 C - 35 Video Adapter Slot 2 for mSATA SSD Non-Operating: -20°C - 60°C Intel® Integrated GPU and NVIDIA® (Factory Option) Slot 3 for 3G Module or Relative Humidity Discrete GPU...
  • Seite 29: Über Das Ausführliche Benutzerhandbuch

    Über das Ausführliche Benutzerhandbuch Diese Kurzanleitung soll einen Überblick über die Schritte geben, die dazu notwendig sind, das System zu starten. Dieses ist nur eine Ergänzung und kein Ersatz für das erweiterte englischsprachige Benutzerhandbuch, das auf der mitgelieferten Disc Device Drivers & Utilities + User's Manual im Adobe-Acrobat-Format vorliegt. Diese Disc enthält auch die Treiber und Utility-Programme, die für einen einwandfreien Betrieb des Computers notwendig sind (Hinweis: Das Unternehmen behält sich das Recht vor, diese Publikation ohne Vorankündigung zu überarbeiten und den Inhalt zu verändern).
  • Seite 30: Sicherheitsinformationen

    Hinweise zu Pflege und Betrieb • Wenn der Computer heruntergefallen ist oder beschädigt wurde (berüh- ren Sie nicht die giftige Flüssigkeit des LCD-Bildschirms). Das Notebook ist zwar sehr stabil, kann aber dennoch be- • Wenn ein ungewöhnlicher Geruch, Hitze oder Rauch aus dem Computer schädigt werden.
  • Seite 31 Polymer Akku Sicherheitshinweise Beachten Sie die folgenden Hinweise, die sich speziell auf Poly- mer Akkus beziehen. Diese Hinweise haben zudem Vorrang gegenüber den Allgemeinen Akku Sicherheitshinweisen. • Polymer Akkus können sich etwas ausdehnen oder anschwellen. Dies ist Teil des Sicherheitsmechanismus des Akkus und kein Anlass zur Sorge. •...
  • Seite 32: Schnellstart

    Schnellstart 1. Entfernen Sie das gesamte Verpackungsmaterial. 130 ° 2. Legen Sie den Computer auf eine stabile Unterlage. 3. Setzen Sie den Akku ein, und stellen Sie sicher, dass sie fest sitzt. 4. Schließen Sie alle Peripheriegeräte, die Sie mit dem Computer verwenden wollen (z.
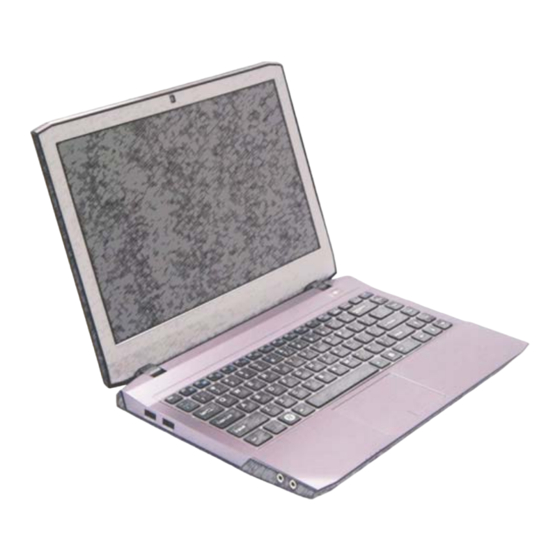
  • Seite 33: Systemübersicht: Ansicht Von Vorne Mit Geöffnetem Lcd-Bildschirm

    Systemübersicht: Ansicht von vorne mit geöffnetem LCD-Bildschirm Abb. 2 Ansicht von vorne mit geöffnetem LCD-Bildschirm 1. PC-Kamera 2. *LED der PC-Kamera *Wenn die PC-Kamera verwendet wird, leuchtet die LED rot. 3. Mikrofon 4. LCD-Bildschirm 5. Netzschalter 6. LED-Anzeigen 7. Tastatur 8.
  • Seite 34: Led-Anzeigen

    LED-Anzeigen Die LED-Anzeigen auf dem Computer zeigen wichtige Symbol Farbe Beschreibung Informationen über den aktuellen Status des Computers. Symbol Farbe Beschreibung Blau Die Nummerntastatur ist aktiviert Der AC/DC-Adapter ist angeschlos- Orange Blau Caps-Lock ist aktiviert Lampe Wenn der AC/DC-Adapter ange- blinkt schlossen wird, ist der USB- Blau...
  • Seite 35: Tastatur

    Tastatur Die Tastatur hat eine eingebettete Nummerntastatur für einfache Zahleneingabe. Durch Drücken auf Fn + Num wird die Nummerntastatur ein- und ausgeschaltet. Zusätzlich gibt es Funktionstasten, über die Sie direkt zwischen den Funktionen um- schalten können. Die Stufe der Tastaturbeleuchtung kann angepasst oder aus-/eingeschaltet werden, indem Sie die Fn + F12 Tasten verwenden.
  • Seite 36: Funktionstasten

    Funktionstasten Wenn die Funktionstasten (F1 - F12) gleichzeitig mit der Fn-Taste gedrückt werden, funktionieren sie wie Hotkeys. Neben den Tastenkombinationen für die Grundfunktionen gibt es einige visuelle Anzeigen (nur bei der Windows Desktop-An- wendung, aber nicht im Start-Bildschirm), wenn der Hotkey Treiber installiert ist. Tasten Funktion/ Visuelle Anzeigen Tasten...
  • Seite 37: Control Center (Steuerzentrum)

    Control Center (Steuerzentrum) Das Control Center (Steuerzentrum) in Windows 8.1 funktioniert in der Desktop App und nicht auf dem Start-Bildschirm. Drücken Sie auf die Tastenkombination Fn + Esc, oder doppelklicken Sie auf das Symbol im Infobereich auf der Taskleiste um das Control Center ein-/auszuschalten. Das Control Center bietet den schnellen Zugriff auf häufig ver- wendete Funktionen, und Sie haben hier die Möglichkeit, das Touchpad/das Kamera-Modul direkt ein-/auszuschalten.
  • Seite 38 Energiemodi Sie können einen Energiemodus einstellen, indem Sie im Control Center auf das entsprechende Symbol klicken. Jeder Energiemodus wird Einfluss auf den Energiesparmodus, Flugzeugmodus, Energiesparplan und PC Kamerastrom usw. haben. Klicken Sie auf das Control Center-Symbol, um einen allgemein gültigen Energiemodus einzustellen. Klicken Sie dann auf die einzelnen Symbole des Control Centers, um das Touchpad und das Kamera-Modul ein-/auszuschalten.
  • Seite 39 Power Status (Energiestatus) Sleep Button (Schaltfläche Schlaf) Das Energiestatus-Symbol zeigt an, ob die Stromversor- Klicken Sie entweder auf die Schaltfläche Ruhezustand gung aktuell über den Akku oder über das an das Stromnetz oder Schlaf, um den Computer der ausgewählten Stromspar- angeschlossene Netzteil erfolgt.
  • Seite 40: Systemübersicht: Ansicht Von Vorne, Links, Rechts, Hinten Und Unten

    Systemübersicht: Ansicht von vorne, links, rechts, hinten und unten Vorderseite Linke Seite Rechte Seite Unterseite Hinterseite Abb. 5  Ansicht von vorne, links, rechts, hinten und unten 1. LED-Anzeigen 9. HDMI-Ausgangsanschluss 2. Luftungsoffnung 10. Schnittstelle für externen Die USB 3.0 Anschlüsse sind blau. Die Datenübertragung ist bei Monitor USB 3.0 viel schneller als bei USB 2.0, und USB 3.0 ist rückwärts 3.
  • Seite 41: Windows 8.1 Systemsteuerung

    Windows 8.1 Systemsteuerung In diesem Handbuch finden Sie eine Anleitung zum Öffnen der Systemsteuerung. Klicken Sie mit der rechten Maustaste auf die Start-Taste in der Desktop-App oder auf dem Start-Bildschirm (oder verwenden Sie die Tastenkombination Windows-Logo-Taste + X), um ein erweitertes Kontextmenü der nützlichen Funktionen aufzurufen: Systemsteuerung, Programme und Funktionen, Energieoptionen, Task-Manager, Suche, Datei-Explorer, Eingabeaufforderung, Geräte- Manager, Netzwerkverbindungen usw.
  • Seite 42: Apps Und Kacheln

    Apps und Kacheln Der Start-Bildschirm enthält bereits eine Reihe von Apps, die mit jeder weiteren Installation erweitert wird. Wenn auf dem Bild- schirm nicht ausreichend Platz ist, um alle Apps anzuzeigen, kön- Klicken Sie auf den Pfeil unten auf dem nen Sie den Schieberegler am unteren Rand des Bildschirms Start-Bildschirm, um auf die Apps zuzugreifen.
  • Seite 43: Grafikfunktionen

    Grafikfunktionen Dieses System verfügt sowohl über eine integrierte GPU So rufen Sie die Steuerung für Intel® HD-Grafik auf: von Intel (zum Energie sparen) und eine diskrete GPU von 1. Klicken Sie auf das Symbol (Steuerung für Intel® HD-Grafik) auf dem Apps-Bildschirm. NVIDIA (für die Leistung).
  • Seite 44: Anzeigegeräte

    Anzeigegeräte Wechseln der Anzeigegeräte mit der Neben dem integrierten LCD-Monitor können Sie auch Windows-Logo-Taste und der Taste P einen externen VGA-Monitor/Flachbildschirm oder ein Wenn Sie gleichzeitig auf die Tasten und P (oder Fn + Fernsehgerät (an die Schnittstelle für externen Monitor oder F7) drücken, konnen Sie bei Windows schnell und einfach an den HDMI-Ausgangsanschluss angeschlossen) als An- die Anzeigeeinstellungen und -modi wechseln (was be-...
  • Seite 45: Audiofunktionen

    Audiofunktionen Sound Blaster Cinema EQ Mit der Anwendung Sound Blaster Cinema können Sie die Sie können die Audio-Einstellungen Ihres Computers über Audioeinstellungen nach Ihren Anforderungen konfigurie- die Windows-Systemeinstellungen bei Sound , über das ren, um eine bestmögliche Audioleistung bei Spielen und der HD VDeck-Symbol auf dem Desktop oder über das VIA HD Wiedergabe von Musik und Videos zu erreichen.
  • Seite 46: Energieoptionen

    Energieoptionen Die Energieoptionen von Windows ermöglichen Ihnen die Konfiguration der Optionen für das Energiemanagement des Com- puters. Sie können Strom sparen, indem Sie Energiesparpläne erstellen und im linken Menü können Sie die Optionen für den Netzschalter, die Energiespartasten (Fn + F4) und Zuklappeinstellung (beim Schließen des Dekkels) und den An- zeige- und Energiesparmodus (die Standardeinstellung Energie sparen) konfigurieren.
  • Seite 47: Installation Der Treiber

    Installation der Treiber  Die Disc Device Drivers & Utilities + User's Manual enthält die Treiber und Hilfspro- gramme, die für das einwandfreie Funktionieren des Computers notwendig sind. Möglicher- Allgemeine Hinweise zur Treiberinstallation weise wurden diese bereits vorinstalliert. Ist das nicht der Fall, legen Sie die Disc ein, und klicken Sie auf Install Drivers (Schaltfläche) oder Option Drivers (Schaltfläche), um das Wenn Sie keine fortge- schrittenen...
  • Seite 48: 3G-Modul

    3G-Modul Wenn Ihr Modell das optionale 3G-Modul enthält, folgen Sie den nachfolgenden Anweisungen, um die USIM-Karte zu in- stallieren (Sie erhalten sie von Ihrem Dienstanbieter). Installieren Sie dann die Anwendung. Einsetzen der USIM-Karte 1. Schalten Sie den Computer aus, drehen Sie es herum, und nehmen Sie den Akku heraus (schieben Sie die Riegel in die unten angezeigte Richtung, und ziehen Sie den Akku heraus).
  • Seite 49: Fehlerbehebung

    Fehlerbehebung Problem Mögliche Ursache - Lösung Die Module Wireless-LAN/ Im Flugzeugmodus sind die Module ausgeschaltet. Prüfen Sie der LED-Anzeige und/ Bluetooth können nicht erkannt oder Funktionstastenanzeige, ob der Computer im Flugzeugmodus ist (siehe Tabelle 1 auf werden. Seite 30). Mit der Tastenkombination Fn + F11 können Sie den Flugzeugmodus ein- oder ausschalten (siehe Tabelle 3 auf Seite 32).
  • Seite 50: Technische Daten

    Technische Daten Prozessor-Optionen Speicher Intel® Core™ i7 Prozessor Zwei 204-Pin SODIMM-Sockel,  Unterstützung von DDR3L 1600MHz i7-4900MQ (2,80GHz) Speicher 8MB L3 Cache, 22nm, DDR3L-1600MHz, Aktualität der technischen Daten Speicher auf bis zu 16GB erweiterbar TDP 47W Die in diesem Teil aufgeführten techni- i7-4800MQ (2,70GHz), i7-4700MQ (Die tatsächliche Speicherarbeitsfrequenz schen Daten sind zum Zeitpunkt der...
  • Seite 51 Zeigegerät Mini-Card-Steckplätze Umgebungsbedingungen Eingebautes Touchpad Steckplatz 1 für Wireless-LAN-Modul oder Temperatur Kombinierte Bluetooth und WLAN-Modul In Betrieb: 5ºC – 35ºC Videoadapter Steckplatz 2 für mSATA-SSD-Laufwerk Bei Aufbewahrung: -20ºC – 60ºC Integrierte GPU von Intel® und Diskrete (Werkseitige Option) Steckplatz 3 für 3G- Relative Luftfeuchtigkeit GPU von NVIDIA®...
  • Seite 53: A Propos De Ce Guide Utilisateur Concis

    A propos de ce Guide Utilisateur Concis Ce guide rapide est une brève introduction à la mise en route de votre système. Il s’agit d’un supplément, et non pas d’une alternative au Manuel de l’Utilisateur en Anglais complet au format Adobe Acrobat sur le disque Device Drivers & Utilities + User's Manual fourni avec votre ordinateur.
  • Seite 54: Instructions D'entretien Et D'utilisation

    Instructions d’entretien et d’utilisation • Si une odeur inhabituel, de la chaleur ou de la fumée apparaissait sor- tant de votre ordinateur. L’ordinateur est robuste, mais il peut toutefois être endomma- gé. Afin d’éviter ceci, veuillez suivre ces recommandations : Informations de sécurité...
  • Seite 55 Précautions concernant les batteries polymères Notez les informations suivantes spécifiques aux batteries po- lymères, et le cas échéant, celles-ci remplacent les informa- tions générales de précaution sur les batteries. • Les batteries polymères peuvent présenter une légère dilatation ou gonflement, mais cela est inhérent au mécanisme de sécurité de la batterie et ne représente pas une anomalie.
  • Seite 56: Guide De Démarrage Rapide

    Guide de démarrage rapide 130 ° 1. Enlevez tous les memballages. 2. Posez l’ordinateur sur une surface stable. 3. Installez la batterie et assurez-vous qu’elle correc- tement positionnée. 4. Connectez fermement les périphériques que vous souhaitez utiliser avec votre ordinateur (par ex. cla- vier et souris) à...
  • Seite 57: Carte Du Système: Vue De Face Avec L'écran Lcd Ouvert

    Carte du système: Vue de face avec l’écran LCD ouvert Figure 2 Vue de face avec l’écran LCD ouvert 1. Caméra PC 2. *Indicateur LED de caméra PC *Quand la caméra PC est en cours d'utilisation le Indicateur LED sera illuminé...
  • Seite 58: Indicateurs Led

    Indicateurs LED Les indicateurs LED sur votre ordinateur affichent des infor- Icône Couleur Description mations utiles sur l’état actuel de votre ordinateur. Icône Couleur Description Verrouillage numérique (pavé numé- Bleue rique) activé Orange L'adaptateur AC/DC est branché Bleue Verrouillage majuscule activé Orange L'adaptateur AC/DC est branché...
  • Seite 59: Clavier

    Clavier Le clavier est doté d'un pavé numérique intégré pour une saisie des données numériques plus facile. Le fait d'appuyer sur Fn + Verr Num active ou désactive le pavé numérique. Il est également doté de touches fonction pour vous permettre de changer instantanément de mode opérationnel.
  • Seite 60: Touches Fonction

    Touches fonction Les touches de fonctions (F1 - F12 etc.) agiront comme touches de raccourci (hot-key) quand pressée en maintenant la touche Fn appuyée. En plus des combinaisons des touches de fonction de base, des indicateurs visuels sont disponibles (dans l'ap- plication Bureau de Windows uniquement et pas dans l'écran d'accueil) quand le pilote de touches de raccourci (HotKey Driver) est installé.
  • Seite 61: Control Center (Centre De Contrôle)

    Control Center (Centre de contrôle) Le Control Center (Centre de contrôle) dans Windows 8.1 fonctionne dans l'application Bureau et non dans l'écran d'accueil. Appuyez sur la combinaison de touches Fn + Échap ou double-cliquez sur l'icône dans la zone de notification de la barre des tâches pour activer/désactiver le Control Center.
  • Seite 62: Modes D'alimentation

    Modes d’alimentation Vous pouvez définir un Mode d’alimentation en cliquant sur l'icône appropriée au dessus du Control Center. Chaque mode d'alimentation aura une incidence sur le mode Economie d'énergie, le mode Avion, la gestion de l'alimentation et l'alimenta- tion de la caméra PC de l'ordinateur, etc. Vous pouvez cliquer sur l’icône du Control Center pour définir un mode d'alimentation générale, puis cliquer sur les icônes individuelles dans le Control Center pour activer/désactiver le touchpad et le module caméra PC Power Saving...
  • Seite 63 Power Status (État d'alimentation) Sleep Button (Bouton Veille) Cliquez sur le bouton Veille Prolongée ou Veille pour que l'ordinateur entre dans le mode d'économie d'énergie sélec- L'icône État d'alimentation indique si vous êtes actuelle- tionné. ment alimenté par la batterie, ou par l'adaptateur AC/DC branché...
  • Seite 64: Carte Du Système: Vues De Face, Gauche, Droite, Arrière & Dessous

    Carte du système: Vues de face, gauche, droite, arrière & dessous Face Gauche Droit Dessous Arrière Figure 5  Vues de face, gauche, droite, arrière & dessous 1. Indicateurs LED 10. Port moniteur externe 2. Ventilation 11. Prise réseau RJ-45 Les ports USB 3.0 sont colorés en bleu.
  • Seite 65: Panneau De Configuration De Windows 8.1

    Panneau de Configuration de Windows 8.1 Tout au long de ce manuel, vous verrez une instruction pour ouvrir le Panneau de Configuration. Faites un clic droit sur le bouton Démarrer dans l'appli Bureau ou sur l'écran d'accueil (ou utilisez la combinaison de touches Touche Logo de Windows + X) pour faire apparaître un menu contextuel avancé...
  • Seite 66: Applications Et Vignettes

    Applications et Vignettes L'écran d'accueil contiendra un certain nombre d'applications, et bien d'autres seront installées lorsque vous ajouterez des applications, etc. Cliquez sur la flèche en bas de Toutes ces applications peuvent tenir sur un seul écran ainsi vous aurez l'écran d'accueil pour accéder à...
  • Seite 67: Caractéristiques Vidéo

    Caractéristiques vidéo Le système comporte à la fois un GPU intégré Intel (pour Pour accéder au Panneau de configuration des graphiques l’économie d’énergie) et un GPU discret NVIDIA (pour les HD Intel®: performances). Vous pouvez changer de périphérique d’affi- 1. Cliquez sur l’icône (Panneau de configuration des graphiques chage, et configurer les options d’affichage dès le moment HD Intel®) dans l'écran Applications.
  • Seite 68 Périphériques d’affichage Utilisez la combinaison de touches du En plus du LCD intégré, vous pouvez aussi utiliser un moni- logo de Windows + P pour changer teur VGA externe/écran plat ou TV (connecté au port moni- d'affichage teur externe ou à la prise de sortie HDMI) comme Vous pouvez utiliser la combinaison de touches + P (ou périphérique d'affichage.
  • Seite 69: Caractéristiques Audio

    Caractéristiques audio Sound Blaster Cinema EQ Installez l'application Sound Blaster Cinema afin de pou- Vous pouvez configurer les options audio de votre ordinateur voir configurer les paramètres audio adéquats permettant à partir du panneau de configuration Son dans Windows, d’obtenir les meilleures performances de jeux, de musique et à...
  • Seite 70: Options D'alimentation

    Options d’alimentation Le panneau de configuration Options d'alimentation de Windows vous permet de configurer la gestion d'alimentation de votre ordinateur. Vous pouvez économiser de l'énergie à l'aide de modes de gestion de l'alimentation et configurer les op- tions pour le bouton d'alimentation, bouton de veille (Fn + F4), couvercle de l'ordinateur (lorsqu'il est fermé), mode Affichage et Veille (l'état d'économie d'énergie par défaut) dans le menu de gauche.
  • Seite 71: Installation Du Pilote

    Installation du pilote  Le disque Device Drivers & Utilities + User’s Manual contient les pilotes et les utilitaires nécessaires pour un bon fonctionnement de votre ordinateur. Cette installation aura proba- Directives générales pour l'installation du pilote blement déjà été faite pour vous. Si ce n'est pas le cas, insérez le disque et cliquez sur Install Drivers (bouton), ou Option Drivers (bouton) pour accéder au menu des pilotes Option- D'une manière...
  • Seite 72: Module 3G

    Module 3G Si votre option d'achat comporte un module 3G optionnel, suivez les instructions ci-dessous pour installer la carte USIM (qui vous sera fournie par votre fournisseur de service), et installez ensuite l'application. Insérer la carte USIM 1. Eteignez l'ordinateur, retournez-le et retirez la batterie (faites glisser le loquet dans la direction indiquée en dessous et sortez la batte- rie).
  • Seite 73: Dépannage

    Dépannage Problème Cause possible - résolution modules sans fil/ Les modules sont désactivés quand l'ordinateur est en Mode Avion. Vérifiez l'indicateur LED Bluetooth ne peuvent pas être et/ou l’indicateur de la touche de fonction pour voir si l'ordinateur est en Mode Avion (voir détectés.
  • Seite 74: Spécifications

    Spécifications Options de processeurs Mémoire Processeur Intel® Core™ i7 Deux emplacements SODIMM 204 broches, supportant la mémoire DDR3L i7-4900MQ (2,80GHz)  1600MHz Cache L3 8Mo, 22nm, DDR3L-1600MHz, Mémoire extensible jusqu’à 16Go TDP 47W Dernières informations de spécification i7-4800MQ (2,70GHz), i7-4700MQ (La fréquence réelle d’opération de la (2,40GHz) mémoire dépend du FSB du processeur.)
  • Seite 75 Dispositif de pointage Logements Mini-carte Spécifications environnementales Touchpad intégré Logement 1 pour module LAN sans fil ou Température ° ° module combo Bluetooth et LAN sans fil Adaptateur vidéo En fonction : 5 C- 35 ° ° Logement 2 pour lecteur SSD mSATA Eteint : -20 C - 60 GPU intégré...
  • Seite 77: Acerca De Esta Guía Del Usuario Concisa

    Acerca de esta Guía del Usuario Concisa Esta guía rápida es una breve introducción para poner su sistema en funcionamiento. Es un suplemento y no un sustituto del Manual del usuario completo en inglés en formato Adobe Acrobat del disco Device Drivers & Utilities + User's Manual suministrado con el ordenador.
  • Seite 78: Instrucciones Para El Cuidado Y Funcionamiento

    Instrucciones para el cuidado y funcio- • Si hay un olor fuera de lo normal, calor o humo que sale del orde- nador. namiento Información de seguridad El ordenador portátil es muy robusto, pero puede dañarse. Para • Utilice solamente un adaptador de alimentación aprobado para su evitar esto, siga estas sugerencias: uso con este ordenador.
  • Seite 79 Precauciones para baterías de polímero Tenga en cuenta la información siguiente específica para bate- rías de polímero; además, donde corresponda, invalida la infor- mación sobre precauciones para baterías normales. • Las baterías pueden aumentar o hincharse ligeramente, sin embargo, esto es parte del mecanismo de seguridad de la batería y o supone un problema.
  • Seite 80: Guía Rápida Para Empezar

    Guía rápida para empezar 1. Quite todos los materiales del embalaje. 2. Coloque el ordenador en una superficie estable. 130 ° 3. Inserte la batería y asegúrese de que quede bloqueada en su posición. 4. Conecte en los puertos correspondientes los periféricos que desee utilizar con el ordenador (p.
  • Seite 81: Mapa Del Sistema: Vista Frontal Con Panel Lcd Abierto

    Mapa del sistema: Vista frontal con panel LCD abierto Figura 2 Vista frontal con panel LCD abierto 1. Cámara PC 2. *LED de cámara PC *Cuando la cámara PC esté en uso, el LED se iluminará en rojo. 3. Micrófono 4.
  • Seite 82: Indicadores Led

    Indicadores LED Los indicadores LED en su ordenador muestran una valiosa Icono Color Descripción información sobre el estado actual del ordenador. Icono Color Descripción El teclado numérico (NumLk) está acti- Azul vado El adaptador AC/DC está conec- Azul El bloqueo de mayúsculas está activado Naranja tado Naranja...
  • Seite 83: Teclado

    Teclado El teclado tiene un teclado numérico para una entrada fácil de datos numéricos. Al presionar Fn + Bloq Num el teclado numérico se habilita o inhabilita. También incluye las teclas de función para permitirle cambiar las características operacionales al instante. Puede ajustar el nivel de iluminación del teclado, o apagarlo y encenderlo, utilizando las teclas Fn + F12.
  • Seite 84: Teclas De Función

    Teclas de función Las teclas de función (F1 - F12 etc.) actuarán como teclas directas (Hot-Key) cuando se pulsan junto con la tecla Fn. Además de las combinaciones de teclas de función básicas algunos indicadores visuales están disponibles (sólo en la aplicación Escritorio de Windows y no en la pantalla Inicio) cuando el controlador de teclas directas está...
  • Seite 85: Control Center (Centro De Control)

    Control Center (Centro de control) El Control Center (Centro de control) en Windows 8.1 funciona bajo la app Escritorio y no en la pantalla Inicio. Presione la combinación de teclas Fn + Esc o haga doble clic en el icono en el área de notificación de la barra de tareas para activar o desactivar el Control Center.
  • Seite 86 Modos de energía Puede ajustar el Modo de energía haciendo clic en el icono apropiado en la parte superior del Control Center. Cada modo de energía afectará a Power Conservation Mode (Modo ahorro de energía), Airplane Mode (Modo de avión), Power Plan (Plan de energía) y PC camera power (Energía de cámara PC), etc.
  • Seite 87 Power Status (Estado de energía) Sleep Button (Botón Suspender) Haga clic en el botón Hibernate (Hibernar) o Sleep (Suspender) para que el equipo entre en el modo de ahorro El icono Estado de energía mostrará si la alimentación de energía seleccionado. actual viene dada por la batería o por el adaptador AC/DC enchufado en una toma de corriente.
  • Seite 88: Mapa Del Sistema: Vistas Frontal, Izquierda, Derecha, Posterior E Inferior

    Mapa del sistema: Vistas frontal, izquierda, derecha, posterior e inferior Parte frontal Lateral izquierdo Lateral derecho Vista inferior Parte posterior  Figura 5 Vistas frontal, izquierda, derecha, posterior e inferior El color de los puertos USB 3.0 es azul. USB 3.0 trans- 1.
  • Seite 89: Panel De Control De Windows 8.1

    Panel de Control de Windows 8.1 A lo largo de este manual verá una instrucción para abrir el Panel de Control. Haga clic con el botón derecho en el botón Inicio en la app del Escritorio o en la pantalla Inicio (o utilice la combinación Tecla de Windows + tecla X) para abrir un menú...
  • Seite 90: Apps Y Mosaicos

    Apps y Mosaicos La pantalla Inicio contendrá varias apps y muchas más se instalarán Haga clic en la flecha en la parte inferior de conforme añada más aplicaciones, etc. No todas estas apps caben en una la pantalla Inicio para acceder a Aplicaciones. pantalla, por lo que a menudo deberá...
  • Seite 91: Parámetros De Vídeo

    Parámetros de vídeo El sistema incluye una GPU integrada de Intel (para el Para acceder al Panel de control de gráficos HD Intel®: ahorro de energía) y una GPU discreta NVIDIA (para 1. Haga clic en el icono (Panel de control de gráficos HD Intel®) en la pantalla Aplicaciones.
  • Seite 92 Dispositivos y opciones de pantalla Usar la combinación de teclas del Además del LCD incorporado, también puede utilizar un logotipo Windows + P para cambiar monitor VGA/pantalla plana o TV (conectado al puerto para entre pantallas monitor externo o al puerto de salida de HDMI) como Puede usar la combinación de teclas + P (o Fn + F7) para dispositivo de pantalla.
  • Seite 93: Características De Audio

    Características de audio Sound Blaster Cinema EQ Instale la aplicación Sound Blaster Cinema para poder Puede configurar las opciones de audio en su ordenador ajustar la configuración de audio según sus necesidades para desde el panel de control de Sonido en Windows, desde el obtener el mejor rendimiento en juegos, música y películas.
  • Seite 94: Opciones De Energía

    Opciones de energía El panel de control de las opciones de energía (menú Hardware y sonido) de Windows permite configurar las funciones de administración de energía del ordenador. Puede ahorrar energía con los planes de energía y configurar las opciones para el botón de encendido, botón de suspensión (Fn + F4), tapa del ordenador (al cerrarla), pantalla y modo de suspensión (el estado de ahorro de energía predeterminado) en el menú...
  • Seite 95: Instalación De Controladores

    Instalación de controladores  El disco Device Drivers & Utilities + User’s Manual contiene los controladores y utilitarios necesarios para utilizar el ordenador correctamente. Inserte el disco y haga clic en Install Directrices generales para la instalación del Drivers (botón), u Option Drivers (botón) para acceder al menú de controladores opcional. controlador Instale los controladores en el orden indicado en la Figura...
  • Seite 96: Módulo 3G

    Módulo 3G Si ha incluido un módulo opcional 3G en su opción de compra, siga las instrucciones siguientes para instalar la tarjeta USIM (suministrada por su proveedor de servicios) y luego instale la aplicación. Insertar la tarjeta USIM 1. Apague el ordenador y gírelo para quitar la batería (deslice los pestillos en la dirección indicada abajo y saque la batería).
  • Seite 97: Solución De Problemas

    Solución de problemas Problema Posible causa - Solución Los módulos WLAN y Los módulos están apagados cuando el equipo está en Modo de avión. Compruebe el indicador Bluetooth no pueden y/o el indicador de la tecla de función para ver si el equipo está en Modo de avión (vea detectarse.
  • Seite 98: Especificaciones

    Especificaciones Opciones de procesadores Almacenamiento Procesador Intel® Core™ i7 Un HDD SATA intercambiable de 2,5" 9,5mm/7,0mm (h) i7-4900MQ (2,80GHz)  Caché de nivel 3 de 8MB, 22nm, DDR3L- (Opción de fábrica) Dos SSDs mSATA con Información actualizada de 1600MHz, TDP 47W soporte para RAID nivel 0/1 especificaciones i7-4800MQ (2,70GHz), i7-4700MQ...
  • Seite 99 Adaptador de vídeo Ranuras Mini-Card Especificaciones del ambiente GPU integrada de Intel® y GPU discreta Ranura 1 para módulo LAN inalámbrica o Temperatura NVIDIA® módulo combo Bluetooth y LAN En funcionamiento: 5°C - 35°C Inalámbrica Apagado: -20°C - 60°C Soporta Microsoft Hybrid Graphics Ranura 2 para mSATA SSD Humedad relativa GPU integrada de Intel®...
  • Seite 101: Informazioni Su Questa Guida Rapida

    Informazioni su questa guida rapida Questa guida rapida rappresenta un’introduzione rapida all’avvio del sistema. Si tratta di un supplemento e non di una sostituzione del Manuale per l'utente completo in lingua inglese nel formato Adobe Acrobat, memorizzato sul disco Device Drivers &...
  • Seite 102: Istruzioni Per La Custodia E Il Funzionamento

    Istruzioni per la custodia e il funziona- • Se c'è un odore non usuale, calore o fumo che fuoriesce dal compu- ter. mento Informazioni di sicurezza Il computer notebook è abbastanza rigido, ma è possibile che possa essere danneggiato. Per evitare qualsiasi danno, attenersi •...
  • Seite 103 Precauzioni relative alla batteria ai polimeri Le informazioni seguenti sono molto importanti e si riferiscono unicamente alle batterie ai polimeri e, ove applicabile, hanno priorità rispetto alle precauzioni generali relative alle batterie. • Le batterie ai polimeri possono espandersi o gonfiarsi leggermente, tuttavia questo fa parte del meccanismo di sicurezza della batteria e non deve essere causa di preoccupazione.
  • Seite 104: Guida Di Avvio Rapido

    Guida di avvio rapido 1. Eliminare tutti i materiali di imballo. 130 ° 2. Appoggiare il computer su una superficie stabile. 3. Inserire la batteria e verificare che sia bloccata in posizione. 4. Collegare bene le periferiche che si desidera usare con il computer (per esempio tastiera e mouse) alle porte corrispondenti.
  • Seite 105: Descrizione Del Sistema: Vista Anteriore Con Pannello Lcd Aperto

    Descrizione del sistema: Vista anteriore con pannello LCD aperto Figura 2 Vista anteriore con pannello LCD aperto 1. Camera PC 2. *LED della camera PC *Quando si utilizza la camera PC, l'indicatore LED si illumina in rosso. 3. Microfono 4. Schermo LCD 5.
  • Seite 106: Indicatori Led

    Indicatori LED Gli indicatori LED sul computer segnalano importanti Icona Colore Descrizione informazioni relative allo stato corrente del computer. Icona Colore Descrizione La funzione blocco numerico (tastie- rino numerico) è attivata Arancione L'adattatore AC/DC è collegato Bloc Maiusc è attivato Arancione lam- L'adattatore AC/DC è...
  • Seite 107: Tastiera

    Tastiera Nella tastiera è stato integrato un tastierino numerico per un facile inserimento dei numeri. Premere Fn + Bloc Num per commutare l’attivazione e la disattivazione della tastiera numerica. Dispone anche di tasti funzione che consentono di cambiare istantaneamente le funzionalità operative. Utilizzando la combinazione di tasti Fn + F12 è possibile attivare/ disattivare l'illuminazione della tastiera e regolare il livello della luminosità.
  • Seite 108: Tasti Funzione

    Tasti funzione I tasti funzione (da F1 a F12) agiscono come Hot-Key quando premuti tenendo premuto il tasto Fn. In aggiunta alle combinazioni di tasti funzione base, quando è installato il driver hot key (HotKey Driver) alcuni indicatori visivi sono disponibili (solo nell'applicazione Windows Desktop e non nella schermata Start).
  • Seite 109: Control Center (Centro Di Controllo)

    Control Center (Centro di controllo) Il Control Center (Centro di controllo) di Windows 8.1 funziona sotto la app Desktop e non sotto la schermata Start. Premere la combinazione di tasti Fn + Esc oppure fare doppio clic sull'icona nell'area di notifica della barra delle applicazioni per attivare/disattivare il Control Center.
  • Seite 110: Modalità Risparmio Energia

    Modalità risparmio energia È possibile impostare una Modalità risparmio energia facendo clic sull'icona corrispondente nella parte superiore del Control Center. Ogni modalità di alimentazione influirà sulla modalità di risparmio energetico, modalità aereo, pianificazione energetica e alimentazione camera PC ecc. È possibile fare clic su un'icona del Control Center per impostare una modalità di risparmio energetico generale e quindi scegliere le singole icone del Control Center per attivare/disattivare il touchpad e il modulo camera.
  • Seite 111 Power Status (Stato di alimentazione) Star. L'icona Stato di alimentazione viene visualizzata se attualmente il computer è alimentatore con la batteria, oppure mediante l'alimentatore collegato in una presa Sleep Button (Pulsante Sospensione) funzionante. La barra dello stato di alimentazione mostra la Cliccare il pulsante di Ibernazione Sospensione...
  • Seite 112: Descrizione Del Sistema: Vista Anteriore, Sinistra, Destra, Posteriore E Inferiore

    Descrizione del sistema: Vista anteriore, sinistra, destra, posteriore e inferiore Lato anteriore Lato sinistro Lato destro Lato posteriore Parte inferiore Figura 5 - Vista anteriore, sinistra, destra, posteriore e in-  feriore 1. Indicatori LED 10. Porta per monitor esterno 2.
  • Seite 113: Pannello Di Controllo Di Windows 8.1

    Pannello di controllo di Windows 8.1 In questo manuale sarà richiesto di aprire il Pannello di controllo. Fare clic con il pulsante destro del mouse sul pulsante Start nell'app Desktop o nella schermata Start (o utilizzare la combinazione di tasti Tasto logo Windows + X) per visualizzare il menu di scelta rapida con utili funzionalità...
  • Seite 114: App & Titoli

    App & Titoli La schermata di avvio conterrà un numero di app, e molte altre ancora sa- Fare clic sulla freccia nella parte inferiore ranno installate come si aggiungono ulteriori applicazioni ecc. Non tutte della schermata Start per accedere alle App. queste applicazioni troveranno posto su uno schermo, così, spesso, per vi- sualizzare tutte le applicazioni necessarie, sarà...
  • Seite 115: Funzioni Video

    Funzioni video Il sistema è dotato sia di una GPU integrata Intel (per il Per accedere al Pannello di controllo della Grafica HD risparmio energetico) sia di una GPU discreta NVIDIA (per Intel®: le prestazioni). È possibile modificare le Impostazioni di 1.
  • Seite 116 Dispositivi di visualizzazione Utilizzo della combinazione di tasti logo Oltre allo schermo LCD integrato, è possibile utilizzare un di Windows + P per passare da una monitor VGA/LCD a schermo piatto o una TV (collegato visualizzazione all'altra alla porta per monitor esterno o alla porta uscita HDMI) È...
  • Seite 117: Funzionalità Audio

    Funzionalità audio Sound Blaster Cinema EQ Installare l'applicazione Sound Blaster Cinema per È possibile configurare le opzioni audio del computer dal consentire all'utente di configurare le impostazioni audio in pannello di controllo Audio di Windows, dall'icona HD base ai propri requisiti per ottenere le prestazioni migliori in VDeck sul desktop o dal pannello di controllo VIA HD giochi, musica e filmati.
  • Seite 118: Opzioni Risparmio Energia

    Opzioni risparmio energia Il pannello di controllo delle Opzioni risparmio energia (menu Hardware e suoni) di Windows consente la configurazione delle funzioni di risparmio energetico del computer. Selezionando Risparmio di energia è possibile attivare questa funzione e configurare le opzioni relative al pulsante di alimentazione, pulsante di sospensione (Fn + F4), coperchio del computer (chiuso), schermo e modalità...
  • Seite 119: Installazione Driver

    Installazione driver  Il disco Device Drivers & Utilities + User’s Manual contiene i driver e le utilità necessari per il corretto funzionamento del computer. Inserire il disco e fare clic su Install Drivers Linee guida generali per (pulsante), oppure il pulsante Option Drivers per accedere al menu del driver opzionale. l'installazione dei driver Installare i driver attenendosi all'ordine indicato nella Figura...
  • Seite 120: Modulo 3G

    Modulo 3G Se nell'opzione di acquisto è stato incluso un modulo 3G opzionale, seguire le istruzioni sotto per installare la carta USIM (presumibilmente fornita dal proprio operatore), quindi installare l'applicazione. Inserimento della carta USIM 1. Spegnere il computer, girarlo e rimuovere la batteria (rilasciare i fermi nella direzione indicata sotto e sganciare la batteria facendola scorrere).
  • Seite 121: Risoluzione Dei Problemi

    Risoluzione dei problemi Problema Possibile causa - Soluzione Non è possibile rilevare i moduli I moduli sono disattivati quando il computer si trova nella modalità aereo. Controllare il LED LAN Wireless e Bluetooth. indicatore e/o l'indicatore del tasto funzione per vedere se il computer è in modalità aereo (vedere la Tabella 1 a pagina 102).
  • Seite 122: Specifiche Tecniche

    Specifiche tecniche Opzioni di processore Memoria Processore Intel® Core™i7 Due prese SODIMM 204 pin, dotate di supporto per la memoria DDR3L 1600MHz i7-4900MQ (2,80GHz)  Memoria espandibile fino a 16GB Cache L3 da 8MB, 22nm, DDR3L- Ultimi aggiornamenti delle 1600MHz, TDP 47W (La frequenza operativa reale della specifiche tecniche memoria dipende dal bus FSB del...
  • Seite 123 Adattatore Video Slot Mini-Card Requisiti ambientali GPU integrata Intel® e GPU discreta Slot 1 per il modulo Wireless LAN o Temperatura ° ° NVIDIA® modulo combo Bluetooth e Wireless LAN In esercizio: 5 C - 35 ° ° Slot 2 per SSD mSATA Non in esercizio: -20 C - 60 Supporto per Microsoft Hybrid Graphics...

Diese Anleitung auch für:

W230st

Inhaltsverzeichnis