Herunterladen Inhalt Inhalt Diese Seite drucken
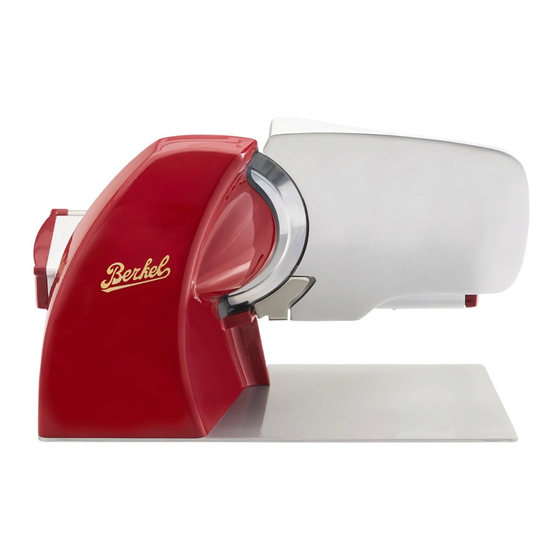
Berkel HOME LINE 200 Gebrauchsanleitung

Berkel HOME LINE 200 Gebrauchsanleitung

Home line series
Vorschau ausblenden Andere Handbücher für HOME LINE 200:

Werbung

Verfügbare Sprachen

Verfügbare Sprachen

HOME LINE 200
HOME LINE 250
MANUALE D'USO
IT
USER MANUAL
EN
HOME LINE SERIES
GEBRAUCHSANLEITUNG
DE
MANUEL D'INSTRUCTIONS
FR

Werbung

Inhaltsverzeichnis
loading

Inhaltszusammenfassung für Berkel HOME LINE 200

  • Seite 1 HOME LINE SERIES HOME LINE 200 HOME LINE 250 MANUALE D’USO GEBRAUCHSANLEITUNG USER MANUAL MANUEL D’INSTRUCTIONS...
  • Seite 2 SAFETY...
  • Seite 3 Halten Sie die Klinge immer nur mit dem Klingenentferner. Vergewissern Sie sich, dass niemand an die Klinge kommt, wenn sie entfernt wird VAN BERKEL INTERNATIONAL S.r.l. - via Varese 14 - 21041 Albizzate (VA) - Italia Tel. +39 331 990825 - Fax + 39 331 984659 - info@berkelinternational.com...
  • Seite 4 Fig. 2 Abb. 2 Obr. 2 Afb. 2 Bild 2...
  • Seite 5: Componenti Principali

    MANUALE D’USO: Affettatrice elettrica Home Line MODELLO: HL200 - HL250 COMPONENTI PRINCIPALI Pulsante di avviamento (bianco) Pulsante di arresto (rosso) Targhetta di identificazione, dati tecnici e marcatura CE Piedino Manopola regolazione spessore fetta Piastra spessimetro Protezione paradita Piatto portamerce Pressamerce 10.
  • Seite 6: Dichiarazione Di Conformità

    DESCRIZIONE grande concentrazione, non di- tamente. Quando necessario strarsi durante l’uso; rivolgendosi per l’intervento a Affettatrice elettrica per uso - evitare l’uso da parte di per- personale qualificato; domestico con lama circolare, sonale che non abbia letto e - arrestare immediatamente progettata per affettare esclu- compreso a fondo il contenuto...
  • Seite 7: Installazione

    Condizioni ambientali d’uso: - protezione magneto-termica; frequenza se necessario. Dopo - Temperatura da -5°C a +40°C - interruttore automatico dif- un periodo di inattività si rac- - Umidità max 95% ferenziale; comanda la pulizia anche prima - impianto di messa a terra. dell’utilizzo.
  • Seite 8: Manutenzione

    1) ruotare di 90° in senso an- detergerla regolarmente. Non filatoio, eccetto nel caso di evi- tiorario il disco coprilama tra- lavare la lama in lavastoviglie. dente difetto di produzione. mite l’apposita manopolina; ASSISTENZA 2) una molla facilita l’estrazio- Il produttore declina qualsiasi ne del disco paralama (Fig.
  • Seite 9 re il dispositivo presso in punto di raccolta. E’ possibile ottenere informazioni sullo smaltimento dalle autorità locali. Risoluzione problemi INCONVENIENTE CAUSA PROBABILE RIMEDIO Premendo il pulsante di accensione Mancanza di Controllare che la spina sia la macchina non si avvia alimentazione o circuito di inserita correttamente, se il controllo difettoso...
  • Seite 10: Caratteristiche Tecniche

    CARATTERISTICHE TECNICHE MODELLO 140 mm 183 mm 200 mm 200 mm 140 mm 183 mm 284 mm 315 mm 290 mm 290 mm 318 mm 340 mm 284 mm 353 mm 450 mm 450 mm 470 mm 552 mm 640 mm 660 mm SPECIFICHE Capacità...
  • Seite 11 USER MANUAL: Electrical Slicer Home Line MODEL: HL200 - HL250 GENERAL PLAN OF THE MACHINE Start button (white) Stop button (red) Identification plate, technical information and CE marking Foot Thickness adjustment knob Thickness gauge plate Safety guards Meat table Product press holder 10.
  • Seite 12: Declaration Of Conformity

    DESCRIPTION - do not allow the machine nel; to be used by personnel who - immediately stop the ma- Electrical slicer machine for have not read and fully com- chine in the event of a defect, home use with circular blade, prehended the content of this abnormal operation, suspicion designed solely to slice food...
  • Seite 13: Installation

    Environmental conditions of - automatic differential switch; Risk of electric shock! Before cleaning the machine, discon- use: - earthing system. - Temperature Before carrying out electrical nect the plug from the electrical mains socket and return the slice from -5°C to +40°C hook up verify that the charac- - Max.
  • Seite 14: Demolition And Disposal

    holder is completely re- components, structural parts, installation; moved. etc.) must be carried out solely - unauthorised modifications by persons authorised by the and/or repairs on the machine; WARNING! Blade manufacturer. - use of non original accesso- sharp, cutting hazard! If a repair is required, it is ad- ries or replacement parts;...
  • Seite 15: Troubleshooting

    Troubleshooting PROBLEM PROBABLE CAUSE REMEDY The machine does not start when No power or defective Check if the plug has been the on button is pressed control circuit inserted correctly. Contact a Service Centre if the problem persists When the start button is pressed, Defective indicator light Do not use the machine with the machine starts but...
  • Seite 16: Data Sheet

    DATA SHEET MODEL 140 mm 183 mm 200 mm 200 mm 140 mm 183 mm 284 mm 315 mm 290 mm 290 mm 318 mm 340 mm 284 mm 353 mm 450 mm 450 mm 470 mm 552 mm 640 mm 660 mm SPECIFICATIONS Circular cutting capacity...
  • Seite 17 GEBRAUCHSANLEITUNG: Elektrische Aufschnittmaschinen Home Line MODELL: HL200 - HL250 HAUPTKOMPONENTEN Starttaster (weiss) Stopptaster (rot) Typenschild, technische daten und CE kennzeichnung Fuss Reglerknopf fur die schnittdick Platte fuhrerlehr Sicherheitseinrichtungen Schneidgutplatte Anschlagplatte 10. Messer 11. Sicherheitsring (messerschutz) 12. Messerschutzscheibe 13. Sockel 14. Griff anschlagplatte 15.
  • Seite 18 BESCHREIBUNG Übereinstimmung mit den An- Messers 5 mm infolge der nor- weisungen im Abschnitt „Ins- malen Abnutzung übersteigt. Elektrische Aufschnittmaschi- tallation“. Wenden Sie sich in diesem Fall ne für den Hausgebrauch mit - Stellen Sie das Gerät an ei- an den Hersteller oder an eine kreisrundem Messer, die aus- nem Ort auf, zu dem Unbefug- autorisierte...
  • Seite 19: Gebrauch Der Aufschnittmaschine

    - Das Gerät darf nicht ohne Schneidbereich zwischen der cke (5) in der sicheren Position Schneidgutplatte oder Anschlag- Anschlagplatte und dem Mes- (Position 0) befindet (Fig. A). platte verwendet werden; ser, wenn sich der Hebel zum Der Hersteller übernimmt kei- Einstellen der Schnittdicke (5) 1.
  • Seite 20 ACHTUNG! Scharfes Schrauben Sie den Griff der INSTANDHALTUNG Messer, Schneidgefahr! Anschlagplatte entgegen Kontrollieren Sie, dass sich der den Uhrzeigersinn ab, bis Sie Instandhaltung des Messers Reglerknopf für die Schnittdi- diese vollständig entfernen Damit das Messer stets scharf cke (5) in der sicheren Position können.
  • Seite 21: Abbau Und Entsorgung

    higkeit oder Fahrlässigkeit des - Verwendung nicht originaler und Stromkabel; Käufers, unsachgemäße Ins- Zubehör- oder Ersatzteile - Elektromotor; tallation oder Positionierung, - außergewöhnliche Ereignisse. - Kunststoff usw. Verschleiß, Versorgung mit einer Spannung, die mehr als Die Übertragung des Eigen- Wenn mit der Entsorgung Drit- 10 % über der Nennspannung tums des Gerätes entbindet te beauftragt werden, wenden...
  • Seite 22: Technische Daten

    TECHNISCHE DATEN MODELL 140 mm 183 mm 200 mm 200 mm 140 mm 183 mm 284 mm 315 mm 290 mm 290 mm 318 mm 340 mm 284 mm 353 mm 450 mm 450 mm 470 mm 552 mm 640 mm 660 mm TECHNISCHE MERKMALE Schnittleistung (rund)
  • Seite 23: Composants Principaux

    MANUEL D’INSTRUCTIONS: Trancheuses électriques Redline MODÈLE: HL200 - HL250 COMPOSANTS PRINCIPAUX Bouton de démarrage (blanc) Bouton d’arrêt (rouge) Plaque d’identification, données techniques et du marquage CE Pied Poignéè de réglage de l’épaisseur de la tranche Plaque de la jauge d’épaisseur (écran) Protection doigt Plat port-aliment Presse-aliment...
  • Seite 24: Déclaration De Conformité

    DESCRIPTION tions indiquées dans le para- l’un des centres de service au- graphe “Installation”; torisés pour changer la lame; Trancheuse électrique à usage - installer la machine dans un - ne pas utiliser la machine domestique avec lame circu- lieu hors de portée de person- avec les branchements élec- laire, conçue pour trancher nel étranger aux opérations...
  • Seite 25: Utilisation De La Trancheuse

    et/ou réparations non autori- possible de la zone de découpe. 3. poser le produit à découper L’utilisation de gants de protec- sées effectuées sur la machine, sur le plat contre la paroi verti- d’utilisation d’accessoires et de tion est conseillée. cale du plat (8), côté...
  • Seite 26: Entretien

    pour les zones du plat et du du couvre-lame et sur le côté Pour des informations concer- presse-aliment pointues. Ne opposé. De la même manière, nant les centres d’assistance, pas nettoyer la machine avec sécher en utilisant un chiffon contacter le: des jets d’eau ou de vapeur ou sec;...
  • Seite 27: Démolition Et Élimination

    nales; - pièces et composants variés - événements exceptionnels. en acier inoxydable; Le transfert de propriété de - parties et câbles électriques; la machine comporte l’annu- - moteur électrique; lation immédiate de toute - plastique, etc. responsabilité de la part du fabricant, exception faite en Si l’élimination est confiée à...
  • Seite 28: Données Techniques

    DONNÉES TECHNIQUES MODÈLE 140 mm 183 mm 200 mm 200 mm 140 mm 183 mm 284 mm 315 mm 290 mm 290 mm 318 mm 340 mm 284 mm 353 mm 450 mm 450 mm 470 mm 552 mm 640 mm 660 mm SPÉCIFICATIONS Capacité...
  • Seite 30 Red. Since 1898. Van Berkel International S.r.l. via Ugo Foscolo 22 21040 Oggiona S. Stefano (VA) - ITALY T +39 0331 214311 info@berkelinternational.com www.theberkelworld.com...

Diese Anleitung auch für:

Hl250Home line 250Hl200

Inhaltsverzeichnis