Inhaltsverzeichnis
Werbung
Verfügbare Sprachen
Verfügbare Sprachen
Quicklinks
I6VMH2A/NL
English
GB
Operating Instructions
COOKER AND OVEN
Contents
Operating Instructions,1
WARNING,2
Using the hob,12
Assistance,14
Nederland
NL
Gebruiksaanwijzing
FORNUIS EN OVEN
Inhoud
PAS OP,2
Beschrijving van het apparaat-Aanzichttekening,4
Beschrijving van het apparaat-Bedieningspaneel,5
Installatie, 17
De kookzones,23
Servicedienst,25
Português
PT
Instruções para a utilização
FOGÃO E FORNO
Índice
Instruções para a utilização,1
ADVERTÊNCIA,3
Descrição do aparelho-Vista de conjunto,4
Descrição do aparelho-Painel de comandos,5
Instalação,28
Utilização do forno,31
Utilização do plano de cozedura,34
Precauções e conselhos,35
Manutenção e cuidados,36
Assistência técnica,36
Deutsch
DE
Bedienungsanleitungen
HERD UND OFEN
Inhalt
Bedienungsanleitungen,1
ZUR BEACHTUNG,3
Beschreibung des Geräts-Übersicht,4
Beschreibung des Geräts-Schalttafel,5
Installation,38
Inbetriebnahme und Benutzung,40
Gebrauch des Ofens,41
Gebrauch des Kochfeldes,44
Vorsichtsmaßnahmen und Tipps,45
Pflege und Wartung,46
Hilfe,46
Werbung
Inhaltsverzeichnis

Verwandte Anleitungen für Indesit I6VMH2A/NL


Inhaltszusammenfassung für Indesit I6VMH2A/NL
-
Seite 1: Inhaltsverzeichnis
I6VMH2A/NL English Português Instruções para a utilização Operating Instructions COOKER AND OVEN FOGÃO E FORNO Índice Contents Operating Instructions,1 Instruções para a utilização,1 WARNING,2 ADVERTÊNCIA,3 Description of the appliance-Overall view,4 Descrição do aparelho-Vista de conjunto,4 Description of the appliance-Control Panel,5 Descrição do aparelho-Painel de comandos,5... -
Seite 2: Warning
WARNING PAS OP PAS OP: Dit apparaat en zijn bereikbare WARNING: The appliance and its onderdelen worden tijdens gebruik zeer accessible parts become hot during use. heet. Care should be taken to avoid touching Zorg ervoor de verwarmende elementen heating elements. niet aan te raken. -
Seite 3: Zur Beachtung
ATENÇÃO ZUR BEACHTUNG ZUR BEACHTUNG: Bei Gebrauch wird ATENÇÃO: Este aparelho e as suas dieses Gerät und alle zugänglichen Teile partes acessíveis aquecem muito durante sehr heiß. a utilização. Es ist darauf zu achten, dass die É preciso ter atenção e evitar tocar os Heizelemente nicht berührt werden. -
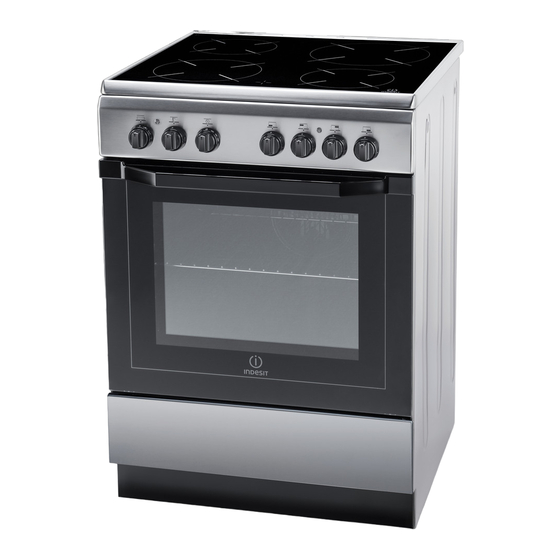
Seite 4: Description Of The Appliance-Overall View
Description of the appliance Descrição do aparelho Overall view Vista de conjunto 1.Glass ceramic hob 1 Plano de vitrocerâmica 2 Painel de comandos 2 .Control panel 3 Prateleira GRADE 3..Sliding grill rack 4 Prateleira BANDEJA PINGADEIRA 4. DRIPPING pan 5 Pé de regulação 5. -
Seite 5: Description Of The Appliance-Control Panel
Beschreibung des Gerätes Description of the appliance Bedienfeld Control panel 1.SELECTOR knob Schalter zur Wahl der Backofenfunktionen 2.THERMOSTAT indicator light Betriebskontrollleuchte THERMOSTAT 3.THERMOSTAT knob THERMOSTAT 4.TIMER knob 5.Electric HOTPLATE control knob Schalter zur Einstellung der Kochfeld-Kochzonen Descrição do aparelho Aanzichttekening Painel de comandos Bedieningspaneel... -
Seite 6: Installation
Installation ! Before operating your new appliance please read The legs* fit into the slots on the this instruction booklet carefully. It contains important underside of the base of the information concerning the safe installation and operation cooker. of the appliance. ! Please keep these operating instructions for future reference. - Seite 7 ! The cable must not be bent or compressed. 400V 2N~ H05RR-F 4x4 CEI-UNEL 35363 ! The cable must be checked regularly and replaced H05VV-F 4x4 CEI-UNEL 35746 by authorised technicians only. L2 L1 ! The manufacturer declines any liability should these safety measures not be observed.
-
Seite 8: Start-Up And Use
Start-up and use ! Never put objects directly on the bottom of the oven; TABLE OF CHARACTERISTICS this will prevent the enamel coating from being damaged. Oven dimensions 32 , 4 x43.5x40 , 6 cm (HxWxD) Only use position 1 in the oven when cooking with the Volume 58 l rotisserie spit. -
Seite 9: Practical Cooking Advice
custard desserts, fruit cakes. By using the fan, the Preheating is not necessary for this cooking mode. This defrosting time is approximately halved. In the case of mode is particularly suitable for cooking pre-packed meat, fish and bread, it is possible to accelerate the food quickly (frozen or pre-cooked). - Seite 10 Using the cooking timer 1. To set the buzzer, turn the COOKING TIMER knob clockwise almost one complete revolution. 2. Turn the knob anticlockwise to set the desired time: align the minutes shown on the COOKING TIMER knob with the indicator on the control panel. 3.
-
Seite 11: Oven Cooking Advice Table
Oven cooking advice table Cooking Foods Weight Rack Position Pre-heating Recommended Cooking modes (in kg) time temperature time (minutes) (minutes) Duck 65-75 Roast veal or beef 70-75 Traditional Pork roast 70-80 Oven Biscuits (short pastry) 15-20 Tarts 30-35 Tarts 20-30 Fruit cakes 2 or 3 40-45... -
Seite 12: Using The Glass Ceramic Hob
Using the glass ceramic hob ! The glue applied on the gaskets leaves traces of grease Setting Normal or Fast Plate on the glass. Before using the appliance, we recommend you remove these with a special non-abrasive cleaning product. During the first few hours of use there may be a Cooking vegetables, fish smell of rubber which will disappear very quickly. -
Seite 13: Precautions And Tips
Precautions and tips ! This appliance has been designed and manufactured in • The glass ceramic hob is resistant to mechanical shocks, but it may crack (or even break) if hit with a sharp object such as a tool. compliance with international safety standards. The following If this happens, disconnect the appliance from the electricity mains warnings are provided for safety reasons and must be read immediately and contact a Service Centre. -
Seite 14: Care And Maintenance
Care and maintenance Replacing the oven light bulb • Make the most of your hot plate's residual heat by 1. After disconnecting the oven switching off cast iron hot plates 10 minutes before the from the electricity mains, remove end of your cooking time and glass ceramic hot plates the glass lid covering the lamp 5 minutes before the end of cooking time. - Seite 15 Removing and fitting the oven door: WARNING! Oven must not be operated with inner 1.Open the door door glass removed! 2.Make the hinge clamps of the oven door rotate backwards completely (see photo) WARNING! When reassembling the inner door glass insert the glass panel correctly so that the text written on the panel is not reversed and can be easily legible.
- Seite 16 Steam-Assisted Oven Cleaning This method of cleaning is recommended especially after cooking very fatty (roasted)meats. This cleaning process allows to facilitate the removal of dirt of the walls of the oven by the generation of steam that is created inside the oven cavity for easier cleaning. ! Important! Before you start steam -cleaning: -Remove any food residue and grease from the bottom of the oven.
-
Seite 17: Installatie
Installatie ! Bewaar dit instructieboekje zorgvuldig voor eventuele De poten* moeten aan het raadpleging in de toekomst. In het geval u het apparaat onderstuk van het fornuis worden verkoopt, weggeeft of wanneer u verhuist, moet het vastgeklemd. boekje bij het apparaat bewaard worden. ! Lees de instructies aandachtig door: er staat belangrijke informatie in over installatie, gebruik en veiligheid. - Seite 18 ! Wanneer het apparaat geïnstalleerd is, moeten de 400V 2N~ elektrische kabel en de contactdoos gemakkelijk te H05RR-F 4x4 CEI-UNEL 35363 bereiken zijn. H05VV-F 4x4 CEI-UNEL 35746 ! De kabel mag niet gebogen of samengedrukt worden. L2 L1 ! De kabel moet van tijd tot tijd worden gecontroleerd en mag alleen door erkende monteurs worden vervangen.
-
Seite 19: Starten En Gebruik
Starten en gebruik Een lijst met kooktijden en aanbevolen kooktemperaturen TECHNISCHE kunt u terugvinden in de speciale tabel (zie Kooktabel GEGEVENS oven). Afmetingen Oven 32,4x43,5x40,6 cm HxBxD Inhoud liter 58 Tijdens het koken kunt u nog altijd: breedte 42 cm •... -
Seite 20: Praktische Kooktips
de rechtstreekse bovenhitte van de grill gecombineerd met Programma TRADITIONELE OVEN de geforceerde circulatie van de lucht in de oven. Eventueel De onderste en bovenste verwarmingselementen gaan aan. verbranden van de buitenkant wordt zo vermeden; de warmte Met deze traditionele kookwijze is het beter een enkel rooster dringt gemakkelijker door naar de binnenkant. - Seite 21 • We raden u aan het vermogen op de maximale stand te zetten. Het is normaal dat het bovenste verwarmingselement niet constant aan blijft: zijn werking B E L A N G R I J K ! D e o v e n i s u i t g e r u s t m e t e e n blokkeringssysteem voor de grill dat het mogelijk maakt om de gril naar buiten te trekken zonder dat deze buiten de oven komt(1).
-
Seite 22: Kooktabel Oven
Kooktabel oven Programma's Gerechten Gewicht Roosterstanden Voorverwar Aanbevolen Duur (kg) ming temperatuur bereiding (minuten) (minuten) Eend 65-75 Gebraden kalfs- of rundvlees 70-75 Traditionele oven Gebraden varkensvlees 70-80 Koekjes (kruimeldeeg) 15-20 Taarten 30-35 Taarten 20-30 Vruchtentaart 2 of 3 40-45 Plumcake 40-50 Cake 25-30... -
Seite 23: Gebruik Van De Glaskeramische Kookplaat
Gebruik van de glaskeramische kookplaat ! De lijm die gebruikt is voor de afdichtingen laat wat Positie Normale of snelle plaat vetvlekjes achter op het glas. Voordat u het apparaat gebruikt raden wij u aan de vlekken te verwijderen met een speciaal niet-schurend schoonmaakmiddel. Groenten en vis Gedurende de eerste paar uur dat u het apparaat gebruikt kan het zijn dat u een rubbergeur ruikt. -
Seite 24: Voorzorgsmaatregelen En Advies
Voorzorgsmaatregelen en advies door gereedschap. Als dit gebeurt moet u onmiddellijk het apparaat afsluiten van de elektrische stroom en contact ! Dit apparaat is ontworpen en vervaardigd volgens de geldende opnemen met de Technische Dienst. internationale veiligheidsvoorschriften. Deze aanwijzingen zijn •... -
Seite 25: Onderhoud En Verzorging
Onderhoud en verzorging Vervangen van het ovenlampje 1 . N a d a t u d e o v e n h e e f t • Gebruik de residuele warmte van uw ovenplaat losgekoppeld van het elektrische optimaal door de gietijzeren platen 10 minuten en net, verwijdert u het glazen deksel keramiek ovenplaten 5 minuten voor het einde van uw van de lamphouder (zie afbeelding). - Seite 26 Demonteren en weer monteren van de WAARSCHUWING! De oven mag niet worden gebruikt ovendeur als de glazen plaat aan de binnenzijde is verwijderd! WAARSCHUWING! Als u de glazen plaat aan de binnenzijde weer in elkaar zet, dient u het 1. Open de deur paneel goed op zijn plaats te schuiven zodat de 2.
- Seite 27 Reiniging van de oven m.b.v. stoom: Deze reinigingsmethode wordt aangeraden na het koken van vette gerechten (gebraden gerechten, vlees). Deze reinigingsprocedure kan het verwijderen van vuil van de ovenwanden vergemakkelijken door het creëren van stoom in de oven. Op deze manier zal de binnenzijde van de oven makkelijker kunnen worden gereinigd.
-
Seite 28: Instalação
Instalação ! Antes de colocar em funcionamento o novo aparelho, As pernas* fornecidas com o leia atentamente este livrete de instruções, pois aparelho, devem ser encaixadas contém informações importantes sobre a instalação e o na base do fogão. funcionamento seguro do aparelho. ! Guarde as instruções de funcionamento do aparelho para consultas posteriores: Certifique-se de que as instruções sejam conservadas junto com o aparelho em... - Seite 29 ! Depois de ter instalado o aparelho, o acesso ao cabo 400V 2N~ de alimentação e à tomada da corrente deve ser fácil. H05RR-F 4x4 CEI-UNEL 35363 H05VV-F 4x4 CEI-UNEL 35746 ! O cabo não deve ser dobrado nem comprimido. L2 L1 ! O cabo deve ser verificado periodicamente e substituído somente por técnicos autorizados.
-
Seite 30: Início E Utilização
Início e utilização Início do forno PLACA DAS CARACTERÍSTICAS 1. Para seleccionar o programa de cozedura que desejar, Medidas do Forno 32,4x43,5x40,6 cm HxLxP rode o selector dos PROGRAMAS. 2. Escolha a temperatura recomendada para o programa Volume Litros 58 ou aquela desejada girando o selector do TERMOSTATO. - Seite 31 Programa FORNO TRADIçãO Programa GRATIN Activam-se os dois elementos aquecedores inferior e Activa-se o elemento aquecedor superior e começam superior. Com esta cozedura tradicional é melhor utilizar a funcionar a ventoinha e o espeto rotatório (se houver). uma única prateleira: com mais de uma prateleira haverá Une a irradiação térmica unidireccional com a circulação má...
- Seite 32 Espeto giratório Para accionar o espeto g i r a t ó r i o p r o c e d e r d a seguinte maneira: 1. coloque o tabuleiro de recolha de gordura na posição 1; 2. coloque o suporte do espeto giratório na posição 4, e introduza o espeto no respectivo orifício, situado...
- Seite 33 Tabela de cozedura no forno Base Ventilada Forno Base Para aperfeiçoar cozinhar...
-
Seite 34: Segurança Geral
Utilização do plano de cozedura de vitrocerâmica ! A cola aplicada nas guarnições deixa alguns traços de graxa no vidro. Antes de utilizar o aparelho, é recomendável eliminá-la com um produto não abrasivo específico para a manutenção. Durante as primeiras horas de funcionamento, pode ser que note odor de borracha, que em todo o caso logo desaparecerá. -
Seite 35: Precauções E Conselhos
Precauções e conselhos • Certifique-se de que os cabos de alimentação de outros Eliminação electrodomésticos não entrem em contacto com partes quentes • Eliminação do material de embalagem: obedeça as regras locais, do forno. de maneira que as embalagens possam ser reutilizadas. •... -
Seite 36: Manutenção E Cuidados
Manutenção e cuidados L i m p a r o p l a n o d e c o z e d u r a d e • Este produto satisfaz os requisitos impostos pela nova Directiva Europeia sobre a limitação dos consumos energéticos em vitrocerâmica stand-by. - Seite 37 Desmontagem e montagem da porta do 8.Abra completamente a porta. forno: 9.Volte a fechar os grampos (ver foto) 1.Abrir a porta 2.Rode completamente para trás os ganchos das dob- radiças da porta do forno (veja a foto) 3.Feche a porta até ao limite do do gancho (a porta 10.Será...
-
Seite 38: Aufstellung Und Ausrichtung
Installation ! Bewahren Sie diese Bedienungsanleitung bitte sorgfältig Die Stellfüße* werden unter dem Herdboden eingesteckt. auf, damit Sie sie jederzeit zu Rate ziehen können. Sorgen Sie dafür, dass sie im Falle eines Verkaufs, einer Übergabe oder eines Umzugs das Gerät stets begleitet. ! Lesen Sie bitte die nachfolgenden Hinweise aufmerksam durch: sie liefern wichtige Informationen hinsichtlich der Installation, des Gebrauchs und der Sicherheit. - Seite 39 ! Das Netzkabel muss regelmäßig kontrolliert werden und 400V 2N~ darf nur durch autorisiertes Fachpersonal ausgetauscht H05RR-F 4x4 CEI-UNEL 35363 werden. H05VV-F 4x4 CEI-UNEL 35746 L2 L1 ! Der Hersteller lehnt jede Verantwortung ab, falls diese Vorschriften nicht eingehalten werden sollten. 400V 3N~ H05RR-F 5x2.5 CEI-UNEL 35363 H05VV-F 5x2.5 CEI-UNEL 35746...
-
Seite 40: Inbetriebsetzung Und Gebrauch
Inbetriebsetzung und Gebrauch Den Ofen in Betrieb nehmen TYPENSCHILD Backofen- 32,4x43,5x40,6 cm 1. Wählen Sie durch Drehen an dem SELECTOR Knopf Abmessungen (HxBxT): den Kochmodus. Nutzvolumen Liter 58 2. Wählen Sie die für den Kochmodus empfohlene oder Breite 42 cm Nutzabmessungen des Tiefe 44 cm gewünschte Temperatur durch Drehen am THERMOSTAT... - Seite 41 ! Die GRILL und GRATIN Kochmodi dürfen nur bei BACK Modus verschlossener Ofentür verwendet werden. Das hintere Heizelement und der Ventilator schaltet sich an und garantieren so, dass die Hitze im Ofen fein und gleichmäßig verteilt wird. Dieser Modus ist ideal für AUFTAU Modus das Backen und Kochen von Temperatur empfindlichen Der oben im Ofen befindliche Ventilator veranlasst, dass...
- Seite 42 PIZZA • Verwenden Sie eine dünne Pizzapfanne aus Aluminium. Stellen Sie sie auf das vorhandene Rost. Wenn Sie einen knusprigen Rand haben möchten, sollten Sie die Tropfpfanne nicht verwenden, da sie die Krustenbildung auch bei verlängerter Kochzeit verhindert. • Wenn die Pizza viel Belag hat, dann empfehlen wir, in der Hälfte des Backvorgangs Mozarella darüber zu streuen.
- Seite 43 Tabelle Garen im Backofen Vorheizzeit Kochzeit Kochmodi Speisen Gewicht Rostposition Empfohlene (Minuten) (Minuten) (in kg) Temperatur Ente 65-75 Traditioneller Gebratenes Kalb- oder Rindfleisch 70-75 Gebratenes Schweinefleisch 70-80 Ofen Plätzchen 15-20 Böden 30-35 Böden 20-30 Obstkuchen 1 und 2 40-45 Pflaumenkuchen 40-50 Biskuit Boden 25-30...
-
Seite 44: Nutzung Des Glaskeramik-Kochfeldes
Nutzung des Glaskeramik- Kochfeldes ! Der auf die Dichtungen aufgetragene Leim hinterlässt normal oder schnelle Zubereitung Einstellung Fettspuren auf dem Glas. Wir empfehlen Ihnen, diese vor Einsatz des Gerätes mit einem herkömmlichen Reinigungsmittel (einer nicht scheuernden Poliercreme) Zubereitung Gemüse, Fisch zu entfernen. -
Seite 45: Vorsichtsmaßregeln Und Hinweise
Vorsichtsmaßregeln und Hinweise • Das Glaskeramikkochfeld ist stoßfest; dennoch kann es durch ! Das Gerät wurde entsprechend den internationalen Stöße bzw. Aufprall von spitzen Gegenständen springen Sicherheitsvorschriften entworfen und gebaut. Die im Folgenden (oder sogar zerbrechen), Schalten Sie das Kochfeld in einem aus Sicherheitsgründen wiedergegebenen Hinweise sollten solchen Fall vom Stromnetz und wenden Sie sich an die aufmerksam gelesen werden. -
Seite 46: Reinigung Und Pflege
Reinigung und Pflege • Nutzen Sie die Restwärme Ihrer Kochplatten indem Sie bei Gusseisen-Kochplatten 10 Minuten A u s t a u s c h d e r und Glaskeramik-Kochplatten 5 Minuten vor dem Backofenlampe geplanten Ende der Kochzeit ausschalten. 1. -
Seite 47: Aus- Und Einbau Der Ofentür
ACHTUNG! Der Ofen darf nicht ohne das innere Aus- und Einbau der Ofentür: Türglas betrieben werden! ACHTUNG! Wenn Sie die innere Glastür wieder 1.Öffnen Sie die Tür einbauen, fügen Sie die Glasplatte korrekt ein, so das 2. Drehen Sie die Scharnierklammern der Ofentür der auf der Platte geschriebene Text nicht verdreht vollständig nach hinten (siehe Foto) ist und leicht erkennbar ist. -
Seite 48: Dampfunterstützte Ofenreinigung
042014 - 195122046.00 XEROX FABRIANO Dampfunterstützte Ofenreinigung Diese Reinigungsmethode ist insbesondere nach dem Kochen sehr fettigen (gebratenem) Fleisch empfehlenswert. Diese Reinigungsmethode erleichtert die Enfernung von Schmutz von den Ofenwänden, in dem Dampf innerhalb der Ofenhöhle zur leichteren Reinigung erzeugt wird. ! Wichtig! Bevor Sie mit dem Dampfreinigen beginnen: - Entfernen Sie alle Speisereste und Fett vom Boden des Ofens.