Inhaltsverzeichnis
Werbung
Quicklinks
PC66, PC66E
Sähkökiukaan asennus- ja käyttöohje
Monterings- och bruksanvisning för bastuaggregat
Instructions for Installation and Use of Electric Sauna Heater
Gebrauchs- und Montageanleitung des Elektrosaunaofens
Инструкция по установке�и эксплуатации электрической каменки для саун
Elektrikerise kasutus- ja paigaldusjuhis
Адрес:
ООО «Харвия РУС».
196084, г. Санкт-Петербург,
ул. Заставская, дом 7
E-mail: regionlog12@mail.ru
PC66
PC66E
01022017/Y05-0117
Werbung
Inhaltsverzeichnis

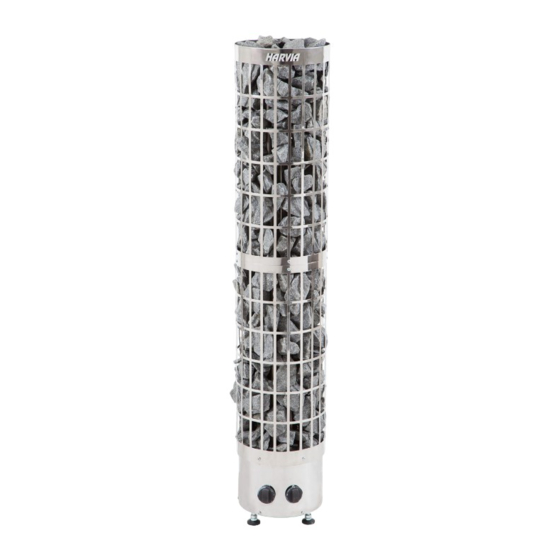
Inhaltszusammenfassung für Harvia PC66, PC66E
- Seite 1 PC66, PC66E Sähkökiukaan asennus- ja käyttöohje Monterings- och bruksanvisning för bastuaggregat Instructions for Installation and Use of Electric Sauna Heater Gebrauchs- und Montageanleitung des Elektrosaunaofens Инструкция по установке�и эксплуатации электрической каменки для саун Elektrikerise kasutus- ja paigaldusjuhis Адрес: ООО «Харвия РУС».
-
Seite 2: Inhaltsverzeichnis
These instructions for installation and use are Diese Montage- und Gebrauchsanleitung richtet intended for the owner or the person in charge of sich an den Besitzer der Sauna oder an die für die the sauna, as well as for the electrician in charge Pflege der Sauna verantwortliche Person, sowie an of the electrical installation of the heater. -
Seite 3: Instructions For Use
1. INSTRUCTIONS FOR USE 1. BEDIENUNGSANLEITUNG 1.1. Piling of the Sauna Stones 1.1. Aufschichten der Saunaofensteine The piling of the sauna stones has a great effect Die Schichtung der Saunaofensteine hat große Aus- on both the safety and the heating capability of wirkungen sowohl auf die Sicherheit als auch auf the heater. -
Seite 4: Maintenance
stones in the middle lets the air flow through mente am nächsten liegen. In der Mitte werden the heater, resulting in good heating of sauna die Steine möglichst lose gestapelt; dadurch and sauna stones. strömt die Luft besser durch den Ofen. Dieses Do not drop stones into the heater. -
Seite 5: Heater On
Figure 2. Timer switch Figure 3. Thermostat switch Abbildung 2. Schalter der Zeitschaltuhr Abbildung 3. Thermostatschalter 1.3.1. Heater On 1.3.1. Ofen ein Turn the timer switch to the ”on” section Stellen Sie den Schalter der Zeitschaltuhr (section A in figure 2, 0–4 hours). The in den Abschnitt ”ein”... -
Seite 6: Throwing Water On Heated Stones
1.4. Aufguss 1.4. Throwing Water on Heated Stones Die Saunaluft trocknet bei Erwärmung aus, daher sollte The air in the sauna room becomes dry when zur Erlangung einer angenehmen Luftfeuchtigkeit auf warmed up. Therefore, it is necessary to throw die heißen Steine des Saunaofens Wasser gegossen water on the heated stones to reach a suitable level werden. -
Seite 7: Warnings
1.6. Warnings 1.6. Warnungen Staying in the hot sauna for long periods of Ein langer Aufenthalt in einer heißen Sauna • • time makes the body temperature rise, which führt zum Ansteigen der Körpertemperatur, may be dangerous. was gefährlich sein kann. Keep away from the heater when it is hot. - Seite 8 Vergewissern Sie sich, dass die Belüftung der • Saunakabine korrekt eingerichtet wurde ( 2.2.). The sauna room heats quickly, but the Die Saunakabine erwärmt sich schnell, aber die temperature of the stones remain insufficient. Temperatur der Steine ist unzureichend. Das auf Water thrown on the stones runs through.
-
Seite 9: Sauna Room
2. SAUNA ROOM 2. SAUNAKABINE 2.1. Sauna Room Structure 2.1. Struktur der Saunakabine Figure 4. Abb. 4. A. Insulation wool, thickness 50–100 mm. The A. Isolierwolle, Stärke 50–100 mm. Die Saunaka- sauna room must be insulated carefully so that bine muss sorgfältig isoliert werden, damit der the heater output can be kept moderately low. -
Seite 10: Sauna Room Ventilation
2.2. Sauna Room Ventilation 2.2. Belüftung der Saunakabine The air in the sauna room should change six times Die Saunaluft sollte sechsmal pro Stunde ausge- per hour. Figure 5 illustrates different sauna room tauscht werden. Abb. 5 zeigt verschiedene Optio- ventilation options. -
Seite 11: Instructions For Installation
3. INSTRUCTIONS FOR INSTALLATION 3. MONTAGEANLEITUNG 3.1. Before Installation 3.1. Vor der Montage Before installing the heater, study the instructions Lesen Sie die Montageanleitung, bevor Sie den Sau- for installation. Check the following points: naofen installieren. Überprüfen Sie die folgenden Is the output and type of the heater suitable for Punkte: •... -
Seite 12: Electrical Connections
1,5 kg Figure 7. Installing the protective sheath Abbildung 7. Montage des Schutzmantels 3.4. Electrical Connections 3.4. Elektroanschlüsse The heater may only be connected to the Der Anschluss des Saunaofens an das Strom- electrical network in accordance with the netz darf nur von einem zugelassenen Elektro- current regulations by an authorised, professional monteur unter Beachtung der gültigen Vorschriften electrician. - Seite 13 Heater Output Dimensions Stones Sauna room Ofen Leistung Abmessungen Steine Saunakabine Width/Depth/Height Weight Cubic vol. Height Breite/Tiefe/Höhe Gewicht Rauminhalt Höhe 2.3.! min. m³ max. m³ min. mm max. kg PC66/PC66E 255/255/1340 1900 Table 2. Installation details of the heater Tabelle 2. Montageinformationen zum Saunaofen PC66 400 V/...
-
Seite 14: Electric Heater Insulation Resistance
cable for electrical heating is brought directly einer Elektroheizung bietet (Abb. 8). Der Ofen into the junction box of the heater, and from übernimmt mit dem Einschalten die Funktion there to the terminal block of the heater along einer Elektroheizung. Das Steuerungskabel für a rubber cable with the same cross-section die Elektroheizung wird direkt zur Klemmdose area as that of the connecting cable. - Seite 15 protector can be reset by pressing through the child zurückgesetzt werden (Abbildung 10). Nur eine label with a screwdriver (Figure 10). Only persons zu Elektroinstallationen befugte Person darf diese authorised to carry out electrical installations can Arbeit ausführen. reset the overheat protector. Vor Betätigung des Knopfes muß...
-
Seite 16: Запасные Части
4. VARAOSAT 4. RESERVDELAR 4. SPARE PARTS 4. ERSATZTEILE 4. ЗАПАСНЫЕ ЧАСТИ 4. VARUOSAD ZSC-022 (2200 W) x 3 ZSB-115 ZSK-520 ZSK-510 ZSB-125 ZSC-145 WX255 (PC66E) Suosittelemme käyttämään vain valmistajan varaosia. Använd endast tillverkarens reservdelar. We recommend to use only the manufacturer’s spare parts. Es dürfen ausschließlich die Ersatzteile des Herstellers verwendet werden.


