Herunterladen Inhalt Inhalt Diese Seite drucken
Sony SRF-DR2000 Bedienungsanleitung

Sony SRF-DR2000 Bedienungsanleitung

Fm data receiver
Vorschau ausblenden Andere Handbücher für SRF-DR2000:
Inhaltsverzeichnis

Werbung

Verfügbare Sprachen
  • DE

Verfügbare Sprachen

FM Data Receiver
Operating instructions see 2-
Mode d'emploi voir 2-
Bedienungsanleitung seite 2-
Gebruiksaanwijzing zie 2-
Istruzioni per l'uso vedere 2-
SRF-DR2000
©1998 by Sony Corporation
3-864-117-12 (1)
GB
FR
DE
NL
IT
GB
FR
DE
NL
IT

Werbung

Inhaltsverzeichnis
loading

Inhaltszusammenfassung für Sony SRF-DR2000

  • Seite 1 3-864-117-12 (1) FM Data Receiver Operating instructions see 2- Mode d’emploi voir 2- Bedienungsanleitung seite 2- Gebruiksaanwijzing zie 2- Istruzioni per l’uso vedere 2- SRF-DR2000 ©1998 by Sony Corporation...
  • Seite 2: General Information

    General Information FOR YOUR RECORDS For your assistance in reporting this unit in case of loss or theft, please record below the model number and serial number which are located on the back of the unit. Please retain this information. Model number Serial number Your ID number...
  • Seite 3: Inhaltsverzeichnis

    Table of Contents Before You Begin ................4 Features ..................4 Getting Started Installing the Batteries ..............5 Selecting a Language ..............7 Operating the Radio Manual Tuning ................9 Presetting Stations ..............10 Seeing FM data Seeing the Information on Your Receiver ....... 12 Saving Information That You Can See ........
  • Seite 4: Before You Begin

    Before You Begin Thank you for choosing the Sony FM data receiver! The FM data receiver will give you many hours of listening pleasure and will display up-to-date information. Before operating the FM data receiver, please read these instructions thoroughly and retain them for future reference.
  • Seite 5: Getting Started

    (not supplied) with the correct polarity. R6 (size AA) × 2 DC IN 3V ÷ Battery Life (Approx. hours) Sony Alkaline LR6(SG) Sony R6(SR) Audio only FM multiplex reception * For maximum performance we recommend that you use alkaline batteries.
  • Seite 6 • House current using a Sony AC-E30HG (not supplied) AC power adaptor • 12/24 V car battery using a Sony DCC-E230 (not supplied) car battery cord Notes • When operating the unit with an external power source, do not remove the batteries in the battery compartment which serve as a backup of the memory.
  • Seite 7: Selecting A Language

    Selecting a Language You can select one of the seven languages (English, French, German, Italian, Spanish, Dutch, Swedish) for the indications in the display. The explanation here is when the language is set in English, and the explanation of the indications in the display will be in English.
  • Seite 8 To change the selected language Press POWER to turn off the unit and repeat from step 1. Notes • The selected language does not translate the FM data. Only the indications in the display will switch over to the selected language, and the FM data will be displayed in the language of that area.
  • Seite 9: Operating The Radio

    ”Operating the Radio Manual Tuning POWER ENTER TUNE +/– VOLUME Function NEWS•MUSIC buttons Connect the stereo headphones to the 2 jack. Press POWER to turn on the unit. Press TUNE +/– to manually tune in to the desired station. If you press and hold TUNE +/–, the frequency is scanned rapidly.
  • Seite 10: Presetting Stations

    Presetting Stations The unit is initially preset with 5 FM radio stations. You can preset up to 5 of your favorite stations. Press POWER to turn on the unit. Press TUNE +/– to manually tune in to the desired station. Press ENTER.
  • Seite 11: Listening To A Preset Station

    Listening to a Preset Station Once your favorite FM radio stations are preset, simply press the corresponding Function button to recall and tune in to the desired station. Press POWER to turn on the unit. Press the desired Function button which corresponds to the preset station you wish to recall.
  • Seite 12: Seeing Fm Data

    ”Seeing FM Data Seeing the Information on Your Receiver You can receive up-to-date information that you can read on the display while receiving the FM radio broadcast through FM multiplex reception which is transmitted by a specific FM broadcasting station only. Also, you can choose from 7 languages (English, French, German, Italian, Spanish, Dutch, Swedish) for the indications in the display.
  • Seite 13 Press FM DATA to receive FM multiplex broadcasts. The DATA indication appears when an FM multiplex broadcast is receivable in the area. (For details on the DATA indication see page 14) Then, the window below (Total Index display) appears with the menus which correspond to the Function buttons.* To Retrieve Stored Data While Receiver...
  • Seite 14 To See the FM data Broadcast Press the corresponding Function button to H-PAGE. Select the desired menu by pressing the corresponding Function button to receive further information where applicable. DATA indicator Appearance of the DATA indicator(1) shows you the availability of FM multiplex reception. DATA Indicator is on The station you tune in to is transmitting FM multiplex...
  • Seite 15 When receiving urgent Information When an urgent information is broadcasted while receiving FM Data Broadcast, you will hear a beeping sound through the headphones and the FM Data Broadcast display will automatically switch over to the urgent information. When you receive the urgent information the DATA and MSG indications appear at the left side of the display.
  • Seite 16 Notes • When you press H-PAGE program, MSG or PAGE to receive the data, “RECEIVING DATA!” will be displayed. If there is no data to be received, approximately after 20 seconds the display will return to the previous screen. (( )) RECEIVING DATA! •...
  • Seite 17: Saving Information That You Can See

    Saving Information That You Can See You can save up to 8 pages of important information that you can recall for later use. SAVE/MENU Function buttons Display the information you wish to save. Press SAVE/MENU. WRITE READ CONFIG Press the Function button corresponding to WRITE on the display.
  • Seite 18 To recall information that has been saved Press SAVE/MENU. Then, press the Function button corresponding to READ on the display window. To scroll to the next page press the Function button corresponding to READ again. DEL READ CONFIG...
  • Seite 19: Deleting The Information That Has Been Saved

    Deleting the Information that Has Been Saved Press the Function button corresponding to READ to display the information you want to delete. DEL READ CONFIG Press the Function button corresponding to DEL. DELETE? To delete, press the Function button corresponding to YES .
  • Seite 20: Setting The Functions

    Setting the Functions You can set the functions such as Auto Power OFF and Reception Area. SAVE/MENU POWER Function buttons Press POWER to turn on the unit. Press SAVE/MENU. Press the Function button Set Up Menu corresponding to CONFIG. F u n c t i o n S e t u p The Mode 1 Main Menu M a i n t e n a n c e M o d e will be displayed.
  • Seite 21 Note If you enter the “Maintenance Mode” at the “Set Up Menu”, press BACK to return to previous display. The Maintenance Mode is not needed for radio operations. To set the Auto Power OFF When you turn this to ON and there is no key operation for 120 minutes while the power is turned on, the power automatically turns off.
  • Seite 22 To set the Reception Area To set the format of the receiving signal to the area, select from one of these modes : EURO or USA. Press the Function button Set Up Function corresponding to ↑ UP or A u t o P o w e r O F F O F F ↓...
  • Seite 23: Additional Information

    ”Additional Information ID Numbers ID refers to the following three ID numbers. Your ID: for personal messaging (Radio Paging Message) services. DDJ Group ID: for group information services. Password ID: for free additional information services. These ID Numbers are factory set. You do not need to register or confirm these ID Numbers for radio operation.
  • Seite 24 To confirm the DDJ Group ID Press the Function button corresponding to ↑ UP or ↓ DWN to move the cursor to the “DDJ Group ID”, press the Function button corresponding to ENT to select the DDJ Group ID. DDJ Group ID ## # # # # # # # # # # J a n .
  • Seite 25 To confirm the Password ID Press the Function button corresponding to ↑ UP or ↓ DWN to move the cursor to the Password ID, and press the Function button corresponding to ENT to select the Password ID. Password ID ## P w d - I D 1 2 2 8 1 7 0 1 # # # P w d - I D 2...
  • Seite 26 To register and correct the Password ID Press the Function button corresponding to ↑ UP or ↓ DWN to move the cursor to an empty Password ID or a Password ID to correct at the display above, and press the Function button corresponding to ENT to switch over the display to a Password ID editing display.
  • Seite 27: Using The Stand

    Using the Stand Lift and use the stand on the base of the unit to see the display at an optimum angle. Specifications Frequency range 87.5 – 108 MHz FM multiplex DARC type 64 x 132 FSTN LCD display 2 jack (stereo minijack) Output Power output 8 mW + 8 mW (at 10 % harmonic...
  • Seite 28: Precautions

    Precautions • Operate the unit only on 1.5 V DC with two R6 (size AA) batteries. • Avoid exposure to temperature extremes, direct sunlight, moisture, sand, dust or mechanical shock. Never leave the unit in a car parked in the sun. •...
  • Seite 29: Troubleshooting

    Should any problem occur with the unit, make the following checks to determine whether or not servicing is required. If the problem persists, consult your nearest Sony dealer. The reception is unstable and contains noise. • The batteries may be weak. Replace with new ones.
  • Seite 30: Index To Parts And Controls

    Index to Parts and Controls Refer to the pages indicated in parentheses for details. Main unit !º !¡ 1 Display (31) 6 SAVE/MENU button 2 DATA indicator (1) (14) (17, 20) 3 BACK button (15) 7 POWER button (7, 9, 4 ENTER button (7, 9) 12, 20) 5 Function buttons (7, 9,...
  • Seite 31 Display DATA 87.5 PAGE PRESET 87 . 5 92 . 0 98 . 0 104.3 108.0 1 DATA indicator (1) (14) 4 Frequency (10) 2 MSG (Message) 5 Preset stations (10) indicator (15) 3 PAGE (Paging) indicator (15)
  • Seite 32: Index

    Index Auto Power OFF ....21 B, C Batteries ........5 DATA indicator ...... 14 DDJ Group ID ......24 External Power sources ... 6 Expiration Dates ....26 F, G, H FM multiplex broadcast ..4, 14 I, J, K, L, M, N, O Improving FM radio reception .........
  • Seite 34 Information d’ordre général Référence de l’utilisateur Pour toute référence en cas de perte ou de vol, veuillez inscrire ci-dessous le numéro de votre modèle et le numéro de série qui sont indiqués à l’arrière de l’appareil. Conservez ces informations en lieu sûr. Numéro de modèle Numéro de série Numéro ID de l’utilisateur...
  • Seite 35 Table des matières Informations préliminaires ............4 Caractéristiques ................4 Préparatifs Mise en place des piles ..............5 Sélection de la langue ..............7 Fonctionnement de la radio Accord manuel ................9 Préréglage des stations .............. 10 Visualisation de données FM Visualisation d’informations sur le récepteur ......
  • Seite 36: Informations Préliminaires

    Informations préliminaires Félicitations pour l’achat de ce récepteur de données FM Sony ! Ce récepteur vous offrira de nombreuses heures d’écoute agréables et des informations de dernière heure que vous pourrez lire sur l’afficheur. Avant de mettre le récepteur de données FM en service, veuillez lire attentivement ce mode d’emploi que vous...
  • Seite 37: Préparatifs

    DC IN 3V 2 piles R6 (format AA) ÷ Autonomie des piles (Approx. en heures) Alcalines Sony LR6 (SG) Sony R6 (SR) Son seulement Réception FM multiplex * Pour une performance optimale, il est conseillé d’utiliser des piles alcalines.
  • Seite 38: Utilisation D'autres Sources D'alimentation

    • Utilisez seulement l’adaptateur secteur ou le cordon allume- cigares de marque Sony recommandés, à l’exclusion de tout autre. La polarité des fiches d’autres marques peut être différente. Polarité de la fiche...
  • Seite 39: Sélection De La Langue

    Sélection de la langue Vous pouvez sélectionner une des sept langues (anglais, français, allemand, italien, espagnol, hollandais, suédois) pour l’affichage des indications. POWER ENTER Touches de fonction Tout en tenant la touche ENTER enfoncée, appuyez sur POWER pour mettre l’appareil sous tension. Le message LANGUAGE SELECT MENU apparaît.
  • Seite 40 Pour changer de langue Appuyez sur POWER pour éteindre l’appareil et répétez l’étape 1. Remarques • La langue sélectionnée ne s’applique qu’aux indications affichées et non pas aux données FM transmises. Les données FM seront donc dans la langue de la zone de diffusion. •...
  • Seite 41: Fonctionnement De La Radio

    ”Fonctionnement de la radio Accord manuel POWER ENTER TUNE +/– VOLUME Touches NEWS•MUSIC de fonction Branchez un casque stéréo sur la prise 2 . Appuyez sur POWER pour mettre l’appareil sous tension. Appuyez sur TUNE +/– pour accorder manuellement la station souhaitée.
  • Seite 42: Préréglage Des Stations

    Préréglage des stations Cet appareil a été préréglé initialement sur 5 stations radio FM. Vous pouvez cependant changer ces 5 stations et choisir vos stations préférées. Appuyez sur POWER pour mettre l’appareil sous tension. Appuyez sur TUNE +/– pour accorder manuellement la station souhaitée.
  • Seite 43 Ecoute d’une station préréglée Une fois que vos stations préférées ont été préréglées, appuyez simplement sur la touche de fonction correspondante pour rappeler et accorder la station souhaitée. Appuyez sur POWER pour mettre l’appareil sous tension. Appuyez sur la touche de fonction souhaitée correspondant à...
  • Seite 44: Visualisation De Données Fm Visualisation D'informations Sur Le Récepteur

    ”Visualisation de données FM Visualisation d’informations sur le récepteur Vous pouvez recevoir des informations de dernière heure et les lire pendant la réception d’une émission radio FM par grâce à la réception FM multiplex qui est transmise par une station de radiodiffusion FM spéciale.
  • Seite 45 Appuyez sur FM DATA pour recevoir les émissions FM multiplex. L’indicateur de données (DATA) apparaît lorsqu’une émission FM multiplex peut être reçue dans la région. (Pour les détails sur l’indicateur de données, voir page 14.) Ensuite, le menu suivant (Affichage complet d’index) apparaît avec les menus correspondant aux touches de fonction.* To Retrieve Stored Data While Receiver...
  • Seite 46 Pour voir les données FM transmises Appuyez sur la touche de fonction correspondant à H-PAGE. Sélectionnez le menu souhaité en appuyant sur la touche de fonction correspondante pour recevoir d’autres informations, le cas échéant. Indicateur de données L’apparition de l’indicateur de données (DATA) (1) signale que des informations FM multiplex sont disponibles.
  • Seite 47 Réception d’informations urgentes Si une information urgente est diffusée pendant la réception de données FM, vous entendrez un bip par le casque et l’information urgente sera automatiquement affichée à la place des données FM. Lorsque vous recevez des informations urgentes, l’indicateur de données (DATA) et l’indicateur de message urgent (MSG) apparaissent sur la gauche de l’afficheur.
  • Seite 48 Remarques • Lorsque vous appuyez sur l’option H-PAGE, MSG ou PAGE pour recevoir des données, “Réception données!” apparaît. Si aucune donnée n’est reçue dans les 20 secondes qui suivent, l’affichage précédent réapparaîtra. (( )) Réception données! • Si la réception est de mauvaise qualité, l’indicateur de données (DATA) disparaît, mais “Réception données!”...
  • Seite 49 Pour revenir à la première page Appuyez sur la touche de fonction correspondant à H-PAGE sur l’afficheur.
  • Seite 50: Sauvegarde Des Informations Affichées

    Sauvegarde des informations affichées Vous pouvez sauvegarder jusqu’à 8 pages d’informations importantes que vous pourrez rappeler par la suite. SAVE/MENU Touches de fonction Affichez l’information que vous voulez sauvegarder. Appuyez sur SAVE/MENU. INSCR LIRE CONFIG Appuyez sur la touche de fonction correspondant à INSCR sur l’afficheur.
  • Seite 51: Suppression D'informations Sauvegardées

    Pour rappeler des informations sauvegardées Appuyez sur SAVE/MENU. Appuyez ensuite sur la touche de fonction correspondant à LIRE sur l’afficheur. Pour afficher la page suivante, appuyez une seconde fois sur la touche de fonction correspondant à LIRE. SUPP LIRE CONFIG Suppression d’informations sauvegardées Appuyez sur la touche de fonction correspondant à...
  • Seite 52: Réglage Des Fonctions

    Réglage des fonctions Vous pouvez régler certaines fonctions, comme l’arrêt automatique de l’appareil et la zone de réception. SAVE/MENU POWER Touches de fonction Appuyez sur POWER pour mettre l’appareil sous tension. Appuyez sur SAVE/MENU. Appuyez sur la touche de Menu de réglage fonction correspondant à...
  • Seite 53 Remarque Si vous entrez dans “Mode d’entretien” de “Menu de réglage”, appuyez sur BACK pour revenir à l’affichage précédent, Le Mode d’entretien ne sert pas pour le fonctionnement de la radio. Pour valider l’arrêt automatique Lorsque que vous validez l’arrêt automatique (ON) et ne touchez aucune touche en l’espace de 120 minutes, lorsque l’appareil est sous tension, l’alimentation de l’appareil est automatiquement coupée.
  • Seite 54 Pour sélectionner la zone de réception Pour sélectionner le format du signal de réception, sélectionnez un des deux modes de réception: EURO ou USA. Fonction de réglage Appuyez sur la touche de A r r ê t A u t o O U I fonction correspondant à...
  • Seite 55: Informations Diverses

    ”Informations diverses Numéros d’identification (ID) Il y a trois types de numéros d’identification, comme suit: Votre ID: pour la messagerie personnelle (radiomessagerie) ID de groupe DDJ: pour les services d’informations groupés. ID de code: pour d’autres services libres. Ces trois numéros d’identification ont été préréglés en usine. Vous n’avez pas besoin d’enregistrer vos numéros ni de confirmer ces numéros auprès des opérateurs pour la réception radio.
  • Seite 56 Pour vérifier un ID de groupe DDJ Appuyez sur la touche de fonction correspondant à ↑ HAUT ou ↓ BAS pour amener le curseur sur “ID de groupe DDJ”, puis appuyez sur la touche de fonction correspondant à ENT pour sélectionner “ID de groupe DDJ. ID Groupe DDJ ## # # # # # # # # # # J a n .
  • Seite 57 ID de code ## C o d e - I D 1 2 2 8 1 7 0 1 # # # C o d e - I D 2 C o d e - I D 3 C o d e - I D 4 C o d e - I D 5 SUPP ENT VHAUT vBAS Lorsque le code est enregistré, le numéro ID apparaît sur...
  • Seite 58 Pour vérifier les dates d’expiration Appuyez sur la touche de fonction correspondant à ↑ HAUT ou ↓ BAS pour amener le curseur sur les dates d’expiration. Appuyez sur la touche de fonction correspondant à ENT pour sélectionner les dates d’expiration. Dates expiration C a t é...
  • Seite 59: Utilisation Du Pied

    Utilisation du pied Levez le pied derrière l’appareil pour incliner l’appareil de manière à mieux voir l’afficheur. Spécifications Plage de fréquences 87,5 – 108 MHz FM multiplex Type DARC Afficheur LCD FSTN 64 x 132 Prise 2 (minijack stéréo) Sortie Puissance de sortie 8 mW + 8 mW (à...
  • Seite 60: Précautions

    Précautions • Faites fonctionner l’appareil sur le courant continu de 1,5 V seulement avec deux piles R6 (format AA). • Evitez d’exposer l’appareil à des températures extrêmes, à la lumière directe du soleil, à l’humidité, au sable, à la poussière et à...
  • Seite 61: En Cas De Panne

    En cas d’éclairs, cessez d’écouter et enlevez immédiatement le casque. Pour toute question ou difficulté concernant cet appareil, veuillez consulter votre revendeur Sony. En cas de panne Si un problème se présente lorsque vous utilisez l’appareil, faites les vérifications suivantes pour déterminer si une réparation est nécessaire.
  • Seite 62: Description Des Éléments Et Commandes

    Description des éléments et commandes Reportez-vous aux pages entre parenthèses pour les détails. Appareil principal !º !¡ 1 Afficheur (31) 6 Touche de 2 Indicateur de données sauvegarde/menu (DATA) (1) (14) (SAVE/MENU) (18, 20) 3 Touche de retour 7 Interrupteur (BACK) (15) d’alimentation 4 Touche de validation...
  • Seite 63 Afficheur DATA 87.5 PAGE PRÉRÉGLAGE 87 . 5 92 . 0 98 . 0 104.3 108.0 1 Indicateur de données 4 Fréquence (10) 5 Stations préréglées (10) (DATA) (1) (14) 2 Indicateur de message urgent (MSG) (15) 3 Indicateur de message personnel (PAGE) (15)
  • Seite 64: Index

    Index A, B, C U, V, W, X, Y Amélioration de la Utilisation du pied ....27 réception radio FM ..... 11 Arrêt automatique ....21 Zone de réception ....21 Dates d’expiration ....26 E, F, G, H Emission FM multiplex .. 4, 14 I, J, K, L ID de code ......
  • Seite 66: Vor Dem Betrieb

    Vor dem Betrieb Bitte Eintragen Füllen Sie bitte die folgende Liste aus, um die Informationen zur Hand zu haben, wenn Sie das Gerät als gestohlen melden müssen. Serien- und Modellnummer stehen auf der Rückseite des Geräts. Wichtige Informationen zum Gerät: Modellnummer Seriennummer ID-Nummer...
  • Seite 67 Inhaltsverzeichnis Vorbereitungen ................4 Merkmale ..................4 Die ersten Schritte Einlegen der Batterien ..............5 Wahl der Sprache ................7 Radiobetrieb Manuelle Abstimmung ..............9 Stationsvorwahl ................10 Anzeigen der UKW-Daten Anzeigen der Informationen im Display des Receivers ..12 Sichern der angezeigten Informationen ........
  • Seite 68: Vorbereitungen

    Vorbereitungen Wir beglückwünschen Sie zu diesem Sony UKW-Daten- Receivers und sind überzeugt davon, daß Sie lange Freude an diesem modernen Gerät haben werden. Bevor Sie das Gerät in Betrieb nehmen, lesen Sie bitte diese Anleitung sorgfältig durch, und bewahren Sie sie zum Nachschlagen gut auf.
  • Seite 69: Die Ersten Schritte

    Mignonzellen DC IN 3V (R6/Größe AA) ÷ Batterie-Lebensdauer (ungefähre Angaben in Stunden) Sony Alkalibatterie LR6(SG) Sony Batterie R6(SR) Nur Tonwiedergabe UKW-Multiplexempfang • Für optimale Leistung wird die Verwendung von Alkalibatterien empfohlen. Wann müssen die Batterien ausgewechselt werden? Wechseln Sie die Batterien aus, wenn „BATTERIE SCHWACH”...
  • Seite 70: Automatische Ausschaltung

    • Auch bei externer Stromversorgung sollten die internen Batterien nicht herausgenommen werden, da sie als Pufferbatterien für den Speicher dienen. • Verwenden Sie nur den empfohlenen Sony Netzadapter und das empfohlene Sony Autobatteriekabel. Polarität und Steckerform sind bei anderen Herstellern möglicherweise unterschiedlich.
  • Seite 71: Wahl Der Sprache

    Wahl der Sprache Für die Anzeigen im Display kann unter den Sprachen Englisch, Französisch, Deutsch, Italienisch, Spanisch, Holländisch und Schwedisch gewählt werden. POWER ENTER Funktionstasten Halten Sie ENTER gedrückt, und drücken Sie gleichzeitig POWER, um das Gerät einzuschalten. Das LANGUAGE SELECT MENU erscheint. LANGUAGE SELECT MENU 1 : E n g l i s h 2 : F r e n c h...
  • Seite 72: Erneutes Ändern Der Sprache

    Erneutes Ändern der Sprache Schalten Sie das Gerät durch Drücken von POWER aus, und beginnen Sie dann erneut ab Schritt 1. Hinweise • Die Sprache der empfangenen UKW-Daten hängt vom Sender ab und kann nicht umgeschaltet werden. Die Umschaltung der Sprache betrifft nur die Menüanzeigen im Display.
  • Seite 73: Radiobetrieb

    ”Radiobetrieb Manuelle Abstimmung POWER ENTER TUNE +/– VOLUME Funktionstasten NEWS•MUSIC Schließen Sie den Stereo-Kopfhörer an die 2 -Buchse Drücken Sie POWER, um das Gerät einzuschalten. Drücken Sie TUNE +/–, um auf den gewünschten Sender abzustimmen. Wenn Sie TUNE +/– gedrückt halten, ändern sich die Frequenzziffern in schneller Folge.
  • Seite 74: Stationsvorwahl

    Stationsvorwahl Werksseitig sind bereits fünf UKW-Sender gespeichert. Wenn Sie fünf eigene Sender speichern wollen, verfahren Sie wie folgt: Drücken Sie POWER, um das Gerät einzuschalten. Drücken Sie TUNE +/–, um manuell auf den Sender abzustimmen. Drücken Sie ENTER. Wenn „VORWAHL” im Display blinkt, drücken Sie die Funktionstaste, auf der der Sender gespeichert werden soll.
  • Seite 75: Abrufen Eines Gespeicherten Senders

    Abrufen eines gespeicherten Senders Die gespeicherten UKW-Sender können wie folgt durch einfaches Drücken der betreffenden Funktionstasten abgerufen werden. Drücken Sie POWER, um das Gerät einzuschalten. Drücken Sie die Funktionstaste des gewünschten Senders. Für optimalen Empfang Breiten Sie das Kopfhörerkabel auf volle Länge aus. Das Kabel dient gleichzeitig als UKW-Antenne.
  • Seite 76: Anzeigen Der Ukw-Daten

    ”Anzeigen der UKW-Daten Anzeigen der Informationen im Display des Receivers Die Multiplexdaten, die von einigen UKW-Sendern ausgestrahlt werden, können im Display dieses Geräts angezeigt werden. Für die Menüanzeige im Display können Sie unter sieben Sprachen (Englisch, Französisch, Deutsch, Italienisch, Spanisch, Holländisch, Schwedisch) wählen (siehe „Wahl der Sprache”...
  • Seite 77 Drücken Sie FM DATA, um ein UKW- Multiplexprogramm zu empfangen. Wenn ein solches Programm in Ihrem Gebiet empfangen werden kann, erscheint die DATA-Anzeige. (Einzelheiten zur DATA-Anzeige finden Sie auf Seite 14.) Im Display erscheint eine Übersichtsanzeige (siehe folgendes Beispiel) mit den über die Funktionstasten wählbaren Menüs*. To Retrieve Stored Data While Receiver Downloads.
  • Seite 78: Anzeigen Der Ukw-Multiplexdaten

    Anzeigen der UKW-Multiplexdaten Drücken Sie die Funktionstaste H-PAGE. Wenn mehrere Optionen zur Auswahl angeboten werden, wählen Sie mit den Funktionstasten die Informationen, die Sie sehen möchten. Die DATA-Anzeige Die DATA-Anzeige (1) signalisiert, daß der Sender UKW- Multiplexdaten ausstrahlt. DATA DATA-Anzeige erscheint Der Sender wird mit ausreichender Stärke empfangen und überträgt UKW-Multiplexdaten.
  • Seite 79: Empfang Von Alarmmeldungen

    Empfang von Alarmmeldungen Wenn der empfangene UKW-Multiplexsender eine Alarmmeldung ausstrahlt, ertönt über den Kopfhörer ein Piepton und im Display erscheint statt der Datenanzeige automatisch die Alarmmeldung. Dabei erscheint links im Display die DATA- und MSG-Anzeige. Durch Drücken einer beliebigen Taste können Sie den Piepton abschalten. DATA Wenn Sie die nächste Seite sehen wollen, folgen Sie den Anweisungen im Display.
  • Seite 80: Zum Zurückschalten Auf Die Vorausgegangene Anzeige

    Hinweise • Nach Drücken von H-PAGE, MSG oder PAGE erscheint „EMPFANGSDATEN” im Display. Wenn keine Daten empfangen werden, schaltet das Gerät nach etwa 20 Sekunden auf die vorausgegangene Anzeige zurück. (( )) EMPFANGSDATEN • Bei schwachem Empfang verschwindet die DATA-Anzeige, „EMPFANGSDATEN”...
  • Seite 81: Sichern Der Angezeigten Informationen

    Sichern der angezeigten Informationen Bis zu acht Informationsseiten können für gespeichert werden. SAVE/MENU Funktionstasten Bilden Sie die gewünschte Information im Display ab. Drücken Sie SAVE/MENU. SCHRB LESE KQNF Drücken Sie die Funktionstaste SCHRB. Hinweis Wenn versucht wird, noch weitere Speicher voll! Seiten zu speichern, obwohl Nicht mehr benötigte Daten bitte löschen!
  • Seite 82: Zum Abrufen Von Gespeicherten Informationen

    Zum Abrufen von gespeicherten Informationen Drücken Sie SAVE/MENU und dann die Funktionstaste LESE. Durch nochmaliges Drücken der Funktionstaste LESE können Sie zur nächsten Seite blättern. LöSCH LESE KONF...
  • Seite 83: Löschen Von Gesicherten Informationen

    Löschen von gesicherten Informationen Drücken Sie die Funktionstaste LESE, um die zu löschende Information anzuzeigen. LöSCH LESE KONF Drücken Sie die Funktionstaste LÖSCH. LöSCH? JA NEIN Drücken Sie die Funktionstaste JA , um den Löschvorgang zu bestätigen. Oder drücken Sie die Funktionstaste NIEN , um den Löschvorgang abzubrechen.
  • Seite 84: Funktionseinstellungen

    Funktionseinstellungen Zum Einstellen der Optionen „Automatische Ausschaltung” und „Empfangsbereich” verfahren Sie wie folgt: SAVE/MENU POWER Funktionstasten Drücken Sie POWER, um das Gerät einzuschalten. Drücken Sie SAVE/MENU. Setup-Menü F u n k t i o n S e t u p Drücken Sie die W a r t u n g Funktionstaste KONF.
  • Seite 85: Einstellen Der Automatischen Ausschaltfunktion

    Einstellen der automatischen Ausschaltfunktion Bei Einstellung auf „Auto Aussch EIN” schaltet sich das Gerät automatisch aus, wenn 120 Minuten lang keine Taste gedrückt wird. Wählen Sie mit der Setup-Funktion Funktionstaste ↑ OBN A u t o A u s s c h E I N oder ↓...
  • Seite 86 Hinweis Wenn Sie die Funktionstaste für die IDs drücken, können Sie Ihr ID und Ihr Paßwort sehen. Diese Informationen werden für Radiobetrieb jedoch nicht benötigt. Durch Drücken der Funktionstaste HAUPT können Sie auf die vorausgegangene Anzeige zurückschalten. (Einzelheiten finden Sie unter „Die ID- Nummern”...
  • Seite 87: Zusatzinformationen

    ”Zusatzinformationen Die ID-Nummern Zwischen den folgenden drei ID-Nummern wird unterschieden. Ihr ID: für persönlichen Rufmeldungsservice. DDJ Gruppen-ID: für Gruppeninformationsservice. Paßwort-ID: für freie Zusatzinformationen. Diese ID-Nummern sind werksseitig voreingestellt. Für Radioempfang ist es nicht erforderlich, die ID-Nummern abzuspeichern oder zu bestätigen. Wenn Sie von dem Anbieter kontaktiert werden, führen Sie die folgenden Schritte aus: Drücken Sie POWER, um das Gerät einzuschalten.
  • Seite 88: Überprüfen Des Ddj Gruppen-Id

    Überprüfen des DDJ Gruppen-ID Wählen Sie mit der Funktionstaste ↑ OBN oder ↓ UNT die Option „DDJ Gruppen-ID”, und bestätigen Sie die Wahl dann durch Drücken der Funktionstaste EING. DDJ Gruppen-ID ## # # # # # # # # # # J a n . 9 , 9 9 # # # # # # # # # # K L D D G - I D 3 D G - I D 4...
  • Seite 89: Überprüfen Des Paßwort-Ids

    Überprüfen des Paßwort-IDs Wählen Sie mit den Funktionstasten ↑ OBN oder ↓ UNT die Option „Paßwort-ID”, und bestätigen Sie die Wahl dann durch Drücken von EING. Paßwort-ID ## P a ß w - I D 1 2 2 8 1 7 0 1 # # # P a ß...
  • Seite 90: Registrieren Und Korrigieren Eines Paßwort-Ids

    Registrieren und Korrigieren eines Paßwort-IDs Wählen Sie mit der Funktionstaste ↑ OBN oder ↓ UNT ein freies Paßwort-ID-Feld bzw. den Paßwort-ID, den Sie korrigieren wollen, und drücken Sie dann die Funktionstaste EING, um das Paßwort-ID-Editiermenü aufzurufen. Paßwort-ID ## P a ß w - I D # 2 2 8 1 7 0 1 # # # ENDE –...
  • Seite 91: Verwendung Des Ständers

    Verwendung des Ständers Mit dem Ständer können Sie das Gerät so aufstellen, daß das Display optimal zu sehen ist. Technische Daten Empfangsbereich 87,5 – 108 MHz UKW-Multiplexverfahren DARC, 64 x 132 FSTN LCD-Anzeige 2-Buchse (Stereo-Minibuchse) Ausgang Ausgangsleistung 8 mW + 8 mW (bei 10% Klirrgrad) Stromversorgung 3V Gleichspannung, zwei Mignonzellen (R6/LR6, Größe AA)
  • Seite 92: Zur Besonderen Beachtung

    Zur besonderen Beachtung • Betreiben Sie das Gerät nur mit 1,5 V Gleichspannung (zwei R6/ AA-Batterien). • Halten Sie das Gerät vor extremen Temperaturen, direktem Sonnenlicht, Feuchtigkeit, Sand, Staub und mechanischen Stößen fern. Lassen Sie es niemals in einem in der Sonne geparkten Auto zurück.
  • Seite 93: Störungsüberprüfungen

    Gehen Sie bei Problemen die folgende Liste durch, um zu entscheiden, ob eine Reparatur erforderlich ist oder nicht. Wenn Sie das Problem nicht selbst beheben können, wenden Sie sich an Ihren Sony Händler. Der Empfang ist unstabil und verrauscht. • Die Batterien sind erschöpft und müssen ausgewechselt werden.
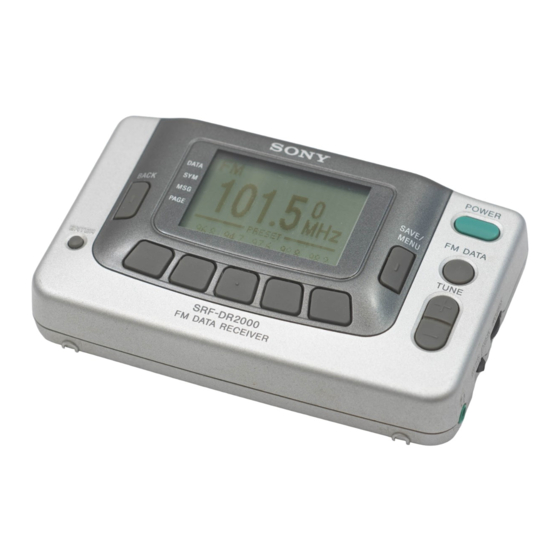
  • Seite 94: Bezeichnung Der Bedienungselemente

    Bezeichnung der Bedienungselemente Einzelheiten finden Sie auf den in Klammern angegebenen Seiten. Gerät !º !¡ 1 Display (32) 6 SAVE/MENU-Taste 2 DATA-Anzeige (1) (14) (17, 20) 3 BACK-Taste (15) 7 POWER-Taste (7, 9, 12, 4 ENTER-Taste (7, 9) 17, 20) 5 Funktionstasten (7, 9, 8 FM DATA-Taste (12) 9 VOLUME-Regler (9)
  • Seite 95 Display DATA 87.5 PAGE VORWAHL 87 . 5 92 . 0 98 . 0 104.3 108.0 1 DATA-Anzeige (1) (14) 4 Frequenz (10) 2 MSG-Anzeige (15) 5 Stationsspeicher (10) 3 PAGE-Anzeige (15)
  • Seite 96: Stichwortverzeichnis

    Stichwortverzeichnis Alarmmeldungen ....15 Automatische -Multiplexempfang ..4, 14 Ausschaltung ....... 21 V, W, X, Y, Z B, C Verwendung des Batterien ......... 5 Ständers ........ 28 DATA-Anzeige ....14 DDJ Gruppen-ID ....25 E, F, G, H, I, J, K Empfangsbereich ....
  • Seite 98: Algemene Informatie

    Algemene informatie Memorandum eigenaar Aan de achterzijde van het apparaat vindt u het model- en serienummer. Noteer deze nummers hieronder, zodat u ze vlot bij de hand heeft in geval van diefstal of verlies van het apparaat. Bewaar deze informatie op een veilige plaats. Modelnummer Serienummer Uw identificatiecode...
  • Seite 99 Inhoudsopgave Woord vooraf ................4 Kenmerken ..................4 Voorbereidingen Inleggen van de batterijen ............5 Kiezen van de taal ................ 7 Bediening van de radio Handmatige afstemming ............. 9 Vastleggen van zenders ............. 10 Kijken naar FM-data Kijken naar informatie in het uitleesvenster ......12 Opslaan van de informatie die u ziet ........
  • Seite 100: Woord Vooraf

    Woord vooraf Hartelijk dank voor de aanschaf van deze Sony FM data- receiver. Dit apparaat zal u vele uren luisterplezier verschaffen en kan tevens ontvangen informatie in het uitleesvenster tonen. Lees de gebruiksaanwijzing aandachtig door voordat u het apparaat in gebruik neemt. Bewaar de gebruiksaanwijzing voor eventuele naslag in de toekomst.
  • Seite 101: Voorbereidingen

    R6 (AA-formaat) × 2 DC IN 3V ÷ Levensduur van de batterijen (bij benadering, in uren) Sony alkali LR6(SG) Sony R6(SR) Alleen geluid FM-multiplex ontvangst * Voor een optimale prestatie van het apparaat verdient het aanbeveling alkalibatterijen te gebruiken.
  • Seite 102 • Lichtnet met behulp van een Sony AC-E30HG netspanningsadapter (niet bijgeleverd). • 12/24 V auto-accu met behulp van een Sony DCC-E230 auto- accusnoer (niet bijgeleverd). Opmerkingen • Bij gebruik op een externe voedingsbron mag u de batterijen niet uit het apparaat verwijderen.
  • Seite 103: Kiezen Van De Taal

    Kiezen van de taal U kunt kiezen uit 7 talen (Engels, Frans, Duits, Italiaans, Spaans, Nederlands en Zweeds) voor de aanduidingen die in het uitleesvenster worden getoond. De onderstaande procedure beschrijft de keuze van Engels als de gewenste taal; de aanduidingen in het uitleesvenster zullen dan in het Engels zijn.
  • Seite 104 Wijzigen van de gekozen taal Druk op de POWER toets om het apparaat uit te schakelen en herhaal de voorgaande procedure vanaf stap 1. Opmerkingen • Wanneer u een andere taal kiest, betekent dit niet dat de FM-data in een andere taal in het uitleesvenster wordt getoond. Alleen de toetsnamen e.d.
  • Seite 105: Bediening Van De Radio

    ”Bediening van de radio Handmatige afstemming POWER ENTER TUNE +/– VOLUME Functietoetsen NEWS•MUSIC Sluit de stereo hoofdtelefoon op de 2 aansluiting aan. Druk op de POWER toets om het apparaat in te schakelen. Druk op de TUNE +/– toetsen om handmatig op de gewenste zender af te stemmen.
  • Seite 106: Vastleggen Van Zenders

    Vastleggen van zenders Bij het verlaten van de fabriek zijn er 5 FM-zenders in het geheugen vastgelegd. U kunt deze zenders vervangen door andere gewenste zenders. Druk op de POWER toets om het apparaat in te schakelen. Druk op de TUNE +/– toetsen om handmatig op de gewenste zender af te stemmen.
  • Seite 107 Luisteren naar een vastgelegde zender (voorkeurzender) Nadat u uw favoriete zenders eenmaal in het geheugen heeft vastgelegd, kunt u hierop afstemmen door een druk op de bijbehorende functietoets. Druk op de POWER toets om het apparaat in te schakelen. Druk op de functietoets waarmee de gewenste zender in het geheugen is vastgelegd.
  • Seite 108: Kijken Naar Fm-Data

    ”Kijken naar FM-data Kijken naar informatie in het uitleesvenster Bij ontvangst van FM-multiplex uitzendingen van bepaalde FM-zenders kunt u informatie die samen met het zendsignaal wordt uitgezonden, ontvangen en in het uitleesvenster weergeven. Voor de aanduidingen die het apparaat in het uitleesvenster toont, kunt u kiezen uit 7 talen (Engels, Frans, Duits, Italiaans, Spaans, Nederlands en Zweeds).
  • Seite 109 Druk op de FM DATA toets voor FM-multiplex ontvangst. De DATA aanduiding verschijnt wanneer er een FM-multiplex uitzending in uw gebied ontvangen kan worden. (Zie blz. 14 voor nadere bijzonderheden betreffende de DATA aanduiding.) Het onderstaande scherm verschijnt (Totale Index scherm) samen met de menu's die bij de functietoetsen horen.* To Retrieve Stored Data While Receiver...
  • Seite 110 Kijken naar de FM-data uitzending Druk op de functietoets die bij H-PAGE hoort. Kies, indien nodig, het gewenste menu door op de bijbehorende functietoets te drukken. DATA aanduiding Wanneer de DATA aanduiding (1) verschijnt, is FM-multiplex ontvangst in uw gebied beschikbaar. DATA Aanduiding licht op De zender waarop u heeft afgestemd, zendt FM-multiplex...
  • Seite 111: Wanneer Een Oproepbericht Wordt Ontvangen

    Wanneer urgente informatie wordt ontvangen Als tijdens ontvangst van een FM-data uitzending een urgent bericht wordt uitgezonden, hoort u een pieptoon via de hoofdtelefoon en schakelt het FM-data scherm automatisch over naar de urgente informatie. Bij ontvangst van urgente informatie verschijnen de DATA en MSG aanduidingen aan de linkerzijde van het uitleesvenster.
  • Seite 112 Om een oproepbericht te zien, gebruikt u de BACK toets om het onderstaande selectiescherm te laten verschijnen en drukt dan op de functietoets die bij PAGE hoort. H-PAGE MSG PAGE Om terug te keren naar het FM-data scherm, drukt u op de BACK toets.
  • Seite 113 Om alleen de normale FM (geluid)- uitzending te ontvangen, om op een andere zender af te stemmen of om zenders in het geheugen vast te leggen Druk op de FM DATA toets. Om terug te keren naar het vorige scherm Druk op de BACK toets.
  • Seite 114: Opslaan Van De Informatie Die U Ziet

    Opslaan van de informatie die u ziet U kunt in totaal 8 pagina's informatie opslaan die u dan naderhand weer kunt oproepen. SAVE/MENU Functietoetsen Laat de informatie die u wilt opslaan in het uitleesvenster verschijnen. Druk op de SAVE/MENU toets. Druk op de functietoets die bij Schr.
  • Seite 115: Wissen Van De Informatie Die Opgeslagen Is

    Oproepen van informatie die opgeslagen is Druk op de SAVE/MENU toets. Druk vervolgens op de functietoets die bij Lees hoort. Om naar de volgende opgeslagen pagina te gaan, drukt u nogmaals op de functietoets die bij Lees hoort. Wissen van de informatie die opgeslagen is Druk op de functietoets die bij Lees hoort totdat de informatie die u wilt wissen in het uitleesvenster wordt...
  • Seite 116: Instellen Van De Functies

    Instellen van de functies Volg de onderstaande aanwijzingen voor het instellen van de diverse functies zoals de automatische uitschakelfunctie en het ontvangstgebied. SAVE/MENU POWER Functietoetsen Druk op de POWER toets om het apparaat in te schakelen. Druk op de SAVE/MENU toets. Druk op de functietoets die bij Config hoort.
  • Seite 117: Instellen Van De Automatische Uitschakelfunctie

    Opmerking Als u per ongeluk “Onderhoudsfunctie” in het “Instelmenu” kiest, druk dan op de BACK toets om terug te keren naar het vorige scherm. De onderhoudsfunctie heeft u niet nodig voor de radio. Instellen van de automatische uitschakelfunctie Wanneer de automatische uitschakelfunctie “AAN” staat en er dan gedurende 120 minuten geen toets wordt ingedrukt terwijl het apparaat ingeschakeld is, zal het apparaat automatisch worden uitgeschakeld.
  • Seite 118 Instellen van het ontvangstgebied Kies de vereiste instelling (EURO of USA) om het formaat van het ontvangstsignaal in te stellen overeenkomstig het gebied waar u bent. Druk op de functietoets Instelfunctie die bij ↑ Op of ↓ Neer A u t o m . U i t s c h a k . U I T O n t v a n g s t g e b i e d hoort om de cursor naar “Ontvangstgebied”...
  • Seite 119: Aanvullende Informatie

    ”Aanvullende informatie Identificatiecodes (ID-codes) Onder de ID-codes worden de volgende drie codes verstaan: Uw ID: code voor persoonlijke berichten (radio- oproepberichten) DDJ Groeps-ID: code voor groepinformatie Wachtwoord-ID: code voor gratis extra informatie De ID-codes zijn op de fabriek ingesteld. Voor gebruik van de radio hoeft u deze codes niet te registreren of te controleren.
  • Seite 120 Controleren van de DDJ groepscode Druk op de functietoets die bij ↑ Op of ↓ Neer hoort om de cursor naar “DDJ Groeps-ID” te brengen en druk dan op de functietoets die bij Inv. hoort om de optie te selecteren. DDJ Groeps-ID ## # # # # # # # # # # J a n .
  • Seite 121 Wachtwoord-ID ## W w d - I D 1 2 2 8 1 7 0 1 # # # W w d - I D 2 W w d - I D 3 W w d - I D 4 W w d - I D 5 Als er een wachtwoordcode geregistreerd is, ziet u de code in het uitleesvenster.
  • Seite 122 Controleren van de verloopdatum Druk op de functietoets die bij ↑ Op of ↓ Neer hoort om de cursor naar “Verloopdata” te brengen. Druk vervolgens op de functietoets die bij Inv. hoort om de optie te selecteren. Verloopdata C a t e g o r i 1 V D N G C a t e g o r i 2 S e p .
  • Seite 123: Gebruik Van De Standaard

    Gebruik van de standaard Klap indien nodig de standaard aan de achterkant van het apparaat uit om de informatie in het uitleesvenster beter te kunnen zien. Technische gegevens Afstembereik 87,5 – 108 MHz FM-multiplex DARC type 64 x 132 FSTN LCD display 2 hoofdtelefoon-aansluiting (stereo Uitgang ministekkerbus)
  • Seite 124: Voorzorgsmaatregelen

    Voorzorgsmaatregelen • Gebruik het apparaat uitsluitend op 1,5 V gelijkstroom van twee R6 (AA-formaat) batterijen. • Leg het apparaat niet te dicht bij een warmtebron en stel het niet bloot aan direct zonlicht, veel stof of zand, vocht, regen of mechanische schokken.
  • Seite 125: Verhelpen Van Storingen

    Als zich bij gebruik van het apparaat een van de onderstaande problemen voordoet, neemt u dan even de lijst met controlepunten door. Is de storing aan de hand hiervan niet te verhelpen, raadpleeg dan a.u.b. uw dichtstbijzijnde Sony handelaar. De ontvangst is niet stabiel en er is veel ruis.
  • Seite 126: Plaats Van De Bedieningsorganen

    Plaats van de bedieningsorganen Zie de paginanummers tussen haakjes voor nadere bijzonderheden. Apparaat !º !¡ 1 Uitleesvenster (31) 6 Opslaan/menutoets 2 Data-aanduiding (SAVE/MENU) (18, 20) 7 Aan/uit-toets (DATA)(1) (14) 3 Terug-toets (BACK) (POWER) (7, 9, 12, 20) 8 FM-data toets (FM (16) 4 Invoertoets (ENTER) DATA) (12)
  • Seite 127 Uitleesvenster DATA 87.5 PAGE Voorinstelling 87 . 5 92 . 0 98 . 0 104.3 108.0 1 Data-aanduiding 3 Oproep-aanduiding (DATA) (1) (14) (PAGE) (15) 2 Bericht-aanduiding 4 Frequentie (10) 5 Voorkeurzenders (10) (MSG) (15)
  • Seite 128: Index

    Index S, T Gebruik van de standaard Automatische uitschakelfunctie ..........27 ..........21 B, C Urgente informatie ..... 15 Batterijen ........ 5 Vervaldatum ......26 DATA aanduiding ....14 DDJ groepscode ....24 W, X, Y, Z Wachtwoordcode ....25 Externe voedingsbronnen ...
  • Seite 130: Informazioni Generali

    Informazioni generali PER VOSTRA DOCUMENTAZIONE Per farvi riferimento in caso di smarrimento o furto di questo apparecchio, annotarsi sotto il numero di modello e il numero di serie, che sono riportati sul retro dell'apparecchio. Conservare queste informazioni. Numero di modello Numero di serie Numero di identità...
  • Seite 131 Indice Prima di cominciare ..............4 Caratteristiche ................4 Preparativi Inserimento delle pile ..............5 Selezione della lingua ..............7 Uso della radio Sintonia manuale ................9 Preselezione delle stazioni ............10 Visione di dati FM Visione delle informazioni sul ricevitore ........ 12 Memorizzazione delle informazioni per la visione ....
  • Seite 132: Prima Di Cominciare

    Prima di cominciare Grazie per aver scelto il ricevitore dati FM Sony! Il ricevitore di dati FM vi fornirà numerose ore di ascolto piacevole e visualizzerà informazioni aggiornate. Prima di usare il ricevitore di dati FM, leggere attentamente queste istruzioni e conservarle per riferimenti futuri.
  • Seite 133: Preparativi

    R6 (formato AA) (non in dotazione) con la polarità corretta. R6 (AA-formaat) × 2 DC IN 3V ÷ Durata delle pile (ore circa) Alcaline Sony LR6 (SG) Sony R6 (SR) Solo audio Ricezione FM multiplex * Per il massimo delle prestazioni consigliamo di usare pile alcaline.
  • Seite 134 • Usare solo il trasformatore CA o il cavo per batteria d'auto consigliati prodotti da Sony. La polarità delle spine dei prodotti di altre marche può essere differente. Polarità della spina...
  • Seite 135: Selezione Della Lingua

    Selezione della lingua Si può selezionare una tra sette lingue (inglese, francese, tedesco, italiano, spagnolo, olandese, svedese) per le indicazioni sul display. Le spiegazioni in questo manuale fanno riferimento al caso in cui è selezionato l'inglese e le spiegazioni delle indicazioni sul display sono per la lingua inglese.
  • Seite 136 Per cambiare la lingua selezionata Premere POWER per spegnere l'apparecchio e ripetere il procedimento dal punto 1. Note • La lingua selezionata non traduce i dati FM. Solo le indicazioni sul display appaiono nella lingua selezionata e i dati FM sono visualizzati nella lingua della zona.
  • Seite 137: Uso Della Radio

    ”Uso della radio Sintonia manuale POWER ENTER TUNE +/– VOLUME Tasti di NEWS•MUSIC funzione Collegare le cuffie stereo alla presa 2. Premere POWER per accendere l'apparecchio. Premere TUNE +/– per sintonizzare manualmente la stazione desiderata. Se si tiene premuto TUNE +/–, la frequenza cambia rapidamente.
  • Seite 138: Preselezione Delle Stazioni

    Preselezione delle stazioni L'apparecchio inizialmente dispone di 5 stazioni FM già preselezionate. Si possono preselezionare fino a 5 stazioni preferite. Premere POWER per accendere l'apparecchio. Premere TUNE +/– per sintonizzare manualmente la stazione desiderata. Premere ENTER. Quando “PRESELEZIONATO” lampeggia sul display, premere uno dei tasti di funzione per preselezionare la stazione.
  • Seite 139 Per ascoltare una stazione preselezionata Una volta che le stazioni FM preferite sono state preselezionate, basta premere il tasto di funzione corrispondente per richiamare e sintonizzare la stazione desiderata. Premere POWER per accendere l'apparecchio. Premere il tasto di funzione corrispondente alla stazione preselezionata che si desidera richiamare.
  • Seite 140: Visione Di Dati Fm

    ”Visione di dati FM Visione delle informazioni sul ricevitore Si possono ricevere informazioni aggiornate che possono essere lette sul display del ricevitore quando si ricevono trasmissioni radio FM tramite la trasmissione FM multiplex, emessa solo da specifiche stazioni FM. Inoltre si può scegliere tra 7 lingue (inglese, francese, tedesco, italiano, spagnolo, olandese, svedese) la lingua per le indicazioni sul display.
  • Seite 141 Premere FM DATA per ricevere trasmissioni FM multiplex. L'indicazione DATA appare quando una trasmissione FM multiplex è ricevibile nella zona. (Per dettagli sull'indicazione DATA vedere pagina 14.) Appare quindi la seguente visualizzazione (indicazione di indice totale) con i menu corrispondenti ai tasti di funzione.* To Retrieve Stored Data While Receiver Downloads.
  • Seite 142 Per vedere la trasmissione dati FM Premere il tasto di funzione corrispondente a H-PAGE. Selezionare il menu desiderato premendo il tasto di funzione corrispondente per ricevere ulteriori informazioni quando appropriato. Indicazione DATA L'apparizione dell'indicazione DATA (1) mostra la disponibilità di trasmissioni FM multiplex. DATA Indicazione visualizzata La stazione sintonizzata trasmette informazioni FM...
  • Seite 143 Quando si ricevono informazioni urgenti Quando sono trasmesse informazioni urgenti durante la ricezione di trasmissioni dati FM, si sente un segnale acustico nelle cuffie e la visualizzazione della trasmissione dati FM passa automaticamente alle informazioni urgenti. Quando si ricevono le informazioni urgenti, le indicazioni DATA e MSG appaiono sul lato sinistro del display.
  • Seite 144 H-PAGE MSG PAGE Per tornare alla visualizzazione della trasmissione dati FM, premere BACK. Note • Quando si preme H-PAGE, MSG o PAGE per ricevere i dati, viene visualizzato “RICEZIONE DATI”. Se non esistono dati ricevibili, dopo circa 20 secondi il display torna alla visualizzazione precedente.
  • Seite 145 Per ricevere solo trasmissioni FM audio, per cambiare stazione o preselezionare una stazione Premere FM DATA. Per tornare alla visualizzazione di un livello superiore Premere BACK. Per tornare alla pagina iniziale Premere il tasto di funzione corrispondente a H-PAGE sul display.
  • Seite 146: Memorizzazione Delle Informazioni Per La Visione

    Memorizzazione delle informazioni per la visione Si possono salvare fino a 8 pagine di informazioni importanti che si desidera richiamare in seguito. SAVE/MENU Tasti di funzione Visualizzare le informazioni che si desidera salvare. Premere SAVE/MENU. SCRIV LEGG CONFIG Premere il tasto di funzione corrispondente a SCRIV sul display.
  • Seite 147: Cancellazione Delle Informazioni Memorizzate

    Per richiamare le informazioni che sono state salvate Premere SAVE/MENU. Quindi premere il tasto di funzione corrispondente a LEGG sul display. Per passare alla pagina successiva premere di nuovo il tasto di funzione corrispondente a LEGG. CANC LEGG CONFIG Cancellazione delle informazioni memorizzate Premere il tasto di funzione corrispondente a LEGG per visualizzare le informazioni che si desidera cancellare.
  • Seite 148: Impostazione Delle Funzioni

    Impostazione delle funzioni Si possono impostare le funzioni come lo spegnimento automatico e l'area di ricezione. SAVE/MENU POWER Tasti di funzione Premere POWER per accendere l'apparecchio. Premere SAVE/MENU. Premere il tasto di funzione corrispondente I m p o s t . F u n z i o n i M o d o M a n u t e n z i o n e a CONFIG.
  • Seite 149 Nota Se si seleziona “Modo Manutenzione” in “Menu Impostazione”, premere BACK per tornare alla visualizzazione precedente. Modo Manutenzione non è necessario per le operazioni radio. Per impostare lo spegnimento automatico Quando si imposta questa funzione su ON e non si preme alcun tasto per 120 minuti mentre l'apparecchio è...
  • Seite 150 Per impostare l'area di ricezione Per impostare il formato del segnale di ricezione in base all'area, selezionare tra i seguenti modi: EURO o USA. Premere il tasto di funzione corrispondente a ↑SU o ↓ GIÙ per S p e g n i m . A u t o m . O F F A r e a r i c e z i o n e spostare il cursore su...
  • Seite 151: Altre Informazioni

    ”Altre informazioni Numeri di identità ID indica i tre numeri di identità seguenti: ID Utente: per servizi di messaggi personali (messaggi di cercapersone radio) ID Gruppo DDJ : per servizi di informazioni di gruppo Codice segreto: per servizi di informazioni addizionali gratuiti Questi numeri di identità...
  • Seite 152 Per verificare I’ID gruppo DDJ Premere il tasto di funzione corrispondente a ↑ SU o ↓ GIÙ per spostare il cursore a “ID Gruppo DDJ” e premere il tasto di funzione corrispondente a ENTER per selezionare ID Gruppo DDJ. ID Gruppo DDJ ## # # # # # # # # # # G e n .
  • Seite 153 Quando il codice segreto è registrato, il numero di codice appare sul display. Si possono registrare fino a 8 codici segreti. Premere il tasto di funzione corrispondente a ↑ SU o ↓ GIÙ per far scorrere la visualizzazione. Per registrare e correggere il codice segreto Premere il tasto di funzione corrispondente a ↑...
  • Seite 154 Per verificare le scadenze Premere il tasto di funzione corrispondente a ↑ SU o ↓ GIÙ per spostare il cursore a Scadenze. Premere il tasto di funzione corrispondente a ENTER per selezionare Scadenze. Scadenze C a t e g o r . 1 S N S C a t e g o r .
  • Seite 155: Uso Del Sostegno

    Uso del sostegno Alzare e usare il sostegno sulla base dell'apparecchio per vedere il display ad un'angolazione ottimale. Caratteristiche tecniche Campo di frequenza 87,5 – 108 MHz FM multiplex Tipo DARC Display LCD FSTN da 64 x 132 Presa 2 (minipresa stereo) Uscita Uscita di potenza 8 mW + 8 mW (al 10% di distorsione...
  • Seite 156: Precauzioni

    Precauzioni • Alimentare l'apparecchio solo a 1,5 V CC con due pile tipo R6 (formato AA). • Evitare di esporre l'apparecchio a estremi di temperatura, luce solare diretta, umidità, sabbia, polvere o scosse meccaniche. Non lasciare mai l'apparecchio in un'auto parcheggiata al sole. •...
  • Seite 157: Soluzione Di Problemi

    Se si hanno difficoltà con l'apparecchio, usare i seguenti controlli per verificare se sono necessarie riparazioni. Se il problema rimane insoluto, consultare il proprio rivenditore Sony. La ricezione è instabile e disturbata. • Le pile possono essere deboli. Sostituirle con altre nuove.
  • Seite 158: Indice Delle Parti E Dei Comandi

    Indice delle parti e dei comandi Fare riferimento alla pagina indicata tra parentesi per dettagli. Apparecchio !º !¡ 1 Display (31) 6 Tasto SAVE/MENU 2 Indicazione DATA (17, 20) 7 Tasto POWER (7, 9, 12, (1) (14) 3 Tasto BACK (15) 4 Tasto ENTER (7, 9) 8 Tasto FM DATA (12) 5 Tasti di funzione (7, 9,...
  • Seite 159 Display DATA 87.5 PAGE PRESELEZIONATO 87 . 5 92 . 0 98 . 0 104.3 108.0 1 Indicazione DATA 4 Frequenza (10) 5 Stazioni preselezionate (1) (14) 2 Indicazione MSG (15) (10) 3 Indicazione PAGE (15)
  • Seite 160: Indice Analitico

    Indice analitico A, B, C, D, E Area di ricezione ....22 Trasmissioni FM multiplex Codice segrento ... 24, 25 .......... 4,14 F, G, H U, V, W, X, Y, Z Fonti di alimentazione Uso del sostegno ....27 esterne ....... 6 I, J, K, L ID Gruppo DDJ ....
  • Seite 164 Sony Corporation Printed in Japan...

Inhaltsverzeichnis