Herunterladen Inhalt Inhalt Diese Seite drucken
Vorschau ausblenden Andere Handbücher für Liam Color:

Werbung

Verfügbare Sprachen

Verfügbare Sprachen

Instrukcja obsługi
User manual
Liam Color
Grupa wagowa 0+ i I uniwersalny 0kg - 18kg
Suitable for Group 0+ and I / 0kg to 18kg
fotelik samochodowy
child safety seat

Werbung

Inhaltsverzeichnis
loading

Inhaltszusammenfassung für Lionelo Liam Color

  • Seite 1 Instrukcja obsługi User manual Liam Color fotelik samochodowy child safety seat Grupa wagowa 0+ i I uniwersalny 0kg - 18kg Suitable for Group 0+ and I / 0kg to 18kg...
  • Seite 3 Informacja Urządzenie przytrzymujące dla dzieci należy do kate- gorii „uniwersalne”. Uzyskało homologację zgod - nie z regulaminem nr 44, seria poprawek 04, do ogól- nego zastosowania w pojazdach i nadaje się do insta- lacji na większości miejsc siedzących w samochodzie. Prawidłowa instalacja jest możliwa, jeśli producent pojaz- du oświadczył...
  • Seite 4 Jeśli masz jakiekolwiek uwagi lub pytania do zakupionego produktu, skontaktuj się z nami: pomoctechniczna@lionelo.com Produkt jest dopuszczony do ECE R44 / 04 jako fotelik dla grup wiekowych 0+ i I 0 - 18kg. Fotelik samochodowy będzie maksymalnie chronić...
  • Seite 5: Ważne Informacje

    1. Ważne informacje Prosimy o uważne przeczytanie instrukcji obsługi przed rozpoczę- ciem użytkowania dziecięcego fotelika samochodowego. Nieprawidłowe użycie fotelika może zagrozić życiu dziecka. Nie należy umieszczać fotelika na siedzeniu pasa- UWAGA: żera wyposażonego w poduszkę powietrzną. 2. Zastosowanie Produkt Liam Plus jest sklasyfikowany jako „uniwersalny” fote- lik samochodowy dla dzieci z grupy 0+ oraz I, czyli dla dzieci o masie ciała mniejszej niż...
  • Seite 6 Prawidłowy montaż fotelika Nieprawidłowy montaż fotelika Nie należy montować fotelika na siedzeniu pasażera wy- posażonego w poduszkę powietrzną Montaż fotelika może być możliwy w przypadku gdy środkowe siedzenie jest wyposażone w 5 punktowy pas bezpieczeństwa 3. Porady dotyczące bezpieczeństwa • Nigdy nie zostawiaj dziecka bez opieki w foteliku.
  • Seite 7 • Fotelik nie może być używany bez oryginalnej tapicerki. Materiał nie powinien być także zastępowany przez inny niż rekomendowany przez producenta, ponieważ stanowi inte- gralną część fotelika. • Fotelik może być montowany w pojazdach mających homologację zatwierdzoną przez ONZ/EKG według rozpo- rządzenia nr 16 lub innymi odpowiednimi przepisami.
  • Seite 8 4. Zestaw oparcie zagłówek osłona pasa pasy bezpieczeństwa podkładka zamek pasów podkładk pod zamek siedzisko regulowana podstawa regulacja pasów bezpieczeństwa prowadnice pasów sprężyny uprząż pasa regulującego złącze pasów regulowana podstawa...
  • Seite 9 5. Użycie zestawu 5.1 Zastosowanie regulacji pasów, naciągnięcie i zwolnienie pasów 5.1.1 Standardowo pasek uprzęży jest zawsze zablokowany tak jak na Ilustracji 5.01. W tej pozycji można zawsze nacią- gnąć pasy żeby przystosować ich długość do wzrostu dziec- ka. ( Ilustracja 5.02 ) Ilustracja 5.01 Ilustracja 5.02 5.1.2 Aby poluźnić...
  • Seite 10 Ilustracja 5.03 Poc gnij pasy Ilustracja 5.04 naramienne w dó Przycisk zwalniaj cy 5.2 Połączenie szelek pasów 5.2.1 Zahacz szelki w łączniku szelek według poniższych ilustracji ( Ilustracja 5.05 ) 5.2.2 Umieść pasek uprzęży w łączniku szelek ( Ilustracja 5.06 ) Ilustracja 5.05 Ilustracja 5.06...
  • Seite 11 5.3 Wpięcie szelki regulującej do uprzęży 5.3.1 Umieść szelkę w uprzęży ( Ilustracja 5.07 ). 5.3.2 Przełóż obręcz przez otwór znajdujący się z przodu siedziska fotelika ( Ilustracja 5.08 ). Następnie pociągnij za szelki naramienne do góry tak aby uprząż zablokowała się od spodniej strony siedziska.
  • Seite 12 5.4 Zamek bezpieczeństwa 5.4.1 Aby wpiąć klamry w zamek bezpieczeństwa nale- ży najpierw je ze sobą złączyć ( Ilustracja 5.11 ). Następ- nie złączone klamry należy wprowadzić od góry do zamka bezpieczeństwa ( Ilustracja 5.11 ). Prawidłowe zatrzaśnięcie klamry w zamku powinno zakończyć się odgłosem kliknięcia. 5.4.2 Aby wypiąć...
  • Seite 13 5.6 Ustawienie odpowiedniej wysokości pasów naramiennych 5.6.1 Wysokość pasów naramiennych nie może być za wysoka i za niska ( Ilustracja 5.13 ) Za nisko Za wysoko 5.7 Regulacja kąta siedziska Fotelik posiada 3 regulacje kąta nachylenia siedziska. Zmienić kąt nachylenia siedziska fotelika, włóż rękę 5.7.1 pod siedzisko fotelika, naciśnij i przytrzymaj blokadę.
  • Seite 14 zerwowana jest dla dzieci z grupy wiekowej 0+. Jest to pozy- cja półleżąca, fotelik w tej pozycji powinien być zainstalowa- ny tyłem do kierunku jazdy ( Ilustracja 5.17 ). Kiedy siedzisko fotelika nie jest ustawione wzglę- 5.7.5 dem żadnej ze strzałek, oznacza to że jest on nieprawidłowo ustawiony i może być...
  • Seite 15 6. Zastosowanie fotelika dla grupy wiekowej 0+ Fotelik musi być zamontowany tyłem do kierunku jazdy. Opar- cie musi być ustawione w pozycji 3 – na niebieskiej strzałce. 6.1. Mocowanie fotelika w pojeździe. 6.1.1. Fotelik musi być ustawiony w pozycji nr 3 – niebieska strzałka. 6.1.2.
  • Seite 16 7. Zastosowanie fotelika dla grupy wiekowej I W przypadku stosowania fotelika dla dzieci z grupy wiekowej I, fotelik musi być zamontowany przodem do kierunku jazdy, oparcie fotelika powinno być ustawione w pozycjach 1 lub dwa – czerwone strzałki. 7.1. Mocowanie fotelika w pojeździe. Ilustracja 7.02 Ilustracja 7.01...
  • Seite 17 7.1.1. Ustaw oparcie fotelika w 1 lub 2 pozycji. 7.1.2. Umieść fotelik w samochodzie wyposażonym w 3 punktowe pasy bezpieczeństwa, przodem do kierunku jazdy. 7.1.3. Aby zamontować fotelik należy wyciągnąć pasy do maksimum. 7.1.4. Pas biodrowy i naramienny należy przeciągnąć przez fotelik ( Ilustracja 7.01, 7.02 ), Pas biodrowy należy przeciągnąć...
  • Seite 18 8. Instrukcja pielęgnacji fotelika 8.1. Zdejmowanie tkaniny z fotelika 8.1.1. Zdemontuj pięciopunktowe pasy bezpieczeństwa. 8.1.2. Dzięki temu wszystkie tkaniny będzie można bezpiecznie zdjąć. 8.2. Czyszczenie tkaniny Do mycia używaj tylko neutralnych detergentów (poniżej 30°C ) i ciepłej wody. Materiał nie powinien być prany w pralce, suszony w suszarce i prasowany.
  • Seite 19 9.Jakie kroki należy podjąć po wypadku Po kolizji z prędkością większą niż 10 km / h, należy dokład- nie sprawdzić czy fotelik nie ma żadnych uszkodzeń mecha- nicznych. Jeżeli fotelik nie będzie działał prawidłowo, dla bezpieczeństwa dziecka, nie należy go dalej eksploatować.
  • Seite 20 WWW.LIONELO.COM...
  • Seite 21 Info This is a “universal” child restraint. It is approved to Regulation No. 44.04 series of amendments, for gener- al use in vehicles, and can be installed on most car seats. A c o r r e c t i n s t a l l a t i o n i s p o s s i b l e i f t h e v e h i - c l e m a n u f a c t u r e r h a s d e c l a r e d i n t h e v e h i - cle’s manual that the vehicle is capable of accept- ing a “universal”...
  • Seite 22 In case of any questions or comments on the purchased product, please contact us: pomoctechniczna@lionelo.com The product is compliant with ECE R44/04 as a car safety seat suitable for the 0+ and I age group that is for children between 0 and 18kg of weight.
  • Seite 23 1. Important information Before using the car safety seat please read this user manual carefully. Improper use may lead to a serious threat to the life of your child. Do not mount the safety seat on a passenger WARNING: seat equipped with an airbag. 2.
  • Seite 24: Safety Notes

    Correct installation of the safety seat Incorrect installation of the safety seat Do not mount the safety seat on a passenger seat equipped with an airbag. The installation of the safety seat is possible if a vehicle’ s middle seat is equipped with a 5-point safety belt. 3.
  • Seite 25 Do not use the safety seat without the original pad. Do not replace the cover / pad with the one that is not recom- mended by the manufacturer. It is an integral part of the product and it contributes to the safety of the child. The seat can be installed in vehicles approved by the UN/ECE (Regulation No 16) or other relevant regulations.
  • Seite 26 4. Accessories: back headrest shoulder strap pad safety harness safety lock buckle pad seat adiustable base seatbelts adiustment strap belts guide springs harness adiustment stra belts connector adiustable base...
  • Seite 27 5. Usage 5.1 Harness adjustment, straps tightening / loosing 5.1.1 Normally the straps are always secured, as shown in the picture 5.01. In this position, you can tighten the straps to adjust their length to the height of the child. (Figure 5.02) Picture 5.01 Picture 5.02 5.1.2 In order to loosen the shoulder straps, use one hand to...
  • Seite 28 Picture 5.03 Poc gnij pasy Pull shoulder Picture 5.04 naramienne w dó straps down Press the adjustment button 5.2 Shoulder straps connection 5.2.1 Hook the shoulder straps in the harness connector as shown in the Picture 5.05. 5.2.2 Run the harness strap through the harness connector (Picture 5.06).
  • Seite 29 5.3 Adjustment strap connection 5.3.1 Attach the strap to the hook (Picture 5.07). 5.3.2 Thread the hook through the hole at the front of the seat (Picture 5.08). Then pull the shoulder straps up so as to lock the harness at the underside of the seat. 5.3.3 To remove the adjustment strap follow the above steps (up to point 5.3.2) in reverse order (Picture 5.09).
  • Seite 30 5.4 Safety lock 5.4.1 In order to fasten the buckles in the safety lock, first joint them (Picture 5.11) and insert the combined buckle into the safety lock (from the top) (Picture 5.11). The “click” sound indicates that the safety lock has been properly fastened. 5.4.2 To remove the buckles from the safety lock, press the red button on it (Picture 5.12).
  • Seite 31 5.6 Proper height of the shoulder straps 5.6.1 The shoulder straps should be neither too tight nor too loose (Picture 5.13). Za nisko Za wysoko To low (tight) To high (loose) Correct 5.7 Seat angle adjustment The seat can be adjusted to three different positions. 5.7.1In order to change the seat angle, put your hand under the seat, then press and hold the lock.
  • Seite 32 When the seat position is not aligned with any of 5.7.5 the arrow, it means that it has been adjusted improperly and can be dangerous for the baby. In that case it is necessary to correct the seat position immediately. Ilustracja 5.14 Picture Picture...
  • Seite 33 6. Installation and usage for the group 0+ The safety seat must be installed in a rear-facing position. The back must be tilted to the position number 3 indicated by the blue arrow. 6.1. Installation of the safety seat in a car 6.1.1.
  • Seite 34 7. Installation for the group I The safety seat must be installed in a forward-facing posi- tion. The back must be locked in the position number 1 or 2 indicated by the red arrows. 7.1. Installation of the safety seat in a car Ilustracja 7.02 Ilustracja 7.01 Picture...
  • Seite 35 7.1.1. Adjust the back of the safety seat so that it is in the position number 1 or 2. 7.1.2. Install the safety seat in a forward-facing position, in a car equipped with 3-point seat belts. 7.1.3. First, pull the vehicle’ s seat belts as much as possible. 7.1.4.
  • Seite 36: Maintenance Instruction

    8. Maintenance instruction 8.1. Cover removal 8.1.1. Remove the 5-point safety harness. 8.1.2. After that all parts of the cover can be easily removed. 8.2. Cleaning the cover Use only natural detergents and warm water (below 30°C). Do not machine wash, tumble dry or iron the cover. 8.3.
  • Seite 37 9.What should be done after the accident? If the collision occurred at the speed greater than 10 km/ h, ensure that the safety seat has no mechanical damage. If it doesn’t work properly, stop using it so as not to put your child at risk.
  • Seite 38 WWW.LIONELO.COM...
  • Seite 39 Information Diese Rückhalteeinrichtung für Kinder wurde zur Kate- gorie „universal“ eingestuft. Das Gerät erhielt eine Homologation gemäß der Regelung Nr. 44, Änderungs- serie 04, für die allgemeine Verwendung in Fahrze- ugen und passt in die meisten Fahrzeugsitze im Auto. Ein korrekter Einbau der Einrichtung kann erwar- tet werden, wenn der Fahrzeughersteller im Fahrze- u g h a n d b u c h e r k l ä...
  • Seite 40 Einleitung. Sehr geehrte Kunden! Wir bedanken uns für Ihr Vertrauen und Auswahl der Marke Lionelo. Unsere Kindersitze werden mit höchster Sorgfalt herg- estellt, um Ihrem Kind eine Komfortreise und vor allem die Sicherheit zu gewähren. Dank den hochwertigen Material- ien und innovativen technologischen Lösungen geben wir zu Ihren Händen ein Produkt über, das perfekt für den tägli-...
  • Seite 41 1. Wichtige Informationen Wir bitten, die Bedienungsanleitung vor dem Gebrauch des Kinder- sitzes sorgfältig durchzulesen. Bei einem Unsachgemäßen Gebrauch des Sitzes kann das Leben des Kindes gefährden werden. Benutzen Sie Ihren Kinderautositz nicht auf ACHTUNG: einem Sitz, der mit Frontairbag ausgestattet wird. 2.
  • Seite 42: Sicherheitshinweise

    • Richtige Montage des Kindersitzes Falsche Montage des Kindersitzes Der Kinderautositz soll nicht auf einem Sitz benutzt werden, der mit Airbag ausgestattet wird. Die Montage des Kindersitzes ist möglich, wenn der mit- tlere Sitz mit einem 5-Punkt-Gurtsystem ausgestattet wird. 3. Sicherheitshinweise •...
  • Seite 43 • Der Kindersitz darf in den Fahrzeugen montiert werden, die eine Homologation nach der Regelung ONZ/EKG Nr. 16 oder nach den anderen entsprechenden Vorschriften erhielten. • Harte Teile und Kunststoff-Elemente der Rückhalteeinrich- tung für die Kinder soll auf diese Weise platziert und eingebaut werden, dass sie bei normalem Gebrauch des Fahrzeuges nicht unter einem beweglichen Sitz oder in der Fahrzeugtür eingeklem- mt werden können.
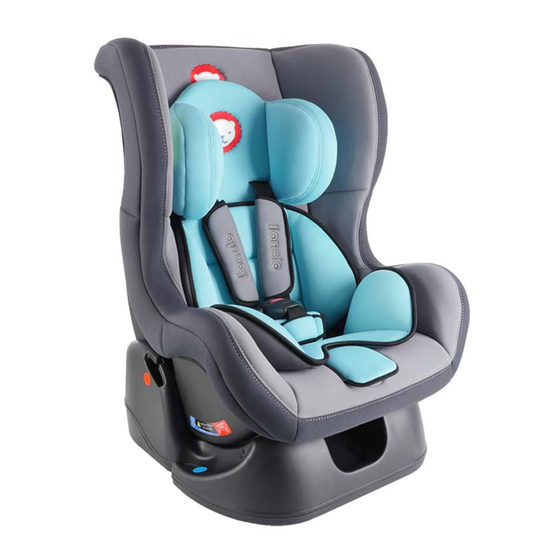
  • Seite 44 4. Set: Stütze Kopfstütze Gurtschoner Sicherheitsgurte Unterlage Gurtverschluss Verschlussunterlage Sitz verstellbare Basis Regulation der Sicherheitsgurte Gurtführung springs Klettergurt Verbindungsstelle verstellbare Bas Sicherheitsgurte...
  • Seite 45: Verwendung Des Sets

    5. Verwendung des Sets 5.1 Verwendung von Regulation der Sicherheitsgurte, Gurtspannung und Gurtlockerung 5.1.1 Standardgemäß wird der Klettergurt immer gesper- rt, wie auf der Abbildung 5.01 dargestellt. In dieser Posi- tion können die Gurte immer gespannt werden, um sie an die Größe des Kindes anzupassen.
  • Seite 46 Abbildung 5.03 Poc gnij pasy Pull shoulder Abbildung 5.04 naramienne w dó straps down Press the adjustment button 5.2 Verbindung der Gurtträger 5.2.1 Befestigen Sie die Gurtträger an dem Verbind- ungsstück gemäß folgenden Abbildungen ( Abbildung 5.05 ) 5.2.2 Platzieren Sie den Klettergurt im Verbindungsstück der Gurtträger (Abbildung 5.06) Abbildung 5.05...
  • Seite 47 5.3 Abheften vom Regulationsgurt in Klettergurt 5.3.1 Stecken Sie den Trägergurt in Klettergurt ein ( Abbildung 5.07 ). 5.3.2 Legen Sie den Ring durch die Öffnung, die sich in der Vorderseite des Sitzes befindet ( Abbildung 5.08 ). Dann ziehen Sie die Schultergurte nach oben so, dass der Klettergurt von Unterseite des Sitzes blockiert.
  • Seite 48 5.4 Sicherheitsverschluss 5.4.1 Um die Schnallen in Sicherheitsverschluss abzuheften, sollen sie zuerst miteinander verbunden werden (Abbildung 5.11). Dann sollen Sie die verbundenen Schallen nach oben, in Sicherheitss- chloss einstecken (Abbildung 5.11). Eine richtige Verriegelung der Schnalle im Schloss soll mit einem Klick beenden. 5.4.2 Um die Schnallen aus dem Sicherheitsschloss herauszune- hmen, sollen Sie eine rote Taste an dem Schlossgehäuse drücken (Abbildung 5.12).
  • Seite 49 5.6 Einstellung der Höhe von Schultergurten 5.6.1 Die Höhe der Schultergurte darf nicht zu hoch oder zu niedrig sein (Abbildung 5.13) Za nisko Za wysoko zu niedrig zu hoch korrekt 5.7 Einstellung des Sitzwinkels Der Kindersitz besitzt 3 Möglichkeiten der Einstellung vom Sitzwinkel. 5.7.1 Um den Winkel des Kindersitzes zu ändern, legen Sie die Hand unter Sitz des Kindersitzes, drücken und halten Sie die Block- ade.
  • Seite 50 5.7.5 Wenn der Sitz des Kindersitzes gegenüber keiner von Pfeilen eingestellt wird, bedeutet das, dass er falsch montiert wurde, was für die Gesundheit des Kindes gefährlich sein kann. Die Einstellung des Kindersitzes soll unverzüglich korri- giert werden. Abbildung Ilustracja 5.14 Abbildung Ilustracja 5.15 Abbildung...
  • Seite 51: Verwendung Des Kindersitzes Für Die Altersgruppe

    6. Verwendung des Kindersitzes für die Altersgruppe 0+ Der Kindersitz muss entgegen der Fahrtrichtung montiert werden. Die Rücklehne muss in 3. Position – blaue Pfeile - eingestellt werden. 6.1. Befestigung des Kindersitzes im Fahrzeug. Der Kindersitz muss in der 3. Position – blaue Pfeile - 6.1.1.
  • Seite 52 7. Verwendung des Kindersitzes für die Altersgruppe I Bei der Verwendung des Kindersitzes für die Altersgruppe I muss er in Fahrtrichtung montiert werden, die Rücklehne soll in der Position 1 oder 2 – rote Pfeile – eingestellt werden. 7.1. Befestigung des Kindersitzes im Fahrzeug Abbildung Ilustracja 7.02 Ilustracja 7.01...
  • Seite 53 7.1.1. Stellen Sie die Rücklehne des Kindersitzes in der 1 oder 2 Posi- tion ein. 7.1.2. Montieren Sie den Kindersitz im Auto mit 3-Punkt-Gurtsystem, in Fahrtrichtung. 7.1.3. Um den Kindersitz zu montieren, sollen die Gurte maximal gezo- gen werden. 7.1.4. Die Becken- und Schultergurt soll durch den Kindersitz gezogen werden (Abbildung 7.01, 7.02).
  • Seite 54: Pflegeanleitung Des Kindersitzes

    8. Pflegeanleitung des Kindersitzes 8.1. Abziehen des Bezuges aus dem Kindersitz 8.1.1. Demontieren Sie das 5-Punkt-Gurtsystem. 8.1.2.Dank dieser Tätigkeit können Sie den Bezug sicher herausnehmen. 8.2. Reinigung des Bezuges Zum Waschen benutzen Sie nur die neutralen Reinigungsmittel und warmes Wasser (unter 30°C). Das Material soll nicht in der Waschmaschine gewaschen, in einem Trockner getrocknet und gebügelt werden.
  • Seite 55: Welche Maßnahmen Sollen Nach Einem Unfall Getroffen

    9. Welche Maßnahmen sollen nach einem Unfall getroffen Nach einer Kollision mit der Geschwindigkeit über 10 km / h, soll genau geprüft werden, ob der Kindersitz keine mechanis- chen Beschädigungen hat. Wenn der Kindersitz nicht richtig funktionieren wird, soll er für die Sicherheit des Kindes nicht weiter benutz werden.
  • Seite 56 BrandLine Group Sp. z o. o. ul.Dziadoszańska 10 61-248 Poznań www.lionelo.com WARRANTY CARD KARTA GWARANCYJNA Model: ………………………….. SN: …………………………..May be sold in: BE CZ DK DE EE IE EL ES FR HR IT LV LT HU MT NL AT PL PT RO SI SK FI SE UK...
  • Seite 57: Warranty Conditions

    Warranty conditions: 1. The Lionelo brand with its registered office at Dziadoszańska 10, 61-248 Poznań, Poland guarantees that the equipment is operational in accordance with the technical-operating conditions described in the manual. 2. The warranty is granted for a 60 months period from the date of sale.
  • Seite 58 12. The warranty does not cover: natural wear of the product relat- ed to its normal operation, damage resulted from improper usage or non-compliance of the instructions described in the manual, tears or cracks caused by the Customer, fading of fabric resulting from pro- longed exposure to sunlight or washing the product or its parts in the wrong temperature, mechanical, electrical, thermal and intentional damages and defects caused by them, as well as damage caused by...
  • Seite 59: Warunki Gwarancji

    Warunki gwarancji: 1. Marka Lionelo z siedzibą w Poznaniu (61-248) przy ul. Dziado- szańskiej 10 gwarantuje sprawne działanie produktu zgodnie z warunk- ami techniczno-eksploatacyjnymi opisanymi w instrukcji obsługi. 2. Gwarancja jest udzielana na okres 60 miesięcy, licząc od daty sprzedaży. W przypadku zakupu produktu przez firmę (faktura VAT) gwarancja udzielana jest na okres 12 miesięcy.
  • Seite 60 12. Gwarancja będzie respektowana jedynie w przypadku dołączenia do reklamowanego urządzenia opisu uszkodzenia, wszystkich akce- soriów, które klient otrzymał podczas kupna urządzenia oraz dowodu zakupu zawierającego datę sprzedaży. 13. Gwarancją nie są objęte: naturalne zużycie związane z eksploatac- ją, uszkodzenia powstałe w wyniku niewłaściwego i niezgodnego z in- strukcją...
  • Seite 61: Garantiebedingungen

    Garantiebedingungen: 1. Die Marke Lionelo mit Sitz in Poznań (61-248), ul. Dziadoszańska 10 garantiert reibungsloses Funktionieren der Ware gemäß den technisch-betrieblichen Bedi- ngungen, die in der Betriebsanleitung beschrieben werden. 2. Die Garantie wird für 60 Monate ab dem Kaufdatum gewährt. Beim Einkauf der Ware durch eine Firma (Rechnung mit ausgewiesener MwSt.) wird die Garantie...
  • Seite 62 13. Die Garantie erstreckt sich nicht auf: natürliche, mit dem Gebrauch der Ware verbundene Abnutzung, Beschädigungen, die infolge einer missbräuchlichen oder unsachgemäßen Verwendung entstanden, Beschädigungen oder die durch Verschulden des Kunden verursachten Zerreißungen, Verblassen der Gewebe, die infolge der längeren Sonneneinstrahlung entstand, falsche Waschtempera- tur, mechanische, elektronische, thermische Beschädigungen, Wirkung der Flüs- sigkeiten, absichtliche Beschädigungen und Defekte, die sie verursachten und die willkürlichen Änderungen.
  • Seite 63 Lionelo Service – Support List of Authorized Service Centers: Lista autoryzowanych centrów serwisowych: lionelo.com/en/service Aktualizacja oprogramowania na www.overmax.eu w zakładce “Wsparcie techniczne”. Software updates are available on our website www.overmax.eu in “Technical support” tab. Dziękujemy za zakup urządzenia naszej marki!
  • Seite 64 WWW.LIONELO.COM...

Inhaltsverzeichnis