HP SD Pro 44-in Scanner Anleitung Zum Zusammenbau
Quicklinks
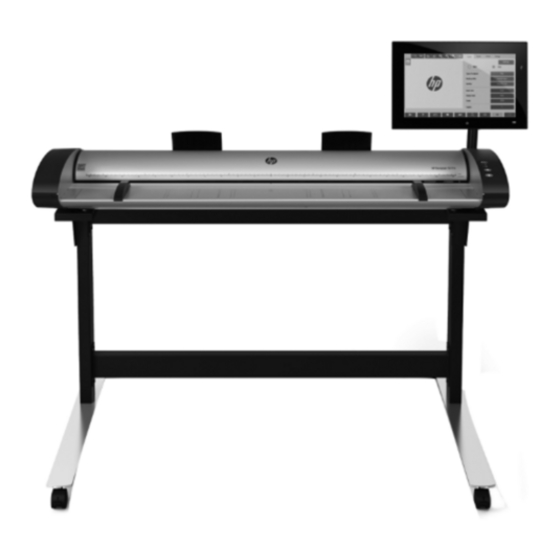
HP SD Pro
44-in Scanner
Assembly Instructions
EN
Instructions d'assemblage
FR
Anleitung zum
DE
Zusammenbau
Istruzioni per 'installazione
IT
Instrucciones de montaje
ES
Instruções de montagem
PT
© Copyright 2015 HP Development Company, L.P..
Camí de Can Graells 1-21 · 08174
Sant Cugat del Vallès
Barcelona · Spain
All rights reserved
Printed in xxx
Read these instructions carefully...
EN
What you will need for this procedure
• Because the scanner is heavy, you may need two people to unpack it. When more than one
person is needed, the symbol at the foot of this box is displayed.
During the stand assembly you will see some reference to the following symbol labels which
appear on some items, standing for left side, and right side.
L - Left side, R - Right side
The HP Designjet SD Pro Scanner -MFP is available in selected countries only. Please contact HP to check availability in your country.
Lisez attentivement les instructions suivantes...
FR
Conditions requises pour cette procédure
• Parce que le scanner est lourd, deux personnes sont requises pour le déballer. Lorsqu'au
moins deux personnes sont requises, le symbole ci-dessous est affiché.
Lors de l'assemblage du support, les symboles ci-dessous peuvent être affichés pour certains
éléments, indiquant le côté gauche et le côté droit.
L - Côté gauche, R - Côté droit
L'imprimante HP Designjet SD Pro Scanner - MFP n'est disponible que dans certains pays. Veuillez contacter HP pour vérifier sa
disponibilité dans votre pays.
Lesen Sie diese Anleitung sorgfältig durch...
DE
Voraussetzungen
• Der Scanner ist sehr schwer, daher werden zum Auspacken zwei Personen benötigt. Wenn
mehr als eine Person erforderlich ist, wird das unten in diesem Kasten abgebildete Symbol
angezeigt.
In der Anleitung zum Zusammenbau der Sockelbaugruppe wird auf folgende Symbole ver-
wiesen, die auf manchen Komponenten angebracht sind. Diese stehen für die linke und die
rechte Seite.
L - Linke Seite, R - Rechte Seite
Der HP Designjet SD Pro Scanner - MFP ist nur in ausgewählten Ländern verfügbar. Bitte nehmen Sie mit HP Kontakt auf, um Informa-
tionen zur Verfügbarkeit in Ihrem Land zu erhalten.
Leggere queste istruzioni attentamente...
IT
Cosa è necessario per questa procedura
• Lo scanner è pesante, pertanto potrebbero essere necessarie due persone per disimballarlo.
Se occorre più di una persona, appare il simbolo riportato alla base di questo riquadro.
Durante l'assemblaggio del piedistallo, si troveranno alcuni riferimenti alle seguenti etichette
che appaiono su alcuni componenti, a indicare il lato sinistro e il lato destro.
L - Lato sinistro, R - Lato destro
La stampante HP Designjet SD Pro Scanner - MFP è disponibile solo in determinati Paesi/regioni. Contattare HP per informazioni sulla
disponibilità nel proprio Paese/regione.
Lea atentamente estas instrucciones...
ES
Qué necesitará durante el proceso de instalación
• Debido al elevado peso del escáner, es posible que se necesiten dos personas para desem-
balarlo. Cuando se requiere la intervención de más de una persona, se muestra el símbolo en la
parte inferior de la caja.
Durante el montaje del soporte, verá referencias a las siguientes etiquetas de símbolos, que
aparecen en algunos elementos, y que indican el lado izquierdo y el derecho.
L - Lado izquierdo, R - Lado derecho
La impresora HP Designjet SD Pro Scanner - MFP solamente está disponible en determinados países/regiones. Póngase en contacto
con HP para comprobar la disponibilidad en su país/región.
Leia estas instruções com atenção...
PT
O que será necessário para este procedimento
• Como o scanner é pesado, podem ser necessárias duas pessoas para retirá-lo da embalagem.
Quando mais de uma pessoa for necessária, haverá um símbolo na parte inferior da caixa.
Durante a montagem da base, você verá algumas referências a este símbolo que aparecem á
direita e esquerda de alguns itens.
L - Lado esquerdo, R - Lado direito
A impressora HP Designjet SD Pro Scanner - MFP está disponível somente em países selecionados.
Entre em contato com a HP para verificar a disponibilidade em seu país
In case you have an stand alone scanner, you can skip this step.
EN
If this scanner is part of the HP Designjet SD Pro MFP, your
printer should already be assembled, working and connected to
the network before starting this procedure. For instructions on
how to assemble the printer, please refer to the assembly poster
included with the printer.
Si vous disposez d'un scanner autonome, vous pouvez ignorer
FR
cette étape. Si ce scanner fait partie de l'imprimante HP Design-
jet SD Pro MFP, celle-ci doit être assemblée, en état de marche
et connectée au réseau avant de débuter cette procédure. Pour
toute instruction sur l'assemblage de l'imprimante, reportez-
vous au poster d'assemblage que vous trouverez avec celle-ci.
Wenn Sie einen Standalone-Scanner haben, können Sie diesen
DE
Schritt überspringen. Wenn dieser Scanner Teil des HP Designjet
SD Pro MFP ist, sollte Ihr Drucker installiert, betriebsbereit und
an das Netzwerk angeschlossen sein, bevor Sie diesen Vorgang
starten. Die entsprechenden Informationen können Sie dem
Installations-poster entnehmen,das dem Drucker beiliegt.
Se si dispone di uno scanner indipendente, è possibile ignorare
IT
questo passaggio. Se lo scanner è incluso nel prodotto multifun-
zione HP Designjet SD Pro, prima di avviare questa procedura
è necessario che la stampante sia già assemblata, funzionante
e collegata alla rete. Per istruzioni su come assemblare la
stampante, fare riferimento al poster relativo all'assemblaggio
fornito con la stampante.
Puede omitir este paso si tiene un escáner independiente.
ES
Si este escáner forma parte de HP Designjet SD/HD Pro MFP, la
impresora debería estar montada, funcionando y conectada a
la red antes de iniciar este procedimiento. Para obtener instruc-
ciones sobre cómo montar la impresora, consulte el póster de
montaje que se incluye con la impresora.
Caso tenha um scanner independente, poderá ignorar esta
PT
etapa. Se o scanner fizer parte da HP Designjet SD Pro MFP, sua
impressora já deverá estar montada, operacional e conectada à
rede antes de iniciar este procedimento. Para obter instruções
sobre como montar a impressora, consulte o pôster de monta-
gem fornecido com a impressora.
The panel PC assembly can be mounted
EN
EN
on either the right or the left side of the
stand.
L'assemblage de l'écran tactile du PC du
FR
FR
panneau peut être monté sur le côté droit
ou gauche du socle.
DE
DE
Der Touchscreen der PC-Konsoleneinheit kann auf der linken
oder rechten Seite des Sockels angebracht werden.
Il gruppo schermo tattile del PC a pannello può essere montato
IT
IT
sul lato destro o sinistro del piedistallo.
El ensamblaje de la pantalla táctil del PC del panel se puede
ES
ES
montar en el lado derecho o izquierdo de la base.
A tela de toque do PC do painel pode ser montada do lado direito
PT
PT
ou esquerdo do suporte.

Verwandte Anleitungen für HP SD Pro 44-in Scanner


Inhaltszusammenfassung für HP SD Pro 44-in Scanner
- Seite 1 Puede omitir este paso si tiene un escáner independiente. Der HP Designjet SD Pro Scanner - MFP ist nur in ausgewählten Ländern verfügbar. Bitte nehmen Sie mit HP Kontakt auf, um Informa- Si este escáner forma parte de HP Designjet SD/HD Pro MFP, la Instruções de montagem...
-
Seite 2: Packungsinhalt
Box contents Assembly kit contents Description Quantity supplied Maintenance sheet Scanner Screw M5 x 16 (Torx T25) for stand feet Paper guides Return guides Screw M5 x 8 (Torx T25) for stand Microfiber cloth Documentation CD/DVD Special screw for scanner (Torx T20) Ethernet cable (3 m) Ethernet cable (5 m) Plastic washer... - Seite 3 Contenuto della scatola Contenuto del kit di montaggio Contenido della caja Contenido del kit di montaje Scatola Caja Descrizione Quantità Descripción Cantidad Foglio di manutenzione Hoja de mantenimiento Vite M5 × 16 (Torx T25) per piedi Tornillo M5 × 16 (Torx T25) para pie Scanner Escáner piedistallo...
- Seite 4 Fix the foot to the leg with 4 screws. Fix the other foot to the other leg with 4 screws. Make sure the wheels are locked. Attach the bottom cross bar to the legs using 4 screws. Make sure the holes for the cable clips are located at the back when the crossbar is mounted.
- Seite 5 M5×8 x 2 Attach the top cross bar to the legs using 4 screws. Slot the supports into the legs, and fix at the desired height At this point you must decide on which side you are going to fit the touch screen assembly. This can be fitted on the left or right Make sure the holes for the cable clips are located at the back with 2 screws in each leg.
- Seite 6 Now you need to decide the height adjustment position. Different heights are possible. The arm support bracket (item 18) is If you need to adjust the height to adopt the highest stand Lift the scanner into place locating the rubber feet in the necessary if the second intermediate or highest position is used.
- Seite 7 M5×20 x 4 M4×10 x 4 Fix with the four special screws. With the protective foam in place, put the panel PC face down Insert the DC adaptor cable and Ethernet cables into the The earth cable comes mounted to the panel PC arm. Use Plastic washers should be used when fixing the left-hand and attach the arm to the rear using four M4×4 screws.
- Seite 8 Important: If this scanner is part of the HP Designjet SD/ monitor arm is fitted. HD Pro MFP, your printer should already be assembled, working and connected to the network in order to connect the scanner to the printer and to slide it under the scanner.
- Seite 9 Clean the glass with a lint-free cloth and a mild, streak-free, You are now required to clean the scan area. To do so you will Lift the lid towards you to open it completely. From the front of the scanner, press down the lid while glass cleaner.
- Seite 10 Dry the glass fully using a separate clean, dry lint-free cloth Clean the white pressure rollers with a lint-free cloth and a Clean the transport rollers and surrounding area. Clean the upper precision rollers with a lint-free cloth and a like the one provided with the maintenance kit.
- Seite 11 Dry the white background plate, rollers, and surrounding Close the scanner cover and push down on the top to lock Insert one end of the y-cable into the DC adapter (under the Fit the cables into the clips. Then attach the clips to the area fully using a separate clean, dry lint-free cloth.
- Seite 12 IMAGE TO BE SENT BY CONTEX Switch on the scanner power switch at the rear. Connect the power cord to the y-connector, and into a Insert the network cables into the panel PC and insert the Press the power button below the screen of the panel PC. power outlet.
- Seite 13 You are now required to calibrate the scanner. For this you Note: When switching on the panel PC touch screen a ‘Please To start the maintenance procedure: The maintenance wizard will ask you to insert the will need the scanner maintenance sheet, found in the make sure the scanner is connected and turned on’...
- Seite 14 To add an HP Designjet printer to the printer list in your Next, you should check the TCP/IP settings in your touch scanner software, follow these steps: screen, and correct them if necessary. If you intend to scan 1: On the touch screen go to the setup tab.
- Seite 15 For any further information on how to use your scanner, see Keep these instructions the online help system available from your touch screen In order to perform routine maintenance (once a month) you will find it useful to refer again to the following sections: using the button.
- Seite 16 © Copyright 2015 HP Development Company, L.P. The information contained herein is subject to change without notice. The only warranties for HP products and services are set forth in the express warranty statements accompanying such products and services. Nothing herein should be construed as constituting an additional warranty.