Herunterladen Inhalt Inhalt Diese Seite drucken
Inhaltsverzeichnis

Werbung

Verfügbare Sprachen

Verfügbare Sprachen

ITALIAN
ENGLISH
GERMAN
GAGGIA ANIMA DELUXE
Manuale d'istruzione
Instruction manual
Bedienungsanleitung

Werbung

Inhaltsverzeichnis
loading

Inhaltszusammenfassung für Gaggia ANIMA DELUXE

  • Seite 1 ITALIAN ENGLISH GERMAN GAGGIA ANIMA DELUXE Manuale d’istruzione Instruction manual Bedienungsanleitung...
  • Seite 3 ENGLISH GAGGIA ANIMA DELUXE Instruction manual...
  • Seite 4: Inhaltsverzeichnis

    ........8 13.1 How to contact Gaggia....22 6.1.2 Brewing a product with one button .
  • Seite 5: Important Safeguards

    IMPORTANT SAFEGUARDS When using electrical appliances, basic safety precautions should always be followed, including the following: Read all instructions. Do not touch hot surfaces. Use handles or knobs. To protect against fire, electric shock and injury to persons do not immerse cord, plugs, or appliance in water or other liquid.
  • Seite 6 CAUTION This appliance is for household use only. Any servicing, other than cleaning and user maintenance, should be performed by an authorized service center. Do not immerse machine in water. To reduce the risk of fire or electric shock, do not disassemble the machine. There are no parts inside the machine serviceable by the user.
  • Seite 7: Introduction To The Manual

    Introduction to the manual Foreword Congratulations for your purchase of a Gaggia Anima Deluxe fully automatic coffee machine! This manual contains all necessary information to install, use, clean and descale your machine. In the “2. Product overview” chapter you will become familiar with the various buttons •...
  • Seite 8: Main Components

    Main components STAND-BY button Water tank seat Coffee bean hopper Pre-ground coffee compartment Removable water tank Main switch Power cord socket Coffee grounds drawer Drip tray Drip tray grill Coffee dispensing spout Steam/hot water dispensing spout Automatic milk frother Main removable parts Water tank lid Coffee bean hopper lid Pre-ground coffee...
  • Seite 9: Safety

    Do not make any modifications to the machine or its power cord. Only have repairs carried out by a service centre authorized by Gaggia to avoid a hazard. The machine should not be used by children younger than 8 years old.
  • Seite 10 The machine can be used by children of 8 years and upwards if they have previously been instructed on the correct use of the machine and made aware of the associated dangers or if they are supervised by an adult. Cleaning and maintenance should not be carried out by children unless they are more than 8 years old and supervised by an adult.
  • Seite 11: Preliminary Operations

    Preliminary operations Make sure to read the “3. Safety” chapter. Positioning To facilitate the use of the machine, it should be placed in an appropriate location that provides adequate space to operate. Working spaces 150 mm 221 mm 430 mm 150 mm 340 mm Unpacking and placement...
  • Seite 12: Activation And Deactivation

    Activation and deactivation Make sure to read the “3. Safety” chapter. Using the selection buttons Some function buttons can be used to navigate through functions / menus: The OK button is used to select / confirm / stop the function. The ESC button is used to return to the main menu, one level at a time. The UP button is used to move upwards.
  • Seite 13: Adjustments

    > Follow the instructions in the “6.4.1 Hot water dispensing” chapter and dispense water until the ‘Water tank empty’ symbol is displayed. Empty the container. > Follow the instructions in the “4.2 Water tank filling” chapter and fill the water tank up to the MAX level. The machine is ready for brewing. Adjustments The machine is supplied with standard brewing default settings.
  • Seite 14: Brewing Temperature Adjustment

    5.3.4 Brewing temperature adjustment Refer to the “8.2 Changing the default settings” chapter to change the coffee temperature default. 5.3.5 Coffee dispensing spout adjustment The height of the coffee dispensing spout can be adjusted to adapt to the size of the cup one wishes to use.
  • Seite 15: Brewing A Product With One Button

    > Press the AROMA STRENGTH button repeatedly, to select the pre-ground coffee brewing function. Proceed by following the further instructions on the preparation of the desired specialty. 6.1.2 Brewing a product with one button > Place one cup under the coffee dispensing spout. One espresso/one espresso lungo >...
  • Seite 16: Milk- And Coffee-Based Preparations

    Inserting phase If necessary, insert the suction tube in the milk frother. > > Insert the milk frother in the steam wand seat, until it locks in place. Burning hazard! If the machine has been recently used the steam wand could be hot. The rubber grip on the steam wand must be properly inserted, without going beyond its seat, otherwise the milk frother does not operate correctly and no milk is sucked.
  • Seite 17: Hot Water-Based Preparations

    Hot water-based preparations 6.4.1 Hot water dispensing > Check that the automatic milk frother is not installed. > Place a container under the steam wand. Burning hazard! At the beginning of each product brewing, hot water or steam sprays might be present. The steam wand may reach high temperatures. Never touch the steam wand with bare hands.
  • Seite 18: Weekly Cleaning Of The Machine

    7.1.2 Weekly cleaning of the machine Follow the step-by-step instructions in the “7.1.1 Machine cleaning when needed” > chapter until you reach the seat of the drip tray. Now clean the drip tray seat. > Place the components back. Brew group cleaning 7.2.1 Weekly brew group cleaning cycle The brew group must be cleaned at least once a week.
  • Seite 19: Monthly Lubrication Of The Brew Group

    For further details please refer to the “10.1 Maintenance products” chapter. Degreasing tablets are recommended only for cleaning purposes, they have no descaling properties. For descaling, use the Gaggia descaling product and follow the procedure described in the “7.5 Descaling cycle” chapter. >...
  • Seite 20: Containers Cleaning

    > Insert the suction tube into a container filled with fresh water. > In the monthly cleaning phase, during the first cleaning cycle add the Gaggia milk circuit cleaner to 1/2 l of lukewarm water and wait for it to dissolve completely. > Place a large container (1.5 l) under the milk frother dispensing spout.
  • Seite 21: Descaling Cycle

    Do not drink the descaling solution or the products resulting from the descaling cycle. Use exclusively the Gaggia descaling solution. The use of other products may damage the machine and leave residue in the water. The Gaggia descaling solution is sold separately. For further details please refer to the “10.1 Maintenance products” chapter.
  • Seite 22: Interruption Of The Descaling Cycle

    Let the water be discharged until the tank is empty. CALC CLEAN > Remove the water tank and rinse it. > Fill it with fresh water to the MAX level and return it to its proper place. > Remove and empty the container. Repeat the entire sequence of operations described in the “Preparation phase”...
  • Seite 23: Changing The Default Settings

    If the following information is insufficient to solve the problem, please refer to the FAQ page of the www.gaggia.com website, or contact the Gaggia hotline. Contacts are included in the warranty booklet supplied separately or can be found at www.
  • Seite 24: Warnings Signals Summary

    Display Description Action Follow the relevant instructions in the “4.2 Water Water tank empty. tank filling” chapter. Close the coffee bean hopper lid on the machine A beverage has been selected with within 30 seconds to complete brewing. the coffee been hopper lid open. (Only for 120V machines) Follow the relevant instructions in the “9.3 The The machine is out of service.
  • Seite 25: Troubleshooting Table

    > Try 2 or 3 times. If the machine does not start, contact the Gaggia hotline and mention the error code shown on the display. Contacts are included in the warranty booklet supplied separately or can be found at www.gaggia.com.
  • Seite 26: 10. Maintenance Accessories And Products

    10.1 Maintenance products To clean and descale the machine use exclusively Gaggia maintenance products. Should it prove difficult to find the machine maintenance products, please contact the nearest Gaggia hotline in your country. Contacts are included in the warranty booklet supplied separately or can be found at www.gaggia.com. MAINTENANCE PRODUCTS Product •...
  • Seite 27: Intenza+ Replacement

    Letter on the filter Water hardness Test strip squares soft water 1 - 2 hard water (standard) very hard water > Insert the INTENZA+ water filter in the empty water tank. > Push it to the lowest possible point. > Fill the water tank with fresh water and restore it to the machine. Dispense all the water contained in the tank as detailed in the “6.4.1 Hot water dispensing”...
  • Seite 28: 12. Transportation And Disposal

    Service We wish to make sure that you are enjoying your machine. If you need help or assistance, please visit the Gaggia website at www.gaggia.com or contact the nearest Gaggia hotline in your Country. 13.1 How to contact Gaggia Contacts are included in the warranty booklet supplied separately or can be found at www.gaggia.com.
  • Seite 30 GAGGIA S.p.a. reserves the right to carry out all modifications which might be considered necessary. GAGGIA S.p.A. Sede Legale/Registered Office Piazza Eleonora Duse, 2 20122 MILANO Sede Amministrativa/Administrative Office Via Torretta, 240 40041 Gaggio Montano (BO) +39 0534 771111 www.gaggia.com...
  • Seite 31 ITALIANO GAGGIA ANIMA DELUXE Manuale d’istruzione...
  • Seite 32 6.1.2 Erogazione di una specialità con un pulsante 9 13.1 Come contattare Gaggia ....22 6.1.3 Erogazione di due specialità con un pulsante (possibile solo con caffè in grani) ..9 6.1.4...
  • Seite 33: Introduzione Al Manuale

    Funzione di risparmio energetico La macchina per caffè espresso superautomatica Gaggia è progettata per il risparmio energetico, come dimostrato dall’etichetta energetica di Classe A. Dopo un tempo di inattività...
  • Seite 34: Componenti Principali

    Componenti principali Tasto STAND-BY Vano serbatoio acqua Serbatoio caffè in grani Serbatoio caffè pre-macinato Serbatoio acqua estraibile Interruttore generale ACCESO SPENTO Alloggiamento spinotto alimentazione Cassetto raccoglifondi Vasca raccogligocce Griglia poggiatazze Erogatore caffè Erogatore acqua calda/vapore Montalatte automatico Parti mobili principali Sportello serbatoio acqua Sportello serbatoio caffè...
  • Seite 35: Sicurezza

    Non alterare né modificare in alcun modo la macchina o il cavo di alimentazione. Tutte le riparazioni devono essere eseguite da un centro assistenza autorizzato da Gaggia per evitare qualsiasi pericolo. La macchina non è destinata all’uso da parte di bambini con età inferiore a 8 anni.
  • Seite 36 La macchina può essere utilizzata da bambini di 8 anni di età (e superiore) se precedentemente istruiti riguardo ad un utilizzo corretto della macchina e coscienti dei relativi pericoli o sotto la supervisione di un adulto. Pulizia e manutenzione non devono essere eseguite da bambini, a meno che non abbiano più...
  • Seite 37: Operazioni Preliminari

    Operazioni preliminari Si raccomanda di aver letto il capitolo “3. Sicurezza”. Collocazione Per agevolare l’utilizzo della macchina si consiglia di posizionarla in un ambiente adeguato tenendo conto degli spazi di manovra. Spazi di rispetto 150 mm 221 mm 430 mm 150 mm 340 mm Disimballo e Posizionamento...
  • Seite 38: Attivazione E Disattivazione

    Attivazione e disattivazione Si raccomanda di aver letto il capitolo “3. Sicurezza”. Uso dei tasti di selezione Alcuni tasti funzione sono utili alla navigazione tra funzioni / menu: Il tasto OK si usa per selezionare / confermare / terminare la funzione. Il tasto ESC si usa per tornare al menu principale, un livello alla volta.
  • Seite 39: Regolazioni

    > Seguire le istruzioni indicate al capitolo “6.4.1 Erogazione acqua calda”, erogando acqua fino a visualizzare il simbolo ‘Serbatoio acqua vuoto’. Vuotare il contenitore. > Eseguire il capitolo “4.2 Riempimento del serbatoio dell’acqua”, riempiendo il serbatoio fino al livello MAX. La macchina è pronta per l’erogazione. Regolazioni La macchina viene fornita con impostazioni di erogazione standard. Per esaltare al meglio qualità...
  • Seite 40: Regolazione Temperatura Di Erogazione

    5.3.4 Regolazione temperatura di erogazione Consultare il capitolo “8.2 Come modificare le impostazioni di fabbrica” per modificare l’impostazione di temperatura caffè. 5.3.5 Regolazione erogatore caffè L’erogatore può essere regolato in altezza per meglio adattarsi alla dimensione delle tazze che si desidera utilizzare. >...
  • Seite 41: Erogazione Di Una Specialità Con Un Pulsante

    > Premere il tasto AROMA STRENGTH più volte, fino a selezionare la funzione di erogazione del caffè pre-macinato. Proseguire seguendo le istruzioni successive, relative all’erogazione della specialità desiderata. 6.1.2 Erogazione di una specialità con un pulsante > Posizionare una tazza sotto l’erogatore caffè. Un espresso/un espresso lungo >...
  • Seite 42: Preparazioni A Base Di Latte E Caffè

    Fase di inserimento Se necessario, inserire il tubo di aspirazione nel montalatte. > > Inserire il montalatte nel tubo vapore fino allo scatto in posizione. Pericolo di scottature! Se la macchina è stata utilizzata di recente il tubo vapore potrebbe essere caldo. La protezione in gomma deve essere inserita correttamente, non oltre la propria sede, altrimenti il montalatte non funzionerà...
  • Seite 43: Preparazioni A Base Di Acqua Calda

    Preparazioni a base di acqua calda 6.4.1 Erogazione acqua calda > Verificare che il montalatte automatico non sia installato. > Posizionare un contenitore sotto il tubo vapore. Pericolo di scottature! All’inizio dell’erogazione possono verificarsi brevi spruzzi di acqua calda o vapore. Il tubo vapore può raggiungere temperature elevate. Non toccarlo a mani nude.
  • Seite 44: Pulizia Settimanale Della Macchina

    7.1.2 Pulizia settimanale della macchina Seguire passo dopo passo le istruzioni al capitolo “7.1.1 Pulizia della macchina al > bisogno” fino a raggiungere la sede della vasca raccogligocce. A questo punto pulire la sede della vasca raccogligocce. > Riposizionare i componenti. Pulizia del gruppo caffè 7.2.1 Ciclo di pulizia settimanale del gruppo caffè Il gruppo caffè...
  • Seite 45: Lubrificazione Mensile Del Gruppo Caffè (Un Ciclo Di Pulizia Con Uso Di Lubrificante)

    “10.1 Prodotti per la manutenzione”. Le pastiglie sgrassanti sono indicate esclusivamente per la pulizia e non hanno funzione decalcificante. Per la decalcificazione, utilizzare il decalcificante Gaggia seguendo la procedura descritta nel capitolo “7.5 Ciclo di decalcificazione”.
  • Seite 46: Pulizia Dei Contenitori

    Inserire il tubo di aspirazione in un contenitore pieno di acqua fresca. > In fase di pulizia mensile, durante il primo ciclo di pulizia, addizionare il detergente Gaggia per pulizia circuito del latte a 1/2 l di acqua tiepida, ed attendere che si sciolga completamente. >...
  • Seite 47: Ciclo Di Decalcificazione

    Non estrarre il gruppo caffè durante il processo di decalcificazione. Non bere la soluzione decalcificante ed i prodotti erogati dal ciclo. Usare esclusivamente la soluzione decalcificante Gaggia. L’utilizzo di altri prodotti può causare danni alla macchina e lasciare residui nell’acqua. La soluzione decalcificante Gaggia è in vendita separatamente. Per maggiori dettagli consultare il capitolo “10.1 Prodotti per la manutenzione”. Fase di preparazione > Premere i tasti laterali.
  • Seite 48: Interruzione Del Ciclo Di Decalcificazione

    Lasciar proseguire l’erogazione finché il serbatoio dell’acqua si svuota. CALC CLEAN > Estrarre il serbatoio dell’acqua e risciacquarlo. > Riempirlo con acqua fresca fino al livello MAX e reinserirlo nella macchina. > Rimuovere e vuotare il contenitore. Ripetere per intero la sequenza di operazioni descritta nella precedente “Fase di preparazione” e proseguire con la successiva “Fase di risciacquo”. Fase di risciacquo Premere il tasto OK per avviare il ciclo di risciacquo.
  • Seite 49: Come Modificare Le Impostazioni Di Fabbrica

    Questo capitolo riassume i problemi più comuni che potrebbero interessare la Vostra macchina. Se le informazioni riportate di seguito non Vi aiutano a risolvere il problema, consultate la pagina FAQ al sito www.gaggia.com, oppure contattate la hotline Gaggia. I contatti sono indicati nel libretto di garanzia fornito separatamente o all’indirizzo www.gaggia.com.
  • Seite 50: Riepilogo Segnali Di Avviso

    Display Descrizione Azione Seguire le istruzioni indicate al capitolo “4.2 Serbatoio dell’acqua vuoto. Riempimento del serbatoio dell’acqua”. Seguire le istruzioni indicate al capitolo “9.3 La La macchina non funziona. macchina non funziona”. Riepilogo segnali di avviso Display Descrizione Azione Macchina pronta per l’erogazione Seguire le istruzioni indicate al capitolo “4.3 dei prodotti: contenitore con caffè...
  • Seite 51: Tabella Di Risoluzione Eventuali Problemi

    Se la macchina non si avvia, contattare la hotline Gaggia e comunicare il codice di errore indicato sul display. I contatti sono indicati nel libretto di garanzia fornito separatamente o all’indirizzo www.gaggia.com. Tabella di risoluzione eventuali problemi Causa Azione Comportamento La macchina non si accende.
  • Seite 52: Accessori E Prodotti Per La

    10.1 Prodotti per la manutenzione Per la pulizia e la decalcificazione usare solo i prodotti per la manutenzione Gaggia. In caso di difficoltà nel reperire i prodotti per la manutenzione della macchina, contattare la hotline Gaggia del Vostro Paese. I contatti sono indicati nel libretto di garanzia fornito separatamente o all’indirizzo www.gaggia.com. PRODOTTI PER MANUTENZIONE Prodotto •...
  • Seite 53: Fase Di Impostazione Macchina In Installazione

    Lettera sul filtrino Durezza acqua Quadrati sul provino acqua dolce 1 - 2 acqua dura (standard) acqua molto dura Inserire il filtro acqua INTENZA+ nel serbatoio d’acqua vuoto. > > Spingerlo fino al punto più basso possibile. > Riempire il serbatoio dell’acqua con acqua fresca e reinserirlo nella macchina. Erogare tutta l’acqua contenuta nel serbatoio come spiegato al capitolo “6.4.1 Erogazione acqua calda”.
  • Seite 54: 12. Trasporto E Smaltimento

    Assistenza Vogliamo assicurarci che siate soddisfatti della Vostra macchina. Se avete bisogno di supporto o assistenza, visitate il sito web di Gaggia www.gaggia.com oppure contattate la hotline Gaggia del Vostro Paese. 13.1 Come contattare Gaggia I contatti sono indicati nel libretto di garanzia fornito separatamente o all’indirizzo...
  • Seite 56 GAGGIA S.p.a. si riserva il diritto di apportare tutte le modifiche ritenute necessarie. GAGGIA S.p.A. Sede Legale/Registered Office Piazza Eleonora Duse, 2 20122 MILANO Sede Amministrativa/Administrative Office Via Torretta, 240 40041 Gaggio Montano (BO) +39 0534 771111 www.gaggia.com...
  • Seite 57 DEUTSCH GAGGIA ANIMA DELUXE Bedienungsanleitung...
  • Seite 58 13.1 Kontakt Gaggia......22 während der Zubereitung ....9 Milchaufschäumer .
  • Seite 59: Einführung

    Einführung Vorwort Herzlichen Glückwunsch zu Ihrem Kauf eines Kaffeevollautomaten Gaggia Anima Deluxe! In dieser Bedienungsanleitung finden Sie alle erforderlichen Informationen für die Inbetriebnahme, den Gebrauch, die Reinigung und Entkalkung Ihres Geräts. Im Kapitel “2. Vollständige Ansicht des Produktes” können Sie sich mit den verschiedenen Tasten •...
  • Seite 60: Hauptbestandteile

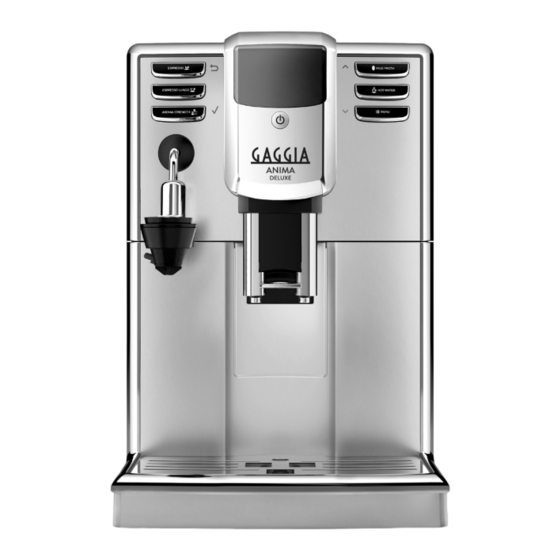
    Hauptbestandteile Taste STAND-BY Aufnahme Wassertank Kaffeebohnenbehälter Fach für vorgemahlenen Kaffee Abnehmbarer Wassertank Hauptschalter Steckdose Netzkabel Kaffeesatzbehälter Abtropfschale Tassenabstellrost Kaffeeauslauf Dampf-/Heißwasserdüse Automatischer Milchaufschäumer Abnehmbare Teile Deckel des Wassertanks Deckel Kaffeebohnenbehälter Deckel Fach für vorgemahlenen Kaffee Servicetür Kaffeeauffangbehälter Brühgruppe Kaffeeauslauf Abtropfschale Kaffeesatzbehälter Anzeige ‘Abtropfschale voll’...
  • Seite 61: Sicherheit

    Gerät selbst defekt oder beschädigt sind. Das Gerät oder das Netzkabel dürfen keinesfalls modifiziert werden. Alle Reparaturen müssen durch ein von Gaggia autorisiertes Kundendienstzentrum ausgeführt werden, um jede Gefahr zu vermeiden. Das Gerät darf nicht von Kindern unter 8 Jahren benutzt werden.
  • Seite 62 Das Gerät darf von Kindern ab 8 Jahren benutzt werden, wenn diese zuvor in den korrekten Betrieb des Geräts eingewiesen wurden und sich der entsprechenden Gefahren bewusst sind oder durch einen Erwachsenen überwacht werden. Die Reinigung und die Pflege dürfen nicht durch Kinder unter 8 Jahren und ohne das Beisein eines Erwachsenen ausgeführt werden.
  • Seite 63: Vorbereitung

    Vorbereitung Das Kapitel “3. Sicherheit” sollte gelesen werden. Aufstellung Um die Bedienung des Geräts zu erleichtern, sollte dieses an einem geeigneten Standort aufgestellt werden, der ausreichenden Freiraum für die Bedienung gewährleistet. Arbeitsbereiche 150 mm 221 mm 430 mm 150 mm 340 mm Herausnahme aus der Verpackung und Aufstellung Die Original-Verpackung wurde für den Schutz des Geräts während des Versandes entwickelt...
  • Seite 64: Ein- Und Ausschalten

    Ein- und Ausschalten Das Kapitel “3. Sicherheit” sollte gelesen werden. Verwendung der Anwahltasten Einige Funktionstasten können für die Navigation in den Funktionen/Menüs benutzt werden: Die Taste OK wird für die Anwahl/Bestätigung/Ausschaltung der Funktion benutzt. Die Taste ESC dient der Rückkehr zum Hauptmenü um jeweils eine Stufe pro Druck. Die Taste UP dient der Bewegung nach oben.
  • Seite 65: Einstellungen

    > Die Hinweise im Kapitel “6.4.1 Heißwasserausgabe” beachten und Wasser ausgeben, bis das Symbol ‚Wassertank leer‘ angezeigt wird. Den Behälter leeren. > Die Hinweise im Kapitel “4.2 Füllung des Wassertanks” beachten und den Wassertank bis zum Füllstand MAX füllen. Das Gerät ist nun ausgabebereit. Einstellungen Das Gerät wird mit Default-Einstellung für die Ausgabe geliefert.
  • Seite 66: Einstellung Der Brühtemperatur

    5.3.4 Einstellung der Brühtemperatur Um die Default-Kaffeetemperatur zu ändern, ist auf Kapitel “8.2 Änderung der Default- Einstellungen” Bezug zu nehmen. 5.3.5 Einstellung Kaffeeauslauf Der Kaffeeauslauf kann in der Höhe eingestellt werden, um ihn an die Abmessungen der verwendeten Tassen anzupassen. >...
  • Seite 67: Ausgabe Eines Produktes Mit Einer Taste

    > Die Taste AROMA STRENGTH mehrmals drücken, um die Funktion für die Ausgabe von vorgemahlenem Kaffee anzuwählen. Folgen Sie dann den weiteren Hinweisen für die Zubereitung der gewünschten Kaffeespezialität. 6.1.2 Ausgabe eines Produktes mit einer Taste > Eine Tasse unter den Kaffeeauslauf stellen. Ein Espresso/ein großer Espresso >...
  • Seite 68: Kaffee

    Einsetzen > Soweit erforderlich, den Ansaugschlauch in den Milchaufschäumer einstecken. > Den Milchaufschäumer in die Aufnahme der Dampfdüse einsetzen, bis er in der korrekten Position einrastet. Verbrennungsgefahr! Wurde das Gerät kürzlich benutzt, kann die Dampfdüse hohe Temperaturen aufweisen. Den Gummischutz auf der Dampfdüse nicht über die markierte Aufnahme hinausschieben. Im diesem Falle besteht die Möglichkeit, dass der Milchaufschäumer nicht korrekt funktioniert und keine Milch angesaugt wird.
  • Seite 69: Getränke Mit Heißwasser

    Getränke mit Heißwasser 6.4.1 Heißwasserausgabe > Sicherstellen, dass der automatische Milchaufschäumer nicht installiert ist. > Einen Behälter unter die Dampfdüse stellen. Verbrennungsgefahr! Beim Start der Produktausgabe können heiße Wasserspritzer oder Dampf austreten. Die Dampfdüse kann hohe Temperaturen erreichen. Die Dampfdüse keinesfalls direkt mit den Händen berühren.
  • Seite 70: Wöchentliche Reinigung Des Geräts

    7.1.2 Wöchentliche Reinigung des Geräts Hierfür sind die im Kapitel “7.1.1 Reinigung des Geräts bei Bedarf ” beschriebenen Schritte > auszuführen, bis die Aufnahme der Abtropfschale erreicht wird. Dann die Aufnahme der Abtropfschale reinigen. > Die Teile wieder einsetzen. Reinigung der Brühgruppe 7.2.1 Wöchentlicher Reinigungszyklus der Brühgruppe Die Brühgruppe muss mindestens einmal pro Woche gereinigt werden.
  • Seite 71: Monatliche Schmierung Der Brühgruppe

    Details werden im Kapitel “10.1 Pflege-Produkte” aufgeführt. Die Kaffeefettlöser-Tabletten sind ausschließlich für die Reinigung bestimmt, sie haben keinerlei entkalkende Funktion. Für das Entkalken sollte der Entkalker Gaggia verwendet werden. Dabei ist der im Kapitel “7.5. Entkalkungszyklus” beschriebene Vorgang auszuführen. >...
  • Seite 72: Reinigung Der Behälter

    Der Milchaufschäumer muss installiert sein. > Den Ansaugschlauch in einen mit frischem Wasser gefüllten Behälter einstecken. > Bei der monatlichen Reinigung und beim ersten Reinigungszyklus den Gaggia Reiniger Milchsystem in einen 1/2 l lauwarmes Wasser geben und warten, bis dieser sich vollständig auflöst. > Einen großen Behälter (1,5 l) unter die Auslauftülle des Milchaufschäumers stellen.
  • Seite 73: Entkalkungszyklus

    Es sollte ausschließlich das Entkalkungsmittel von Gaggia verwendet werden. Die Verwendung anderer Produkte kann zu Schäden am Gerät und zu Rückständen im Wasser führen. Das Entkalkungsmittel Gaggia ist separat erhältlich. Weitere Details werden im Kapitel “10.1 Pflege- Produkte” aufgeführt. Vorbereitung >...
  • Seite 74: Unterbrechung Des Entkalkungszyklus

    Das Wasser ausgeben, bis der Tank leer ist. CALC CLEAN > Den Wassertank abnehmen und ausspülen. > Bis zum Füllstand MAX mit frischem Wasser füllen und wieder ins Gerät einsetzen. > Den Behälter leeren und wieder einsetzen. Die gesamte Abfolge der Vorgänge ausführen, die im Abschnitt “Vorbereitung” beschrieben werden, dann die “Spülphase”...
  • Seite 75: Änderung Der Default-Einstellungen

    Helfen Ihnen die nachfolgend aufgeführten Informationen nicht bei der Behebung des Problems, so besuchen Sie die Seite FAQ auf der Webseite www.gaggia.com oder wenden Sie sich an die Hotline Gaggia. Die jeweiligen Kontaktdaten werden im separat gelieferten Garantieheft oder unter der Adresse www.gaggia.com genannt.
  • Seite 76: Zusammenfassung Hinweissignale

    Display Beschreibung Vorgehensweise Den Kaffeesatzbehälter leeren, wie im Kapitel “7.1.1 Kaffeesatzbehälter voll. Reinigung des Geräts bei Bedarf ” beschrieben. Die entsprechenden Hinweise im Kapitel “4.2 Füllung des Wassertank leer. Wassertanks” beachten. Die entsprechenden Hinweise im Kapitel “9.3 Das Gerät Das Gerät funktioniert nicht. funktioniert nicht”...
  • Seite 77: Tabelle Problemlösung

    Kann das Gerät nicht gestartet werden, wenden Sie sich an die Hotline von Gaggia und geben Sie dabei den auf dem Display angezeigten Fehlercode an. Die jeweiligen Kontaktdaten werden im separat gelieferten Garantieheft oder unter der Adresse www.gaggia.com genannt. Tabelle Problemlösung...
  • Seite 78: 10. Pflege-Zubehör Und Produkte

    Milch und Kaffee”. die Aufschäumung. 10. Pflege-Zubehör und Produkte 10.1 Pflege-Produkte Für die Reinigung und das Entkalken dürfen ausschließlich die Pflege-Produkte von Gaggia benutzt werden. Sind die Pflege-Produkte für das Gerät nicht erhältlich, so wenden Sie sich an die Hotline Gaggia in Ihrem Land. Die jeweiligen Kontaktdaten werden im separat gelieferten Garantieheft oder unter der Adresse www.gaggia.com genannt.
  • Seite 79: 10.2.2 Austausch Intenza

    Buchstabe auf dem Filter Wasserhärte Felder Teststreifen weiches Wasser 1 - 2 hartes Wasser (Standard) sehr hartes Wasser > Den Wasserfilter INTENZA+ in den leeren Wassertank einsetzen. > So weit wie möglich nach unten drücken. > Den Wassertank mit frischem Wasser füllen und wieder in das Gerät einsetzen. Das gesamte im Tank enthaltene Wasser ausgeben, wie im Kapitel “6.4.1 Heißwasserausgabe”...
  • Seite 80: 12. Transport Und Entsorgung

    Handbuch beschriebenen, grundlegenden Eigenschaften beibehalten. Kundendienst Wir möchten sicherstellen, dass Sie mit Ihrem Gerät zufrieden sind. Für Hilfe oder den Kundendienst besuchen Sie die Webseite Gaggia www.gaggia.com oder wenden sich an die Hotline Gaggia in Ihrem Land. 13.1 Kontakt Gaggia Die jeweiligen Kontaktdaten werden im separat gelieferten Garantieheft oder unter der Adresse www.gaggia.com genannt.
  • Seite 82 GAGGIA S.p.a. hält das Recht alle notwendigen Änderungen durchzuführen. GAGGIA S.p.A. Sede Legale/Registered Office Piazza Eleonora Duse, 2 20122 MILANO Sede Amministrativa/Administrative Office Via Torretta, 240 40041 Gaggio Montano (BO) +39 0534 771111 www.gaggia.com...
  • Seite 84 GAGGIA S.p.a. si riserva il diritto di apportare tutte le modifiche ritenute necessarie. GAGGIA S.p.a. reserves the right to carry out all modifications which might be considered necessary. GAGGIA S.p.a. hält das Recht alle notwendigen Aenderungen durchzuführen. GAGGIA S.p.A. Sede Legale/Registered Office Piazza Eleonora Duse, 2 20122 MILANO Sede Amministrativa/Administrative Office Via Torretta, 240 40041 Gaggio Montano (BO) +39 0534 771111 www.gaggia.com...

Inhaltsverzeichnis