Herunterladen Inhalt Inhalt Diese Seite drucken
Inhaltsverzeichnis

Werbung

Verfügbare Sprachen

Verfügbare Sprachen

Bedienungsanleitung
GM106NS LED Moving Head
Best.-Nr. 1413290
Operating Instructions
GM106NS LED moving head
Best.-Nr. 1413290
Mode d´emploi
GM106NS Projecteur à tête mobile à LED
Best.-Nr. 1413290
Gebruiksaanwijzing
GM106NS LED Moving Head
Best.-Nr. 1413290
Seite 2 - 23
Page 24 - 45
Page 46 - 67
Pagina 68 - 89

Werbung

Inhaltsverzeichnis
loading

Inhaltszusammenfassung für Renkforce GM106NS LED

  • Seite 1 Bedienungsanleitung GM106NS LED Moving Head Best.-Nr. 1413290 Seite 2 - 23 Operating Instructions GM106NS LED moving head Best.-Nr. 1413290 Page 24 - 45 Mode d´emploi GM106NS Projecteur à tête mobile à LED Best.-Nr. 1413290 Page 46 - 67 Gebruiksaanwijzing GM106NS LED Moving Head Best.-Nr.
  • Seite 2: Inhaltsverzeichnis

    Inhaltsverzeichnis Seite Einführung ................................3 Lieferumfang ................................3 Bestimmungsgemäße Verwendung ........................4 Symbolerklärung ..............................4 Sicherheitshinweise ............................5 Featurebeschreibung ............................6 Einzelteile und Bedienelemente ........................7 Montage ................................8 DMX-Anschluss ..............................9 a) Anschluss eines DMX-Controllers ......................9 b) Aufbau einer Master-Slave-Kette......................10 10. Netzanschluss ..............................10 11. Bedienung ................................11 a) Einstellung der Betriebsart ........................11 b) Betrieb mit externem DMX-Controller .....................13 c) Automatik-Betrieb ............................18 d) Master-Slave-Betrieb ..........................18...
  • Seite 3: Einführung

    1. Einführung Sehr geehrte Kundin, sehr geehrter Kunde, wir bedanken uns für den Kauf dieses Produkts. Dieses Produkt erfüllt die gesetzlichen nationalen und europäischen Anforderungen. Um diesen Zustand zu erhalten und einen gefahrlosen Betrieb sicherzustellen, müssen Sie als Anwender diese Bedienungs- anleitung beachten! Diese Bedienungsanleitung gehört zu diesem Produkt.
  • Seite 4: Bestimmungsgemäße Verwendung

    3. Bestimmungsgemäße Verwendung Der LED Moving Head dient zur Erzeugung von Lichteffekten in Lightshow-Anlagen, Partyräumen etc. und wird über den eingebauten Controller oder einen externen DMX-Controller gesteuert. Dieses Produkt ist nur für den Anschluss an 100 - 240 V/AC, 50/60 Hz Wechselspannung und nur für Schutz- kontaktsteckdosen zugelassen.
  • Seite 5: Sicherheitshinweise

    5. Sicherheitshinweise Bei Schäden, die durch Nichtbeachtung dieser Bedienungsanleitung verursacht werden, er- lischt die Gewährleistung/Garantie. Für Folgeschäden übernehmen wir keine Haftung! Bei Sach- oder Personenschäden, die durch unsachgemäße Handhabung oder Nichtbeachten der Sicherheitshinweise verursacht werden, übernehmen wir keine Haftung. In solchen Fällen erlischt die Gewährleistung/Garantie! Sehr geehrte Kundin, sehr geehrter Kunde: Die folgenden Sicherheits- und Gefahrenhinweise dienen nicht nur zum Schutz des Gerätes, sondern auch zum Schutz Ihrer Gesundheit.
  • Seite 6: Featurebeschreibung

    • Setzen Sie das Gerät keinen hohen Temperaturen, Tropf- oder Spritzwasser, starken Vibrati- onen sowie hohen mechanischen Beanspruchungen aus. • Stellen Sie keine offenen Brandquellen wie brennende Kerzen auf oder direkt neben dem Gerät • Wenden Sie sich an eine Fachkraft, wenn Sie Zweifel über die Arbeitsweise, die Sicherheit oder den Anschluss des Produktes haben. • Betreiben Sie das Gerät nicht unbeaufsichtigt. • Benutzen Sie das Gerät nur in gemäßigtem Klima, nicht in tropischem Klima. • Lassen Sie Verpackungsmaterial nicht achtlos liegen. Es könnte für Kinder zu einem gefähr- lichen Spielzeug werden. • In gewerblichen Einrichtungen sind die Unfallverhütungsvorschriften des Verbandes der ge- werblichen Berufsgenossenschaften für elektrische Anlagen und Betriebsmittel zu beachten. • Sollten Sie sich über den korrekten Anschluss nicht im Klaren sein oder sollten sich Fragen ergeben, die nicht im Laufe der Bedienungsanleitung abgeklärt werden, so setzen Sie sich bitte mit unserer technischen Auskunft oder einem anderen Fachmann in Verbindung.
  • Seite 7: Einzelteile Und Bedienelemente

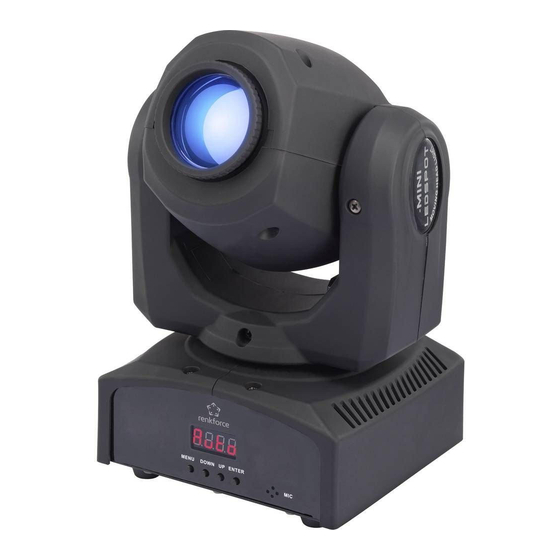
    7. Einzelteile und Bedienelemente (1) Display (2) Taste MENU (3) Taste DOWN (4) Taste UP (5) Taste ENTER (6) Mikrofon...
  • Seite 8: Montage

    8. Montage Die Montage und die Installation des Gerätes darf nur durch eine Fachkraft erfolgen, die mit den Gefahren und den einschlägigen Vorschriften hierfür vertraut ist. Die Wartung, Bedienung und Inbetriebnahme dieses Produktes darf nur durch Personen ausgeführt werden, die entspre- chend qualifiziert sind.
  • Seite 9: Dmx-Anschluss

    • Der Lichteffekt kann aufgestellt oder mit dem beiliegenden Montagebügel montiert werden. • Wenn Sie das Gerät nicht aufstellen, sondern an einem geeigneten Traversensystem montieren wollen, befestigen Sie den Lichteffekt mit dem beiliegenden Montagebügel und einer geeigneten Traversen- klemme, die separat erhältlich ist. • Montieren Sie hierzu den Montagebügel mit den beiden Schrauben an der Bodenplatte und befestigen Sie den Lichteffekt mit Hilfe einer geeigneten Traversenklemme am Traversensystem. Verwenden Sie ausschließlich Montagematerial, das für die Montageart geeignet ist und die Last des Lichteffekts tragen kann.
  • Seite 10: Aufbau Einer Master-Slave-Kette

    Pinbelegung des DMX-Anschlusses: Pin1 = Masse / Pin2 = (-) / Pin3 = (+). Verbinden Sie niemals die Masseleitung GND mit der Gehäusemasse des Lichteffekts, da es an- sonsten zu Störungen in der Signalübertragung verursacht durch Masseschleifen kommen kann. b) Aufbau einer Master-Slave-Kette Der Lichteffekt kann alternativ zum Betrieb an einem DMX-Controller auch als Gerät in einer Master-Slave- Kette verwendet werden.
  • Seite 11: Bedienung

    11. Bedienung a) Einstellung der Betriebsart Der Lichteffekt kann mit dem eingebauten Controller oder mit einem externen DMX-Controller gesteuert werden. Außerdem kann er im Master-Slave-Betrieb als Master-Gerät mit dem eingebauten Controller andere angeschlossene Lichteffekte synchron steuern oder als Slave-Gerät über den Controller eines an- deren Lichteffekts gesteuert werden.
  • Seite 12 Menü-Übersicht: Anzeige Option Funktion Bemerkung Addr 001-512 Einstellung der DMX-Startadresse ChNd 9-Kanal DMX-Betrieb 11Ch 11-Kanal DMX-Betrieb Shnd Sh 0 Automatik-Effekt 1 Sh 1 Automatik-Effekt 2 Sound-to-Light-Betrieb muss Sh 2 Automatik-Effekt 3 abgeschaltet sein. Sh 3 Automatik-Effekt 4 Sh 4 Automatik-Effekt 5 SLNd NASt Master-Betrieb...
  • Seite 13: Betrieb Mit Externem Dmx-Controller

    b) Betrieb mit externem DMX-Controller Jedes DMX-Gerät einer DMX-Kette benötigt eine so genannte DMX-Startadresse, um vom Controller ein- deutig angesteuert werden zu können. Diese DMX-Startadresse definiert den ersten DMX-Kanal, auf den der Lichteffekt reagiert. Die weiteren Steuerkanäle folgen auf diesen ersten DMX-Kanal (DMX-Startadres- se).
  • Seite 14 9-Kanal-DMX-Betrieb DMX Kanal Wert Funktion Bemerkung 000-255 Drehbewegung PAN 000-255 Schwenkbewegung TILT 000-007 Farbeinstellung weiß 008-014 Farbeinstellung rot 015-021 Farbeinstellung grün 022-028 Farbeinstellung blau 029-035 Farbeinstellung gelb 036-042 Farbeinstellung orange 043-049 Farbeinstellung magenta 050-056 Farbeinstellung hellblau 057-127 jeweils 2 Farben gleichzeitig 128-189 Farbwechsel schnell >...
  • Seite 15 DMX Kanal Wert Funktion Bemerkung 128-189 Gobowechsel schnell > langsam 190-193 Gobowechsel stopp 194-255 Gobowechsel langsam > schnell 000-007 Licht aus 008-015 Dauerlicht 016-131 Strobe-Effekt langsam > schnell 132-139 Dauerlicht bei Automatik-/Sound- 140-181 Einblendeffekt langsam > schnell to-Light-Betrieb deak- 182-189 Dauerlicht tiviert 190-231...
  • Seite 16 11-Kanal-DMX-Betrieb DMX Kanal Wert Funktion Bemerkung 000-255 Drehbewegung PAN 000-255 Feineinstellung PAN 000-255 Schwenkbewegung TILT 000-255 Feineinstellung TILT 000-007 Farbeinstellung weiß 008-014 Farbeinstellung rot 015-021 Farbeinstellung grün 022-028 Farbeinstellung blau 029-035 Farbeinstellung gelb 036-042 Farbeinstellung orange 043-049 Farbeinstellung magenta 050-056 Farbeinstellung hellblau 057-127 jeweils 2 Farben gleichzeitig...
  • Seite 17 DMX Kanal Wert Funktion Bemerkung 128-189 Gobowechsel schnell > langsam 190-193 Gobowechsel stopp 194-255 Gobowechsel langsam > schnell 000-007 Licht aus 008-015 Dauerlicht 016-131 Strobe-Effekt langsam > schnell 132-139 Dauerlicht bei Automatik-/Sound- 140-181 Einblendeffekt langsam > schnell to-Light-Betrieb deak- 182-189 Dauerlicht tiviert 190-231...
  • Seite 18: C) Automatik-Betrieb

    c) Automatik-Betrieb • Drücken Sie die Taste MENU (2), bis „Shnd“ angezeigt wird und drücken Sie die Taste ENTER (5). • Wählen Sie den gewünschten Automatik-Effekt „Sh 0“ bis „Sh 4“ mit den Tasten DOWN (3) bzw. UP (4) aus: Sh 0 Automatik-Effekt 1 Sh 1 Automatik-Effekt 2 Sh 2 Automatik-Effekt 3 Sh 3 Automatik-Effekt 4 Sh 4 Automatik-Effekt 5 • Bestätigen Sie die Auswahl mit der Taste ENTER (5). d) Master-Slave-Betrieb • Drücken Sie die Taste MENU (2), bis „SLNd“ angezeigt wird und drücken Sie die Taste ENTER (5). • Wählen Sie die gewünschte Betriebsart mit den Tasten DOWN (3) bzw. UP (4) aus: NASt Master-Betrieb Slave-Betrieb • Bestätigen Sie die Auswahl mit der Taste ENTER (5). Wenn das Gerät als einziges Gerät (Stand alone) betrieben werden soll, muss es als Master- Gerät definiert werden.
  • Seite 19: Invertierung Von Dreh- Und Schwenkbewegung

    f) Invertierung von Dreh- und Schwenkbewegung Drehbewegung • Drücken Sie die Taste MENU (2), bis „PInt“ angezeigt wird und drücken Sie die Taste ENTER (5). • Wählen Sie die gewünschte Betriebsart mit den Tasten DOWN (3) bzw. UP (4) aus: Drehbewegung ist invertiert Drehbewegung ist nicht invertiert • Bestätigen Sie die Auswahl mit der Taste ENTER (8). Schwenkbewegung • Drücken Sie die Taste MENU (2), bis „tInt“ angezeigt wird und drücken Sie die Taste ENTER (5). • Wählen Sie die gewünschte Betriebsart mit den Tasten DOWN (3) bzw. UP (4) aus: Schwenkbewegung ist invertiert Schwenkbewegung ist nicht invertiert • Bestätigen Sie die Auswahl mit der Taste ENTER (8). g) Displayeinstellung • Drücken Sie die Taste MENU (2), bis „Led “ angezeigt wird und drücken Sie die Taste ENTER (5). • Wählen Sie die gewünschte Betriebsart mit den Tasten DOWN (3) bzw. UP (4) aus: Das Display ist dauernd eingeschaltet Display schaltet sich nach ca.
  • Seite 20: Temperaturanzeige

    j) Temperaturanzeige • Drücken Sie die Taste MENU (2), bis „tenp “ angezeigt wird und drücken Sie die Taste ENTER (5). • Im Display wird die interne Gerätetemperatur angezeigt. k) Reset • Drücken Sie die Taste MENU (2), bis „rSet “ angezeigt wird und drücken Sie die Taste ENTER (5). • Das Gerät führt den Reset durch. Während dieser Zeit wird die Softwareversion im Display angezeigt. • Nach erfolgreichem Reset wird der Betrieb in der letzten Betriebsart wieder aufgenommen. l) Fokussierung • Stellen Sie die Schärfe der Projektion durch Drehen der Projektionslinse am Objektiv wunschgemäß ein. 12. Handhabung • Stecken Sie den Netzstecker niemals gleich dann in eine Netzsteckdose, wenn das Gerät von einem kalten Raum in einen warmen Raum gebracht wurde. Das dabei entstehende Kondenswasser kann unter Umständen das Gerät zerstören. Lassen Sie das Gerät uneingesteckt auf Zimmertemperatur kommen. Warten Sie bis das Kondenswasser verdunstet ist.
  • Seite 21: Wartung

    13. Wartung Überprüfen Sie regelmäßig die technische Sicherheit des Effektstrahlers z.B. auf Beschädigung der Netz- leitung und des Gehäuses. Wenn anzunehmen ist, dass ein gefahrloser Betrieb nicht mehr möglich ist, so ist das Gerät außer Betrieb zu setzen und gegen unbeabsichtigten Betrieb zu sichern. Netzstecker aus der Steckdose ziehen! Es ist anzunehmen, dass ein gefahrloser Betrieb nicht mehr möglich ist, wenn: • das Gerät sichtbare Beschädigungen aufweist • das Gerät nicht mehr arbeitet • nach längerer Lagerung unter ungünstigen Verhältnissen, oder...
  • Seite 22: Behebung Von Störungen

    14. Behebung von Störungen Mit dem Effektstrahler haben Sie ein Produkt erworben, welches nach dem Stand der Technik gebaut wurde und betriebssicher ist. Dennoch kann es zu Problemen oder Störungen kommen. Deshalb möchten wir Ihnen hier beschreiben, wie Sie mögliche Störungen beheben können: Beachten Sie unbedingt die Sicherheitshinweise! Keine Funktion, nachdem das Gerät mit dem Stromversorgungsnetz verbunden wurde: • Der Netzstecker steckt nicht richtig in der Steckdose.
  • Seite 23: Entsorgung

    15. Entsorgung Elektronische Geräte sind Wertstoffe und dürfen nicht in den Hausmüll! Entsorgen Sie das Produkt am Ende seiner Lebensdauer gemäß den geltenden gesetzlichen Be- stimmungen. 16. Technische Daten Betriebsspannung..........100 - 240 V/AC, 50/60 Hz Leistungsaufnahme ........... 70 W Sicherung ............
  • Seite 24 Table of Contents Page Introduction.................................25 Scope of Delivery ...............................25 Intended Use...............................26 Explanation of Symbols .............................26 Safety Notes ...............................27 Features ................................28 Components and Control Elements .........................29 Installation................................30 DMX Connection ..............................31 a) Connection of a DMX Controller .......................31 b) Setting up a Master-Slave Chain ......................32 10.
  • Seite 25: Introduction

    1. Introduction Dear Customer, thank you for purchasing this product. This product complies with the statutory national and European specifications. To maintain this status and to ensure safe operation, you as the user must observe these operating instructions! These operating instructions are part of this product. They contain important notes on commis- sioning and handling.
  • Seite 26: Intended Use

    3. Intended Use The LED Moving Head is used to generate light effects in light show equipment, party rooms, etc. and is controlled by the built-in controller or an external DMX controller. This product is only approved for connection to 100 - 240 V/AC, 50/60 Hz alternating voltage and only for use with an earthed mains socket. The DMX connections must only be connected to suitable DMX controllers or other DMX devices. It is intended for indoor use only.
  • Seite 27: Safety Notes

    5. Safety Notes In case of damage caused by non-compliance with these operating instructions, the warranty/ guarantee will expire. We do not assume any liability for consequential damage! We do not assume any liability for property damage and personal injury caused by improper use or non-compliance with the safety instructions.
  • Seite 28: Features

    • Consult an expert if you are unsure as to the function, safety or connection of the product. • Never operate the device unattended. • Only operate the device in moderate climates, never in tropical climates. • Do not leave any packaging material unattended. It may become a dangerous toy for children. • In commercial institutions, the accident prevention regulations of the Employer’s Liability In- surance Association for Electrical Systems and Operating Materials are to be observed. • If you are not sure of the correct connection or if there are any questions that are not covered by the operating instructions, do not hesitate to contact our technical support or another spe- cialist. 6.
  • Seite 29: Components And Control Elements

    7. Components and Control Elements (1) Display (2) MENU button (3) DOWN button (4) UP button (5) ENTER button (6) Microphone...
  • Seite 30: Installation

    8. Installation Assembly and installation of the device must be carried out by a specialist familiar with the hazards and the relevant regulations. Maintenance, operation and commissioning of this device must only be carried out by qualified persons. When choosing a location for your device, make sure to avoid impact, vibration, dust, hot and cold temperatures and dampness.
  • Seite 31: Dmx Connection

    • The effect light can be set up or installed with the enclosed mounting bracket. • If you do not want to use the device standing but mount it on a suitable traverse system, attach the effect light with the included mounting bracket and a suitable traverse clamp that is available separately. • For this, use the mounting bracket to install the two screws at the bottom plate and attach the effect light to the traverse system with a suitable traverse clamp. Use only assembly material suitable for the type of assembly and for bearing the effect light load. • The assembly must never swing freely.
  • Seite 32: B) Setting Up A Master-Slave Chain

    Pin assignment of the DMX connection: Pin1 = earth / Pin2 = (-) / Pin3 = (+). Never connect the earth pin GND to the casing earth of the effect light; this may result in interfer- ence in signal transmission caused by ground loops. b) Setting up a Master-Slave Chain The effect light can be operated controlled by a DMX controller or in a master-slave chain. In that case, the integrated controller of the master device controls the connected slave devices. • Connect the DMX OUT port of the master device to the DMX IN port of the first slave device.
  • Seite 33: Operation

    11. Operation a) Setting the Operating Mode The effect light can be controlled with the integrated controller or with an external DMX controller. Ad- ditionally, it can be used as a master device with integrated controller to control other connected effect lights synchronously in master-slave operation, or as slave device via the controller of another effect light.
  • Seite 34 Menu overview: Display Option Function Comment Addr 001-512 Setting the DMX starting address ChNd 9-channel DMX operation 11Ch 11-channel DMX operation Shnd Sh 0 Automatic effect 1 Sh 1 Automatic effect 2 Sound-to-Light mode must be Sh 2 Automatic effect 3 switched off.
  • Seite 35: Use With An External Dmx Controller

    b) Use with an External DMX Controller Each DMX device in a DMX chain requires a so-called DMX starting address to be clearly identified by the controller. This DMX starting address specifies the first DMX channel to which the effect light responds. The remaining control channels come after this first DMX channel (DMX starting address). The effect light requires 9 or 11 free DMX channels. Setting the DMX starting address • Push the button MENU (2) until "Addr" is displayed and push the button ENTER (5).
  • Seite 36 9-channel DMX operation DMX channel Value Function Comment 000-255 Rotating movement PAN 000-255 Swivel movement TILT 000-007 Colour setting white 008-014 Colour setting red 015-021 Colour setting green 022-028 Colour setting blue 029-035 Colour setting yellow 036-042 Colour setting orange 043-049 Colour setting magenta 050-056...
  • Seite 37 DMX channel Value Function Comment 128-189 Gobo change fast > slow 190-193 Gobo change stop 194-255 Gobo change slow > fast 000-007 Lights off 008-015 Continuous light 016-131 Strobe effect slow > fast 132-139 Continuous light Deactivated for auto- 140-181 Fade-in effect slow >...
  • Seite 38 11-channel DMX operation DMX channel Value Function Comment 000-255 Rotating movement PAN 000-255 Fine setting PAN 000-255 Swivel movement TILT 000-255 Fine setting TILT 000-007 Colour setting white 008-014 Colour setting red 015-021 Colour setting green 022-028 Colour setting blue 029-035 Colour setting yellow 036-042...
  • Seite 39 DMX channel Value Function Comment 128-189 Gobo change fast > slow 190-193 Gobo change stop 194-255 Gobo change slow > fast 000-007 Lights off 008-015 Continuous light 016-131 Strobe effect slow > fast 132-139 Continuous light Deactivated for auto- 140-181 Fade-in effect slow >...
  • Seite 40: Automatic Operation

    c) Automatic Operation • Push the button MENU (2) until "Shnd" is displayed and push the button ENTER (5). • Select the desired automatic effect "Sh 0" to "Sh 4" with the DOWN (3) and UP (4) buttons: Sh 0 Automatic effect 1 Sh 1 Automatic effect 2 Sh 2 Automatic effect 3 Sh 3 Automatic effect 4 Sh 4 Automatic effect 5 • Push the ENTER button (5) to confirm your selection. d) Master-Slave Mode • Push the button MENU (2) until "SLNd" is displayed and push the button ENTER (5). • Select the desired operating mode with the DOWN (3) and UP (4) buttons: NASt Master mode Slave mode...
  • Seite 41: F) Inversion Of Rotating And Swivel Movement

    f) Inversion of Rotating and Swivel Movement Rotating movement • Push the button MENU (2) until "PInt" is displayed and push the button ENTER (5). • Select the desired operating mode with the DOWN (3) and UP (4) buttons: Rotating movement is inverted Rotating movement is not inverted • Push the ENTER button (8) to confirm your selection. Swivel movement • Push the button MENU (2) until "tInt" is displayed and push the button ENTER (5). • Select the desired operating mode with the DOWN (3) and UP (4) buttons: Swivel movement is inverted Swivel movement is not inverted • Push the ENTER button (8) to confirm your selection. g) Display Settings • Push the button MENU (2) until "Led" is displayed and push the button ENTER (5).
  • Seite 42: Temperature Display

    j) Temperature Display • Push the button MENU (2) until "tenp" is displayed and push the button ENTER (5). • The display shows the internal device temperature. k) Reset • Push the button MENU (2) until "rSet" is displayed and push the button ENTER (5). • The device performs a reset. During this time, the software version is displayed. • After a successful reset, operation will recommence in the last operating mode. l) Focussing • Adjust the sharpness of the projection as desired by turning the projection lens at the lens. 12. Handling • Never connect the mains plug to a mains socket immediately after the device has been taken from a cold to a warm environment. The resulting condensation may destroy the device. Allow the device to reach room temperature before connecting it. Wait until the condensation has evaporated. • Never plug in or unplug the mains plug when your hands are wet.
  • Seite 43: Maintenance

    13. Maintenance Regularly check the technical safety of the effect beamer, e.g. for damage to the mains cable or the casing. If you have reason to believe that the device can no longer be operated safely, disconnect it immediately and make sure it is not operated unintentionally. Pull the mains plug from the mains socket! It can be assumed that safe operation is no longer possible if: • the device is visibly damaged • the device is no longer working...
  • Seite 44: Troubleshooting

    14. Troubleshooting By purchasing this effect light, you have acquired a product designed to the state of the art and operation- ally reliable. Nevertheless, problems or errors may occur. Therefore, we would like to describe how to eliminate possible errors here: Always observe the safety information! No function after the device has been connected to the power supply grid: • The mains plug is not plugged into the socket correctly.
  • Seite 45: Disposal

    15. Disposal Electronic devices are recyclable waste and must not be disposed of in the household waste! Dispose of the product according to the applicable statutory provisions at the end of its service life. 16. Technical Data Operating voltage..........100 - 240 V/AC, 50/60 Hz Power intake ............
  • Seite 46 Table des matières Page Introduction.................................47 Contenu de la livraison............................47 Utilisation conforme ............................48 Explication des symboles ..........................48 Consignes de sécurité............................49 6. Equipement .................................50 Pièces détachées et éléments de commande ....................51 Montage ................................52 Raccordement DMX ............................53 a) Raccordement d’un contrôleur DMX .......................53 b) Structure d’une chaîne maître-esclave ....................54 10.
  • Seite 47: Introduction

    1. Introduction Chère cliente, chere client, Nous vous remercions pour l’achat de ce produit. Le produit est conforme aux exigences des directives européennes et nationales en vigueur. Afin de main- tenir le produit en bon état et de garantir un fonctionnement sans danger, l’utilisateur doit impérativement respecter le présent mode d’emploi ! Le présent mode d’emploi fait partie intégrante de ce produit. Il contient des remarques impor- tantes à propos de la mise en service et de la manipulation du produit. Observez ces remarques, même en cas de cession de ce produit à des tiers. Conservez donc le présent mode d’emploi afin de pouvoir le consulter à tout moment ! Pour toute question technique, veuillez vous adresser à: France (email): technique@conrad-france.fr Suisse:...
  • Seite 48: Utilisation Conforme

    3. Utilisation conforme Le projecteur à tête mobile à DEL permet de créer des effets de lumière dans les shows lumineux, les salles de fêtes, etc. et se pilote au moyen du contrôleur intégré ou d’un contrôleur DMX externe. Ce produit est uniquement homologué pour le fonctionnement avec une tension alternative 100 - 240 V / CA, 50 / 60 Hz sur les prises de courant de sécurité. Les raccords DMX doivent uniquement être branchés sur des contrôleurs DMX compatibles ou sur d’autres appareils DMX.
  • Seite 49: Consignes De Sécurité

    5. Consignes de sécurité Tout dommage résultant du non-respect du présent mode d’emploi entraîne l’annulation de la garantie ou garantie légale. Nous déclinons toute responsabilité pour les dommages consécu- tifs ! De même, nous déclinons toute responsabilité pour les dommages matériels ou corporels ré- sultant d’une utilisation de l’appareil non conforme aux spécifications ou du non-respect des présentes consignes de sécurité.
  • Seite 50: Equipement

    • Ne placez pas de récipients comportant des liquides, par ex. verres, seaux, vases ou plantes, sur ou à proximité immédiate de l’appareil. Les liquides pourraient pénétrer à l’intérieur du boîtier et compromettre la sécurité électrique. Un tel geste pourrait, en outre, engendrer des dangers importants d’incendie ou d’électrocution mortelle ! En tel cas, déconnectez tous les pôles de la prise de courant correspondante (par ex. au moyen du coupe-circuit automatique et du disjoncteur différentiel) et retirez ensuite la fiche de la prise de courant. Le produit ne doit ensuite plus être remis en service, confiez-le à un atelier spécialisé. • N’exposez pas l’appareil à des températures extrêmes ni à des gouttes ou projections d’eau, ni à de fortes vibrations ou contraintes mécaniques.
  • Seite 51: Pièces Détachées Et Éléments De Commande

    7. Pièces détachées et éléments de commande (1) Écran (2) Touche MENU (3) Touche DOWN (4) Touche UP (5) Touche ENTER (6) Microphone...
  • Seite 52: Montage

    8. Montage Le montage et l´installation de l´appareil doivent uniquement être effectué par un technicien spécialisé connaissant parfaitement les risques potentiels encourus et les prescriptions spé- cifiques en vigueur. La maintenance, l’utilisation et la mise en service de ce produit ne doivent être effectuées que par des personnes qualifiées.
  • Seite 53: Raccordement Dmx

    • Lorsque vous ne souhaitez pas poser l’appareil sur une surface appropriée, mais que vous souhaitez le monter sur un système de traverses approprié, fixez le projecteur à effets lumineux à l’aide de l’arceau de montage fourni et d’une pince pour traverses appropriée à acheter séparément. • À cet effet, montez l’arceau de montage sur la plaque de fond à l’aide des deux vis puis fixez le projecteur à effets lumineux sur le système de traverses à l’aide d’une pince pour traverses appropriée. Employez uniquement du matériel de montage conçu pour le montage préconisé et pouvant supporter le poids du projecteur à effets lumineux. • Le produit ne doit pas être monté de façon à pouvoir osciller librement. • Durant le montage, sécurisez également l’appareil au moyen d’un câble d’arrêt de sécurité approprié ou d’un filet d’arrêt. Indépendamment de la fixation principale, le câble ou le filet d’arrêt de sécurité doit être en mesure de retenir le projecteur à effets lumineux en cas de défaillance affectant la suspension principale. • Veillez à ce que la tête du projecteur à effets lumineux puisse librement se déplacer ; elle ne doit pouvoir heurter aucun obstacle ni se bloquer. 9. Raccordement DMX Au total, 32 appareils peuvent être installés dans une chaîne DMX.
  • Seite 54: B) Structure D'une Chaîne Maître-Esclave

    Affectation des broches de la prise DMX : Broche 1 = Terre / broche 2 = (-) / broche 3 = (+). Ne reliez jamais le câble de mise à la terre GND avec la masse du boîtier du projecteur car ceci pourrait provoquer, le cas échéant, des perturbations dans la transmission de signaux en raison des boucles de masse. b) Structure d’une chaîne maître-esclave Alternativement, le projecteur à effets lumineux peut être utilisé pour le fonctionnement sur un contrôleur DMX comme appareil dans une chaîne maître-esclave. Le contrôleur de l’appareil maître intégré sert ici de contrôleur de commande pour les appareils esclaves raccordés. • Reliez la prise DMX OUT de l’appareil maître à l’entrée DMX IN du premier appareil esclave. • Reliez la prise DMX OUT du premier appareil maître au raccord DMX IN de l’appareil esclave suivant. • Pour tous les appareils esclaves suivants, procédez comme décrit ci-dessus. • Dans la prise DMX OUT du dernier appareil esclave, branchez une fiche XLR avec résistance de termi- naison (comme décrit sous « Raccordement d’un contrôleur DMX »). 10. Raccordement au réseau La prise de courant à laquelle le projecteur à effets lumineux est raccordé doit se trouver à proximité...
  • Seite 55: Utilisation

    11. Utilisation a) Réglage du mode de fonctionnement Le projecteur à effets lumineux peut directement être commandé à l’aide du contrôleur intégré ou à l’aide d’un contrôleur DMX externe. Par ailleurs, en tant qu’appareil maître avec un contrôleur intégré, il peut également commander d’autres projecteurs à effets lumineux raccordés ou être commandé en tant qu’ap- pareil esclave via le contrôleur d’un autre projecteur à effets lumineux. La configuration des modes de fonctionnement s’effectue à partir de l’écran (1) et des touches de fonction MENU (2), DOWN (3), UP (4) et ENTER (5). • Appuyez plusieurs fois sur la touche MENU (2) jusqu’à ce que la fonction souhaitée s’affiche. • Confirmez la sélection à l'aide de la touche ENTER (5). • Sélectionnez l’option souhaitée à l’aide des touches UP (4) et DOWN (3). • Confirmez la sélection à l'aide de la touche ENTER (5). • Pour retourner au niveau précédent du menu, appuyez sur la touche MENU (2). Le contrôleur intégré nécessite quelques secondes pour enregistrer et appliquer les réglages. Lorsqu’aucune touche n’a plus été enfoncée depuis plus de 30 secondes, les touches sont ver- rouillées. Pour déverrouiller à nouveau les touches, appuyez pendant env. 3 secondes sur la touche MENU (2).
  • Seite 56 Aperçu du menu : Affichage Option Fonction Remarque Addr 001-512 Réglage de l’adresse de départ DMX ChNd Mode DMX à 9 canaux 11Ch Mode DMX à 11 canaux Shnd Sh 0 Effet automatique 1 Sh 1 Effet automatique 2 Le mode Sound-to-Light doit Sh 2 Effet automatique 3 être éteint. Sh 3 Effet automatique 4 Sh 4 Effet automatique 5 SLNd NASt Mode maître Mode esclave SoUn Mode Sound-to-Light activé...
  • Seite 57: B) Fonctionnement Avec Un Contrôleur Dmx Externe

    b) Fonctionnement avec un contrôleur DMX externe Chaque appareil DMX d’une chaîne DMX requiert ce que l’on appelle une adresse de départ DMX afin de pouvoir clairement être commandé par le contrôleur. Cette adresse de départ DMX définit le premier canal DMX auquel le projecteur à effets lumineux réagit. Les autres canaux de commande suivent ce premier canal DMX (adresse de départ DMX). Le projecteur à effets lumineux requiert 9 ou 11 canaux DMX libres. Réglage de l’adresse de départ DMX • Appuyez plusieurs fois sur la touche MENU (2) jusqu’à ce que la fonction « Addr » s’affiche puis validez en appuyant sur la touche ENTER (5). • Sélectionnez l’adresse de départ souhaitée 001-512 à l’aide des touches DOWN (3) et UP (4). • Confirmez la sélection à l'aide de la touche ENTER (5). Réglage du mode de fonctionnement DMX • Appuyez plusieurs fois sur la touche MENU (2) jusqu’à ce que la fonction « ChNd » s’affiche puis validez en appuyant sur la touche ENTER (5).
  • Seite 58 Mode DMX à 9 canaux Canal DMX Valeur Fonction Remarque 000-255 Mouvement rotatif PAN 000-255 Mouvement de pivotement TILT 000-007 Réglage des couleurs blanc 008-014 Réglage des couleurs rouge 015-021 Réglage des couleurs vert 022-028 Réglage des couleurs bleu 029-035 Réglage des couleurs jaune 036-042 Réglage des couleurs orange 043-049...
  • Seite 59 Canal DMX Valeur Fonction Remarque 128-189 Changement de Gobo rapide > lent 190-193 Arrêt du changement de Gobo 194-255 Changement de Gobo lent > rapide 000-007 Lumière éteinte 008-015 Lumière permanente 016-131 Effet stroboscopique lent > rapide 132-139 Lumière permanente Désactivé mode 140-181 Effet de fondu lent > rapide automatique/sound-to- light 182-189...
  • Seite 60 Mode DMX à 11 canaux Canal DMX Valeur Fonction Remarque 000-255 Mouvement rotatif PAN 000-255 Réglage fin PAN 000-255 Mouvement de pivotement TILT 000-255 Réglage fin TILT 000-007 Réglage des couleurs blanc 008-014 Réglage des couleurs rouge 015-021 Réglage des couleurs vert 022-028 Réglage des couleurs bleu 029-035...
  • Seite 61 Canal DMX Valeur Fonction Remarque 128-189 Changement de Gobo rapide > lent 190-193 Arrêt du changement de Gobo 194-255 Changement de Gobo lent > rapide 000-007 Lumière éteinte 008-015 Lumière permanente 016-131 Effet stroboscopique lent > rapide 132-139 Lumière permanente Désactivé mode 140-181 Effet de fondu lent > rapide automatique/sound-to- light 182-189...
  • Seite 62: Mode Automatique

    c) Mode automatique • Appuyez plusieurs fois sur la touche MENU (2) jusqu’à ce que la fonction « Shnd » s’affiche puis validez en appuyant sur la touche ENTER (5). • Sélectionnez le mode de effet automatique souhaité « Sh 0 » à « Sh 4 » avec les touches DOWN (3) ou UP (4) : Sh 0 Effet automatique 1 Sh 1 Effet automatique 2 Sh 2 Effet automatique 3 Sh 3 Effet automatique 4 Sh 4 Effet automatique 5 • Confirmez la sélection à l'aide de la touche ENTER (5). d) Mode maître-esclave • Appuyez plusieurs fois sur la touche MENU (2) jusqu’à ce que la fonction « SLNd » s’affiche puis validez en appuyant sur la touche ENTER (5). • Sélectionnez le mode de fonctionnement souhaité à l’aide des touches DOWN (3) et UP (4) : NASt Mode maître Mode esclave...
  • Seite 63: F) Inversion Des Mouvements Rotatif Et De Pivotement

    f) Inversion des mouvements rotatif et de pivotement Mouvement rotatif • Appuyez plusieurs fois sur la touche MENU (2) jusqu’à ce que la fonction « PInt » s’affiche puis validez en appuyant sur la touche ENTER (5). • Sélectionnez le mode de fonctionnement souhaité à l’aide des touches DOWN (3) et UP (4) : Mouvement rotatif est inversé no Mouvement rotatif n’est pas inversé • Confirmez la sélection à l'aide de la touche ENTER (8). Mouvement de pivotement • Appuyez plusieurs fois sur la touche MENU (2) jusqu’à ce que la fonction « tInt » s’affiche puis validez en appuyant sur la touche ENTER (5). • Sélectionnez le mode de fonctionnement souhaité à l’aide des touches DOWN (3) et UP (4) : Mouvement de pivotement est inversé...
  • Seite 64: Affichage De La Température

    j) Affichage de la température • Appuyez plusieurs fois sur la touche MENU (2) jusqu’à ce que la fonction « tenp » s’affiche puis validez en appuyant sur la touche ENTER (5). • La température interne de l’appareil s'affiche à l'écran. k) Remise à zéro • Appuyez plusieurs fois sur la touche MENU (2) jusqu’à ce que la fonction « rSet » s’affiche puis validez en appuyant sur la touche ENTER (5). • L'appareil effectue la réinitialisation. Pendant cette période la version logiciel s’affiche à l’écran. • Après la réinitialisation réussie le fonctionnement reprend dans le dernier mode. l) Focalisation • Réglez la netteté de la projection en tournant la lentille de projection de l'objectif à votre convenance. 12. Manipulation • Ne branchez jamais immédiatement la fiche de secteur dans une prise de courant après avoir transporté l’appareil d’une pièce froide dans une pièce chaude. L’eau de condensation qui se forme alors risquerait de détruire l’appareil. Attendez que l’appareil ait atteint la température ambiante avant de le brancher.
  • Seite 65: Entretien

    13. Entretien Contrôlez régulièrement la sécurité technique du projecteur à effets lumineux en vous assurant par ex. de l’absence de détérioration au niveau du cordon d’alimentation et du boîtier. Lorsqu’un fonctionnement sans danger de l’appareil n’est plus garanti, il convient de mettre celui-ci hors service et d’empêcher toute remise en marche accidentelle. Débranchez la fiche de secteur de la prise de courant ! Une utilisation sans danger n’est plus garantie lorsque : • l’appareil est visiblement endommagé, • l’appareil ne fonctionne plus, • suite à un stockage prolongé dans des conditions défavorables ou • l’appareil a été fortement sollicité pendant le transport. Avant de procéder au nettoyage ou à l’entretien du projecteur à effets lumineux, il est impératif de respec- ter les consignes de sécurité suivantes : L’ouverture des boîtiers et le démontage des pièces risquent de mettre à nu des pièces sous tension. Avant tout entretien ou réparation, il convient donc de déconnecter l’appareil de toutes les sources de tension.
  • Seite 66: Dépannage

    14. Dépannage Avec le projecteur à effets lumineux, vous avez acquis un produit à la pointe du développement technique et bénéficiant d’une grande sécurité de fonctionnement. Il est toutefois possible que des problèmes ou des pannes surviennent. Vous trouverez ci-après plusieurs procédures vous permettant, le cas échéant, d’effectuer un dépannage : Respectez impérativement les consignes de sécurité ! Aucune fonction après le raccordement de l’appareil au réseau d’alimentation électrique : • La fiche de secteur n’est pas correctement branchée dans la prise de courant. • Le cordon d’alimentation n’est pas correctement inséré dans le raccordement au réseau de l’appareil. • La prise de courant n’est pas alimentée en courant. L’appareil ne réagit pas aux instructions DMX : • Le mode Blackout est activé sur le contrôleur DMX.
  • Seite 67: Élimination

    15. Élimination Les appareils électroniques sont des matériaux recyclables et ne doivent pas être éliminés avec les ordures ménagères ! À la fin de sa durée de vie, éliminez le produit conformément aux dispositions légales en vigueur. 16. Données techniques Tension de service ..........100 - 240 V / CA, 50 / 60 Hz Puissance absorbée .......... 70 W Fusible ..............F3 AL / 250 V (5 x 20 mm) Modes de fonctionnement ....... DMX / automatique / maître-esclave / Sound-to-Light DELs..............DEL haute capacité 30 W Angle PAN ............540° Angle TILT ............
  • Seite 68 Inhoudsopgave Pagina Inleiding ................................68 Leveringsomvang ...............................68 Voorgeschreven gebruik ..........................69 Verklaring van symbolen ..........................69 Veiligheidsvoorschriften ...........................70 Uitrusting ................................71 Afzonderlijke onderdelen en bedieningselementen ..................72 Montage ................................72 DMX-aansluiting ..............................74 a) Aansluiting van een DMX-controller ......................74 b) Opbouw van een master-slave ketting ....................75 10.
  • Seite 69 1. Inleiding Geachte klant, Hartelijk dank voor de aanschaf van dit product. Dit product voldoet aan de voorwaarden van de nationale en Europese wetgeving. Volg de instructies van de gebruiksaanwijzing op om deze status van het apparaat te handhaven en een ongevaarlijke werking te garanderen! Deze gebruiksaanwijzing hoort bij dit product.
  • Seite 70: Voorgeschreven Gebruik

    3. Voorgeschreven gebruik De LED Moving Head dient voor het opwekken van lichteffecten in lichtshowinstallaties, feestzalen, enz. en wordt via de ingebouwde controller of een externe DMX-controller bestuurd. Dit product is alleen goedgekeurd voor aansluiting op 100 - 240 V/AC, 50/60 Hz wisselspanning en voor randgeaarde contactdozen.
  • Seite 71: Veiligheidsvoorschriften

    5. Veiligheidsvoorschriften Bij beschadigingen veroorzaakt door het niet opvolgen van deze gebruiksaanwijzing vervalt ieder recht op garantie. Voor gevolgschade die hieruit ontstaat, zijn wij niet aansprakelijk! Voor materiële of persoonlijke schade, die door ondeskundig gebruik of niet inachtname van de veiligheidsvoorschriften veroorzaakt worden zijn wij niet aansprakelijk. In zulke gevallen vervalt de garantie! Geachte klant: de volgende veiligheids- en gevarenvoorschriften hebben niet alleen de bescher- ming van het product, maar ook de bescherming van uw gezondheid tot doel.
  • Seite 72: Uitrusting

    • Stel het apparaat niet bloot aan hoge temperaturen, druip- of spatwater, sterke trillingen of hoge mechanische belastingen. • Zet geen brandende voorwerpen, zoals kaarsen, op of naast het apparaat. • Raadpleeg een elektromonteur als u twijfelt aan de werking, de veiligheid of de aansluiting van het product. • Het toestel mag nooit zonder toezicht in werking zijn. • Gebruik het apparaat uitsluitend in een gematigd klimaat; niet in een tropisch klimaat. • Laat verpakkingsmateriaal niet achteloos slingeren. Dit kan voor kinderen gevaarlijk speelgoed zijn. • In bedrijven moet rekening gehouden worden met de voorschriften ter voorkoming van on- gevallen opgesteld door de nationale bonden van de ongevallenverzekering voor elektrische installaties en bedrijfsmiddelen.
  • Seite 73: Afzonderlijke Onderdelen En Bedieningselementen

    7. Afzonderlijke onderdelen en bedieningselementen (1) Scherm (2) Toets MENU (3) Toets DOWN (4) Toets UP (5) Toets ENTER (6) Microfoon...
  • Seite 74: Montage

    8. Montage De montage en de installatie van het apparaat mogen uitsluitend door een vakman worden uitgevoerd die vertrouwd is met de gevaren en relevante voorschriften. Het product mag al- leen onderhouden, bediend en in gebruik genomen worden door personen die overeenkomstig gekwalificeerd zijn.
  • Seite 75: Dmx-Aansluiting

    • Het lichteffect kan worden opgesteld of met de meegeleverde montagebeugel worden gemonteerd. • Wanneer u het apparaat niet opstelt, maar op een geschikt traversensysteem wilt monteren, bevestigt u het lichteffect met de meegeleverde montagebeugel en een geschikte traverseklem die afzonderlijk verkrijgbaar is. • Monteer hiervoor de montagebeugel met de beide schroeven aan de bodemplaat en bevestig het lichtef- fect met behulp van een geschikte traverseklem aan het traversesysteem. Gebruik uitsluitend montage- materiaal dat geschikt is voor het montage-oppervlak en de belasting van het lichteffect kan dragen. • Het apparaat mag nooit zonder beugel worden gemonteerd.
  • Seite 76: Netaansluiting

    Pentoewijzing van de DMX-aansluiting: Pen1 = massa / Pen2 = (-) / Pen3 = (+). Verbind de massaleiding GND nooit met de massa van de behuizing van het lichteffect, omdat het anders kan komen tot storingen in de signaaloverdracht, veroorzaakt door massalussen. b) Opbouw van een master-slave ketting Het lichteffect kan alternatief voor het bedrijf via een DMX-controller ook worden gebruikt als apparaat binnen een master-slave ketting.
  • Seite 77: Bediening

    11. Bediening a) Instelling van de bedrijfsmodus Het lichteffect kan met de ingebouwde controller of met een externe DMX-controller worden gestuurd. Verder kan hij in het Master-Slave-bedrijf als master-apparaat met de ingebouwde controller andere aan- gesloten lichteffecten synchroon sturen of als slave-apparaat via de controller van een ander lichteffect worden aangestuurd.
  • Seite 78 Menu-overzicht: Scherm Optie Functie Opmerking Addr 001-512 Instelling van de DMX-startadres ChNd 9-kanaals DMX-bedrijf 11Ch 11-kanaals DMX-bedrijf Shnd Sh 0 Automatisch effect 1 Sh 1 Automatisch effect 2 Sound-to-Light-modus moet Sh 2 Automatisch effect 3 uitgeschakeld zijn. Sh 3 Automatisch effect 4 Sh 4 Automatisch effect 5 SLNd...
  • Seite 79: B) Gebruik Met Een Externe Dmx-Controller

    b) Gebruik met een externe DMX-controller Elk DMX-apparaat in een DMX-ketting heeft een zogenaamd DMX-startadres nodig om eenduidig door de controller aangestuurd te kunnen worden. Dit DMX-startadres definieert het eerste DMX-kanaal, waarop het lichteffect reageert. De andere stuurkanalen volgen op dit eerste DMX-kanaal (DMX-startadres). Het lichteffect heeft 9 of 11 vrije DMX-kanalen nodig.
  • Seite 80 9-kanaals DMX-bedrijf DMX-kanaal Waarde Functie Opmerking 000-255 Draaibeweging PAN 000-255 Kantelbeweging TILT 000-007 Kleurinstelling wit 008-014 Kleurinstelling rood 015-021 Kleurinstelling groen 022-028 Kleurinstelling blauw 029-035 Kleurinstelling geel 036-042 Kleurinstelling oranje 043-049 Kleurinstelling magenta 050-056 Kleurinstelling lichtblauw 057-127 Telkens 2 kleuren tegelijk 128-189 Kleurwissel snel >...
  • Seite 81: Werkt In Combinatie

    DMX-kanaal Waarde Functie Opmerking 128-189 Gobowissel snel > langzaam 190-193 Gobowissel stop 194-255 Gobowissel langzaam > snel 000-007 Licht uit 008-015 Continu licht 016-131 Strobe-effect langzaam > snel 132-139 Continu licht automatische/ 140-181 Invoegeffect langzaam > snel Sound-to-Light-modus gedeactiveerd 182-189 Continu licht 190-231 Verdwijneffect langzaam >...
  • Seite 82 11-kanaals DMX-bedrijf DMX-kanaal Waarde Functie Opmerking 000-255 Draaibeweging PAN 000-255 Fijninstelling PAN 000-255 Kantelbeweging TILT 000-255 Fijninstelling TILT 000-007 Kleurinstelling wit 008-014 Kleurinstelling rood 015-021 Kleurinstelling groen 022-028 Kleurinstelling blauw 029-035 Kleurinstelling geel 036-042 Kleurinstelling oranje 043-049 Kleurinstelling magenta 050-056 Kleurinstelling lichtblauw 057-127 Telkens 2 kleuren tegelijk...
  • Seite 83 DMX-kanaal Waarde Functie Opmerking 128-189 Gobowissel snel > langzaam 190-193 Gobowissel stop 194-255 Gobowissel langzaam > snel 000-007 Licht uit 008-015 Continu licht 016-131 Strobe-effect langzaam > snel 132-139 Continu licht automatische/ 140-181 Invoegeffect langzaam > snel Sound-to-Light-modus gedeactiveerd 182-189 Continu licht 190-231 Verdwijneffect langzaam >...
  • Seite 84: Automatische Modus

    c) Automatische modus • Druk op de toets MENU (2) tot "Shnd" wordt weergegeven en druk op de toets ENTER (5). • Kies het gewenste automatische effect "Sh 0" tot "Sh 4" met de knoppen DOWN (3) of UP (4): Sh 0 Automatisch effect 1 Sh 1 Automatisch effect 2 Sh 2 Automatisch effect 3 Sh 3 Automatisch effect 4 Sh 4 Automatisch effect 5 • Bevestig uw keuze met de toets ENTER (5). d) Master-slave-modus • Druk op de toets MENU (2) tot "SLNd" wordt weergegeven en druk op de toets ENTER (5). • Selecteer met de toetsen DOWN (3) of UP (4) het gewenste bedrijfsmodus: NASt Master-modus Slave-modus...
  • Seite 85: F) Omkeren Van De Draai- En Kantelbeweging

    f) Omkeren van de draai- en kantelbeweging Draaibeweging • Druk op de toets MENU (2) tot "PInt" wordt weergegeven en druk op de toets ENTER (5). • Selecteer met de toetsen DOWN (3) of UP (4) het gewenste bedrijfsmodus: Draaibeweging is omgekeerd Draaibeweging is niet omgekeerd • Bevestig uw keuze met de toets ENTER (8). Kantelbeweging • Druk op de toets MENU (2) tot "tInt" wordt weergegeven en druk op de toets ENTER (5). • Selecteer met de toetsen DOWN (3) of UP (4) het gewenste bedrijfsmodus: Kantelbeweging is omgekeerd Kantelbeweging is niet omgekeerd • Bevestig uw keuze met de toets ENTER (8). g) Scherminstelling • Druk op de toets MENU (2) tot "Led" wordt weergegeven en druk op de toets ENTER (5). • Selecteer met de toetsen DOWN (3) of UP (4) het gewenste bedrijfsmodus: Het scherm is permanent ingeschakeld Het scherm schakelt zichzelf na ca.
  • Seite 86: J) Temperatuurweergave

    j) Temperatuurweergave • Druk op de toets MENU (2) tot "tenp" wordt weergegeven en druk op de toets ENTER (5). • Op het scherm wordt het interne toesteltemperatuur aangeduid. k) Reset • Druk op de toets MENU (2) tot "rSet" wordt weergegeven en druk op de toets ENTER (5). • Het apparaat voert de reset uit. Tijdens deze periode wordt de softwareversie op het scherm weergege- ven. • Na een succesvolle reset wordt de werking in de laatst ingestelde bedrijfsmodus hernomen. l) Focussering • Stel de projectiescherpte in door naar wens aan het projectieobjectief aan de lens te draaien. 12. Instandhouding • Steek de netstekker nooit direct in een contactdoos, als het apparaat van een koude in een warme ruimte is gebracht. Het te ontstane condenswater kan onder bepaalde omstandigheden het apparaat vernietigen.
  • Seite 87: Onderhoud

    13. Onderhoud Controleer regelmatig de technische veiligheid van de effectstraler, b.v. op beschadiging van de netleiding en de behuizing. Wanneer kan worden aangenomen dat een veilig gebruik niet meer mogelijk is, mag het apparaat niet meer worden gebruikt en moet het worden beveiligd tegen onbedoeld gebruik. Neem de stekker uit de contactdoos! Men moet aannemen dat gevaarloos gebruik niet meer mogelijk is, wanneer: • het apparaat zichtbaar is beschadigd,...
  • Seite 88: Verhelpen Van Storingen

    14. Verhelpen van storingen U heeft met de effectstraler een product aangeschaft dat volgens de nieuwste stand der techniek is ont- wikkeld en veilig is in het gebruik. Toch kunnen zich enkele problemen of fouten voordoen. Daarom willen wij hier beschrijven hoe u mogelijke storingen kunt verhelpen: Neem altijd de veiligheidsvoorschriften in acht! Geen functie nadat het apparaat met het stroomnet werd verbonden: • De netstekker zit niet goed in de contactdoos.
  • Seite 89: Afvoer

    15. Afvoer Elektronische apparaten zijn recycleerbare stoffen en horen niet bij het huisvuil! Als het product niet meer werkt, moet u het volgens de geldende wettelijke bepalingen voor afvalverwerking inleveren. 16. Technische gegevens Bedrijfsspanning ..........100 - 240 V/AC, 50/60 Hz Opgenomen vermogen ........
  • Seite 90 Impressum Dies ist eine Publikation der Conrad Electronic SE, Klaus-Conrad-Str. 1, D-92240 Hirschau (www.conrad.com). Alle Rechte einschließlich Übersetzung vorbehalten. Reproduktionen jeder Art, z. B. Fotokopie, Mikroverfilmung, oder die Erfassung in elektronischen Datenverarbeitungsanlagen, bedürfen der schriftlichen Genehmigung des Herausge- bers. Nachdruck, auch auszugsweise, verboten. Die Publikation entspricht dem technischen Stand bei Drucklegung. © Copyright 2016 by Conrad Electronic SE. Legal notice This is a publication by Conrad Electronic SE, Klaus-Conrad-Str.

Diese Anleitung auch für:

1413290

Inhaltsverzeichnis