testo 230 Bedienungsanleitung
Inhaltsverzeichnis
Verfügbare Sprachen
Verfügbare Sprachen
Kapitel
Inhaltsverzeichnis

Verwandte Anleitungen für testo testo 230


Inhaltszusammenfassung für testo testo 230
- Seite 1 230 pH- und Temperatur-Messgerät Bedienungsanleitung Instruction manual...
-
Seite 2: Inhaltsverzeichnis
Inhalt Gerätebeschreibung..............3 Display/Tastatur ..............4 Benutzungshinweise..............5 Sicherheitshinweise ..............5 Anschlußvarianten ..............6 pH/°C-Messung...............6 pH-Messung..............7 °C-Messung ..............7 Redox-Messung ..............7 Inbetriebnahme.................8 Fühlermontage ..............8 Gerät einschalten ............9 Auto-Off-Funktion............9 1 Punkt Kalibrierung ..............10 2 Punkt Kalibrierung ..............12 pH-Messung ................15 Hold-Funktion .................16 Meßwerte festhalten............16 Auto-Hold-Funktion ............16 Konfigurations-Menü .............17 °C/°F-Umschaltung •... -
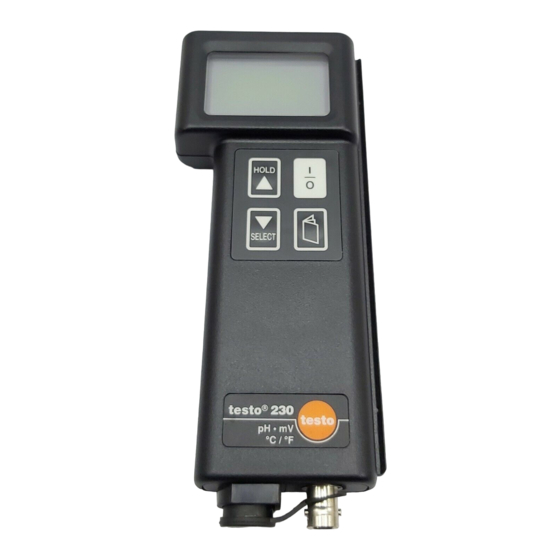
Seite 3: Gerätebeschreibung
Gerätebeschreibung Display Tastatur Anschlußbuchse für Temperaturfühler Batteriefach Anschlußbuchse für pH- und Redox-Elektrode... -
Seite 4: Display/Tastatur
Gerätebeschreibung Display /Tastatur Darstellung des Meßwertes (pH / mV) (°C bei Temperaturmessungen ohne pH-Elektrode) Darstellung des Temperaturwertes Fühlererkennung • MAN .....Elektroden ohne Temp.-Sensor • Symbol + AUTO..…externer Temp.-Fühler • AUTO ....Elektrode mit Temp.-Sensor DIN/NBS Puffer (Anzeige im Kalibrier-Menü) Batteriekontrolle BeimEinschalten: Batteriespannung Im Betrieb: Warnung schwache Batterie HOLD-Funktion / Auto-Hold-Funktion Darstellung Kalibrier-Menü... -
Seite 5: Benutzungshinweise
Benutzungshinweise testo 230 dient zum Ermitteln von pH-Werten, Redoxspannungen und der Temperatur in wässrigen Lösungen sowie in halbfesten bis festen Medien. testo 230 ist ein pflegeleichtes, robustes und einfach zu bedienendes pH- und Temperatur- meßgerät mit einem Meßbereich von pH 0...14, ±1999 mV sowie -50…+150 °... -
Seite 6: Anschlußvarianten
Anschlußvarianten pH/°C-Messung Mit den pH-Elektroden Typ 04 pH und 05 pH wird der pH-Wert sowie die Temperatur des Mediums ermittelt. Beim Messen und Kalibrieren wird die Tempera- tur des Mediums automatisch in den Vorgang einbezogen. 04 pH 04 pH 05 pH 05 pH Mit den pH-Elektroden Typ 01 pH, 02 pH, 03 pH und 13 pH wird der pH-Wert, mit den NTC-... -
Seite 7: Ph-Messung
03 pH 13 pH 13 pH °C-Messung Mit den NTC-Fühlern Typ 02T, 09T, 22T, 24 T und 70 T ist das testo 230 ein vollwertiges Tem- peratur-Meßgerät für den Bereich -50 °C … +150 °C. 02 T 02 T 09 T... - Seite 8 Inbetriebnahme Fühlermontage Bevor das Gerät eingeschaltet wird muß die Kabelverbindung mit der Elektrode hergestellt werden. Stecker auf die Buchse stecken und durch Rechtsdrehen arretieren. Beim Anschluß eines externen Fühlers auf die Markierungen (><) an Fühlerstecker und Gerät achten. Beim Entfernen des Steckers nicht an der Leitung ziehen! Die Elektroden sowie die Temperaturfühler können lose oder aufgesteckt verwendet werden.
-
Seite 9: Inbetriebnahme
Inbetriebnahme Gerät einschalten Gerät einschalten. Nach dem Einschalten erfolgt ein kurzer Anzeigen- und Funktionstest, gefolgt von einer Batteriekontrolle welche Ihnen beim Einschalten den Zustand der Batterie anzeigt (s. auch Batteriewechsel). Das Meßgerät ist jetzt einsatzbereit. Auto-Off-Funktion Auto-Off-Funktion Wird das Meßgerät 10 Min. lang nicht bedient erfolgt eine automatische Abschaltung Die "Auto-Off"-Funktion wird im Display angezeigt. -
Seite 10: Punkt Kalibrierung
Messung durchzuführen. Dafür stehen Ihnen folgende Puffer zur Verfügung: Testo-Puffer pH 2, pH 4, pH 7, pH 10 DIN-Puffer pH 4,008*; pH 6,865*; pH 9,18 Bei Messungen in extremen Lösungen (pH-Wert < 1 und pH-Wert > 12), bei häufigem... - Seite 11 1 Punkt Kalibrierung Nun wird der Puffer abgefragt. Mit der Pfeiltaste ( ) den vorgesehenen Puffer auswählen und mit SELECT den Abgleichvor- gang starten. Folgende Lösungen können zur Anwendung kommen: pH 1,68 DIN/NBS; 2,00; 4,00; 4,008 DIN/NBS*; 6,865 DIN/NBS*; 7,00; 9,18 DIN/NBS; 10.00 Während des Kalibrierens blinkt "CAL"...
- Seite 12 Vor der ersten Messung ist grundsätzlich eine Kalibrierung (1 Punkt oder 2 Punkt) durchzu- führen. Zum Kalibrieren stehen Ihnen folgende Sets zur Verfügung: Testo-Pufferset pH 4/7, pH 7/10, pH 4/7/10 DIN-Pufferset pH 4,008/6,685*, pH 6,865/9,18* Die Differenz beider Pufferlösungen A (bu 1) und B (bu 2) muß...
- Seite 13 2 Punkt Kalibrierung Nun wird der erste Puffer abgefragt. Mit der Pfeiltaste ( ) den vorgesehenen Puffer auswählen und mit SELECT den Abgleichvor- gang starten. Folgende Lösungen können zur Anwendung kommen: pH 1,68 DIN/NBS; 2,00; 4,00; 4,008 DIN/NBS*; 6,865 DIN/NBS*; 7,00; 9,18 DIN/NBS; 10.00 Während des Kalibrierens blinkt "CAL"...
- Seite 14 2 Punkt Kalibrierung Das Gerät kalibriert, "CAL" blinkt im Display (Dauer des Abgleichs min. 20 Sec. max 10 Min.), ist der Vorgang beendet ertönt ein Signal. Nach max. 10 min. wird der Abgleichvorgang abgebrochen, wahrscheinlich hat die Elektrode einen Defekt, wenden Sie sich in diesem Fall an unseren Service.
-
Seite 15: Ph-Messung
pH-Messung Schliessen Sie die Elektrode an das Meßgerät Verschlußstopfen an der Elektrode (zum Druck- ausgleich) öffnen. Wässerungskappe von der Elektrode abziehen. Elektrode in Wasser spülen und abtupfen (siehe auch Bedienungsanleitung pH-Elektroden). Stellen Sie nun die Elektrode in die Meßlösung. Gerät einschalten. Im Display wird der pH-Wert (anfangs unstabil) und die Temperatur angezeigt. -
Seite 16: Hold-Funktion
Hold-Funktionen Meßwerte festhalten Mit der HOLD-Taste kann in einer laufenden Messung der Meßwert festgehalten werden. HOLD-Taste drücken. Im Display erscheint neben dem Meßwert "Hold". Der Meßwert bleibt beliebig lang im Display, die Auto-Off-Funktion ist abgeschaltet. Nochmaliges Betätigen der HOLD-Taste beendet diese Funktion, der aktuelle Meßwert wird ange- zeigt. -
Seite 17: Konfigurations-Menü
Konfigurations-Menü °C / °F Umschaltung • Auto-Off Funktion ein- bzw. ausschalten testo 230 ermöglicht die Umschaltung der Meßgröße von °C in °F und umgekehrt. Außerdem kann die Auto-Off Funktion ein- bzw. ausgeschaltet werden. Die Auto-Off Funktion erhöht die Lebensdauer der Batterie und schont somit die Umwelt. -
Seite 18: Clear-Funktion
Konfigurations-Menü Clear-Funktion Nach der °C/°F- und dem Auto-Off Modus errei- chen Sie die "Clear-Funktion". In diesem Menü können die durch eine Kalibrierung gespeicherten Werte überschrieben werden, z.B. wenn Sie die Elektrode wechseln müssen und eine Kalibrierung nicht möglich ist. In diesem Menü werden die Werte für Steigung und Asymetriespannung auf die Idealwerte -58 mv/pH und 0 mV gesetzt und abgespeichert. -
Seite 19: Pflege Und Wartung
Pflege und Wartung Batteriewechsel Die Batteriespannung wird beim Einschalten des Gerätes, nach dem Funktionstest, angezeigt, und kann somit jederzeit überprüft werden. Sinkt die Batteriespannung während der Anwen- dung unter einen zul. Wert, so erscheint das "BAT"-Symbol im Display. Ist die Batteriespannung nicht mehr ausreichend, für den einwandfreien Betrieb des Gerätes, schaltet das Gerät automatisch ab. -
Seite 20: Allgemeine Hinweise
Pflege und Wartung Allgemeine Hinweise testo 230 ist wartungsfrei und unterliegt daher keinen besonderen Wartungsintervallen. Reinigen Sie das Gehäuse mit einem feuchten Tuch. Schwache Haushaltsreiniger dürfen ver- wendet werden. Das Gerät ist für den Umgang mit schwachen Säuren und Laugen geeignet. -
Seite 21: Fehlermeldungen
Fehlermeldungen ERROR 1-3 Meßbereich pH oder mV überschritten Der Meßwert pH ist nicht im Bereich 0...14 pH. - Mögliche Ursachen und • Abhilfen: - keine pH-Elektrode angeschlossen. • pH-Elektrode anschliessen. - Falsch kalibriert. • Neu kalibrieren. - pH-Elektrode defekt. • pH-Elektrode überprüfen ggf. ersetzen. - Niederer pH-Wert bei Elektrode mit hoher Steigung und Asymetriespannung und gleichzeitig hohe Meßtemperatur. -
Seite 22: Error 4-6
Blätter-Taste löschen (Kalibration mit Blätter-Taste abbrechen, die Werte der letzten Kalibration bleiben erhalten). Elektrode spülen und Vorgang wiederholen, tritt der Fehler erneut auf neue Elektrode verwenden. Interner Geräte-Fehler. - Mögliche Ursachen und • Abhilfen: - Meßgerät defekt. • Gerät zum Testo-Service geben. -
Seite 23: Meßfehler Beheben
Meßfehler beheben Instabile Anzeige Ursache Abhilfe Luftblasen in der Glaskugel • Klopfen Sie vorsichtig mit den Fingern gegen die Elektrode oder schwingen Sie die Elektrode im Kreis. Luftblasen in den KCI-Kristallen • Siehe oben. • Elektrode bei 60 °C im Wasserbad erhitzen bis genügend KCI gelöst ist und die Luftblasen entfernt sind. -
Seite 24: Technische Daten
Betriebstemperatur: 0...+40°C Lager/ Transporttemperatur: -20...+70°C Anzeige: zweizeilig Anschlüße • BNC-kompatible Buchse für pH bzw. pH/°C • Mini-DIN-Buchse für Temp.-Fühler (testo 110) Batteriestandzeit: ca. 100 Std. Gewicht 180 g (inkl. Batterie) Sonstiges: IP 54 Low.-Batt.-Anzeige Autom. Abschaltung °C - °F Umschaltung... -
Seite 25: Ph-Elektroden/Temperaturfühler
= 10 sec. Robuster Einstechfühler *) Kurzzeitig < 10 Minuten **) Steckkopfelektroden benötigen ein Elektrodenkabel Best. Nr 0554.2317 Garantie Meßgerät testo 230............24 Monate Elektroden................12 Monate * Fühler ................12 Monate Bei Öffnen des Gerätes, unsachgemäßer Behandlung oder Gewaltanwendung erlöschen die Gewährleistungsansprüche! -
Seite 26: Bestelldaten
Bestelldaten Gerät Best.-Nr. testo 230.......................0560.2304 testo 230, Set 1 Universal ................0563.2305 testo 230, Set 2 Lebensmittel ...............0563.2306 testo 230, Set 3 Preiswert ................0563.2307 Elektroden und Fühler Universalelektrode Typ 01 pH ohne °C ........0650.0623 Laborelektrode Typ 02 pH ohne °C ........0650.1223... -
Seite 27: Anhang
Anhang Welche Elektrode für welche Anwendung Legende: - nicht geeignet, o bedingt geeignet, + gut geeignet Anwendung Abwasserproben Allgemeine wässrige Medien Aquarium Bier, Obstsäfte, Wein Joghurt, Käse Eiweißhaltige Medien Emulsionen, wässrig Emulsionen, teilwässrig Erdboden (Suspension) Extreme pH-Werte (pH<1, >13) Fleisch im Einstich Früchte, Gemüse im Einstich Flussäurehaltige Medien Galvanik-Abwässer... -
Seite 28: Ph-Wert Skala
Anhang pH-Wert Skala Puffer-Tabelle In der unten gezeigten Tabelle sind die tempera- turbedingten Änderungen der Puffer aufgelistet. (DIN Puffer nach DIN 19266) Bei der Kalibrierung wird dies automatisch berücksichtigt. - Seite 29 230 pH- and temperature measuring instrument Bedienungsanleitung Instruction manual...
- Seite 57 Notizen Notes...
- Seite 58 Notizen Notes...
- Seite 59 Notizen Notes...
- Seite 60 AG Postfach 11 40, 79849 Lenzkirch Testo-Straße 1, 79853 Lenzkirch Telefon: (07653) 681-0 Fax: (07653) 681-100 E-Mail: info@testo.de Internet: http://www.testo.com 0973.2610/02.01/T/dr/06.05.2004...