Herunterladen Inhalt Inhalt Diese Seite drucken

Werbung

Verfügbare Sprachen
  • DE

Verfügbare Sprachen

  • DEUTSCH, seite 15
QUICK USER GUIDE
UK
DE
FR
NL
IT
ES
PT
CORDLESS
TELEPHONE
Smart 64

Werbung

Inhaltsverzeichnis
loading

Inhaltszusammenfassung für AEG Smart 64

  • Seite 1 QUICK USER GUIDE CORDLESS TELEPHONE Smart 64...
  • Seite 3: Important Safety Instructions

    BECAUSE WE CARE Thank you for purchasing this product. This product has been designed and assembled with utmost care for you and the environment. This is why we supply this product with a quick installation guide to reduce the number of paper (pages) and therefor save trees to be cut for making this paper.
  • Seite 4: Intended Use

    7. NEVER use your phone outdoors during a thunderstorm-unplug the base from the telephone line and the mains socket when there are storms in your area. Damage caused by lightning is not covered by the guarantee. 8. Do not use the telephone to report a gas leak in the vicinity of the leak.
  • Seite 5: Setting Up Your Phone

    SETTING UP YOUR PHONE Handset overview (see P1) Meaning Power Button • Press and hold to turn the handset power on / off. • Press briefly to put the handset in to or out of sleep mode. Camera • Front facing camera lens. Earpiece • Place your ear against this when making normal phone calls.
  • Seite 6 Micro USB / Charging Port • Connect your handset to your computer to transfer files. • Connect a 5V DC micro-USB socket AC Adaptor to charge the phone. Inserting the Handset Battery (See P2) To access the battery compartment, carefully remove the cover by lifting from the small cut-out in the bottom corner as shown, Then insert the battery into position and replace the cover.
  • Seite 7 Switching Your Phone On 1. Press and hold Power on the top of the handset until the startup image appears. It takes about one minute for the handset to power up completely. 2. By default, the phone screen will be locked, tap and slide the right until shows.
  • Seite 8: Basic Operation

    BASIC OPERATION Tap once to access the dialler. Tap once to answer a call. Tap once to access menu options. Tap once to return to a previous screen. Tap once to hide the on screen keyboard, dialogue box, options menu or notifcations panel. Tap to return to the home screen.
  • Seite 9: Using The Touchscreen

    USING THE TOUCHSCREEN Action Function Operation Select on-screen items such as applications and Gently tap an item on the settings icons. screen to select the item Select on-screen buttons. that you wish to activate. Type using the on-screen keyboard. Open other options for an item, for example, tap and Tap an item on the screen Tap &...
  • Seite 10 WIRELESS CONNECTION (WI-FI®) The handset Wi-Fi can be accessed at any time using the settings menu. To use Wi-Fi, you must first make sure it is turned on. > Settings. 1. From the Home screen, tap 2. Slide bar next to Wi-Fi to the ON position. 3.
  • Seite 11: Guarantee And Service

    GUARANTEE AND SERVICE The phone is guaranteed for 24 months from the date of purchase shown on your sales receipt. This guarantee does not cover any faults or defects caused by accidents, misuse, fair wear and tear, neglect, faults on the telephone line, lightning, tampering with the equipment, or any attempt at adjustment or repair other than through approved agents.
  • Seite 12: Technical Specifications

    TECHNICAL SPECIFICATIONS Operating System Android OS 4.2.2 (Jelly Bean) Battery Information Shenzhen JETECH Energy Technology Co., Ltd. Battery Model 465155 Battery Type 3.7V Li-ion, 1500mAh Only use the provided battery Screen Size 4” TFT LCD, WVGA , 800 x 480 pixel Panel Capacitive Multi Touch (5 Fingers) Connectivity...
  • Seite 13: Disposal Of The Device

    Manufacturer DongGuan MLF Tech. Co., Ltd. Model MLF-A00060501000FE0021 / MLF MLF- A00060501000FU0021 Input Rating 100~240VAC, 180mA Output Rating 5VDC 1A CE DECLARATION This product is in compliance with the essential requirements and other relevant provisions of the R&TTE directive 1999/5/EC. The Declaration of conformity can be found on: www.aegtelephones.eu DISPOSAL OF THE DEVICE...
  • Seite 14: Cleaning And Care

    CLEANING AND CARE Do not clean any part of your phone with benzene, thinners or other solvent chemicals as this may cause permanent damage which is not covered by the Guarantee. When necessary, clean it with a damp cloth. Keep your phone system away from hot, humid conditions or strong sunlight, and don‘t let it get wet.
  • Seite 15: Unser Einsatz Für Die Umwelt

    UNSER EINSATZ FÜR DIE UMWELT Vielen Dank, dass Sie sich für dieses Produkt entschieden haben. Dieses Gerät wurde mit größter Sorgfalt entwickelt und zusammengebaut, um Ihnen ein ausgezeichnetes Produkt zu bieten und die Umwelt zu schonen. Deshalb liegt diesem Produkt eine Kurzanleitung bei, um die Papiermenge (Seiten) zu reduzieren und um die Anzahl der für Papier benötigten, gefällten Bäume zu vermindern.
  • Seite 16: Bestimmungsgemässe Verwendung

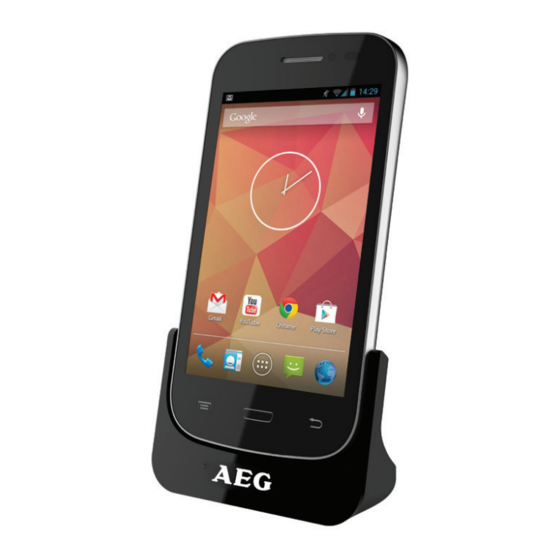
    • Wenn das Produkt trotz Beachten der Bedienungsanleitung nicht richtig funktioniert. • Wenn das Produkt hingefallen ist und das Gehäuse beschädigt wurde. • Wenn das Produkt starke Leistungsänderungen aufweist. 7. Benutzen Sie das Produkt NIEMALS während eines Gewitters, sondern trennen Sie die Basisstation bei Gewitter vom Telefonnetz und von der Netzsteckdose.
  • Seite 17 INSTALLATION IHRES TELEFONS Überblick Mobilteil (siehe S. 1) Bedeutung Ein-/Ausschalter • Drücken und gedrückt halten, um das Mobilteil ein-/ auszuschalten. • Kurz drücken, um das Mobilteil in den Ruhezustand zu versetzen oder um es wieder einzuschalten. Kamera • Frontkameralinse. Hörer • Gegen das Ohr halten, wenn Sie normale Telefongespräche führen.
  • Seite 18 Lautstärke • Lautstärke erhöhen/verringern +/-. Micro-USB/Ladeanschluss • Zum Anschließen des Mobilteils an den Computer, um Dateien zu übertragen. • Schließen Sie hier ein 5 V DC Micro-USB-Netzteil zum Laden des Telefons an. Einlegen des Akkus in das Mobilteil (Siehe S 2) Zum Batteriefach gelangen Sie, indem Sie die Rückseitenabdeckung vorsichtig abnehmen, indem Sie diese über die kleine Aussparung in der unteren Ecke (siehe Abbildung) anheben.
  • Seite 19 Register Button (Registrieren-Taste) Drücken und halten Sie diese Taste gedrückt, um ein neues Mobilteil bei der Basisstation zu registrieren. Power Line In (Netzanschlussbuchse) Verbinden Sie den Micro-USB-Stecker des Netzanschlusskabels mit der Netzanschlussbuchse im Mobilteil. Phone Line In (Telefonanschlussbuchse) Verbinden Sie Ihre Telefonleitung mit dieser Buchse. Das Telefon einschalten 1.
  • Seite 20 GRUNDFUNKTIONEN Einmal drücken, um zur Wählvorrichtung zu gelangen. Einmal drücken, um einen Anruf entgegenzunehmen. Einmal drücken, um zu den Menüoptionen zu gelangen. Einmal drücken, um zur vorherigen Bildschirmansicht zu gelangen. Einmal drücken, Bildschirmtastatur, die Dialogboxen, das Optionsmenü oder die Benachrichtigungsleiste zu verbergen. . Drücken, um zur Startansicht zu gelangen.
  • Seite 21: Verwenden Des Touchscreens

    VERWENDEN DES TOUCHSCREENS Aktion Funktion Bedienung Wählen Sie Elemente auf dem Bildschirm aus wie z. B. Anwendungen und Drücken Sie leicht auf Einstellungs symbole. das Element, das Sie Drücken Wählen Sie aktivieren wollen. Bildschirmtasten aus. TippeSie Teste mit der Bildschirmtastatur. Öffnen Sie die verfügbaren Optionen eines Elementes,...
  • Seite 22 Blättern funktioniert ähnlich wie Gleiten, Durchsuchen Sie schnell jedoch kann man mit der Blättern eine Elementeliste in Blättern-Funktion die vertikaler Richtung. Bildschirmansichten mit leichteren und schnelleren Bewegungen durchgehen. Wenn Sie Fotos oder eine Website ansehen, legen Mit dieser Taste Sie zwei Finger auf den können Sie einen Teil Bildschirm bewegen Sie Zoom...
  • Seite 23: Drahtlose Verbindung (Wi-Fi®)

    DRAHTLOSE VERBINDUNG (WI-FI®) Die Wi-Fi-Verbindung des Mobilteils kann jederzeit über das Einstellungsmenü aufgerufen werden. Um diese Funktion benutzen zu können, müssen Sie die drahtlose Wi-Fi-Verbindung erst einmal aktivieren. 1. Drücken Sie in der Startbildansicht > Settings. 2. Schieben Sie die Leiste, neben dem Element Wi-Fi auf ON. 3.
  • Seite 24: Garantie Und Service

    GARANTIE UND SERVICE Die Garantiefrist für das Gerät beträgt 24 Monate ab dem Datum des Kaufbeleges. Diese Garantie deckt keine Fehler oder Defekte ab, die durch Unfälle, Missbrauch, normalen Verschleiß, Nachlässigkeit, Defekte im Telefonnetz, Blitzeinschlag, jegliche Versuche zur Veränderung/Reparatur des Geräts seitens des Kunden oder nicht zugelassenen Servicepersonals entstanden sind.
  • Seite 25 Netzwerkfähigkeit Bluetooth 4.0 (für Datenaustausch) Unterstützte Micro SD-Speicherkarte (nicht Speicherkarte enthalten) bis zu 32 GB SDHC Anschlusstyp Micro-USB des Mobilteils Kopfhörer 3,5 mm Klinkenstecker Lautsprecher Mono des Mobilteils Wi-Fi-Verbindung 802.11b/g/n Mobilteilkamera Frontkamera (VGA) (640x480) Interner Speicher DECT- 1,88 G bis 1,90 GHz (Bandbreite = 20MHz) Frequenzbereich Netzteil für Bitte verwenden Sie nur das...
  • Seite 26: Ce-Konformitätserklärung

    CE-KONFORMITÄTSERKLÄRUNG Dieses Produkt entspricht den maßgeblichen Anforderungen und anderen relevanten Bestimmungen der FuTKEE-Richtlinie 1999/5/EG. Die Konformitätserklärung liegt vor unter: www.aegtelephones.eu ENTSORGEN DES GERÄTS (UMWELTSCHUTZ) Am Ende des Produktlebenszyklus sollten Sie dieses Gerät nicht über den normalen Hausmüll entsorgen, sondern es zu einer Sammelstelle für das Recycling von elektrischen und elektronischen Geräten bringen.
  • Seite 27: Instructions De Sécurité Importantes

    NOTRE ENGAGEMENT Merci d’avoir acheté ce produit. Ce produit a été conçu et fabriqué avec le plus grand soin pour vous satisfaire tout en préservant l’environnement. C’est pourquoi nous fournissons ce produit avec un guide de démarrage rapide, afin de réduire la quantité de papier (le nombre de pages) utilisée et d’éviter ainsi à...
  • Seite 28: Utilisation Conforme

    7. N’utilisez JAMAIS votre téléphone à l’extérieur pendant un orage ; débranchez la base de la ligne téléphonique et de la prise secteur en cas de risque d’orage. Les dommages causés par la foudre ne sont pas couverts par la garantie. 8.
  • Seite 29 CONFIGURATION DE VOTRE TÉLÉPHONE Vue d’ensemble du combiné (voir P1) Signification Touche Power (marche) • Appuyez sur la touche et maintenez-la enfoncée pour allumer/éteindre le combiné. • Appuyez brièvement pour mettre le combiné en mode veille ou pour sortir du mode veille. Appareil photo • Objectif d’appareil photo frontal.
  • Seite 30 Port de chargement/Micro USB • Connectez votre combiné à votre ordinateur pour transférer des fichiers. • Branchez un adaptateur secteur 5V DC à prise micro- USB pour charger le téléphone. Mise en place de la batterie du téléphone (Voir P2) Pour accéder au compartiment de la batterie, enlevez délicatement le couvercle en soulevant au niveau de la petite encoche située dans le coin inférieur comme illustré.
  • Seite 31 Mise en marche de votre téléphone 1. Appuyez sur la touche Power (marche) située en haut du combiné et maintenez-la enfoncée jusqu’à ce que l’image de démarrage s’affiche. La mise en marche complète du téléphone prend environ une minute. 2. Par défaut, l’écran du téléphone est bloqué; touchez et faites glisser vers la droite jusqu’à...
  • Seite 32: Fonctionnement De Base

    FONCTIONNEMENT DE BASE Appuyez une fois pour accéder au clavier de numérotation. Appuyez une fois pour répondre à un appel. Appuyez une fois pour accéder aux options du menu. Appuyez une fois pour revenir à l’écran précédent. Appuyez une fois pour masquer le clavier virtuel, la boîte de dialogue, le menu des options ou le panneau des notifications.
  • Seite 33: Utilisation De L'écran Tactile

    UTILISATION DE L’ÉCRAN TACTILE Action Fonction Opération Sélectionner des éléments affichés tels Touchez doucement un que des applications objet affiché sur l’écran Appuyer et des icônes de pour sélectionner l’élément paramètres. que vous désirez activer. Sélectionner des touches affichées. Ouvrir d’autres options pour un élément ;...
  • Seite 34 Feuilleter s’apparente à Parcourir rapidement faire glisser, mais implique Feuilleter dans le sens vertical que le doigt tapote une liste d’éléments. l’écran par touches plus légères et plus rapides. Lorsque vous visualisez Effectuer un zoom des photos ou une page avant ou arrière web, placez deux doigts Zoom...
  • Seite 35 CONNEXION SANS FIL (WI-FI®) La fonction Wi-Fi du téléphone est accessible à tout moment par l’intermédiaire du menu settings. Pour utiliser le Wi-Fi, assurez-vous d’abord qu’il est allumé. 1. Dans l’écran d’accueil, sélectionnez > Settings. 2. Faites glissez la barre à côté de Wi-Fi sur la position ON (marche). 3.
  • Seite 36: Garantie Et Service

    GARANTIE ET SERVICE Le téléphone est garanti durant 24 mois à compter de la date d’achat figurant sur votre ticket de caisse. Cette garantie ne couvre pas les pannes ou les défauts dus à des accidents, une utilisation non conforme, l’usure normale, la négligence, aux défaillances de la ligne téléphonique, à...
  • Seite 37 Connectivité Bluetooth 4.0 (pour le transfert de données) Carte mémoire Micro-SD (non fournie) prise en charge jusqu’à 32GB SDHC Type de port Micro-USB du combiné Prise casque 3,5mm jack Haut-parleur Mono du combiné Connexion Wi-Fi 802.11b/g/n Appareil photo Frontal VGA (640 x 480) du combiné...
  • Seite 38: Mise Au Rebut De L'appareil

    DÉCLARATION CE Ce produit est conforme aux prescriptions essentielles et aux autres dispositions pertinentes de la directive R&TTE 1999/5/EC. La déclaration de conformité est disponible à l’adresse suivante : www.aegtelephones.eu MISE AU REBUT DE L’APPAREIL (ENVIRONNEMENT) Lorsque le cycle de vie du produit arrive à son terme, ne jetez pas cet appareil avec les ordures ménagères ;...
  • Seite 39: Belangrijke Veiligheidsinstructies

    ONZE ZORG Wij willen u bedanken voor de aankoop van dit product. Bij de ontwikkeling en montage van dit product stonden u en het milieu centraal. Daarom krijgt u bij dit product een verkorte installatiehandleiding, zodat er minder papier wordt gebruikt en er dus minder bomen moeten worden gekapt. Een volledige, gedetailleerde gebruikershandleiding met beschrijvingen van alle functies vindt u op onze website www.aegtelephones.eu.
  • Seite 40: Bedoeld Gebruik

    7. Gebruik uw telefoon NOOIT buiten tijdens een onweersbui.Koppel het toestel los van de telefoonlijn en het stopcontact wanneer het onweert in uw omgeving. Schade door blikseminslag wordt niet gedekt door de garantie. 8. Gebruik de telefoon niet om een gaslek te melden wanneer u zich in de buurt van het lek bevindt.
  • Seite 41: De Telefoon Instellen

    DE TELEFOON INSTELLEN Overzicht van de handset (zie pag. 1) Betekenis Aan/Uit-knop • Houd de Aan/Uit-knop ingedrukt. • Kort drukken om de handset in slaapstand te zetten of uit slaapstand te halen. Camera • Front-facing cameralens. Luidspreker • Breng uw oor tegen deze luidspreker voor het voeren van een gewoon telefoongesprek.
  • Seite 42 Volume • Pas het volume aan + (luider) / - (stiller). Micro USB / poort voor opladen • Sluit uw telefoon aan op uw computer om bestanden over te brengen. • Verbind met een 5V DC adapter met micro-USB aansluiting om de telefoon op te laden. Plaatsen van de batterij in de handset (Zie pag.
  • Seite 43 Uw telefoon inschakelen 1. Druk op de knop Power (Aan/uit) bovenaan de telefoon en houd ingedrukt tot het opstartscherm verschijnt. Het duurt ongeveer een minuut voordat de handset volledig opgestart is. 2. Het scherm van de telefoon wordt standaard vergrendeld; tik en schuif naar rechts tot te zien...
  • Seite 44 BASISHANDELINGEN Eén keer tikken om de kiesfunctie te openen. Eén keer tikken om een oproep te beantwoorden. Eén keer tikken om de menuopties te openen. Eén keer tikken om terug te keren naar het vorige scherm. Eén keer tikken toetsenbord, dialoogvenster, het optiemenu of het paneel met berichten op het scherm te verbergen.
  • Seite 45 HET AANRAAKSCHERM Actie Functie Handeling Selecteer op het scherm items zoals apps en pictogrammen Tik voorzichtig op een voor instellingen. item op het scherm Tikken Toetsen op het om het item dat u wilt scherm selecteren. activeren te selecteren Typen met het toetsenbord op het scherm.
  • Seite 46 Vegen lijkt op schuiven, Blader snel in een maar bij vegen maakt Vegen lijst met items in uw vinger lichtere en verticale richting snellere bewegingen over het scherm Bij het bekijken van foto‘s of een webpagina, In-of uitzoomen gebruikt u twee vingers van het scherm op het scherm en brengt Zoom...
  • Seite 47: Draadloze Verbinding (Wi-Fi®)

    DRAADLOZE VERBINDING (WI-FI®) De handset Wi-Fi-verbinding kan op elk moment worden geraadpleegd via het menu “Settings” (instellingen). Om Wi-Fi te gebruiken, moet u er eerst voor zorgen dat het ingeschakeld is. 1. Vanuit het beginscherm op tikken op > Settings. 2.
  • Seite 48: Garantie En Service

    GARANTIE EN SERVICE De telefoon wordt geleverd met 24 maanden garantie vanaf de aankoopdatum vermeld op uw aankoopbon. Onder deze garantie vallen geen storingen of defecten als gevolg van ongevallen, verkeerd gebruik, normale slijtage, onachtzaamheid, storingen in de telefoonlijn, blikseminslag, knoeien met de apparatuur of pogingen om het toestel aan te passen of te repareren die niet door goedgekeurde servicepunten zijn uitgevoerd.
  • Seite 49 Connectiviteit Bluetooth 4.0 (voor gegevensoverdracht) Ondersteunde Micro-SD (niet inbegre- geheugenkaart pen) tot 32 GB SDHC Aansluiting handset Micro-USB Hoofdtelefoon 3.5mm jack Handset luidspreker Mono Wi-Fi verbinding 802.11b/g/n Handset Camera Voorkant VGA (640x480) Intern geheugen DECT frequen- 1,88 - 1,90 GHz (20 MHz bandbreedte) tieband Basis voedings- Gebruik alleen de meegele-...
  • Seite 50: Reiniging En Zorg

    CE-VERKLARING Dit product voldoet aan de essentiële vereisten en andere relevante voorschriften van de R&TTE-richtlijn 1999/5/EG. U vindt de conformiteitsverklaring op: www.aegtelephones.eu HET TOESTEL AFDANKEN (MILIEU) Aan het einde van de levensduur van het product mag u dit product niet weggooien met het normale huishoudafval, maar moet u het product naar een inzamelingspunt voor de recycling van elektrische en elektronische apparatuur brengen.
  • Seite 51: Importanti Istruzioni Di Sicurezza

    CI PREOCCUPIAMO Grazie per aver acquistato questo prodotto. Questo prodotto è stato progettato e montato con massima attenzione a voi e all’ambiente. Ecco perché forniamo questo prodotto con una guida rapida all’installazione per ridurre il numero di pagine di carta e, di conseguenza, salvare alberi che verrebbero tagliati per produrre carta.
  • Seite 52: Uso Previsto

    7. NON usare mai il telefono all’aperto durante una tempesta — scollegare la base dalla linea telefonica e dalla presa di corrente in caso di tempesta. I danni causati dalla luce non sono coperti dalla garanzia. 8. Non usare il telefono per riportare perdite di gas in prossimità di una perdita.
  • Seite 53: Configurazione Del Telefono

    CONFIGURAZIONE DEL TELEFONO Descrizione del microtelefono (see P1) Significato Tasto Power (Alimentazione) • Tenere premuto accendere/spegnere microtelefono. • Premere breve tempo mettere microtelefono in modalità Sleep. Videocamera • Lenta della videocamera rivolta verso il lato frontale. Ricevitore • Mettere la testa contro il ricevitore durante normali telefonate.
  • Seite 54 Volume • Regolare il volume su + / giù -. Micro USB / Porta di ricaricamento • Collegare il microtelefono al computer per trasferire file. • Collegare la presa micro-USB 5V DC dell’adattatore AC per caricare il telefono Inserimento della batteria del ricevitore (See P2) Per accedere al vano batteria, togliere delicatamente il coperchio sollevando il piccolo interruttore all’angolo inferiore come mostrato.
  • Seite 55 Accensione del telefono 1. Tenere premuto il tasto Power (Alimentazione) sopra il ricevitore finché non compare l‘immagine iniziale. Ci vuole circa un minuto affinché il ricevitore si accenda completamente. 2. Come impostazione predefinita, la schermata del telefono sarà bloccata, toccare e far scorrere verso destra finché...
  • Seite 56: Funzionamento Di Base

    FUNZIONAMENTO DI BASE Toccare una volta per accedere al Dispositivo di chiamata automatica (Dialer). Toccare una volta per rispondere ad una chiamata. Toccare una volta per accedere alle opzioni del menu. Toccare una volta per tornare ad una schermata precedente. Toccare una volta per nascondere la tastiera dello schermo, casella di dialogo, menu opzioni o pannello di notifiche...
  • Seite 57: Utilizzo Del Touchscreen

    UTILIZZO DEL TOUCHSCREEN Azione Funzione Funzionamento Selezionare gli elementi sullo schermo come Toccare delicatamente icone applicazioni una voce sullo schermo Toccare e impostazioni. per selezionare una voce Selezionare i tasti sullo che si desidera attivare. schermo. Digitare usando la tastiera sullo schermo.
  • Seite 58 Il colpetto è simile Sfogliare velocemente allo scorrimento, Colpetto l’elenco di voci in eccetto che prevede direzione verticale. lo scorrimento sullo schermo piano o veloce. Quando si visualizzano Ingrandire o ridurre foto o una pagina Web, lo schermo per usare due dita sullo Zoom visualizzare una parte schermo e avvicinare le...
  • Seite 59 CONNESSIONE WIRELESS (WI-FI®) È possibile accedere al ricevitore Wi-Fi in qualsiasi momento usando il menu impostazioni. Per usare Wi-Fi, verificare prima che la funzione sia attiva. 1. Dalla schermata principale, toccare > Settings. 2. Far scorrere la barra accanto a Wi-Fi su ON (Attivo).. 3.
  • Seite 60: Garanzia E Servizio

    GARANZIA E SERVIZIO Il telefono ha una garanzia di 24 mesi dalla data di acquisto mostrata dalla ricevuta di acquisto. Questa garanzia non copre guasti o difetti causati da incidenti, uso errato, usura e negligenza, guasti alla linea telefonica, luce, sabotaggio del dispositivo o qualsiasi altro tentativo di regolare o riparare ad opera di terzi che non siano tecnici approvati.
  • Seite 61 Scheda di memoria Scheda Micro-SD (non inclusa) supportata fino a 32GB SDHC Tipo di porta Micro-USB per ricevitore Cuffie Jack 3,5 mm Altoparlante Mono del ricevitore Connessione Wi-Fi 802.11b/g/n Telecamera del VGA rivolto in avanti (640x480) ricevitore Memoria interna Banda di 1.88G - 1.90 GHz (ampiezza frequenza DECT di banda 20MHz)
  • Seite 62: Smaltimento Del Dispositivo

    DICHIARAZIONE CE Questo prodotto è conforme ai requisiti essenziali e altri requisiti della direttiva R&TTE 1999/5/CE. La dichiarazione di conformità è presente su: www.aegtelephones.eu SMALTIMENTO DEL DISPOSITIVO (AMBIENTE) Alla fine della durata del prodotto, non buttare questo prodotto nei rifiuti normali ma consegnarlo ad un centro di raccolta destinato al riciclo di dispositivi elettrici ed elettronici.
  • Seite 63: Instrucciones Importantes De Seguridad

    PORQUE NOS PREOCUPAMOS Gracias por comprar este producto Este producto ha sido diseñado y montado con el máximo cuidado para usted y el medio ambiente. Por ello suministramos este producto con una guía de instalación rápida para reducir la cantidad de papel (páginas) y por lo tanto evitar que se corten más árboles para fabricar este papel.
  • Seite 64 7. NUNCA use el teléfono al aire libre durante una tormenta- desenchufe la base de la línea telefónica y la toma de corriente cuando haya tormentas. Los daños ocasionados por rayos no están cubiertos por la garantía. 8. No utilice el teléfono para informar de una fuga de gas estando cerca de la fuga.
  • Seite 65 CONFIGURAR SU TELÉFONO Resumen del teléfono (vease P1) Significado Botón de encendido • Mantenga pulsado para encender/apagar teléfono. • Pulse brevemente para poner o sacar el teléfono en /del modo de descanso. Cámara • Lente de cámara frontal. Auricular • Coloque su oreja contra esto cuando realice llamadas de teléfono normales.
  • Seite 66 Micro USB /Puerta De Carga • Conecte su teléfono a su ordenador para transferir archivos. • Conecte un adaptador AC enchufe 5V DC micro- USB para cargar el teléfono. Insertar la batería del teléfono (Véase P2) Para acceder al compartimento de la batería, retire cuidadosamente la tapa levantando de la pequeña ranura en la esquina de abajo como se muestra, luego coloque la batería en su sitio y vuelva a colocar la tapa.
  • Seite 67 Encender su teléfono 1. Mantenga pulsado Power (botón de encendido) en la parte superior del teléfono hasta que aparezca la pantalla de inicio. Se tarda aproximadamente un minuto para que el teléfono se encienda por completo. 2. Por defecto, la pantalla del teléfono estará bloqueada, toque y deslice a la derecha hasta que aparezca 3.
  • Seite 68: Funcionamiento Básico

    FUNCIONAMIENTO BÁSICO Pulse una vez para acceder al marcador. Pulse una vez para responder a una llamada Pulse una vez para acceder a las opciones del menú. Pulse una vez para volver a la pantalla anterior. Pulse una vez para esconder el teclado en pantalla, cuadro de dialogo, menú...
  • Seite 69 UTILIZAR LA PANTALLA TÁCTIL Acción Función Funcionamiento Seleccione elementos Con cuidado pulse en pantalla tales como sobre un elemento aplicaciones e iconos de en la pantalla para Pulse ajuste. Seleccione botones seleccionar el elemento en pantalla.Teclée usando que desea activar. el teclado en pantalla.
  • Seite 70 Pulsar es similar a Examine rápidamente deslizar, salvo que Pulsar una lista de elementos pulsar implica rozar la en dirección vertical. pantalla de manera más suave y rápida. Cuando esté mirando Acerque o aleje la fotos o una página web, pantalla para ver una use dos dedos en la Zoom...
  • Seite 71 CONEXIÓN INALÁMBRICA (WI-FI®) Se puede acceder al teléfono Wi-Fi en cualquier momento utilizando el menú de ajustes. Para usar Wi-Fi, debe asegurarse primero que está encendido. 1. Desde la pantalla de inicio, pulse > Settings. 2. Deslice la barra al lado del Wi-Fi a la posición de ON (encendido). 3.
  • Seite 72: Garantía Y Servicio Técnico

    GARANTÍA Y SERVICIO TÉCNICO El teléfono tiene una garantía de 24 meses a partir de la fecha que figura en su recibo de compra. Esta garantía no cubre ningún fallo o defecto causado por accidentes, mal uso, desgaste normal, negligencia, fallos en la línea telefónica, rayos, manipulación del equipo, o cualquier intento de ajuste o reparación que no sea a través de agentes autorizados.
  • Seite 73 Tarjeta de memoria Micro-SD (no incluida) compatible hasta 32GB SDHC Tipo de puerto Micro-USB del teléfono Auricular 3.5mm jack Altavoz del teléfono Mono Conexión Wi-Fi 802.11b/g/n Cámara del teléfono VGA parte delantera (640x480) Memoria interna DECT Frecuencia 1.88G - 1.90 GHz (ancho de Banda de banda 20MHz) Adaptador de...
  • Seite 74: Eliminación Del Dispositivo

    DECLARACIÓN CE Este producto cumple con los requisitos esenciales y otras disposiciones relevantes de la directiva R & TTE 1999/5/CE. La declaración de conformidad puede ser encontrada en: www.aegtelephones.eu ELIMINACIÓN DEL DISPOSITIVO (MEDIO AMBIENTE) Al final del ciclo de vida del producto, éste no debe desecharse en la basura normal, sino llevar el producto a un punto de recogida para el reciclaje de equipos eléctricos y electrónicos.
  • Seite 75: Instruções Importantes De Segurança

    PORQUE NOS PREOCUPAMOS Obrigado por comprar este produto. Este produto foi concebido e montado com a máxima preocupação por si e pelo ambiente. É por isso que fornecemos este produto com um guia de instalação rápida, para reduzir a quantidade de papel (páginas) e, consequentemente, salvar árvores que seriam cortadas para fazer o papel correspondente.
  • Seite 76: Utilização Pretendida

    7. NUNCA utilize o seu telefone no exterior durante uma trovoada – desligue a base da linha telefónica e da tomada elétrica quando existirem tempestades na sua área. Os danos provocados por relâmpagos não são cobertos pela garantia. 8. Não utilize o telefone na vizinhança de uma fuga de gás para comunicar a fuga.
  • Seite 77 CONFIGURAR O SEU TELEFONE Vista Geral do Telefone (Ver Pág. 1) Descrição Botão de Energia • Mantenha o botão pressionado para ligar/desligar o telefone. • Pressione rapidamente para colocar ou retirar o telefone no modo de espera Câmara • Lente da câmara frontal.. Auscultador • Posicione o seu ouvido sobre o auscultador quando fizer chamadas telefónicas normais.
  • Seite 78 Volume • Ajustar o volume para cima + / ou baixo -. Porta Micro USB / Carregamento • Ligue o seu telefone ao computador para transferir ficheiros. • Ligue um adaptador AC 5V DC com conector micro- USB para carregar o telefone. Inserir a Bateria no Telefone (Ver Pág.2) Para aceder ao compartimento da bateria remova cuidadosamente a cobertura, levantando-a através da pequena ranhura no canto inferior como indicado.
  • Seite 79 Ligar o Seu Telefone 1. Mantenha pressionado o botão Power (Ligar/Desligar) no topo do telefone até que a imagem de início apareça. O telefone demora cerca de um minuto até ligar completamente. 2. Por definição, o ecrã do telefone estará bloqueado, toque e deslize para a direita até...
  • Seite 80: Funcionamento Básico

    FUNCIONAMENTO BÁSICO Toque uma vez para aceder ao marcador de chamadas. Toque uma vez para atender uma chamada. Toque uma vez para aceder ao menu de opções. Toque uma vez para voltar ao ecrã anterior. Toque uma vez para esconder o teclado do ecrã, a caixa de diálogo, o menu de opções ou o painel de notificações.
  • Seite 81: Usando O Touchscreen

    USANDO O TOUCHSCREEN Ação Função Operação Selecionar itens no ecrã, tais como, Toque suavemente ícones de aplicações num item do ecrã Tocar e de configurações. para selecionar o item Selecionar botões no que deseja ativar. ecrã. Escrever usando o teclado do ecrã. Abrir outras opções de um item, por exemplo, toque e mantenha o...
  • Seite 82 O movimento rápido é semelhante ao deslizar, Consultar rapidamente com exceção que o Movimento uma lista de itens na movimento rápido Rápido direção vertical. envolve deslizar no ecrã com movimentos mais leves e rápidos. Ao ver fotografias ou Fazer/desfazer o uma página de internet, zoom do ecrã...
  • Seite 83 LIGAÇÃO SEM-FIOS (WI-FI®) A Wi-Fi do telefone pode ser acedida em qualquer altura usando o menu de configurações. Para usar a Wi-Fi certifique-se primeiro de que a mesma está ligada. 1. A partir do ecrã de Início, toque em > Settings. 2.
  • Seite 84: Especificações Técnicas

    GARANTIA E MANUTENCÃO O telefone tem garantia de 24 meses a partir da data da compra indicada no recibo de compra. Esta garantia não cobre quaisquer falhas ou defeitos provocados por acidentes, uso indevido, desgaste normal, negligência, falhas na linha telefónica, relâmpagos, adulteração do equipamento ou qualquer tentativa de ajuste ou reparação efetuada por agentes não autorizados.
  • Seite 85 Cartão de Memória Micro-SD (não incluído) até 32GB SDHC Suportado Tipo do Porto Micro-USB do Telefone Auscultadores Entrada de 3.5mm Auscultador Mono do Telefone Ligação Wi-Fi 802.11b/g/n Câmara do Telefone VGA (640x480) Virada para a Frente Memória Interna Banda de 1.88G - 1.90 GHz (largura de banda 20MHz) Frequência DECT Adaptador de...
  • Seite 86 DECLARAÇÃO CE Este produto está em conformidade com os requisitos essenciais e outras provisões relevantes da diretiva R&TTE 1999/5/EC. A Declaração de Conformidade pode ser encontrada em: www.aegtelephones.eu DESFAZER-SE DO DISPOSITIVO (AMBIENTE) No final do ciclo de vida do produto, não deverá deitá-lo para o lixo doméstico normal, mas sim levá-lo até...
  • Seite 87: Limpeza E Cuidado

    LIMPEZA E CUIDADO Não limpe nenhuma peça do seu telefone com benzeno, diluentes ou outros químicos solventes, dado que este podem provocar danos permanentes que não são cobertos pela Garantia. Quando necessário, limpe-o com um pano húmido. Mantenha o seu sistema de telefone afastado de condições quentes e húmidas ou da luz solar intensa, e evite que fique molhado.
  • Seite 88 © 2014 Binatone Electronics International Limited All rights reserved Subject to availability. Rights of modification reserved. AEG is a registered trademark used under license from AB Electrolux (publ) www.aegtelephones.eu...

Inhaltsverzeichnis