HomeMatic HM-Sec-TIS Montageanleitung Und Bedienungsanleitung
Vorschau ausblenden
Andere Handbücher für HM-Sec-TIS:
- Montageanleitung und bedienungsanleitung (17 Seiten)

Verwandte Anleitungen für HomeMatic HM-Sec-TIS


Inhaltszusammenfassung für HomeMatic HM-Sec-TIS
- Seite 1 Montage- und Bedienungsanleitung Funk-Neigungssensor HM-Sec-TiS Seite 4 - 17 Mounting instruction and operating manual Wireless inclination sensor HM-Sec-TiS Seite 18 - 31...
- Seite 2 1. Ausgabe Deutsch 01/2010 Dokumentation © 2008 eQ-3 Ltd., Hong Kong Alle Rechte vorbehalten. Ohne schriftliche Zustim- mung des Herausgebers darf dieses Handbuch auch nicht auszugsweise in irgendeiner Form reproduziert werden oder unter Verwendung elektronischer, me- chanischer oder chemischer Verfahren vervielfältigt oder verarbeitet werden.
- Seite 3 1. English edition 10/2010 Documentation © 2008 eQ-3 Ltd., Hong Kong All rights reserved. This manual may not be re- produced in any format, either in whole or in part, nor may it be duplicated or edited by electronic, mechanical or chemical means, without the written consent of the publisher.
-
Seite 4: Inhaltsverzeichnis
Funktion......6 Allgemeine Systeminformation zu HomeMatic 7 Allgemeine Hinweise zum Funkbetrieb ..8 Montage und Inbetriebnahme . -
Seite 5: Hinweise Zu Dieser Anleitung
Hinweise zu dieser Anleitung Lesen Sie diese Anleitung sorgfältig, bevor Sie ihre HomeMatic-Komponenten in Betrieb nehmen. Bewahren Sie die Anleitung zum späteren Nach- schlagen auf! Wenn Sie das Gerät anderen Personen zur Nutzung überlassen, übergeben Sie auch diese Bedienungs- anleitung. -
Seite 6: Funktion
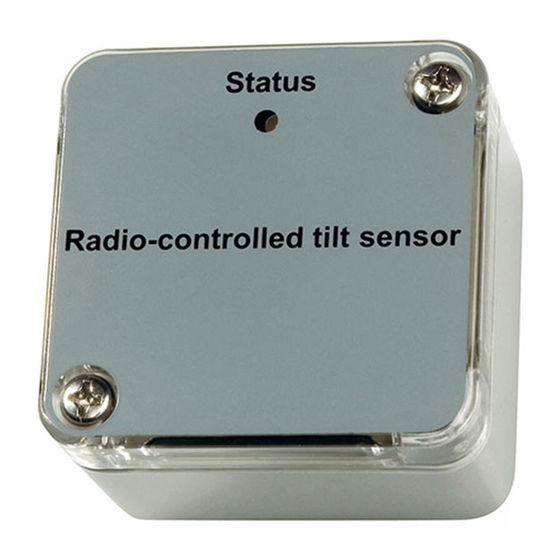
Der Funk-Neigungssensor verfügt über einen internen Lagesensor, der bei einer einstellbaren Lage-Abweichung aus der Waagerechten einen Kontakt öffnet. Eine Auswerteschaltung wandelt den detektierten Zustand in HomeMatic-Funkbefehle um. Das Gerät ist batteriebetrieben und ist so flexi- bel und ortsunabhängig einsetzbar. (A) – Anlerntaste (B) –... -
Seite 7: Allgemeine Systeminformation Zu Homematic
Allgemeine Systeminformation zu HomeMatic Dieses Gerät ist Teil des HomeMatic-Haussteu- ersystems und arbeitet mit dem bidirektionalen BidCoS® Funkprotokoll. Alle Geräte werden mit einer Standardkonfiguration ausgeliefert. Darüber hinaus ist die Funktion des Gerätes über ein Programmiergerät und Software konfigurierbar. Welcher weitergehende Funktions-... -
Seite 8: Allgemeine Hinweise Zum Funkbetrieb
Umwelteinflüssen wie Luftfeuchtigkeit bauliche/abschirmende Gegebenheiten vor Ort eine wichtige Rolle. Hiermit erklärt die eQ-3 Entwicklung GmbH, dass sich dieses Gerät in Übereinstimmung mit den grundlegenden Anforderungen und den anderen relevanten Vorschriften der Richtlinie 1999/5/EG befindet. Die vollständige Konformitätserklärung finden Sie unter www.HomeMatic.com. -
Seite 9: Montage Und Inbetriebnahme
• Somit kann gewährleistet werden, dass der Funk-Neigungsschalter bei einer Kippbewe- gung von ca. 15° einen Funkbefehl auslöst. Sollte der Funk-Neigungssensor HM-Sec-TiS zu empfindlich gegen Erschütterungen, z. B. durch Wind, reagieren, kann der Lagesen- sor (C) leicht nach oben gebogen werden. Auf diese Weise kann der Sensor z. B. auch an im Ruhezustand nicht genau senkrecht oder waagerecht liegenden Gegenständen ange-... -
Seite 10: Montage, Batterie Einlegen
6.2 Montage, Batterie einlegen Öffnen Sie das Gerät durch Lösen der beiden De- ckelschrauben und nehmen Sie den Deckel ab. Befestigen Sie das Gerät am Montageort ent- weder über die Montagebohrungen (B) mit zwei Schrauben/Bolzen oder kleben Sie es mittels doppelseitigem Montage-Klebeband an den zu überwachenden Gegenstand an. -
Seite 11: Batterie Wechseln
Nehmen Sie das Anlernen entsprechend Kapitel 6.3 vor und justieren Sie bei Bedarf den Neigungssensor entsprechend Kapitel 6.1. Setzen Sie den Gehäusedeckel so auf das Gerät auf, dass die Druck-Aussparung für die Geräte-LED oben liegt und diese durch die Aussparung zusehen ist. Achten Sie dabei darauf, dass die Neopren-De- ckeldichtung sauber und komplett umlaufend (Stoß... -
Seite 12: Verhalten Nach Dem Einlegen Der Batterie
vom Netz getrennt, leere Batterien des Empfängers) so ist die verbrauchte Batterie wie im vorhergegan- genen Kapitel beschrieben gegen eine neue Lithium- Zelle des Typs CR 2032 auszutauschen. Beachten Sie dabei die richtige Polung der Batterie. 6.2.2 Verhalten nach dem Einlegen der Batterie Nach dem Einlegen der Batterie führt der Sensor zunächst einen Selbsttest durch. -
Seite 13: Anlernen
6.3 Anlernen Bitte lesen Sie diesen Abschnitt erst vollständig, bevor sie mit dem Anlernen beginnen! Mit dem Funk-Neigungssensor HM-Sec-TiS können HomeMatic Aktoren, wie z.B. der Funk-Schalter gesteuert werden. Dazu ist vorher ein Anlernprozess durchzuführen. Alle HomeMatic-Geräte verfügen dazu über eine Anlerntaste und eine Geräte-LED. - Seite 14 Anlerntaste am Funk-Schalter drücken, bis die LED anfängt, rot zu blinken. Dies dauert ca. 4 Sekunden. Anlerntaste am Funk-Neigungssensor HM-Sec-TiS kurz drücken. Die Geräte-LED blinkt für einige Sekunden grün. Nach beendetem Blinken ist der Sensor erfolg- reich angemeldet. Wenn kein Anlernen erfolgt, wird der Anlernmo- dus automatisch nach 20 Sekunden beendet.
-
Seite 15: Zurücksetzen In Den Auslieferungszustand
Zurücksetzen in den Auslieferungszustand Halten Sie die Anlerntaste für mindestens 5 Sekun- den gedrückt. Die Geräte-LED beginnt, langsam rot zu blinken. (Wollen Sie an dieser Stelle das Zurück- setzen abbrechen, können Sie das mit einem kurzen erneuten Tastendruck auf die Anlerntaste tun, oder Sie warten 15 Sekunden. -
Seite 16: Wartung Und Reinigung
vom Auslieferungsschlüssel verschiedenen System-Sicherheitsschlüssel aktiv. Um den Sensor zurückzusetzen, müssen sie die Konfigurationssoft- ware der Zentrale zum Zurücksetzen benutzen! Der Vorgang ist in der Anleitung zur Zentralen-Software beschrieben. Wartung und Reinigung Das Produkt ist für Sie bis auf einen eventuell erfor- derlichen Batteriewechsel und eine eventuell not- wendige Justage des Neigungssensors wartungs- frei. -
Seite 17: Technische Daten
Technische Daten Funkfrequenz: 868,3 MHz Typ. Freifeldreichweite: 100 m Stromversorgung: 1 x Lithium-Knopfzelle CR2032 Batterielebensdauer: bis zu 3 Jahre Schutzart: IP65 Gehäuse: Abmessungen (H x B x T): 50 x 50 x 35 mm Technische Änderungen vorbehalten. Entsorgungshinweis Gerät nicht im Hausmüll entsorgen! Elek- tronische Geräte sind entsprechend der Richtlinie über Elektro-und Elektronik-Altgeräte über die örtlichen Sammelstellen für Elektronik-Altgeräte...