
Verwandte Anleitungen für Harman Kardon AVR 1710


Inhaltszusammenfassung für Harman Kardon AVR 1710
- Seite 1 AVR 1710, AVR 171, AVR 171/230C AVR 1610, AVR 161, AVR 161/230C Audio/video receiver Owner’s Manual ®...
-
Seite 2: Inhaltsverzeichnis
MutIng the Sound plAcIng the Surround SpeAkerS In A 5.1-chAnnel SYSteM lIStenIng through heAdphoneS AVr 1710/AVr 171 onlY: plAcIng the Surround SelectIng A Source SpeAkerS In A 7.1-chAnnel SYSteM SelectIng A Surround Mode AVr 1710/AVr 171 onlY: plAcIng Front heIght lIStenIng to FM And AM rAdIo SpeAkerS In A 7.1-chAnnel SYSteM... -
Seite 3: Introduction
Thank you for choosing this Harman Kardon product! Verify Line Voltage Before Use For more than fifty years, the harman kardon mission has been to share a passion for music the AVr 1710 and AVr 1610 have been designed for use with 120-volt alternating and entertainment, using leading-edge technology to achieve premium performance. -
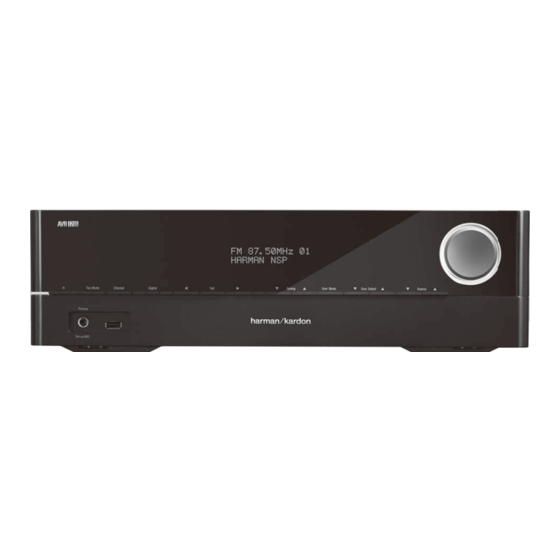
Seite 4: Front-Panel Controls
Front-Panel Controls Front-Panel Controls tuning Mode button (AVr 1710/AVr 1610)/ channel Volume Adjust button button rdS button (AVr 171/ AVr 161) power power Front-panel Volume Indicator button Sensor display knob headphone Jack/ left/right up/down buttons/ Surround Modes ezSet/eq port buttons tuning buttons Select buttons Mic Input... - Seite 5 Up/Down buttons/Tuning buttons: use these buttons to navigate the AVr’s menus. or play audio in response to an Airplay stream from a networked device (AVr 1710/ when the radio is the active source, use these buttons to tune stations according to the AVr 171 only).
-
Seite 6: Rear-Panel Connectors
Rear-Panel Connectors Rear-Panel Connectors AVR 1710/AVR 171 digital Audio connectors Fan Vents radio Antenna network hdMI output hdMI/Mhl Input hdMI Input power cord connectors connector connectors connector connectors (AVr 1710) Subwoofer Speaker Analog Video Ir and trigger Analog Audio Ac Input... - Seite 7 Network connector: If your home network is wired, use a cat. 5 or cat. 5e ethernet Fan Vents (AVR 1710/AVR 171 only): these vents are used by the AVr’s fan to cool the cable (not supplied) to connect the AVr’s network connector to your home network to system.
-
Seite 8: System Remote Control Functions
System Remote Control Functions System Remote Control Functions Ir transmitter zone 2 button power off button (AVr 1710/AVr 171 only) power on button Mute button Source Selector buttons AVr button Surround Modes button oSd/Menu button ok button up/down/left/right buttons home button... - Seite 9 Volume Up/Down buttons: press these buttons to raise or lower the volume. Zone 2 button (AVR 1710/AVR 171 only): use this button to select whether the AVr commands will affect the main listening area (zone 1) or the remote zone of a multizone Channel/Tuner buttons: when radio has been selected, press these buttons to select a system (zone 2).
-
Seite 10: Introduction To Home Theater
® 7.1 modes that are designed for 7.1-channel systems. Front Height Left and Right (AVR 1710/AVR 171 only): Your AVr includes dolby pro logic IIz decoding, which uses the AVr’s Assigned Amp channels as front height channels. the addition of front height channels – an additional pair of speakers positioned above the front left and right speakers –... -
Seite 11: Place Your Speakers
You should place the surround speakers 2 feet – 6 feet (0.6m – 1.8m) higher than the listener’s ears. AVR 1710/AVR 171 only: Placing the Surround Speakers in a 7.1- Channel System In a 7.1-channel system, place the side surround speakers 90 degrees from the center speaker, directly to either side of the listening position. -
Seite 12: Types Of Home Theater System Connections
Association has established the ceA color-coding standard. ® to make a line-level (non-amplified) connection from the AVr’s Subwoofer connector to a corresponding input jack on the subwoofer. (the AVr 1710 and AVr 171 have two Analog Audio Connection Color subwoofer output connections.) -
Seite 13: Video Connections
AM antenna connector uses spring-clip terminals. After assembling the antenna as connections. If you are going to be setting up a multizone system (AVr 1710/AVr 171 shown below, press the levers to open the connectors, insert the bare wires into the only), remember that zone 2 is an audio-only zone (the AVr does not have a zone 2 video openings, and release the levers to secure the wires. -
Seite 14: Network Connector
11, connect each speaker to its color-coded terminal on the AVr as explained in Speaker Connections, on page 12. connect the speakers as shown in the illustration. AVr 1710/AVr 171 only: connect Surround back l/r Speakers -or- Front height l/r Speakers here... -
Seite 15: Connect Your Subwoofer
If your TV has an HDMI connector and you have HDMI source devices: use an hdMI subwoofer as explained in Subwoofer Connections, on page 12. note: the AVr 1710 and cable (not included) to connect it to the AVr’s hdMI Monitor out connector. the AVr AVr 171 provide connections for two subwoofers. -
Seite 16: Connect Your Audio And Video Source Devices
Connected Device hdMI 1 disc hdMI 2 cable-Sat hdMI 3 hdMI 4 game hdMI 5 Audio none/Analog 2 composite 1/Analog 1 Monitor Output Connector Connected Device hdMI out 1 hdMI out 2 (AVr 1710/AVr 171 only) composite Video Monitor out... - Seite 17 Making Connections Roku Streaming Stick Connect Your Composite Video Devices ™ If you have a roku Streaming Stick device, insert it into the AVr’s hdMI/Mhl In connector. use composite video connectors for video source devices that don’t have hdMI note: do not insert the roku Streaming Stick device into any other hdMI In connector. connectors.
-
Seite 18: Usb And Ios Devices
2. only analog Modem sources are available in zone 2. AVr 1710/AVr 171 AVr 1610/AVr 161 to home Analog Audio connectors Analog Audio connectors cat. -
Seite 19: Install A Multizone System
Install a Multizone System Making Connections AVR 1710/AVR 171 only: Install a Multizone System B. Connect an external amplifier to the AVR’s Zone 2 Out connectors. this method offers the benefit of retaining a 7.1-channel home theater in the main room simultaneously with multizone operation, although it does require an additional amplifier for zone 2. -
Seite 20: Connect Ir Equipment
AVr inside a cabinet or facing away from the listener, connect it is powered on. an external Ir receiver, such as the optional harman kardon he 1000, to the AVr’s Ir In jack. AVr Ir In Jack... -
Seite 21: Set Up The Remote Control
Set Up the Remote Control Set Up the Remote Control 2. look up the code numbers for the device in tables A12-A22 in the Appendix. write all the applicable code numbers in a convenient place. 3. press the Source Selector button for the device and hold it as it glows red, goes dark Install the Batteries in the Remote Control and glows red again. -
Seite 22: Set Up The Avr
Main Menu system consists of six submenus: Source Select, Source Setup, Surround Mode, Speaker Setup, network and System Setup. (the AVr 1710/AVr 171 also have a zone 2 submenu.) use the up/down/left/right buttons on the remote or the front panel to navigate the menu system, and press the ok button to select a menu or setting line, or to enter a new setting. -
Seite 23: Set Up Your Sources
Sub.” connector. 9. For AVr 1610/AVr 161, or for AVr 1710/AVr 171’s in 5.0- or 5.1-channel systems, select “5.0” or “5.1” in the Speaker configuration screen. For AVr 1710/AVr 171’s in 7.0- or 7.1-channel systems, select “7.0” or “7.1.”... -
Seite 24: Set Up The Network
2. Scroll to “Bluetooth” and select it. the oSd will display that bluetooth is unpaired. Zone 2 In (AVR 1710/AVR 171 only): this setting determines the audio source for zone 2 of a multizone system. Select the analog audio input the source is connected to. digital audio is not available to the multizone system. -
Seite 25: Operating Your Avr
• “7 ch Stereo” (AVr 1710/AVr 171 only) follows the same scheme as 5 ch Stereo but briefly appear on the tV screen. adds the surround back left and surround back right speakers. this mode is available only when the surround back speakers are present and have not been reassigned to multizone or front height operation. -
Seite 26: Listening To Fm And Am Radio
• highlight “Yes” and press “ok.” in the AVr 1710/AVr 171). the dolby pro logic II/IIx/IIz Music mode allows access to a Your AVr may take several minutes to complete the Auto Store process. note that submenu with some additional settings. See Audio Processing and Surround Sound, on performing Auto Store will erase all currently saved preset station. -
Seite 27: Listening To An Ipod/Iphone/Ipad Device
Listening to Media via AirPlay (AVR 1710/AVR 171 only) If you have joined an AVr 1710/AVr 171 to your home network you can stream audio to it via Airplay from compatible Apple devices with ioS 4.2 or newer and computers that have itunes 10.1 or newer that are joined on the same network. -
Seite 28: Listening To Vtuner (Internet Radio)
AVr’s MAc address as its Id # (the MAc address is on the network Settings screen in the System Settings menu - AVr 171/AVr 1710 only) or your AVr’s the screen will list by name all devices on the network that allow sharing. use the up/ vtuner Id # (the vtuner Id # is found on the help page on the vtuner main menu - AVr down and ok buttons to browse the content stored in the device’s media player library. -
Seite 29: Playing Media From A Roku Streaming Stick
Your AVr is able to play the new audio formats, delivering a more exciting home theater experience. AVR 1710/AVR 171 only: to use the 6.1- and 7.1-channel surround modes, the surround back channels must be enabled. See Manual Speaker Setup, on page 30 for more information. -
Seite 30: Manual Speaker Setup
“1” represents AVR 1710/AVR 171 only: dolby pro logic IIx is available only if you have set up the AVr’s Assigned Amp to Surround back; dolby pro logic IIz is available only if you have... - Seite 31 A4 in the Appendix. even if all of your speakers are the same distance from AVr 1710/AVr 171 only: the Assigned AMp setting includes four options: the listening position, enter your speaker distances as described in Set the Speaker •...
- Seite 32 Advanced Functions Step Four – Setting Channel Output Levels Manually For each speaker group, select one of these eight crossover frequencies: large, 40hz, 50hz, 60hz, 70hz, 80hz, 90hz, 100hz, 110hz, 120hz, 140hz, 150hz, 160hz, 180hz For a conventional stereo receiver, a simple balance control adjusts the stereo imaging or 200hz.
-
Seite 33: Listening In Zone 2
AVR 1710/AVR 171 only: Listening in Zone 2 with the multizone system in use, you may enjoy an exciting 5.1-channel home theater presentation in the main listening area, while others listen to an entirely different source in another room. -
Seite 34: System Settings
Software Update: If a software upgrade is released for your AVr, installation instructions will be available in the product Support section of the web site or from harman kardon customer service. At that time, you may use this submenu to install the upgrade software. -
Seite 35: Troubleshooting
Intermittent buzzing in tuner • L ocal interference • M ove the AVR or antenna away from computers, fluorescent lights, motors or other electrical appliances (AVR 1710/AVR 171 only): Surround-back speaker • M ulti-zone operation has been selected/Assigned AMP • U se the Speaker Setup menu to reassign the Assigned settings cannot be accessed, and the test tone does not channels have been assigned to zone 2... -
Seite 36: Specifications
Specifications Specifications AM Tuner Section Audio Section Frequency range: 520 – 1710khz (AVr 1710/AVr 1610) 522 – 1620khz (AVr 170/AVr 160) Stereo power: AVr 1710/AVr 171: 100w per channel, Signal-to-noise ratio: 38db two channels driven @ 6/8 ohms, 1khz, usable sensitivity (loop): 500µV... -
Seite 37: Appendix
Table A1 – Recommended Source Component Connections Digital Audio Analog Audio Connection Video Device Type AVR Source Connection Connections roku Streaming Stick or other Mhl (AVr 1710/AVr 171/ portable device; hdMI-capable hdMI 1/Mhl Analog 1 or 2 hdMI 1/Mhl AVr 1610/AVr 161) device dVd Audio/Video, SAcd,... - Seite 38 100hz Surround left/right Speakers crossover Frequency 100hz Surround back left/right or left/right Front height Speakers 100hz crossover Frequency (AVr 1710/AVr 171 only) Subwoofer Mode (if Front Speakers are set to large) l/r + lFe Front left level center level Front right level...
-
Seite 39: Default Settings
Appendix Table A4 – Source Settings Cable/ iPod/ USB Network / Disc Radio Game Audio Bluetooth vTuner connected device Surround Mode Video Input Audio Input radio hdMI Arc network Bluetooth night Mode Adjust lip Sync change name zone 2 Input bass treble Table A5 –... - Seite 40 Appendix Table A7 – Remote Control Codes Source Input Device Type (if changed) Product Brand and Code Number cable/Sat disc game Table A8 – System Settings Feature Default Your Settings panel timeout Auto power off 8 hours Menu timeout 20 seconds Status Message 5 seconds Volume default...
-
Seite 41: Surround Mode
See below group be played through one or two surround back speakers. the dolby pro logic IIx modes (AVr 1710/ may be selected not only with dolby digital bitstreams, but thanks to the AVr’s post- AVr 171 only) processor, they may also be used with some dtS bitstreams to add a surround back... - Seite 42 Surround Mode Description Incoming Bitstream or Signal dolby pro logic IIx Music this mode is similar to dolby pro logic II Movie, with an added surround back channel. • Dolby Digital 2/0/.0 or .1, 2/2/.0 or .1, 3/2/.0 or .1, EX (AVr 1710/ • Analog (two-channel) AVr 171 only) • Tuner • PCM (32kHz, 44.1kHz, 48kHz, 96kHz) dolby pro logic IIx Music this mode is similar to dolby pro logic II Music, including the availability of center • Dolby Digital 2/0/.0 or .1, 2/2/.0 or .1, 3/2/.0 or .1, EX...
- Seite 43 • PCM (32kHz, 44.1kHz, 48kHz, 96kHz) 7-channel Stereo expands the 5-channel Stereo presentation to include the surround back channels. • Analog (two-channel) (AVr 1710/ • Tuner AVr 171 only) • PCM (32kHz, 44.1kHz, 48kHz, 96kHz) 2-channel Stereo turns off all surround processing and plays a pure two-channel signal or a downmix • Analog (two-channel; DSP downmix available for multichannel)
- Seite 44 Appendix refer to the numbered buttons when using the Function list in table A11.
- Seite 45 Stop Stop Stop Stop Stop Stop Stop play /pause play /pause play /pause play /pause play /pause play /pause play /pause play /pause prev. ch prev. ch * AVr 1710/AVr 171 only.
- Seite 46 Scan up top Menu Stop Stop Stop Stop Stop Stop Stop play /pause play /pause play /pause play /pause play /pause play /pause play /pause prev. ch prev. ch * AVr 1710/AVr 171 only.
- Seite 47 029 087 121 123 128 133 145 159 163 SIeMenS grundIg SIgnAture hAll MArk SonY 028 031 117 130 136 194 212 hArMAn kArdon SoundeSIgn 045 128 hItAchI 123 128 132 144 147 SYlVAnIA 025 123 128 145 148 hYtek...
- Seite 48 313 340 342 410 412 thoMAS 340 FISher tIVo See table A22 FunAI 376 395 424 toShIbA 412 455 hArMAn kArdon 302 303 318 349 hItAchI 340 348 toteVISIon Jc penneY 318 345 unItech Vector reSeArch JenSen VIdeo conceptS...
- Seite 49 055 095 wArdS FunAI YAMAhA 019 031 053 061 135 169 York hAItAI 099 214 hArMAn kArdon 001 002 025 054 190 Table A16 – Remote Control Product Codes: DVD hItAchI DVD Manufacturer/Brand setup Code number Inkel Apex dIgItAl Jc penneY...
- Seite 50 Appendix Table A17 – Remote Control Product Codes: SAT Table A18 – Remote Control Product Codes: Game sAT Manufacturer/Brand setup Code number gAME Manufacturer/Brand setup Code number bIrdVIew Microsoft (xbox, xbox 360) 001 003 chAnnel MASter 320 321 325 361 nYko (pS3) SonY (pS2, pS3) 002 004...
- Seite 51 Table A20 – Remote Control Product Codes: Media Server Manufacturer/Brand setup Code number Apple 008 009 beYond eScIent (FIrebAll) 004 005 006 007 hArMAn kArdon 001 002 logItech MIcroSoFt nAIM requeSt SonoS Table A21 – Remote Control Product Codes: AUX-Cable/SAT...
- Seite 52 8500 balboa boulevard, northridge, cA 91329 uSA © 2013 hArMAn International Industries, Incorporated. All rights reserved. harman kardon is a trademark of hArMAn International Industries, Incorporated, registered in the united States and/or other countries. ezSet/eq is a trademark of hArMAn International Industries, Incorporated. the Bluetooth ®...
- Seite 53 BDT 3/BDT 30 Blu-ray Disc -Player ™ Bedienungsanleitung...
- Seite 54 BDT 3/BDT 30 Inhaltsverzeichnis WICHTIGE SICHERHEITSANWEISUNGEN AUSPACKEN AUFSTELLUNGSORT REINIGUNG VIELEN DANK, DASS SIE SICH FÜR EIN PRODUKT VON HARMAN KARDON ENTSCHIEDEN HABEN ® BDT 3/BDT 30-LEISTUNGSMERKMALE LIEFERUMFANG BEDIENELEMENTE AN DER VORDERSEITE ANSCHLÜSSE AUF DER RÜCKSEITE FUNKTIONEN DER FERNBEDIENUNG BD-SPIELER ANSCHLIESSEN...
-
Seite 55: Fcc-Vorschriften
BDT 3/BDT 30 Wichtige Sicherheitsanweisungen Wichtige Sicherheitsanweisungen 1. Lesen Sie diese Anweisungen. 2. Bewahren Sie diese Anweisungen auf. 3. Nehmen Sie alle Warnungen ernst. 4. Befolgen Sie alle Anweisungen. 5. Verwenden Sie dieses Gerät nicht in der Nähe von Wasser. 6. -
Seite 56: Wichtige Sicherheitsanweisungen
Sie die Bedienungsanleitung sorgfältig durch, um eine ordnungsgemäße Verwendung dieses Produkts sicherzustellen, und bewahren Sie die Anleitung zum eventuellen späteren Gebrauch auf. Sollte das Gerät Wartung oder Reparatur benötigen, wenden Sie sich bitte an Ihre örtliche Harman Kardon-Vertragswerkstatt. Wartungsarbeiten dürfen nur von qualifiziertem Fachpersonal ausgeführt werden. -
Seite 57: Auspacken
Erschütterungen beim Transport. Wir empfehlen deshalb, dass Sie das Material aufbewahren, Seit mehr als 50 Jahren stehen die Produkte von Harman Kardon an der Spitze der technischen damit Sie es z. B. bei einem Umzug oder bei einer Reparatur wiederverwenden können. -
Seite 58: Anschlüsse
BDT 3/BDT 30-Leistungsmerkmale BDT 3/BDT 30-Leistungsmerkmale Lieferumfang Anschlüsse Sollte etwas fehlen, wenden Sie sich bitte an den Kundendienst von Harman Kardon. Besuchen Sie uns im Internet unter www.harmankardon.com. • Ein HDMI-Anschluss • Ein Anschluss für koaxialen Digitalaudioausgang • Analoge Audioausgangsanschlüsse rechts und links •... -
Seite 59: Bedienelemente An Der Vorderseite
BDT 3/BDT 30 Bedienelemente an der Vorderseite Bedienelemente an der Vorderseite Betriebsanzeige Diskeinschub Informationsanzeige USB-Anschluss Power-Taste Diskeinschub Pausentaste Titelsprung/ öffnen/schließen Einzelbild rückwärts Wiedergabetaste Stopptaste Titelsprung/ Einzelbild vorwärts Betriebsanzeige: Wenn der BDT 3/BDT 30 an eine Steckdose angeschlossen und sein Informationsanzeige: In dieser Anzeige können Sie Meldungen und andere Netzschalter auf der Rückseite auf "On"... -
Seite 60: Anschlüsse Auf Der Rückseite
BDT 3/BDT 30 Anschlüsse auf der Rückseite/Funktionen der Fernbedienung Anschlüsse auf der Rückseite Analoge HDMI- Netzschalter Audioausgangsanschlüsse Ausgangsanschluss Lüfteröffnung BLU-RAY DISC PLAYER ON OFF 110V-240V –50/60Hz 25W Netzkabel- Koaxialer Composite Video- Netzwerkanschluss Anschlussbuchse Digitalausgangsanschluss Ausgangsanschluss Funktionen der Fernbedienung HINWEIS: Siehe Abschnitt BD-Spieler anschließen auf Seite 10. Dort finden Sie detaillierte Informationen zum Verbinden mit anderen Geräten. - Seite 61 BDT 3/BDT 30 Funktionen der Fernbedienung Hauptschalter Ein: Mit dieser Taste schalten Sie den BDT 3/BDT 30 aus dem Standby- Wiedergabe vollständig beendet ist. Modus vollständig ein. Suchlauf/Zeitlupe rückwärts: Drücken Sie auf diese Taste, um durch den aktuellen Öffnen/Schließen-Taste: Taste zum Öffnen und Schließen des Diskeinschubs. Bitte Titel rückwärts nach der gewünschten Stelle zu suchen.
-
Seite 62: Bd-Spieler Anschliessen
BDT 3/BDT 30 BD-Spieler verkabeln/Fernbedienung in Betrieb nehmen BD-Spieler anschließen Netzkabel-Anschlussbuchse (AC Input) Der BDT 3/BDT 30 ist mit einem abnehmbaren Netzkabel ausgestattet. Das ist während HDMI-Anschluss verkabeln der Verkabelung umfangreicher Heimkino-Systeme besonders praktisch. Wenn Ihr Receiver/Prozessor einen HDMI-Eingang hat HINWEISE: Verbinden Sie den HDMI-Ausgang am BD-Player mit dem HDMI-Eingang am AV- •... -
Seite 63: Bd-Spieler Konfigurieren
Setup Wizard Page: 1/5 angezeigt. Sind Sie sich nicht sicher, welches Seitenverhältnis Sie wählen sollen, wählen Sie bitte "Auto" – damit überlassen Sie dem BD-Spieler die Wahl. Welcome to the Harman Kardon BDT Setup Wizard. Setup Wizard Page: 4/5 Some simple information is needed to ensure you get the best experience from your product. -
Seite 64: Menü "Settings" (Einstellungen)
Software des BDT 3/BDT 30 auf den neuesten Stand bringen - sie steht auf den Heimnetzwerken ist die Einstellung "Disabled" (Deaktiviert) zutreffend. Webseiten von Harman Kardon zum Herunterladen zur Verfügung. • Setup Wizard (Konfigurations-Assistent): Diese Option aktiviert den Konfigura- tions-Assistenten des BDT 3/BDT 30 (siehe Setup Wizard (Konfigurations-... -
Seite 65: Display-Einstellungen
BDT 3/BDT 30 BD-Spieler konfigurieren Display-Einstellungen • Standard: Neutrale Einstellungen • Vivid (Kräftig): Optimal für Videospiele • Cinema (Kino): Optimal für die Wiedergabe von Videofilmen und für viele TV-Sendungen • Custom (Benutzerdefiniert): Mit dieser Option können die Videoeinstellungen Display Settings manuell angepasst werden. -
Seite 66: Bd-Spieler Konfigurieren/Disk-Wiedergabe
BDT 3/BDT 30 BD-Spieler konfigurieren/Disk-Wiedergabe • Dynamic Range Ctrl: Mit dieser Option können Sie den Dynamikumfang steuern. Regionalcodes • Auto: Der BDT 3/BDT 30 legt den dynamischen Bereich automatisch fest, Ihr BDT-Player ist mit den Regionsinformationen kompatibel, die auf den meisten und zwar basierend auf dem Lautstärkebereich der Audioquelle. -
Seite 67: Wiedergabefunktionen
HINWEIS: Ziehen Sie das USB-Speichergerät nicht ab, während BD-Live-Informationen Display-Taste: Spielt der BDT 3/BDT 30 eine Blu-ray Disc oder DVD-Disk ab, können Sie heruntergeladen werden. Wenn Sie das Gerät abziehen und der Harman Kardon- mit dieser Taste die Statusanzeige ein- und wieder ausschalten. -
Seite 68: Wiedergabe Von Usb-Medien Und Daten-Cds
BDT 3/BDT 30 Wiedergabe von USB-Medien und Daten-CDs Wiedergabe von USB-Medien und Daten-CDs Fotos wiedergeben Wählen Sie im oberen Verzeichnis "Photo" aus. Öffnen Sie anschließend den gewünschten Der BDT 3/BDT 30 spielt folgende Datentypen ab: MP3-Dateien (mit einer Abtastrate Ordner mit den Fotos und markieren Sie eine der Bilddateien. Eine Miniaturdarstellung von bis zu 320 kBit/s), AAC-Audiodateien, JPEG-Standbilder, MPEG 1 (Layer 1), MPEG 2 des gewählten Fotos wird auf der rechten Bildschirmseite angezeigt. - Seite 69 BDT 3/BDT 30 Wiedergabe von USB-Medien und Daten-CDs Miniaturansicht (gelbe Taste): Drücken Sie bei laufender Diashow auf diese Taste, Markieren Sie eine Tondatei, wird diese sofort abgespielt. Wenn der ausgewählten Datei werden alle Bilder des aktuellen Ordners in Miniaturansicht auf dem Bildschirm im Ordner weitere Musikdateien folgen, gibt der BDT 3/BDT 30 jede davon in der auf angezeigt.
-
Seite 70: Wiedergabe Von Usb-Medien Und Daten-Cds/Wiedergabelisten
BDT 3/BDT 30 Wiedergabe von USB-Medien und Daten-CDs/Wiedergabelisten Wiedergabelisten verwenden Videos abspielen Wählen Sie in der obersten Ordnerebene den Dateityp "Video". Öffnen Sie anschließend USB-Datenträger und Daten-CDs können viele Dateien enthalten. Um auch bei einen Ordner mit Videos und markieren Sie eine Videodatei im aktiven Ordner. umfangreichen Medienarchiven den Überblick nicht zu verlieren, können Sie Wiedergabelisten zusammenstellen. -
Seite 71: Fehlerbehebung
BDT 3/BDT 30 Fehlerbehebung Fehlerbehebung Sollte einmal Ihr BDT 3/BDT 30 nicht so reagieren, wie Sie vielleicht erwarten, sollten Sie die hier abgebildete Checkliste durchgehen, bevor Sie sich an Ihren Fachhändler wenden. Problem Lösung Der BD-Spieler lässt sich nicht einschalten (die Betriebsanzeige leuchtet nicht auf): •... -
Seite 72: Spezifikationen
BDT 3/BDT 30 Spezifikationen Spezifikationen Unterstützte Diskformate: BD-Video (Single-Layer oder Double-Layer), BD-R, BD-RE, DVD-Video, DVD+R/+RW, DVD-R/-RW, CDDA (CD Digital Audio), CD-R/RW mit 12 oder 8 cm Durchmesser Regionalcode (BD/DVD): Gerätemodell/Verkaufsregion: BDT 3/USA, Kanada: BDT 30/Europa, Naher Osten: BDT 30/Korea, Südostasien: BDT 3/Mexiko, Lateinamerika: BDT 30/Australien, Neuseeland: BDT 30/Russland, Indien:... - Seite 73 Hergestellt in China © 2011 HARMAN International Industries, Incorporated. Alle Rechte vorbehalten. Harman Kardon ist eine Marke von HARMAN International Industries, Incorporated, eingetragen in den USA und/oder anderen Ländern. Blu-ray Disc und BD-Live sind Marken der Blu-ray Disc Association. DivX...