Werbung
Quicklinks
INFORMATION / INFORMATION / INFORMATION
•ThIS MAnUAL DESCRIBES ExCLUSIvELy hoW To ESTABLISh A WIRELESS ConnEC-
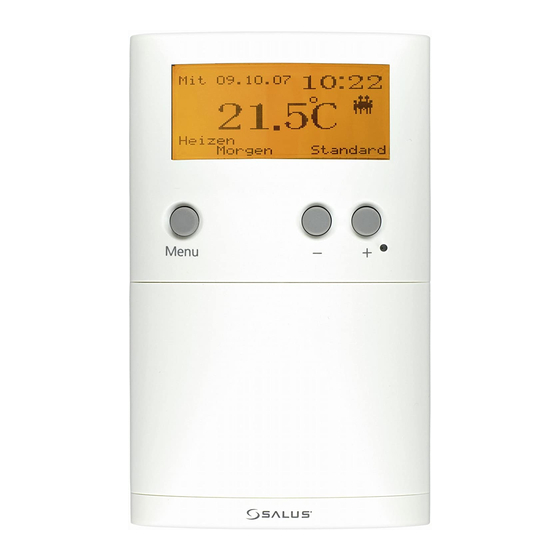
ERT 50 RF
Wireless connection
TIon BETWEEn ThE ThERMoSTAT AnD ThE ConTRoL UnIT. ThE SAfETy InSTRUC-
TIonS AnD WARnIngS of ThE oRIgInAL MAnUALS ALSo APPLy To ThIS MAnUAL.
KL 06
Funkverbindung herstellen
Connexion radio
•DIESE BEDIEnUngSAnLEITUng BESChREIBT AUSSChLIESSLICh DIE hERSTELLUng
DER fUnKvERBInDUng ZWISChEn DEM ThERMoSTAT UnD DER KonTRoLLEIn-
hEIT. ES gELTEn DIE SIChERhEITS- UnD WARnhInWEISE DER jEWEILIgEn oRIgInAL
BEDIEnUngSAnLEITUng.
• CE MAnUEL DéCRIT UnIqUEMEnT LA fABRICATIon DE LA LIAISon RADIo EnTRE
Sun 12.24.08
LE ThERMoSTAT ET DE L'UnITé DE ConTRôLE. LES RègLES DE SéCURITé ET LES
AvERTISSEMEnTS DE L'oRIgInAL MoDE D'EMPLoI.
Heat
Afternoon
Comfort
RESETTIng ThE SynChRonISATIon:
Press and hold the SYNC key. In the meantime press and release the RESET key.
Release the SYNC key, all LEDs flash simultaneously. Press and hold the SYNC
key for 5 seconds, all LEDs illuminate simultaneously. Release the SYNC key, the
control unit can now be synchronised newly.
ZURüCKSETZEn DER SynChRonISATIon:
Drücken und halten Sie die SYNC Taste der Kontrolleinheit. Drücken Sie wäh-
rend dessen die RESET Taste. Lassen Sie die SYNC Taste los, alle LEDs blinken
zeitgleich auf. Drücken und halten Sie die SYNC Taste für 5 Sekunden, alle LEDs
leuchten zeitgleich auf. Lassen Sie die SYNC Taste los, die Kontrolleinheit kann
jetzt neu synchronisiert werden.
RéInITIALISER LA SynChRonISATIon:
Appuyez et maintenez la touche SynC de l'unité de contrôle. Appuyez pendant
laquelle la touche RESET. Laissez la touche SynC los, tous les voyants clignotent
simultanément. Appuyez et maintenez la touche SynC pour 5 secondes, tous les
voyants s'allument simultanément. Laissez la touche SynC, l'unité de surveillance
peut maintenant être resynchronisés.
SALUS Controls gmbh
D-10553 Berlin
Tel.: +49 (0) 30 34806085
www.salus-controls.de
Kaiserin-Augusta-Allee 14
germany
fax.: +49 (0)30 34806087
info@salus-controls.de
CONNECTING / VERBINDEN / CONNEXION
1
3
•The control unit must be installed according to its original manual, but the trans-
•When the desired terminal is set, press and hold the SYNC key for about 2 sec-
parent cover shall be removed.
onds until its LED starts flashing.
•Das Kontrolleinheit muss installiert sein wie in ihrer Montageanleitung angege-
•Wenn Sie den gewünschten Terminal eingestellt haben, drücken und halten Sie
ben, entfernen Sie jedoch den transparenten Deckel.
die SYNC Taste für ca. 2 Sekunden, bis dessen LED anfängt zu blinken.
• L'unité de contrôle doit être installé que dans sa notice de montage, mais sup-
• Si vous souhaitez terminal ont été réglées, appuyez et maintenez la touche
primer le couvercle transparent.
SYNC pour environ 2 secondes jusqu'à ce que son LED commence à clignoter.
2
4
•The thermostat must be installed according to its original manual. Press select
•Press the SYNC key continuously to select the desired terminal. The correspond-
and cancel simultaneously to enter the program-menu.
ing LED shows the current selection.
•Das Thermostat muss installiert sein wie in seiner Montageanleitung angegeben. Drü-
•Drücken Sie die SYNC Taste mehrfach, um den zu synchronisierenden Terminal
cken Sie die select und cancel für 3 Sekunden um in das Program-Menü zu gelangen.
auszuwählen. Die entsprechende Terminal-LED signalisiert die Auswahl.
• Le thermostat doit être installé comme indiqué dans sa notice de montage. Ap-
• Appuyez sur la touche SYNC à plusieurs reprises, le terminal à synchroniser. La
puyez sur la touche select et cancel pendant 3 secondes pour entrer dans le menu
LED terminal indique la sélection.
des programmes.
Program
Profile
Temp. Zones
Basic Settings
Control
Heat/Cool
Select
Cancel
~2 Sec.
2x
5
•Press – key two times and select Basic Settings. Press select to enter the Basic
Settings.
•Drücken Sie zwei mal – und wählen Sie den Punkt Grundeinstellungen aus. Drü-
cken Sie select um in die Grundeinstellungen zu gelangen.
• Appuyez deux fois – et sélectionnez le point de Paramètres de Base. Appuyez
sur pour select dans les Paramètres de Base.
Program/Basic Settings
Date - Time
Language
Maintenance
Device Pairing
Select
Cancel
3x
6
•Press – key three times and select Device Pairing. Press select to enter the De-
vice Pairing.
•Drücken Sie drei mal – und wählen Sie den Punkt Device Pairing aus. Drücken
Sie select um in das Device Pairing zu gelangen.
• Appuyez trois fois - et sélectionnez le point Device Pairing. Appuyez sur pour
select le périphérique Device Pairing de jumelage.
Program/Basic Settings
Device Pairing
Pairing...
20
Select
Cancel
7
•Press select as long as the LED on the control unit is flashing (30 seconds) to
start the synchronisation process. A countdown displays the synchronisation.
•Drücken Sie select solange die LED an der Kontrolleinheit blinkt (30 Sekunden) um
den Synchronisationsprozess zu starten. Ein Countdown zeigt die Synchronisation an.
• Appuyez sur la touche select tant que le voyant à l'unité de contrôle est allumé
(30 secondes) pour le processus de synchronisation. Un compte à rebours montre
la synchronisation.
Program/Basic Settings
Device Pairing
Pairing
Successful!
Select
Cancel
8
•If the synchronisation is made, Successful! will be displayed. If Failed! is dis-
played, start the synchronisation again from step 2.
•Bei erfolgreicher Synchronisation erscheint Sucessfull! auf dem Display. Erscheint
Failed! starten Sie die Synchronisation von Punkt 2 erneut.
• En cas de réussite de synchronisation apparaît Sucessfull! sur l'écran. Si Failed!
vous pouvez lancer la synchronisation du paragraphe 2 nouveau.
Werbung

Verwandte Anleitungen für Salus Controls ERT 50 RF


Inhaltszusammenfassung für Salus Controls ERT 50 RF
- Seite 1 Cancel ~2 Sec. •ThIS MAnUAL DESCRIBES ExCLUSIvELy hoW To ESTABLISh A WIRELESS ConnEC- ERT 50 RF Wireless connection TIon BETWEEn ThE ThERMoSTAT AnD ThE ConTRoL UnIT. ThE SAfETy InSTRUC- TIonS AnD WARnIngS of ThE oRIgInAL MAnUALS ALSo APPLy To ThIS MAnUAL.
- Seite 2 ERT 30 RF Wireless connection KL 06 Funkverbindung herstellen Connexion radio Sun 12.24.08 Heat Afternoon Comfort...