Salus Controls iT500 Kurzanleitung
Internet thermostat
Vorschau ausblenden
Andere Handbücher für iT500:
- Schnellanleitung (2 Seiten) ,
- Bedienungsanleitung (25 Seiten)
3. iTG500
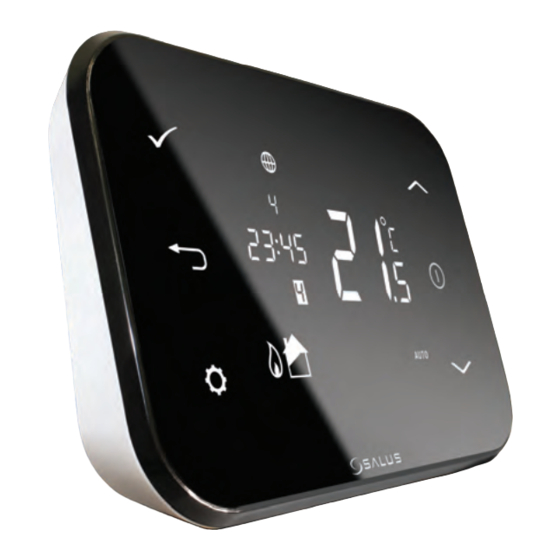
AM
PM
Connected to the SALUS Controls Server when the LED is green.
Mit dem SALUS Controls verbunden wenn LED Grün leuchtet.
1
Connected to the SALUS Controls Server when the LED is green.
Verbonden met de SALUS Controls Server zodra de LED groen is.
AM
PM
Connecté au serveur de controle SALUS quand le LED est vert.
EN Legend GE Legende DK Legend NL Legenda FR Legende
2
1
EN
EN
The internet connection is ON.
Access the Settings Menu.
1
2
GE
GE
Mit Internet verbunden.
Zugriff auf das Einstellungsmenü.
DK
DK
The internet connection is ON.
Access the Settings Menu.
NL
NL
De internet verbinding is ON
Ga naar Instellingen.
FR
FR
La connection internet fonctionne.
Accédez au menu de Réglages.
EN
EN
Confirm your option and move to the next screen.
Go back to the previous screen or hold to
3
4
GE
Bestätigen Sie Ihre Auswahl und fahren sie mit dem
return to main screen.
GE
AM
Rückkehr zum vorherrigen Bilrdschirm oder
nächsten Bildschrim fort.
PM
gedrückt halten um zum Hauptbildschirm
DK
AM
Confirm your option and move to the next screen.
zurück zu gehen.
NL
PM
Bevestig uw optie of ga naar het volgende scherm
DK
Go back to the previous screen or hold to
FR
Confirmez votre option ou aller sur l'écran suivant.
return to main screen.
2
1
NL
EN
Ga terug naar het vorige scherm of houd
5
Go down or navigate through the options.
AM
GE
ingedrukt om terug te keren naar
PM
Runter oder navigieren Sie durch die Optionen.
AM
hoofdmenu
PM
DK
Go down or navigate through the options.
ON
FR
Revenir à l'écran precedent ou maintenir pour
NL
1
Ga naar beneden of navigeer door de keuzes.
revenir à l'écran principal.
2
AUTO
1
FR
Descendre ou naviguer dans les options.
ON
OFF
1
EN
EN
2
AUTO
6
LCD light turns on, when pressed.
1
7
Go up or navigate through the options.
1
OFF
GE
GE
LCD-Licht geht an wenn gedrückt
Hoch oder navigieren Sie durch die Optionen
DK
DK
LCD light turns on, when pressed.
Go up or navigate through the options.
AM
PM
NL
NL
LCD licht gaan branden indien ingedrukt.
Ga naar boven of navigeer door de keuzes
FR
FR
L'écran s'allume une fois appuyé
Remonter ou naviguer dans les options.
1
7
AM
1
PM
3
ON
1
2
AUTO
1
OFF
4
AM
PM
2
5
2
1
4. System Configuration
EN Select your system configuration in association with the wiring of the receiver by pressing and hold
GE Wählen Sie ihre Systemkonfiguration in Verbindung mit der Verdrahtung des Empfängers durch drücken und halten.
DK Select your system configuration in association with the wiring of the receiver by pressing and hold
NL Selecteert u uw systeemconfiguratie i.s.m. de bedrading van de ontvanger door op te drukken en ingedrukt houden
FR Selectionner votre configuration de système avec le cablâge du receveur on pressant et maintenant
ON
1
2
AUTO
OFF
EN Select the heating or cooling mode for your system.
GE Wählen Sie Heiz-oder Kühlmodus für Ihr System
AM
PM
DK Select the heating or cooling mode for your system.
NL Kies de verwarming of cooling modus voor uw systeem
ON
1
FR Selectionner le mode chauffage ou climatisation de votre système.
AUTO
OFF
ON
1
2
1
AUTO
OFF
AM
EN Set your temperature display mode.
PM
GE Wählen Sie die Temperaturanzeige
DK Set your temperature display mode.
NL Uw temperatuur-weergavemodus instellen
ON
1
ON
FR Régler votre mode d'affichage de temperature.
AUTO
1
OFF
2
AUTO
1
OFF
ON
1
2
AUTO
OFF
EN Set your time zone. 0 hr=GMT
GE Wählen Sie ihre Zeitzone. 0hr=GMT
DK Set your time zone. 0 hr=GMT
ON
1
NL Uw tijd zone 0 hr=GMT instellen
2
AUTO
OFF
FR Régler votre fuseau horaire 0 hr=GMT
6
EN Set your DST(daylight saving time) ON.
GE Wählen Sie DST ( Sommer/Winter Umstellung)
DK Set your DST(daylight saving time) ON.
NL Uw DST (daylight saving time) ON instellen
ON
1
FR Régler votre DST (Temps éco lumière du jour)
AUTO
OFF
ON
5. Pairing the iT500 and iT500RX Receiver
1
2
AUTO
1
1
OFF
AM
PM
AM
PM
ON
1
1
2
AUTO
AM
OFF
PM
AM
PM
AM
ON
PM
1
2
1
AUTO
AM
OFF
PM
ON
1
ON
1
2
AUTO
OFF
AM
1
PM
ON
1
2
2
1
AUTO
AUTO
1
OFF
ON
OFF
1
2
AUTO
1
OFF
Insert a paper clip into the hole marked SYNC
AM
2
1
PM
ON
1
1
2
AUTO
Stecken Sie einen dünnen/spitzen Gegenstand in
OFF
das Loch mit der Aufschrift Sync.
Insert a paper clip into the hole marked SYNC
Steek een paperclip in het gat met tekst SYNC
Insérer un trombone dans le trou marqué SYNC
AM
PM
3
2
1
5
AM
PM
2
1
6
AM
PM
i
ON
Time and temperature settings can be altered by using the iT500 Plus App or the thermostat menu.
1
2
Please download the iT500 Plus App from App Store and Google Play. You can also use the website:
1
AUTO
OFF
www.salus-it500.com. Full manual is available at www.salus-manuals.com
Zeit und Temperatur können mittels der iT500 Plus app geändert werden oder im Thermostat Menü.Bitte
laden Sie die iT500 Plus app aus dem App Store oder Google Play runter. Eine PDF-Version der Anleitung
können Sie auf www.salus-manuals.com einsehen.
Time and temperature settings can be altered by using the iT500 Plus App or the thermostat menu.
Please download the iT500 Plus App from App Store and Google Play. You can also use the website:
www.salus-it500.com. Full manual is available at www.salus-manuals.com
Tijd en temperatuur instellingen kunnen worden verander met de iT500 Plus App of het thermostaat menu.
S.v.p. download de iT500 Plus App uit de App Store en Google Play. U kunt ook de website gebruiken.
AM
www.salus-it500.com. De volledige handleiding is beschikbaar op www.salus-manuals.com
PM
Les réglages de temperature et de temps peuvent être altérés en utilisant l'Appli iT500 Plus ou le
menu du thermostat. Merci de télécharger l'Appli iT500 Plus depuis l'Apple Store et Google play.
www.salus-it500.com. Le man uel complet est disponible sur www.salus-manuals.com
2
ON
1
The red LED will indicate that the iT500RX
AUTO
OFF
is ready to pair.
Die rote LED zeigt an das der iT500RX zum
verbinden bereit ist.
The red LED will indicate that the iT500RX
is ready to pair.
Het rode LED toont dat de iT500RX is klaar om
te pairen.
Le LED rouge indiquera que l'iT500RX est prêt à
AM
être appairer.
PM
4
ON
1
AUTO
ON
OFF
1
AM
2
AUTO
1
PM
OFF
AM
Press
or
to return to home screen
PM
AM
ON
Drücken
Sie
auf or um zum
PM
1
Hauptbildschirm zurückzukehren
AM
2
AUTO
1
ON
PM
1
AM
OFF
AM
2
Press
1
AUTO
or
to return to home screen
PM
PM
ON
OFF
1
AM
AM
iT500 Internet Thermostat
1
2
AUTO
Druk
of
keer terug naar home screen
PM
PM
OFF
AM
ON
Appuyer
ON
sur
ou etourner à l'écran d'accueil
PM
ON
1
1
1
AM
2
AUTO
1
2
AUTO
1
PM
AUTO
OFF
OFF
ON
ON
1
1
OFF
AM
2
2
1
1
AUTO
AUTO
PM
When the iT500RX Receiver and the iT500
OFF
OFF
ON
2
1
1
Thermostat are paired the LED will be green.
AM
2
AUTO
1
ON
PM
OFF
1
2
1
AUTO
Wenn der iT500RX und der iT500 Thermostat
OFF
ON
verbunden sind wird die LED Grün.
1
2
AUTO
1
OFF
ON
1
2
When the iT500RX Receiver and the iT500
1
AUTO
OFF
Thermostat are paired the LED will be green.
Als de iT500RX ontvanger en de iT500 Thermostaat
gepaired zijn dan is het LED groen.
Quand le receveur iT500RX et le thermostat
iT500 sont appairés; le LED sera vert.
ON
1
ON
1
AUTO
OFF
Quick Guide

Verwandte Anleitungen für Salus Controls iT500


Inhaltszusammenfassung für Salus Controls iT500
- Seite 1 Tijd en temperatuur instellingen kunnen worden verander met de iT500 Plus App of het thermostaat menu. EN Set your DST(daylight saving time) ON. S.v.p. download de iT500 Plus App uit de App Store en Google Play. U kunt ook de website gebruiken. www.salus-it500.com. De volledige handleiding is beschikbaar op www.salus-manuals.com GE Wählen Sie DST ( Sommer/Winter Umstellung)
- Seite 2 Volt Free - Combination Boiler iT500 Quick Guide iT500 Kurzanleitung 1. iT500RX 2. iT500TR Introduction Einführung The SALUS iT500 is an Internet SALUS iT500 Programmable Thermostat with programmierbarer BOILER BOILER options for hot water control and Internetthermostat two zone heating.