WimTec ONE UR Montage- Und Bedienungsanleitung
Urinalsteuerung
Verfügbare Sprachen
Verfügbare Sprachen
Inhaltsverzeichnis

Verwandte Anleitungen für WimTec ONE UR


Inhaltszusammenfassung für WimTec ONE UR
- Seite 1 ONE UR Montage- und Bedienungsanleitung Assembly and operating instructions...
-
Seite 2: Allgemeine Hinweise
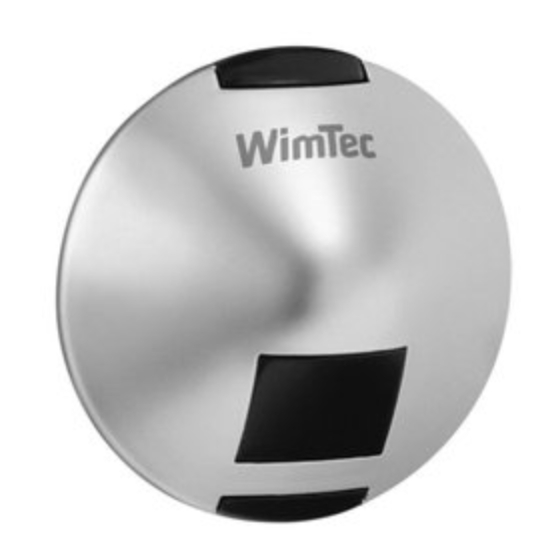
Reinigungs- oder Desinfektionsmittel verwenden nur mit weichem Schwamm oder Tuch behandeln keine Reinigung mit Dampfstrahlgeräten Diese Anleitung ist gültig für folgende Produkte: WimTec ONE UR Urinalsteuerung Art.Nr. 102 673 Lieferumfang: Elektronikmodul mit Sicherheitstrafo, MICRO Sensor Urinal und Magnetventil. -
Seite 3: Technische Daten
B/H/T: 135 x 165 x 77 mm Abmessungen: Maße in cm 10-17,5 min 100 51,5 Höhe Mitte Sensor 100 (im Element ca. 100-120) Sensor Ansprechbereich 30 - 70 einstellbar Ventil- Zulauf einheit DN 15 Ablauf DN 50 OK-FFB OK-RFB Urinalsteuerung WimTec ONE UR... - Seite 4 (1 s bis 10 s einstellbar, Zeit (permanent bis 30 min, Ansprechbereich (30 - 70 cm 5 s voreingestellt). 5 min voreingestellt) keine einstellbar, 50 cm voreinge- Auslösung, erfolgt bei der stellt). nächsten Benutzung eine Vorspülung. Urinalsteuerung WimTec ONE UR...
- Seite 5 2 3 4 5 6 Dient zum Freispülen der Leitung, um Stagnationswasser und Austrocknung bei längerer Nichtbenutzung (24 h voreingestellt) zu vermeiden. Dip Schalter 6 ON = Austrocknungsschutz-Funktion aktiviert (voreingestellt). Dip Schalter 6 OFF = Austrocknungsschutz-Funktion deaktiviert. Urinalsteuerung WimTec ONE UR...
-
Seite 6: Montage
Erst wieder aktivieren sobald Urinalkeramik montiert Reihenfolge ausführen! ist. Magnetventil mit Dichtungen einschrauben. Achtung! Fluss- richtung beachten. Anschließend Vorabsperrung öffnen. Verbindungskabel 2-polig (2 x 0,5 mm) zu Sensor einziehen. Infrarotsensor anklemmen. Polarität beliebig. Micro Sensor anschrauben. Urinalsteuerung WimTec ONE UR... - Seite 7 ONE UR Montage Abdeckkappe aufsetzen. ACHTUNG! Netzanschluss herstellen. Folgende Schritte unbe- dingt in beschriebener Infrarotsensor am Elektronikmodul anschließen. Polarität Reihenfolge ausführen! beliebig. Elektronikmodul in Unterputzgehäuse einstecken und Mag- netventil anschließen. Urinalkeramik aufsetzen. Spannungsversorgung und Wasser- zufluss aktivieren. Urinalsteuerung WimTec ONE UR...
-
Seite 8: Spülmengen-Übersicht
7,0 s 10,0 s 2 bar 4,5 s 5,5 s 7,5 s 3 bar 3,0 s 4,5 s 6,0 s 4 bar 2,5 s 4,0 s 5,5 s 5 bar 2,5 s 4,0 s 5,0 s Urinalsteuerung WimTec ONE UR... - Seite 9 ONE UR Ersatzteile Nr. Bezeichnung Art.Nr. Nr. Bezeichnung Art.Nr. ONE UR Sensor 189 049 Magnetventil 24 V 221 008 Absperrventil inkl. Filter 221 381 Dichtung 222 074 Sanitäroberteil 221 398 Anschlussverschraubung 221 053 Schmutzsieb 107 074 ONE UR Elektronikmodul 231 472...
- Seite 18 ONE UR Urinal control SanTec MICRO ONE...
- Seite 19 ONE UR Urinal control SanTec MICRO ONE...
- Seite 20 WIMTEC Elektronische Steuerungs- u. Meßgeräte GmbH p: A - 3325 Ferschnitz, Freidegg 50, AUSTRIA t: +43 (0) 7473 5000 f: +43 (0) 7473 5000 - 500 m: verkauf@wimtec.com i: www.wimtec.com...